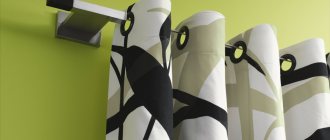
The window opening is an important part of the interior. Various design techniques are used to decorate it. However, the most common type of window decoration remains textiles and structures used to fasten the canvas. The choice and installation of curtain rods causes difficulties for many ordinary people. Before purchasing a suitable device, you should solve a number of problems, for example, take into account the correspondence of the appearance of the product to the style of the room, the ability of walls, finishing materials, and the item itself to withstand certain loads.
How to choose a cornice
From a functional point of view, the cornice is intended exclusively for attaching curtains. From an aesthetic point of view, this is an important element that can emphasize the style of the room and focus attention on the window opening. The item has a simple design, which consists of the following parts: a base supporting the curtain (pipe, string, tire); brackets, holders for fixing the base; fasteners for textile fabric; side plugs.
The choice of product should be approached very responsibly. When purchasing a design, you must consider the following points:
- Window size. The length of the cornice should exceed the width of the window opening by 40 cm.
- Load bearing capacity. The item must be strong enough to withstand the load exerted by the curtains.
- Location of batteries, pipes, protruding part of the window sill. These elements should not interfere with the free hanging and movement of the canvas.
- Color spectrum. The shade is selected in accordance with the existing design.
- Size and space. If round models are suitable for framing windows in a room of any size, then string models will look more impressive only in small rooms, and bulky wooden ones are recommended to be installed in large living rooms.
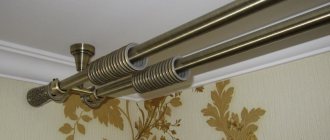
- Number of rows. Depending on the purpose, you can choose one-, two-, three-row designs. The latest models will allow you to decorate a room with complex textile compositions.
- Material. Metal, wood, and plastic are used in the production of products. The choice of the most suitable option depends on the style, price category, and personal preferences of the buyer.
Description
Curtains are curtains made of thin and soft fabric. Used to close a window or doorway. In almost all models, the canvas reaches the floor, but there are short curtains. Hang separately or combine models.
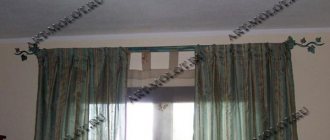
Curtains and cornices should be in harmony with each other and match the overall style of the room
Kinds:
- Classic curtain shape. They are called scissor curtains. Go down to the floor with the same length on both sides.
- Narrow, long scarf curtains.
- Thiers, curtains covering several parts of the window.
- Swags are curtains with a complex shape. Decorative variety with two hanging edges.
- A canopy is a decorative, elegant element.
To curtain windows and doors, the first option is often used - classic scissors, and the rest are used as decorative decorations for the interior.
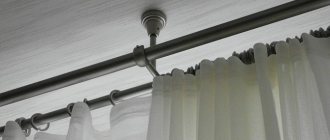
Classic curtains are most often used to decorate door and window openings
The main function is to decorate the room, but there are also significant purposes.
Functions:
- decorative purpose;
- give comfort and tranquility;
- easily allow air to pass through;
- protect from the sun and cold air;
- prevent interior elements from fading;
- protect the room from prying eyes.
Combining destination functions, they become an integral part of the room. They are able to preserve the unique features of a separate room and add the finishing touch to the interior.
Curtains are a great way to give your interior a new lease of life.
Features and rules for installing cornices
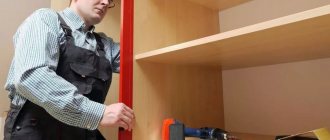
Assembling and installing any model will not take much time from an experienced craftsman. An amateur who wants to do the work with his own hands will need help. Initially, he needs to take measurements of the window opening, on the basis of which calculations are made. Next, you should familiarize yourself with the rules and features of installation:
- Regardless of the mounting method (ceiling, wall), the length of the structure must be at least 30 cm greater than the width of the window, with the exception of the option when the product is located along the entire wall.
- The distance from the wall to the rod is selected within 10-15 cm. This is quite enough for the curtain to move freely without touching the protruding part of the window sill or the radiator.
- The distance between the cornice and the ceiling is determined individually, but professionals recommend mounting the structure at a distance of 5-10 cm from the ceiling surface.
- Particular attention should be paid to the height at which the device will be mounted above the upper border of the window frame. This parameter must exceed 5-7 cm, otherwise the curtains will interfere with the opening of the window.
Photo of curtains
PreviousCurtains Wall curtain rods: three-row, two-row, designer
Next
CurtainsTypes of components for roller blinds for plastic windows
Methods and choice of fastening
Depending on the installation method, a distinction is made between ceiling and wall cornices. In the first case, some models can be mounted directly to the ceiling or using brackets. In the second option, the products can only be mounted on supporting cantilever structures. Dowel-nails, self-tapping screws, liquid nails, drywall dowels, and anchor bolts are used as fasteners.
The choice of fasteners depends on various factors. First of all, the material of the walls and ceiling is taken into account. For example, for fragile partitions made of foam blocks, special expansion anchor bolts are used. For brick walls, or those built from durable concrete, you can use any type of fasteners. In red brick, which tends to chip, wood caps are often used.
It is worth paying attention to the raw materials from which the cornice is made, its weight, and the load it places on the partitions. In some cases, you will have to use additional fasteners or even abandon massive wooden or metal products in favor of lighter plastic or aluminum ones.
The bracket can be securely fixed on a wooden or concrete base. When installing the structure on a suspended ceiling or plasterboard, the presence of mortgages should be provided in advance.
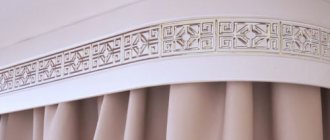
Baguettes
It is a decorative strip that breaks both the structure of the cornice and the mechanism for fastening the curtains.
Baguettes come in a wide variety of shapes. They are often inlaid with decorative elements. These models, especially if made of mahogany and decorated with carvings, have an unusually luxurious appearance.
Note!
- Automatic electric window blinds: review of the best models with photos and descriptions
- Double-row curtain rod, all types: wall, ceiling, metal, plastic. Assembly and installation instructions
- Ceiling hidden curtain rod - do-it-yourself installation and installation rules (110 design photos)
Installation of ceiling cornices
Ceiling models are very popular. They can be hung in almost any place, even placed in niches. These products are preferred in the following cases:
- if necessary, hang long curtains from the ceiling;
- if it is impossible to securely fix the brackets on the wall;
- to close the panoramic window;
- to hide minor finishing defects;
- the distance between the top of the window opening and the ceiling is so small that there is no possibility of mounting wall-mounted options.
Even a beginner in the construction business can carry out installation work. The main thing is to adhere to all the rules and recommendations, follow the instructions. The experience gained in this way will help in the future to correctly connect all the elements and install similar structures without any problems.
Materials and tools
Before starting work, you should prepare everything you need. This will allow you not to be distracted from work by searching for missing components or consumables. To perform installation you will need:
- curtain supporting base, brackets, caps or decorative ends;
- curtain rings or hooks;
- fasteners;
- measuring instruments, level, pencil;
- ladder;
- drill or hammer drill;
- screwdriver, screwdriver;
- hammer;
- hacksaw;
- drill.
Installation procedure
The order of work, as well as its type, directly depends on the type of cornice chosen. The profile structures can be fixed directly to the ceiling using brackets. Let's consider the option of attaching a plastic tire box to a concrete floor:
- We take measurements of the window opening.
- Following all the rules, we make markings on the ceiling.
- If the product is longer than the measurements taken, cut it using a hacksaw.
- We drill mounting holes in the plastic box, which should be located in the spaces between the tracks. To do this you will need two drills of different diameters. We make the first hole in the middle, the rest at the same distance from it. Their number directly depends on the expected load.
- Using a drill whose diameter exceeds the screw head, we make a hole on the front of the box.
- Using the second drill, which matches the diameter of the fastener rod, we drill a hole in the rear wall.
- We apply the box to the ceiling, starting from the center, set marks at the place where the dowels are attached, and drill holes in the concrete.
- We hammer in the dowels.
Safety precautions
Even such installation work requires compliance with some safety precautions. Hazardous activities relate to working at height. The cause of injury when operating on a stepladder or ladder can be: insufficient lighting, burrs, sharp edges, roughness of the surfaces of tools, mechanisms and workpieces. Ladders/stepladders must be equipped with a device that prevents them from moving, folding or tipping over during operation. To work at height, all necessary tools should be placed in a box. When attaching the curtain rod, only one person should be on the stepladder. It is prohibited to add additional drawers or other elements to the stairs to increase the height.
The picture shows the presence of a limiter for the stepladder, the same one that prevents folding and tipping over when performing work. It must be firmly fixed to the surface
Wear safety glasses when working with a hammer or similar device. Before starting work with a hammer drill or electric drill, you should check for any external defects. During operations, you must firmly hold the equipment strictly horizontally relative to the floor.
The photo shows how to correctly position the hammer drill relative to the wall and other objects. You can also see that you need to hold it firmly with both hands.
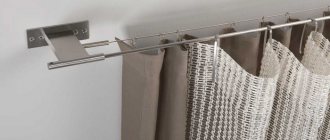
Installation of wall cornices
Models mounted on walls have a wider application. They are compatible with interior design made in any style. Unlike ceiling options, these structures are much easier to install yourself. For clarity, let’s look at how to install the main types, which include:
- round;
- strings;
- profile;
- baguette
Each type has its own installation features. However, all of the above types are mounted using brackets. The main stages of the work are almost identical, as can be seen from the examples given in the instructions.
Baguette
The main difference between baguette cornices is the presence of a decorative strip that hides all structural elements. Based on the type of base used for attaching curtains, rod, string, and rail models are distinguished. The procedure for installing a baguette with a plastic tire:
- We mark the wall according to the level.
- We drill holes with a hammer drill and insert dowels into them.
- We install the brackets and securely fix them with self-tapping screws.
- According to the existing diagram, we assemble the workpiece and connect the tire to the decorative strip.
- We fix the resulting workpiece to the brackets.
- Upon completion of installation, you can hang curtains and tulle on the finished product.
String
The main feature of string models is their special structure. They consist of steel threads, brackets, and hooks. The length of the string should not exceed five meters; it can be hung in several rows. However, it is worth considering that only light textiles can be hung on a thin thread. The structure will not support the weight of heavy curtains. Installing these curtain rods should not cause difficulties even for an inexperienced person; the process itself is as follows:
- We determine the location for fastening and carry out markings according to the level.
- After attaching the fasteners, we make a mark for the dowel.
- We drill holes and install fasteners.
- Through the hole in the installed mount, we insert a steel string into the first bracket.
- We distribute hooks or rings along the thread.
- We pass the string through the second string bracket and adjust the required tension using a special bolt.
- We cut off the excess steel thread, you can also roll it, this will allow you to lengthen the product in the future.
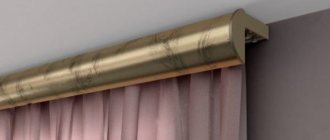
Rod
Round cornices, in which the rod is the main element, are classic models. Special caps or decorative tips are attached to the edges of the product. They act as decoration and do not allow the rings to come off the pipe. When choosing such options, you should pay attention to their parameters. Short structures can be fixed on two brackets, but if their length exceeds 1.5 m, then additional fasteners should be provided, which are installed in the center. Installation work is carried out according to the following scheme:
- We measure the width of the window.
- We make markings according to the level.
- We unscrew the heel from the holder, try it on the wall, and mark with a pencil the places for the dowels.
- When installing long products, we make an additional mark in the middle of the window opening.
- Using an electric drill, we drill holes in the intended location and hammer dowels into them.
- Using self-tapping screws, screw the heels to the wall.
- We screw the base of the holder onto the heels.
- We assemble the structure, put on the required number of rings, and install plugs on the sides.
- When installing, first fix the central bracket, then the side fasteners.
- At the final stage we hang the curtains.
Profile
Profile models look appropriate in any interior. They are made from plastic or aluminum. The maximum length does not exceed 6 m, however, if necessary, this parameter can be increased using connecting parts. Some products are capable of bending in two planes at any angle, which allows them to be used to design window openings of any fancy shape. For clarity, let’s look at the step-by-step instructions for installing the structure:
- We determine the installation location.
- We make markings along the entire length with a pencil.
- If a long structure is being installed, it is necessary to provide more than two brackets, especially at bend points.
- Often profile curtain rods are sold without holders, so they will have to be purchased separately.
- We drill holes and install brackets.
- We fix the profile on the fasteners.
Wood species
Wooden curtain rods are made from both soft and hard wood materials.
Note!
- String curtain rods, overview of all types: ceiling, wall. DIY selection and installation instructions
Accessories for curtains - photos of design and design examples
- Plastic curtain rods: ceiling, wall, with hood. Description of all options, as well as photos of new designs
Hardwoods provide noble shades and increased reliability. However, if structures with two or three rows of guides are used, additional fastening is required.
Softwoods allow manufacturers to apply spectacular carvings to cornices, and modern technologies provide painting in any color.
How to hang a cornice on a suspended ceiling
If the room has suspended ceilings, then you should give preference to wall-mounted models. However, it is not always possible to hang the product on the wall. In this case, the master faces a more difficult task. This can be solved with the help of special mortgages, which are installed in advance, before stretching the fabric. There are two main ways to fix the cornice:
- Visible or open. The most common method. Before installing the stretch ceiling, we determine the place where the product will be fixed. Next, we make markings on the base ceiling, along which we secure the embedded wooden beam using dowels. We pre-treat the wood with special antiseptic and hydrophobic compounds. Then we stretch the canvas, install a profile cornice on top of it, having previously drilled holes in it. We fasten the product to the tree using self-tapping screws, which we screw through the film.
- Hidden in a niche. This method is radically different from the previous one. It is more complex to execute, but the resulting effect created by the curtains falling from the ceiling is worth the effort. In this case, we install the cornice in a niche; we attach the canvas not to the wall, but to the embedded block. First, we make markings on the ceiling and install the cornice using the previously described technology. Having retreated a few millimeters from the structure, we mount a wooden beam, we will screw fixing profiles to it and attach the canvas.
Classification
Wooden cornices are grouped according to several parameters:
- type of material;
- methods of attachment to the surface;
- appearance;
- number of guides.
Features of fastening to drywall
You can install a cornice on almost any base; drywall is no exception. The work can be done by analogy with suspended ceilings, using embedded beams, or using special dowels such as “butterfly” or “driva”. But if in the first case it is possible to secure more bulky structures, then in the second it is worth giving preference to lightweight products whose weight can withstand the fragile material. Let's look at the second method in more detail:
- Before starting work, we assemble the cornice.
- We attach the structure to the wall, level it, and make marks with a pencil.
- Carefully drill holes.
- We take the butterfly dowel, squeeze the protrusions, insert it into the hole all the way, tapping it with a hammer.
- Next, use self-tapping screws to secure the heels of the brackets.
- We fix the product to the wall.
Dismantling rules
If you need to remove an old curtain hanger, there are a few rules to follow.
- First, remove the curtain from the rings, clothespins, or hooks.
- Next, carefully unscrew the screws, being careful not to touch the facing part of the brackets.
- After the last screw is unscrewed, the suspension can be freely removed.
The dismantling process is best done by two people. This way you are guaranteed to save the product.
If you are hanging a new cornice, you need to drill out the old dowels from the holes and seal the wall with cement mortar.
Check out the selection of photos below that show different methods of attaching curtains to walls.
The mounting of curtain hangers on walls can be determined by different cases. The presence of suspended ceilings that do not allow the brackets to be fixed without damaging the integrity of the coating, incorrect ordering of window textiles according to the length - all these shortcomings are easily eliminated by installing them on the wall.
Installing cornices on a bay window
Bay windows are characterized by various shapes. They repeat the protruding shaped part of the building, which can be round, oval, trapezoidal, multifaceted. For rooms with non-standard geometry, special bay windows are used, which are practically no different from standard options and can be flexible and rigid. In the first case, bay window adapters are used to connect the elements; in the second, the profile itself is bent, after which it is installed in the designated place. Consider the method of installing flexible curtain rods:
- Depending on the chosen location for mounting the structure, we make markings on the wall or ceiling.
- Every 30-40 cm we drill holes for the brackets.
- We install fastenings.
- We try on the cornice and cut off the excess.
- We fix the structure to the fastenings.
- We hang hooks.
Necessary tools for work
The curtain element in question comes with certain fittings for its installation. But fastening the cornice should be done with a number of additional tools:
- hammer drill,
- screws and dowels,
- level,
- hammer,
- roulette,
- pencil.
An expensive hammer drill can be rented; it is not necessary to spend financial resources on purchasing it for the sake of one shed.
Here you can see a standard set of equipment and accessories for installation. It should be supplemented with bolts, screws, a hammer and a level
What cornices are fashionable in 2022
Beautiful cornices will give any room a finished look. Along with properly selected curtains, they will highlight the design of the room. In 2022, Scandinavian style and minimalism remain trendy. Therefore, when choosing the most suitable product, it is better to give preference to more functional models without unnecessary decoration. Metal cornices painted black or white, or wooden ones with a natural pattern will look most appropriate.
Art Deco will also strengthen its position. For this direction, you can use gold-plated products that will look perfect with Armstrong hanging systems. The classic style, which is characterized by strict symmetry, an abundance of decor, and the use of natural materials, is also relevant. When decorating the interior, you should think about the cornice hidden in the niche of the stretch ceiling, leaving only the flowing curtains in sight.
Barbells
The most popular and sought after type among buyers. A round wooden cornice brings special harmony and elegance to the interior, and also ensures the smooth sliding of the rings to which the curtains are attached.
Guides
Wooden curtain rods with one row are used mainly in kitchens, where it is enough to hang one curtain.
Double-row curtain rods are the most common option - they are designed for light tulle and heavy curtains. Installed in bedrooms and living rooms.
The most complex designs of three guides are attached to the wall if the curtains are made into a multi-layer composition using lambrequins.