When renovating an apartment or house, the problem of restoring old doors and jambs often arises; in some cases, their replacement is necessary. Which doors to choose, how to decorate them correctly and tastefully? Many questions arise. If you do not plan to implement an exclusive home design project, then this article may provide answers to some of your questions.
Methods for making jambs and finishing materials
Depending on the amount of damage and unevenness remaining after installation of the structure, the slopes are designed in one of the following ways:
- filling the voids with mortar and plastering;
- fixing the facing material with an adhesive or solution;
- by installing the finishing panels on the frame.
Slopes made of decorative panels Which option is more suitable for your home depends on the features of the door, the general style of the interior, as well as personal preferences and needs.
If reliable sound insulation is important to you, then you should opt for completely filling the slopes with mortar. This will eliminate all voids and give the structure additional strength. In some cases, when the consumption of solution for filling irregularities is too high, it is more advisable to mount the materials on a frame made of metal or wood. Thus, making the jambs perfectly even will not be difficult. Another advantage of this method is the ability to hide communication wires inside the slope and install a lamp or switch in it.
Read also: Why love spells don't work. Causes
As for finishing materials, the most commonly used are plasterboard, plastic and MDF panels, artificial stone, laminate, wood or decorative plaster. They all have their own characteristics that should be taken into account. For example, plastic is quite fragile and is easily damaged by mechanical stress, and applying smooth, high-quality plaster will require a lot of effort. Based on this, we can say that drywall and MDF are the most versatile materials, but the final decision on how to decorate the doorway of the front door is up to you.
MDF is a universal material with a wide color palette
Choosing material for the door frame
When choosing a material for creating a door frame, you should give preference only to solid wood, MDF, chipboard and metal.
The advantages of solid wood as a material from which a door frame can be made include:
- health safety;
- special strength;
- high quality;
- easy installation.
There are no significant disadvantages found in solid wood. The only thing is that doors made of this material are poorly processed by the manufacturer, which is why they absorb moisture.
The door frame made of solid wood has enviable strength
To make a door frame, you should take wood of a certain species. The ideal raw material is durable oak. And pine, which is more accessible and therefore used much more often, is considered less hard. This type of wood, unlike oak, is definitely not suitable for making entrance door frames.
Fiberboards have several advantages:
- low price;
- excellent appearance;
- good sound insulation;
- ease of use.
The negative characteristics of chipboard are:
- fear of moisture;
- harmful glue in the composition.
A chipboard door frame looks good, but quickly deteriorates if the room is humid
A chipboard box will look good in the opening leading into the room. At the same time, he will be able to flawlessly perform his function.
How to install door jambs
Door jambs are quite often called decks. The installation of door jambs usually has serious requirements. To make a door frame, you need to prepare thick logs in advance. You also need to have some skills in processing wood materials.
Door jambs are quite often called decks. The installation of door jambs usually has serious requirements. To make a door frame, you need to prepare thick logs in advance. You also need to have some skills in processing wood materials.
Door jambs are often called decks
Lay the logs with wedges on two or four blocks. From the resulting blocks it will be possible to cut four-rope beams. Make a groove in them on one side, which is needed for attaching to the wall studs. On the other side, select the quarter in which the door leaf will be installed. Installation of old casings Cut out tenons at the ends of the logs.
Also, adjust them exactly to the size of the grooves in the door jambs. Please note that the box is attached to the wall only with spikes. There is no other fastening. Quite often wooden doors are installed indoors. They are very heavy. When fully opened, they will try to turn the decks inside out. When closed tightly, they become loose. If the fit is poorly done, the defect will immediately begin to appear. The decks will become loose, moss will begin to fall out, and strong air will begin to blow into the resulting cracks.
Why the jambs bend all the reasons
You know that door frames are made of wood. And, as everyone knows, wood absorbs moisture excellently. Of course, the outside of the jambs is covered with varnish. And this, as a rule, should protect the material from water. But this is all because the varnish is highly permeable to moisture.
In the end, the following diagram comes out. By eating moisture, the tree becomes larger in size. And when it gives it away, its size becomes smaller. The process is natural – but nasty.
Installation of jambs
Because the tree has a heterogeneous structure, it becomes larger and less heterogeneous. As a result, the jambs bend.
This is the main, only one and main reason for the difficulty. How to resolve it? Yes, very easy! The jambs should be properly attached. Then they will remain in their place under any circumstances, even under the influence of external factors.
Some nuances when installing platbands
It is necessary to install platbands or a finishing frame on the doorway, the finishing of which will give a finished and aesthetic appearance to the structure. You can select the necessary platband from a large number of standard ones presented in a hardware store. They are fastened using finishing and liquid nails and self-tapping screws. Some tips that will make the process of installing trim on doorways easier:
- Heads of screws/nails or small cracks can be hidden using a wax corrector or acrylic-based sealant.
- Gaps where the planks meet each other can be eliminated with a single finishing nail.
- Large defects in the door frame can be hidden with wider trims.
Finishing door slopes using MDF panels
As we know, most often entrance doors are made of wood, and often manufacturers offer us to purchase door slopes made of MDF. This material has a number of advantages. here are some of them:
Easy installation will save a lot of time, effort and nerves, which is important.
High strength. The sheets are practically not deformed. MDF is resistant to the development of dangerous microorganisms. Belongs to emission class E1
which means that this material emits virtually no phenolic compounds. The work done with MDF sheets looks very presentable.
It is because of these advantages that MDF has now become one of the most popular materials. However, it has one drawback. It is not always possible to choose a finish exactly to match the color of the door due to the small range of colors available.
Required materials and tools:
- MDF panels
- Wood slats
- Hammer
- Platbands
- Drill
- Decorative corner
- Dowels, screws, clamps or nails.
Step 1: Using a hammer drill and dowels, attach the wood slats along the inside and outside edges. MDF panels will subsequently be attached to these slats, so they need to be installed level, using a level.
Step 2. So, start attaching the panels to the resulting frame. Clamps and small nails will help you with this. The edge panel must be screwed all the way through to the corner strip.
Step 3. Using liquid nails and decorative corners (you can use platbands), we “hide” the corners of the panels.
Methods for making slopes
Finishing the doorway of the front door allows you to hide the fastenings of the frame, level the surface and give the space an aesthetic appearance. At the same time, the structure’s burglary resistance, heat and noise insulation increases.
The formation of slopes is possible in several ways:
- plastering with cement mortar and building mixtures;
- gluing finishing material;
- frame paneling.
Sealing with mortar mixtures is the simplest option. Allows you to obtain a monolithic and durable layer, without voids. However, such a surface is not decorative and requires a finishing coat of paint or textured plaster. Plasterboards also need finishing. To implement other methods, materials with external decor and original design are used, which already during installation form the final appearance of the doorway. They are mounted on a frame made of wooden beams or metal profiles. It is recommended to fill the resulting space with insulation - mineral wool or polyurethane foam.
How to beautifully make slopes outside and inside the apartment
To design openings, installation is required:
- slopes;
- platbands;
- thresholds.
Sometimes, before facing, the surface is plastered or covered with plasterboard. The decoration is made up of trims and tiles.
Plaster
The entrance door slopes are plastered before finishing. Alabaster, gypsum, perlite or decorative compositions are recommended. Even with labor-intensive installation, they are heat-resistant and aesthetically pleasing. Treatment with antiseptics is required to prevent the formation of fungus. Features of plaster finishing:
- the surface is moistened, primed in 2 layers;
- a rule is hung along the edge of the slopes according to the level;
- plaster mortar is poured on, leveled with the rule;
- external corners are rubbed or leveled with a perforated corner;
- the plaster is applied in 2–3 layers with a break for drying;
- to form even corners, metal beacons can be installed, which are supported by a rule;
- after drying, the rule moves to the left, the aligned corners are rubbed over.
Important Before facing, plastered slopes are puttied. An angle spatula can be used to form corners
Then the installation of beacons will not be required. To prevent the mixture from falling from a vertical slope, a reinforcing mesh is installed.
Video about how door slopes are plastered:
Installation of accessories
The extensions form an integral structure in the door niche, which does not require separate installation of slopes and trims. Allows you to hide significant distortions and unevenness of the opening. Single-color and telescopic elements are produced, connected by a tongue and groove. The accessories are made from:
- MDF;
- wood;
- plastic.
Installation process on a door frame without grooves:
- vertical and horizontal planks are assembled into a structure in the shape of the letter “U”, fixed with self-tapping screws;
- the prepared box is installed in a niche;
- in the opening (between the wall and the structure), the box is compacted with spacer bars, which are driven in with a hammer;
- expansion joints are filled with polyurethane foam;
- the structure is framed with platbands installed in a tongue and groove.
Additional platbands are often solid structures in the shape of the letter “P”. Collapsible elements must be sharpened by 45 degrees at corner joints. To do this you will need a miter box and a wood saw.
Video about installing door panels:
Plasterboard structures
Drywall is used to prepare the base for finishing slopes. It is fire resistant, low weight, easy to install and affordable, but cannot withstand impact loads. The problem is solved by panel or tile cladding. Stages of work:
- measure the height, length and width of the niche;
- make blanks by cutting out slopes with a wood saw;
- Drill holes for self-tapping screws on concrete and workpieces;
- fix the vertical bar with self-tapping screws, checking with a building level;
- install the longitudinal strips in the same way;
- Fill the gaps between the slopes and the door with foam.
Attention When marking workpieces, reduce the width by 2–3 cm from one edge to leave room for the mounting foam. Then the seams are plastered and masked under the cladding.
Tiling
The tiles are used both for decorating slopes and for arranging thresholds. Entrance doors are often decorated with concrete thresholds that require cladding. The tiles are fixed with tile adhesive. The gaps between the floor and the door are first filled with polyurethane foam. The seams between the slopes and the frame are sealed in the same way. Process:
- the surface is primed in 2–3 layers;
- tiles are laid on a dry surface, taking into account the seams, the pattern is marked with a construction pencil;
- apply the adhesive composition with a thickness of 5–10 mm using a notched trowel;
- the tiles are laid on the mortar and moved until they fit tightly;
- after 48 hours, the seams are filled with grouting solution;
- after 30 minutes, the remnants of the grout are removed;
- the seams are sealed with acrylic or silicone sealant.
Tip To maintain the distance between elements, you can use spacer crosses. They are removed before grouting after the glue has dried.
Entrance groups are designed in conjunction with door trim and opening decoration. Doors are paneled, covered with films or painted. Entrance niches are sealed with plasterboard or plaster and then decorated. Extensions are installed as a universal option.
How to make a door jamb
Door jambs are often called decks
Door jambs are quite often called decks. There are usually serious requirements for cutting decks. To make a door frame, you need to prepare thick logs in advance. You also need to have some skills in processing wood materials.
Lay the logs with wedges on two or four blocks. From the resulting blocks it will be possible to cut four-rope beams. Make a groove in them on one side, which is needed for attaching to the wall studs. On the other side, select the quarter into which the door leaf will be installed.
Cut out spikes at the ends of the logs. Also, adjust them exactly to the size of the grooves in the door jambs. Please note that the box is attached to the wall only with spikes. There is no other fastening. Quite often wooden doors are installed indoors. They are very heavy. When fully opened, they will try to turn the decks inside out. When closed tightly, they become loose. If the fit is poorly done, the defect will immediately begin to appear. The decks will become loose, moss will begin to fall out, and strong air will begin to blow into the resulting cracks.
Next, proceed to installing the box in the required location. Make the opening width on both sides of the door frame to the depth of the tenon. The depth of the tenon completely depends on the thickness of the decks.
Then choose one of two options: first, the door frame is made and an opening in the wall is cut along it, or the opening is cut first, and the frame is already cut to it. If you already have some experience in these matters, then feel free to cut the door “by eye.” Using a plumb line, make markings on the wall of the log house in the form of vertical lines. They will show the border of the opening for the door frame. Using a level, break through the upper and lower boundaries. Draw all the lines on the wall. Then cut out the doorway according to this marking.
If your doorway is wide, then use freshly cut short logs from the opening to make logs. Then place the selected logs with wedges on the blocks. The profile of the resulting decks may not be rectangular. It can be in the shape of a trapezoid.
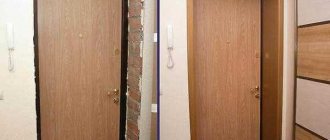
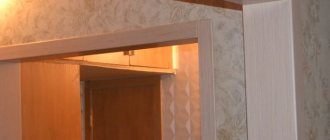
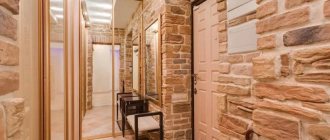
Finishing slopes near the front door
The most expensive and luxurious door will lose its beauty if the slopes are not carefully finished. And the task is to make them look beautiful, fit into the overall style of the hallway and corridor, and be practical.
Before decorating, slopes must be leveled with plaster or covered with plasterboard. However, if you chose decorative stone or brick to decorate the slopes of the front door inside the apartment, plasterboard sheets may not withstand the weight of the finish.
Therefore, plaster, and with the addition of alabaster, is attached to the wall securely and quickly.
The pattern on the door is repeated on the walls.
The finishing of the slopes continued in the hallway
The principle of gluing slopes is practically no different from finishing work in an apartment.
- Laminate and MDF panels require a flat surface if the width of the slope is very large. If it is narrow, then some errors will not be a hindrance. They are attached to a thin layer of mounting foam, which fills the space between the material and the wall.
- It is not recommended to use plastic for slopes due to its fragility and cheap appearance.
- Clinker tiles in the form of bricks will be appropriate in both houses and apartments.
- Finishing stone is not cheap, but it also looks presentable and expensive. It is attached with liquid nails or special resin.
Not only the slopes, but also the walls are finished with stone
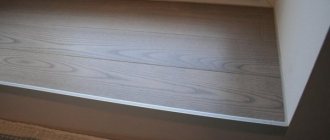
The slopes are not wide, so their finishing is minimal
Tip: using clinker bricks or stone, use these materials to decorate not only the slopes, but also the outer corners, the part of the wall in which the front door is located. Then the doorway will not stand out too much.
We have already talked about options for decorating the hallway with decorative stone. The same tips for choosing a design apply to the design of slopes.
And I would like to add that in a private house it is undesirable to use MDF panels, veneer, vinyl artificial leather, or plasterboard in the doorway.
Behind the outer wall there is already a street, and this is fraught with the formation of condensation, mold and subsequent damage to finishing materials. Stone or brick is preferable.
Plastering slopes
First of all, it is necessary to complete the preparatory stage. To begin with, the entire surface and objects must be covered with film so that they do not get dirty. Remove debris and dust and prime. This will eliminate the possibility of fungus appearing in the future.
Now you need to set the guide beacons, which are placed on the plaster or mortar. All potholes should be filled with cement mortar. After drying, you can begin applying the starting plaster. After the walls have dried, a reinforcing mesh should be applied and a second layer of putty should be applied, leveling the surface along the beacons.
After the second layer has dried, you can begin applying the finishing putty. Next, the surface is cleaned with sandpaper and painted or covered with wallpaper.
Plasterboard finishing
Finishing door jambs with plasterboard can be done in two ways: using glue or using wooden slats. Most often the first method is used. Do not forget that before starting work it is necessary to take measurements of the door jamb.
The wall is primed. Prepare the necessary parts from drywall: 2 on the sides and 1 on top.
Mix the adhesive solution and apply it to the back side of the plasterboard blank. The cut strip is applied to the wall and leveled.
After the glue has dried, excess material must be carefully cut off. The corners and surface must be puttied and sanded down with sandpaper.
Dimensions
The dimensions of the doorway can be either standard or non-standard. Most often, the parameters of the entrance door are 800 x 2000 mm. Thus, the size of the box is 870 x 2022 mm. These are the parameters that are encountered most often.
If you decide to replace an old door, you need to take your time with the purchase. After all, entrance openings in houses with old and new layouts may differ. Often, non-standard dimensions of the door frame are found in buildings with an old layout.
The dimensions of doorways are regulated by GOST, as well as building codes and regulations (SNiP). In accordance with GOST 6629-88, the width of the doorway can be 670-1872 mm, height - 2071-2371 mm.
What is the best way to finish the slopes of the front door?
Having looked at the new, just installed door, we come to the conclusion that, unfortunately, the work did not end there.
From the outside, everything looks quite luxurious and beautiful, which cannot be said about the hallway of the apartment. Bare concrete or brick walls and polyurethane foam are far from pleasing to the eye. In order to fix this, it is necessary to complete the work on the front door by beautifully finishing its slopes. The problem is that there are several options for solving this problem, but this article will help you choose the right materials and also explain how to install them correctly yourself.
So, here are the main finishing methods:
In order to choose the option that is right for you and the interior of your home, we will consider separately the disadvantages and advantages of each of them.
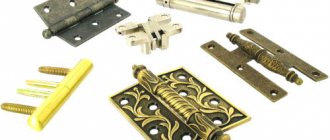
What is needed to install a door frame
Typically, the jambs cover door frames, which are sold assembled, but can be purchased individually in the form of cut lumber. The technology for their installation requires certain tools and materials. Their exact set may vary, but approximately it is as follows:
- door frame set (frames, extensions, trim);
- polyurethane foam;
- decorative nails;
- putty;
- serpyanka;
- hammer;
- set of self-tapping screws;
- level;
- drill (screwdriver);
- putty knife;
- screws;
- hacksaw;
- wedges
What will be needed to install slopes?
To install MDF slopes you will need the following tools:
Photo 1. Set of tools for installing slopes
- 1 – miter saw;
- 2 – roulette;
- 3 – pencil;
- 4 – angle;
- 5 – knife;
- 6 – hammer;
- 7 – masking tape;
- 8 – fastening elements;
- 9 – screwdriver;
- 10 – polyurethane foam;
- 11 – drill.
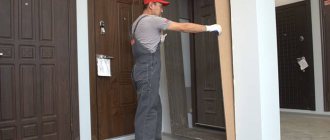
DIY door frame
Preparing door frame parts
For the door frame, it is important to choose wood that does not warp. In this case, the master chooses pine, but other types of wood that are resistant to external influences, in particular teak and oak, can be used to make door frames.
To ensure that the door frame fits perfectly with the door panels, the craftsman lays it in folds on both side panels of the future door frame.
To ensure the correct position of the door, the master places 3 mm spacers between the frame elements and the door leaf - in the upper part, exactly in the middle and in the lower part.
This distance ensures that the door opens and closes freely.
Fixing door frame parts
To maintain the correct position of the door relative to the door frame, the master fastens them with long clamps.
Now the main thing is to keep all the elements in place; for this, the master uses three screw clamps. They are placed in the upper, middle and lower parts, exactly where the spacers are located.
Preparing the top panel
For the door frame, it is important to choose wood that does not warp.
Now the master takes measurements for the top of the door frame, which will adjoin both side panels of the frame on top.
The size is taken from the outer edge of one side panel of the door frame to the outer edge of the other panel and in our case is 86.2 cm.
Saw off the top panel of the door frame.
Now we still need to cut it so that it rests on top of both side elements of the door frame.
The parts to be removed must have a width equal to the thickness of the jamb, that is, 2.8 cm. The master places this size on the top panel.
When marking, it is important to use a square so that the cuts are absolutely accurate. It is also very important to adjust the saw as precisely as possible so that the width of the rebate is exactly 2.8 cm.
The cutting depth should be 1.4 cm (this is the distance to the bottom surface of the rebate). Then the top panel of the door frame will ideally fit the upper ends of the side panels of the frame.
So, all that remains is to simply cut out the marked pieces of the top panel on both sides. If you don't have a miter saw, you can use a fine-toothed hacksaw.
Before attaching the top panel, you need to double-check that it fits neatly between the side panels.
Securing the top panel
Everything is in order, and now it can be secured. We do this using wood glue, applying it along the edges where the top panel will come into contact with the side panels. We press the top panel, but not all the way yet. First you need to squeeze the glue a little between the outer edges of the panels on both sides. And then we press the panel properly.
The door frame needs to be assembled and fastened, and the master takes a 3.5 mm drill. He drills three holes: one at the top, one at the bottom and one in the middle. Then he screws in the 4.5 x 70 mm screws. The same must be done on the other side. Now the door is almost ready.
Adjusting the height of the door frame
Before the door frame leaves the workshop, the craftsman will reduce the height of the frame. Since the height of the threshold under the door frame is 1.8 cm, the master puts this measurement on the frame below. He draws lines using a square and saws off the excess with a hacksaw. Finish cuts carefully to avoid splitting the wood.
Once both frame side panels have been cut to the correct length, a support board should be installed to ensure the door frame remains stable during transport.
The long clamps can now be removed. The new door frame is ready for installation. It took the craftsman about 45 minutes to make a new door frame for an old door.
Preparation before assembling the door frame
The door frame is fixed only on a solid base. This means that before finishing, the opening must be cleaned until its surface becomes as hard as possible. To do this, you need to use a grinding machine or drill with an attachment.
If the walls of the opening are uneven, then this can be easily corrected: you just need to fill the holes with sand-cement mortar. Otherwise, you can use brickwork.
As the author of the article has seen from his own experience, it is convenient to assemble the door frame when all its parts are located horizontally. The easiest way is to place the structural elements on the floor, laying ordinary cardboard or other soft material under them. If the master does not want to assemble the door frame on his knees, then he can place the frame elements on four chairs or two tables.
Laying beams on stools will ensure ease of box assembly
Before making a door jamb, it is mandatory to take measurements of the opening and prepare special tools.
Doorway measurement
According to the rules, the opening under the door frame is measured with a tape measure in six places:
- at the top from one wall to another (horizontally);
- below from one wall to another (horizontally);
- in the middle part of the opening between two walls (horizontally);
- from the upper left corner to the floor (vertically);
- from the upper right corner to the floor (vertically);
- from the middle between the left and right corners at the top of the opening to the same point at the bottom.
To get accurate results, the opening must be measured at six points
This number of measurements is necessary, as this will help the master choose the optimal values. The correct opening width is the smallest distance between vertical areas. And the correct height of the passage into the room will be the smallest figure obtained by measuring the gap from the top to the bottom of the opening.
Installation of accessories
In most cases, ready-made MDF boards covered with decorative film are used as additional elements in the manufacture of a door jamb. In the standard version, their size is 80x550 mm.
Additions allow you to make the door frame more aesthetically pleasing and stronger.
According to traditional technology, additional elements are installed “in a quarter”, that is, they are inserted into a special groove on the inside of the door frame. Therefore, such a device visually enlarges the door frame.
When additional elements need to be mounted on a door already fixed in the opening, add-on (adjacent to the frame) and underlay (substituted under the door frame) extensions are used.
To attach extensions to the door frame, proceed as follows:
1. Place the door frame with the inside facing up on 4 chairs. We align the corners to rectangularity, checking with the diagonals: they must be the same length. To do this, we temporarily nail to the bottom with small nails a wooden strip with a length equal to the length of the top strip of the door.
2. If the jamb does not have a quarter for the extensions, then we cut out the quarter with a milling machine. The depth of the quarter should be equal to the thickness of the additional board, and its width should be equal to the depth. For example, we have an additional board with a thickness of 16 mm (standard MDF thickness). Then you need to choose a quarter 16x16 mm.
3. Along the perimeter of the door frame, we attach strips of plywood or drywall to the outside so that they protrude upward to the width of the additional board. A continuous frame is not needed; two scraps are enough for the top bar and 3-4 for the sides. We nail the plywood with nails, and the drywall with self-tapping screws.
Drywall is attached to the outside of the door frame
4.Cut the extensions to size. The top trim strip should lie between the side ones, so we cut it to the size of the top quarter, and the side strips to the size of the sides of the box. Apply liquid nails or any wood mounting adhesive to both edges of the quarter.
5. We insert the additional boards into place and wait for the glue to set. We remove the temporary bottom strip that kept the extensions from falling out of the plywood, and put the door frame in place. We align it in width using wooden spacers, and check the verticality of the sidewalls with a plumb line.
6. Under the sidewalls of the wedges, we ensure that the top door strip is horizontal. We fill the cracks with foam and plaster them flush with the wall surface. We nail the baseboards, cut them to size and glue the platbands with liquid nails - the door with extensions is ready.
Since the box can be called a door lock on hinges, its manufacture must be done with all diligence. Even minor deviations from the rules will result in the door frame being too small for the opening.
Options for doing the job
There are at least a dozen options for making slopes on interior doors. Here are just some of the possible options:
- Installation of drywall sheets.
- Plastering followed by applying putty.
- Application of decorative plaster.
- Overlay panels, for example MDF.
- Wood finishing.
- Laminate lining.
- Installation of chipboard panels.
- Installation of PVC panels.
- Plastic finish.
- Finishing slopes with artificial stone.
- Installation of tiles.
The most popular options at the moment are:
- plaster followed by applying putty;
- installation of overhead panels;
- plastic finishing;
- installation of drywall sheets.
Each of these methods has its own advantages and disadvantages. The pros and cons of these slopes for interior doors are shown in the table below:
| № | Method | Advantages | Flaws |
| 1 | Plastering followed by applying putty | Can be used on any slopes, no matter how wide they are. The finishing can be varied - wallpaper, paint, and so on. | The work being performed is very dirty, and you also need to have at least basic putty skills. The crooked the slope, the more difficult it is to level it with putty. It takes time for the layers to dry; finishing requires a large number of materials and tools. |
| 2 | Installation of overlay panels | The work is done quickly, the appearance of the finished slopes is attractive, expensive and beautiful. After installing the panels, there is no need to further process the slope. | Panels are expensive. Precision and accuracy are important during installation. |
| 3 | Plastic finish | Plastic door slopes are installed quickly, are cheap, and are durable. Plastic is easy to clean. | Precision is required when working. Plastic slopes look cheap. |
| 4 | Drywall installation | Drywall provides a smooth surface; working with drywall is easy. There is a choice of final design of the slope - painting or wallpapering. | Drywall should not be used in places of high humidity. |
When you make the slopes for interior doors yourself, you should choose the option that is the most realistic in execution. Below we will provide a step-by-step guide for making slopes using the options described above.
Stage 4. Assembling the accessory box
Before installation, we assemble the extensions into a solid, rigid box.
Photo 11. Drilling holes for self-tapping screws
Using a drill, we drill holes for self-tapping screws - for fastening from the inside. This is a mandatory step so that when screwing in the screw does not split the MDF panel.
Photo 12. Drilling holes for self-tapping screws
We make several holes at a distance of 10–15 cm from each other.
Stage 2. Setting aside and marking the required dimensions of the extensions
Photo 4. Preliminary markings
After we have measured the required dimensions of the additions, we set them aside on the blanks of the additional elements. We make preliminary markings directly on the panel.
Photo 5. Gluing future cutting areas with masking tape
Using masking tape, mark future cutting lines.
On one blank for additional elements, you can put two parts - the threshold and the upper part of the additional elements.
In the same way, we set aside the dimensions of the second part, make preliminary markings on the workpiece and glue it with masking tape.
Photo 6. Re-mark
We re-mark the length of the extension directly on the masking tape.
If you do not glue the edge of the additional element with masking tape, chips may appear on it during sawing.
Photo 7. Checking dimensions
Once again we check the correctness of the markings.
Photo 8. Postponing the cutting angle
Use a miter angle to mark a cutting line perpendicular to the edge of the panel.
Stage 3. Trimming the extensions to the required sizes
Photo 9. Sawing blanks
Using a miter saw, we cut blanks for additional elements exactly along the marks.
Photo 10. Sawing the second workpiece
We saw off the first and then the second horizontal parts of the extension.
We repeat the procedure for the vertical parts.