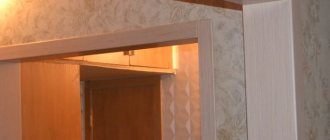
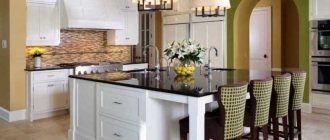
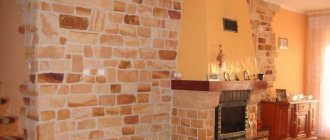
Not so long ago, a doorway trimmed with artificial stone could only be found in the decor of a cafe or restaurant. The idea caught on, and finishing the slopes of the front door from the inside with decorative stone began to spread in private construction. Let's figure out what the pros and cons of the method are and how to choose the right material that suits the style of your home.
Decorating the front door to resemble old brick Source stroyka-gid.ru
How to prepare a free doorway for work
The preparation of the doorway before finishing it must be approached thoroughly. The main thing is to remove all gaps and irregularities. It all goes something like this.
- Eliminate all holes and cracks using a mortar mixture, carefully seal all logs and broken pieces of concrete, stone and plaster. It is better to use materials with good adhesion for this purpose. It is also advisable to pre-prime the surfaces for better adhesion. This method is ideal for later applying decorative or any other type of plaster to the opening.
- Before you begin finishing overlay materials: tiles, laminate, lining and other flat panels, you should prepare the coating using a level. Usually no backfilling of the solution is required. It is enough to hide the deep pits and scratch off the tubercles. After which you can freely place selected decorative fragments on the adhesive base.
- In case you plan to cover the door slopes with plastic panels, it is enough to simply fill the metal or wooden sheathing. All irregularities will be hidden in this frame, so there will be no need to waste money on starting building material.
- If a perfectly flat surface is required to finish a doorway, for example, for wallpapering, liquid plaster, or painting, it is better to sew up the deformed opening after dismantling the doors using sheets of plasterboard. The advantage of this material is that there is no need to adjust the surface level. The downside is the high price for raw materials and labor.
Regardless of how the slopes will be faced, you should definitely purchase a primer. It is used to cover the surfaces of the doorway before finishing for better adhesive properties.
A wide doorway made of decorative stone connecting two rooms in the houseSource atlantgranit.ru
Doorways with functional shelvesSource homeli.ru
Preparing the base
The facing material should be laid out on a flat surface; the appearance of the finish and its strength will depend on this. You can use plaster or drywall. The latter is installed on a metal frame made of profiles. In this case, the seams are taped and covered with putty. It will be possible to attach decorative stone to such a surface.
If you are not afraid of the duration of the process, you can use plaster, as it simplifies the work and does not take up additional space. You can apply starting plaster to the surface, and then sand the base. The final layer will be finishing plaster, which is processed according to the same principle.
Walls are decorated with stone, usually applying a primer to the rough surface. It provides strong adhesion of the cladding to the wall. A brush or roller is used. The layer dries well, after which masonry work can begin.
Stone arches: preparation of tools, adhesive joints and surfaces
Before you start framing the arches with artificial brick or stone, you need to prepare all the necessary materials. After all, you can’t just start working on top of old untreated walls, gluing artificial stone onto jelly. The adhesive connection required for the work is prepared and the working surface is processed.
Materials to help create an arch:
- The stone itself, which is selected according to a pre-thought-out design;
- Pencil for indicating the location of parts, framing;
- Sandpaper will help to trim rough corners of the stone;
- The surface is covered with a soil solution to prepare it for cladding;
- Adhesive connection for attaching stone to the surface of interior walls;
- In order for the stone tiles to look decent, the gaps between each element are covered with grout for the seams;
- A tub for mortar or glue.
Before decorating an arch with stone, you need to prepare the base
Unevenness on the walls can also be smoothed out with sandpaper, and later also primed. This will prepare the surface. A special glue (liquid nails) or mortar (made of cement and sand) is used. The reliability of the fastening depends on the quality of the adhesive joint or how rough the surface of the decorative stone itself is. If the work is carried out without the help of a specialist, then it is worth preparing the solution gradually. This will help prevent it from drying out quickly. Mix the adhesive compound using a drill with a special attachment. The solution should resemble liquid sour cream in consistency.
Some recommendations
- The width of the seam between the tiles can vary from three to eight millimeters.
- The work will be made easier by plastic crosses that act as supports and fix the stone.
The optimal combination of decorative stone tiles
- A doorway trimmed with decorative stone will look harmonious if the seams between the tiles are filled with special jointing. The jointing solution is prepared according to the instructions on the packaging, and a drill with a special attachment or a mixer is used to obtain a homogeneous mass. After preparation, the resulting mixture should sit for fifteen minutes (unless otherwise written on the package). With the help of tints you can change the color of the jointing solution.
In any case, finishing not only wall surfaces, but also doorways with decorative stone will create a unique, original interior in the apartment. Decorative stone is an affordable finishing material that allows you to implement a variety of solutions and ideas in the interior of your apartment.
Advantages of using decorative stone in the interior
Well, firstly, the stone is extremely resistant to temperature changes, and it is also absolutely non-flammable, which is why it is often used as a cladding for fireplaces. By the way, a fireplace finished with decorative stone creates a unique comfort in the room, being the heart of the house. The fireplace can be made of stone entirely or partially - it all depends on the preferences and tastes of the owners
Also, stone is often used for lining artificial reservoirs, fountains or small waterfalls, in other words, for finishing corners of wildlife, which is currently a particularly stylish and fashionable element. You can also create a real garden in your apartment, where you can have a good time and relieve stress.
Decorating the walls of rooms such as corridors, dining rooms, kitchens, halls and offices with stone significantly improves the interior, and also eliminates the need for frequent cosmetic repairs, because artificial stone does not require special care, its service life is unusually long. If you need to create changes in the decor, you just need to install small inserts from tiles of a different texture and type, or simply replace some elements, for example, with a spectacular panel - and your interior will be perfectly updated.
Flights of stairs are also quite often decorated with stone; for example, stone steps combined with wall cladding can turn a home into a real palace, especially if windows and doorways are also decorated in the same way. In addition, such finishing creates a feeling of reliability and strength of the walls, as well as security for the inhabitants of the house.
No less impressive is the bar counter, lined with decorative stone, as well as all kinds of racks, shelves, podiums and niches. Moreover, the bar counter can be given the most unimaginable and bizarre shape, using facing stone with various shapes.
To give the interior an antique feel, it is recommended to use coarse-grained stone to decorate arches, doorways and fireplaces.
There is one more small nuance when using stone - try to lay the tiles, maintaining a certain distance, which is filled with grout. The color of the grout can be changed if desired. This method helps to bring freshness to the interior.
It is especially recommended to use natural stone finishing in those areas where the TV or other equipment is located, because... natural material helps reduce the stress on the nervous system that the body receives when watching TV for a long time or working for many hours at the computer.
You should also not overuse the use of stone parts in the interior. This threatens to create a feeling of heaviness and cavernousness that will put pressure on people in the room.
Thus, artificial decorative stone can transform absolutely any interior. Even if only a small interior detail is decorated with such material, a special chic is guaranteed for your home.
Advantages and disadvantages
The use of stone as cladding indoors is one of the most attractive solutions, giving the building its own style. Knowing the advantages and disadvantages of the product, you can make the right choice.
The use of decorative stone in the interior has several advantages.
Decorative stone attracts attention with its beauty and naturalness. The plates are suitable for decorating walls outside and inside the building. The pronounced structure and natural colors will suit any interior. The aesthetic effect is enhanced by the skillful use of lighting - shadows on the uneven surface of the stone that create unforgettable visual effects.
Complementarity. The stone fits perfectly into another style of wall cladding. Placing the plates on a small piece of surface next to the doors creates an original look. If the door design takes place in the corridor, then a smooth transition of plates to furniture in the form of a regular strip will be an excellent combination
It is important that the colors of the furniture and decorative stone are in the same tone.
- The artificial stone is fixed using liquid nails.
- Gypsum is easy to cut with a saw, and the absorbent ability of the material allows it to be painted in any color.
Decorative stone has several disadvantages.
- The stone has a porous structure, it absorbs dust, fungi and water, and it is difficult to clean the plates to a new look. If you use parts to decorate doors on the street of a private house, then over time the material will become dirty, especially light-colored decorative stones. To prevent such consequences, you need to treat the surface with a water repellent. The composition impregnates the plates and a protective film appears from external environmental influences. The color of the parts becomes brighter.
- An ordinary concrete surface is not suitable for installing stone. You need to glue it on a plastered wall. And also cannot be glued to drywall, since the parts will tear off the top layer of the material.
Finishing a window opening with artificial stone
Decorating windows with stone looks no less impressive than decorating doorways. An important condition is the size of the elements. It is necessary to trim the window slope with a small facing stone so that the finished window opening does not look massive.
It is recommended to use small products for window cladding
Window slopes must be leveled and primed outside and inside. When using artificial material, reinforcing the surface of the slope, even if it is made of plasterboard, using reinforced mesh is not required.
The material is laid on the windows using the monolithic method, starting from the bottom of the slope. When the lower fragments are securely fixed, you can continue laying out the upper rows. Corners should be formed by trimming the end sides of the facing products at an angle of 45 degrees.
Sheathing installation
Facing materials are attached to the canvas in two ways:
- installation on the frame from the inside of the surface;
- screwing (gluing) to a flat surface.
Fastening panels
MDF panels, solid wood paneling or homemade cards are attached with self-tapping screws:
Through holes for self-tapping screws are drilled of such a diameter that the screw fits freely into it. The self-tapping screw is inserted into the hole and screwed into the body of the lining from the reverse side. As a result, the card is attracted from the surface of the door.
- First, screw on the inner panel, which should be smaller than the outer one.
- Before installing the card, the cavity of the canvas must be insulated. To do this, use polystyrene foam, mineral wool or isolon.
- After installing the inner panel, screw on the outer one, drill holes for the keyhole, for the peephole and for the handle fasteners.
This method of installing cladding is the simplest.
Sheathing with slatted material
The load-bearing element for fastening lining, laminate and other slatted material is a frame made of wooden slats, which is attached to the stiffening ribs of the canvas from the inside. The rail is taken the same thickness as the height of the jumpers of the metal frame. It is secured using metal screws. Insulation is placed into the cavity cells and the lining is installed, nailing it to the frame slats.
When working with wooden lining, thin decorative slats are used to decorate the perimeter of the door leaf and close the joints between the slats when there are breaks in the direction of the lines. When working with plastic and laminate, a plastic starting L-shaped profile is used for such purposes. It is first stuffed around the perimeter of the canvas, and then the cut strips are inserted.
This method is more labor-intensive in all versions, since trimming the lining takes much more time than instantly screwing on the linings.
The procedure for designing the opening
You need to start laying out decorative elements from the corner. The first horizontal row is located along the slats, which ensures alignment with the floor and ceiling. In order to maintain a gap between the tiles, crosses are used. Using a spatula, the composition is applied to the back side of the tile and distributed over the area. A comb tool will allow you to remove excess. The jambs are finished horizontally with decorative stone; it is necessary to move from the bottom up. Sometimes a more impressive gap is left between the elements than the distance equal to the seam.
Laying can be done using a suture or seamless method. You can decide which option to choose by looking at the photo. The corner can be formed by tying the elements together according to the principle of brickwork. The second method is to cut the tiles at an angle of 45˚ from the end of the side element. If you are a beginner master, the first method will suit you, but the second method is more aesthetically attractive.
The doorway may include a hanging leaf. In order to prevent the corners from being leveled with the mixture, the material is laid with an overlap. Installation of platbands in this case is carried out immediately. If there is a door, the facing of the slopes is done using a different material. You should step back from the edge of the slope and leave a distance along the width of the casing; this is a space that will be filled later.
When finishing the surface with decorative stone using suture technology, you need to provide a gap of 3 to 8 mm. In order to make the surface airtight, the seams are filled with jointing. This allows you to create a complete object.
Decorative stone can be laid with seams in contrasting or matching colors. In the photo you can see this option for decorating an apartment. In one case, dark material with white trim is used, which creates a feeling of freshness and solemnity.
Whereas a stone with a darker decoding makes the cladding close to the naturalness of the distant past. As soon as the decoration of the door openings with decorative stone is completed and the adhesive composition has dried, you need to place the jointing composition in a plastic bag, cut off a corner and fill all the recesses, squeezing out a uniform sausage.
Advice from professionals
Before finishing a doorway, you should choose the right material for it. Experts emphasize that for cladding plasterboard walls, it is best to prefer gypsum stone. To all its advantages you can add a variety of colors and a wide selection of textures.
Such material can be placed between two doors, where the walls should not be subject to high loads. You can even find unpainted products on sale, which you can paint as you wish. But it is better not to place such a stone near the bathtub and toilet, because if it gets dirty, it cannot be rubbed or wet too much, otherwise the surface will be damaged.
If you have already trimmed the door slopes with decorative stone, but did not take into account its susceptibility to negative factors, you can treat the material with a special acrylic-based varnish, which does a good job of repelling dirt. If you still want to choose gypsum stone, but do not plan to apply additional compounds yourself, you can choose a material with a polymer coating. This option for finishing the front door will cost more, but will save you time.
Stages of work
Installation of decorative stone with your own hands is carried out in two ways:
- no seams;
- with unstitching.
Seamless installation is a faster and easier technology. The material is laid close to each other. As a result of this installation, a monolithic surface is created.
Laying decorative coverings with jointing is a labor-intensive procedure. But it is in great demand because the surface finished in this way has a more attractive appearance.
Installation work involves the following sequential actions:
- removal of plinth and platband;
- cleaning the surface from old coating;
- wall marking;
- laying decorative stone on the floor;
- treating the walls with a primer (it is better to apply 2 layers);
- drying of the primer;
- installation of finishing material.
Laying out decorative coverings on the floor is necessary to properly sort products by color and size. When a pre-planned pattern is created on slopes, there should be no even horizontal and vertical seams on the created surface.
Particular attention is paid to the preparation of a special composition. The effectiveness of attaching decorative stone to the wall largely depends on its quality.
In most cases, 1 kg of dry mixture is added to 180-220 ml of water. The composition is thoroughly mixed with a construction mixer (5-6 minutes). The working solution is used within 15 minutes.
The covering of the doorway begins in the lower corner from the area where the plinth was removed (it will be attached to the already created base). The main guideline for laying the first row of facing material is the floor.
If necessary, the decorative coating is cut off and the outermost part of the stone is polished. There should be no sharp corners. Fitting of workpieces is carried out on the floor. And only after that they are attached to the wall.
When laid in a vertical plane, the material is mounted flush against the door frame. The area where the stone and the casing come into contact is leveled with special care. When covering a corner, the decorative material is trimmed and mounted end-to-end. This is the only way the seam will be invisible.
Final processing
The facing of the doorway is completed by grouting the tile joints (if seamless technology for laying the finishing material was used). This process is carried out after the glue under the decorative coating has completely dried. Using a spatula, the grouting compound is placed into the seams. Excess solution is immediately removed with a soft, damp sponge.
To improve performance, the surface is treated with a protective varnish. If the surface is not shiny enough, then it is covered with another layer of transparent acrylic varnish. The surface acquires maximum decorative properties when painted. After the paint and varnish composition has dried, the installation of platbands and baseboards is carried out.
How to sheathe a metal door
After the final choice of material for finishing the metal door leaf, you should think about how to beautifully, quickly and easily make the doorway heat-proof, while the appearance should be completely compatible with the interior of the room. Sheathing the door from the inside with your own hands is not difficult, you just need to be precise in your measurements and avoid making mistakes. Not only the appearance, but also the quality will depend on the accuracy of the work.
Finishing metal sheet with clapboard
For greater convenience, covering the material should remove the door from its hinges. Then:
- It is necessary to prepare the canvas. There should be no dust, cobwebs, pieces of dirt or cement mortar remaining after repairs on the surface of the door.
- Next, you should treat the door with a metal corrosion inhibitor. If there are traces of rust, they need to be cleaned with sandpaper, covered with a primer, and after drying, apply paint. Only when the paint has dried can you proceed to further actions.
- Take measurements and determine the places where the locking mechanism, peephole, and handles are located.
- A sheathing of wooden slats is installed in the metal leaf around the entire perimeter of the door. For this purpose, gluers are used, fixed with self-tapping screws.
- Insulation (mineral wool, penoplex) is inserted into the resulting cells.
- The lining is fixed on top of the wooden slats using “liquid nails” (it is better to use them). Everything should be done one by one and slowly. The material should fit very tightly to each other.
After finishing the work, the resulting surface is opened with varnish. The last step is to install the lock and hardware.
An example of covering a metal door with clapboard
Laminate cladding
Sheathing a metal door with laminate is easy. To do this you will need:
- Liquid Nails.
- Wooden slats.
- Electric jigsaw.
After the door is removed from its hinges and laid horizontally, the door leaf is prepared - all rusty spots are cleaned and treated, dust and debris are removed. After this, the fabric is assembled from the laminate. Using an electric jigsaw, the blade is adjusted to the size of the door leaf where it needs to be mounted (accordingly, the metal corners of the door remain outside the finish - the panel is laid inside the corners). A frame made of wooden slats is glued onto the door using liquid nails (they must be treated against moisture). A laminated panel is glued onto the frame and everything is left to dry.
The process of installing laminate on a door
Design options for laminated doors
Covering a metal door with leatherette
Covering a metal door with leatherette with your own hands is not difficult. First you need to make the doors clean. After this, glue is applied. First, foam rubber is glued - like insulation; after drying, glue for the material is applied around the perimeter of the door leaf from the end. After sewing the door, everything should be left to dry. The last step will be to clean up the remaining glue and hang the fittings.
The process of finishing a door with leatherette
MDF for covering the metal door leaf
At the very beginning of the work, you should prepare the door leaf. It should be free of traces of rye, dust and debris. The metal is covered with vinyl film on top. This is done for good adhesion of the metal to the MDF.
Example of doors covered with MDF
- MDF panels are commercially available in different sizes. In order to purchase an MDF panel, you should take measurements of your door from the inside.
- Afterwards, you need to apply glue, for example, liquid nails, to the inside of the panel.
- After this, the panel is applied to the metal base, fixed and left for a day to dry.
- Upon completion, the lock and fittings are attached.
Decorating a doorway or arch
You can also finish the doorway if the door is not intended to be installed. In this case, depending on the depth (thickness) of the opening, either the door slopes are made entirely of stone, or only the corners are covered with stone, and the rest of the space remains smooth and is covered with matte oil or acrylic paint or, for example, decorative plaster, which gives a beautiful combination invoices
The stone decoration of doorways in the fireplace room, where the fireplace is decorated in a similar way, looks especially advantageous.
It must be said that the use of stone in home decoration looks organic when it, as a decorative element, is included in the project and “runs like a red thread” throughout the entire interior, participating in the decoration of the fireplace room, kitchen, services, hallway and the outside of the front door.
Cladding on plasterboard
Only this material pliably forms a part of a complex configuration, for example, a curved arch. However, the installation work is not easy - you will need a lot of additional material: profiles, corners, screws. And after installation, drywall requires finishing: putty, paint or wallpaper.
Typically, arched blocks without a door are sheathed with plasterboard. A semicircular opening will soften the corners, as if raising the low ceiling and lowering its high and uncomfortable counterpart. The arch is appropriate between the living room and the hallway or kitchen. Also often found is an arched exit to a loggia or balcony.
Openings without doors unify rooms in an original way, harmonize with the overall style, and expand the area. The quality of finishing and its design is especially noticeable at the border of the hallway and living room or when connecting to the loggia. This design advantageously emphasizes the interior of the premises or zones the space.
Types of masonry
There are two types of masonry - with and without seams. The seam looks better when laying elements of a clearly defined geometric shape.
Seam preservation
When performing finishing work from artificial stone, you can use a masonry technique that preserves the seams. In order for the seams to be even, it is necessary to install plastic wedges between them. This will keep the masonry elements in the required position while the adhesive solution sets.
To maintain the gap between the stones, plastic wedges are used
When finishing slopes with stone, work begins in the lower corner. Cover part of the wall with the adhesive solution using a comb spatula. The decorative element is applied to the wall and pressed.
Stone surface finishing techniqueIf the door slopes do not have a door leaf, then the decorative stone is laid overlapping. If there is a door, the color and texture of the openings should fit harmoniously into the interior and be combined with other decorative finishing materials.
Joining seams
The jointing occurs after the decorative material and the wall surface have completely set. The instructions from the manufacturer of the artificial stone contain recommendations on the use of the type of grouting composition.
Using a syringe gun, the seam is filled to a depth not exceeding 5 mm. This will give the masonry a more pronounced relief.
Seam cutting is done using a syringe gun.
When the grout begins to set, it must be leveled using a shaped spatula or spatula.
A spatula or spatula is used to grout the seam.
The remaining grout from the front surface can be cleaned off with a brush.
Clean seams with a brush
A stone door slope will look more solid if the grout color is gray. Light grout against the background of dark decorative masonry will refresh its overall perception.
Monolithic masonry
When designing a door slope without seams, the work takes less time. The monolithic nature of the masonry is achieved by placing the elements as closely as possible to each other. With this method, the adhesive solution is applied directly to the product.
In monolithic masonry, the elements are laid as close to each other as possible
It is important that there are no traces of glue left on the outside. The adhesive solution is applied to the stone
The adhesive solution is applied to the stone
When laying, it is necessary to control the vertical direction of the masonry
If the products have the correct geometric shape, then it is important to ensure their correct horizontal position
Check the evenness of the masonry using a level
At the final stage, the masonry is coated with a solution that increases the strength and water-repellent characteristics of the material.
How to make slopes from laminated slats with your own hands: methods
Laminate is used not only as a floor covering. There are other possible applications for it, for example, door slopes. Why the use of laminated material seems convenient for this and how to do it, using the potential of an ordinary repairman.
Purpose of slopes
A finished door jamb is necessary to give the doorway a finished look. If new doors are installed, then leaving the old slopes will not be presentable. Therefore, they emphasize the novelty of the doors and redo the slopes with laminate.
The slopes undergo changes when the old door frame is dismantled. The plaster is crumbling, so they are either re-plastered or sealed in some other way. When a new door is inserted, the seams are foamed to seal, so this foam is closed.
Using plaster to fill the resulting holes does not seem to be a decorative or effective method. Therefore, the use of laminate has become something of a novelty, which provides many opportunities in choosing the design of the opening.
Why laminate
The use of slopes was previously used to strengthen the doorway, but today it has become more of a decorative part, which is why laminate is used. So why laminate and not another type of material.
Laminated slope
First, let's look at the features of laminate to understand why this material is often used for decorating slopes.
The laminate is a four-layer lamella. The base of the lamella is MDF, impregnated with resins and having a protective layer on each side. On the front side of the lamellas, under a protective film, there is paper with a pattern that imitates the surface of a stone or the texture of wood. Therefore, laminate is popular due to the variety of shapes and structures.
Basic rules for decorating jambs with stone
- Symmetry. Both sides of the opening, regardless of whether there is a door jamb in it or it is dismantled, are finished identically. Only this approach will ensure the completeness of the composition.
- Height proportions. Priority is given to the bottom of the door. This applies not only to the vertical, but also to the horizontal axis. That is, the base of the opening, with any method of its design, should visually look more massive. In accordance with this, a scheme for decorating the jamb is drawn up, taking into account the size of the purchased samples.
- A combination of texture and seams. The task of a master working with artificial stone is to achieve complete naturalness of the cladding. Experts recommend that before starting installation, lay out the “picture” on the floor and evaluate the effect it gives. How to position the products relative to each other, with what interval or offset - all such nuances are calculated in advance.
- Compliance with the jamb material. This must be taken into account even before purchasing decorative products. If the door frame and slopes are well polished and varnished, then stones with a smooth front surface are used to decorate the opening. And it is advisable to attach textured samples around a jamb that is untreated (made independently) or with a “rough” wood pattern.
This is interesting: Terrace to the house + projects, photos - we understand all the details
Final processing
Once you have succeeded in decorating the walls, you can begin finishing. In an apartment, the cladding is rarely affected by negative factors. But experts recommend applying a special impregnation. To do this, the wall is first cleaned. If you want to get a shiny surface, the decorative stone can be treated with acrylic varnish. For maximum naturalness, the impregnation is diluted with water. If you have changed the doors, but the decoration of the entrance area remains the same, the stone can be repainted.
Decorative finishing of doorways with stone
Using natural or artificial stone to decorate doorways is a good solution, but it is not always appropriate. The fact is that these materials are not suitable for all interiors. They will look more organic in those living spaces that are made in an old style. Of course, in such apartments and houses, stone simply has no competitors. Finishing entrance doors with decorative stone has a number of obvious advantages, and the appearance of such a solution looks great, as you can see from the photo in our article.
The most important advantage of these materials is their neutral structure. This means that both artificial and natural stone in no way affect the microclimate of the room
Both materials have excellent moisture resistance characteristics, which is very important when lining the slopes of entrance doors that emit condensation during the cold season
Another important advantage of finishing doors with decorative stone is durability. It is known that the glue used to fix the material will disintegrate into its components much faster than the stone itself. In this regard, natural stone is somewhat preferable to artificial stone. But the second one can also last for several decades. Also, the advantages of using stone include a simple laying technology, which does not necessarily require straight seams. Even a person far from the construction and repair industry can perform this method of cladding. In addition, it is worth emphasizing the wide range of this material. This especially applies to artificial stone. The variety of natural stone products is achieved through different cutting methods. Using this technique allows you to create hundreds of different patterns and ornaments, even if you use one type of stone, for example, sandstone.
It should be emphasized that finishing entrance doors with artificial or natural stone is an expensive pleasure. But this “disadvantage” is fully compensated by the unique appearance of the cladding, as can be seen in the photo. In addition, this solution is highly reliable. Many experts and designers emphasize that finishing slopes with artificial stone is an ideal solution due to a number of advantages of this particular material. For example, they note the spectacular appearance, the strength of the cladding and durability, the ease of caring for the stone, as well as the ability to restore the decorative finish in case of damage to its individual elements.
In addition, you can also remember the excellent organic combination of this material with other types of cladding. Often, medium-sized stones are used to decorate doorways with artificial stone in apartments and houses. This allows you to avoid loading the interior with large forms. It would be appropriate to say that many designers use one interesting technique to make the atmosphere natural. The outer edge of artificial stone trim is deliberately made uneven, but smooth edges are almost never used.
In cases where it is necessary to decorate an arched opening with stone, the material is laid out in the upper part along the perimeter, which allows you to emphasize the shape and make the design noticeable against the background of the rest of the wall. An important nuance of laying decorative stone cladding is the finishing of the slopes themselves with the material. This will allow you to stay within the chosen design solution and maintain harmony in the interior.
Briefly about the main thing
Decorative stone in the decoration of the front door is used when they want to emphasize style and make the interior more colorful. The decor becomes especially impressive in large rooms with high ceilings. There are several types of decor available on the construction market. They are manufactured using different technologies, which determines their properties and application possibilities.
When choosing an artificial stone, pay attention to the quality of the surface and structure, check the absence of bending and the quality of the edge. When choosing tiles, you are guided by the style, color palette of the interior and your own taste.
Ratings 0
Types and features of stone for wall decoration
Thanks to a wide range of shades, textures and methods of laying artificial stone on the wall, you can choose the most interesting option for your interior.
How to properly lay decorative tiles on a wall will be described below.
It is important to understand the difference, there is:
- Natural facing stone;
- Decorative tiles - imitation.
From natural stone, preference is given to tiles made of sandstone, limestone, shell rock, basalt, tuff and granite. Used frequently:
- Natural marble. Elite cladding, its reserves are almost exhausted, but hard synthetic analogues are produced. Among the popular shades are white and black marble, beige, reddish and olive shades of this stone.
- Hewn sandstone slabs. There are fine-grained textures, coarse-grained and medium-grained batches. Lots of milky, reddish and chocolate shades are available. Sandstone looks good in mosaic layout and chaotic alternation of multi-colored slabs.
- Granite. Traditional facing material, not very heavy, can be processed. The cladding will decorate the hallway, living room, or any other room. Smooth slabs can be laid on the floor.
- Naturally polished sea pebbles. Suitable for combined laying of decorative stone on the wall with your own hands. Heavy weight, non-standard shape and questionable aesthetics complicate the application. But this material can be found on the seashore and used in some design solutions.
- Limestone (shell rock) is a dense structure of marine calcium. The material is cut into slabs for laying in rows. The most common varieties are milky, gray, yellowish and pinkish.
- Slate. It is distinguished by a characteristic texture, thanks to which it is laid with jointing and “seamless” laying of decorative stone on the wall.
Synthetic and composite materials are widely used. Natural stone chips are poured into a transparent polymer base, from which countertops and slabs are made. It imitates onyx, jasper or malachite.
Artificial “stone” will enhance any interior thanks to its interesting texture. A wider variety of decor is produced on an environmentally friendly basis:
- Gypsum;
- Cement.
Gypsum boards are lightweight but fragile. Without additional preservation with colorless varnish, gypsum stone is unsuitable for rooms with fluctuations in temperature and humidity. Practical cement-based decor is a universal finish for facades and interior spaces without heating.
Artificial “stone” will enhance any interior thanks to its interesting texture.
Best options
Decorative stone collections differ in production method, surface texture and color. All these functions create a certain pattern, which is called a style.
- For a house designed in a minimalist style, decorative stone acts as zoning. Matte but rich colors of parts are used for decoration. If the room does not have enough light, you should use masonry with a glossy surface. Basic tones are black and white.
- The classic style takes on smooth and uniform plate shapes. The dominant colors in the interior are beige and cream. Stone imitation can be agate or alunite. Such a stone will highlight expensive furniture, and muted warm light will create a cozy atmosphere.
- High-tech with contrasting colors and geometric shapes will perfectly complement artificial black stone against a white wall with metal accessories.
- For lovers of eco-style, the finishing of snow-white stone, complemented by live plants in pots, looks excellent in green and white tones.
- The rustic style will be emphasized by the standard, even shape of brown or muted orange brick. Such details will harmoniously combine with the furniture.
- It is difficult to imagine a loft-style interior without elements of brickwork. After all, without such fragments the atmosphere of this direction is lost. You need to choose gypsum material in blue and white shades. To update the parts after some time, painting will be required if desired.
Decorative stone attracts attention. It creates an impression and defines the style of the interior more than any other design element.
For detailed instructions and tips on laying decorative stone, see the video below.
Until recently, finishing doorways with decorative stone was used in restaurants and cafes. Today this solution is widely used in residential interiors. The use of this beautiful material helps to create a romantic atmosphere or add a touch of antiquity to the interior. Today there are stones on sale in any color, for any design.
