An ottoman in the interior is a useful, beautiful and functional thing.
It makes it much more convenient to put on shoes when leaving the apartment, it can be used as an additional seat, children can jump and play on it. Ottomans are also often used as decorative elements . They are distinguished by bright colors, interesting shapes and a variety of designs. Making a pouf out of tires with your own hands is quite possible even for a beginner - the main thing is not to be afraid and to show creative ingenuity!
DIY tire well (decorative) -10 photos
A great idea for a summer cottage is to create a well from tires.
The tires themselves are of regular round shape, durable, and can be at hand in any household. Moreover, three tires are enough for a decorative well, a well - a flower bed. It is easy for a skilled owner to build such a well. And if you decorate it beautifully and decorate it, it will be a kind of masterpiece on your personal plot. A wonderful well made of tires; this model also has a roof made of tires.
The following photo shows the stages of creating a decorative well.
A great idea for a well decorated with stone, it turned out to be a very realistic well.
Tire decoration in the form of a “red brick” well.
An excellent decoration for the garden, in the form of a turquoise tire well with elegant flowers in a blue pot.
“Birch motifs” are good in any interpretation, as well as in creating a decorative well from tires.
A simple craft, it would seem, but a flower garden in the form of a well will always decorate a personal plot.
A well made of tires, decorated with African giraffe motifs, is a great idea for children's games.
In the next work, the tires are decorated with cement, everything is simple, but quite attractive.
A wonderful decoration for the garden is a full-fledged decorative well with a roof and a bucket that goes into the flower garden. The decorative white pebbles bordering the well stand out effectively.
Read in full (link)
Why furniture made from tires should interest you
Nowadays, DIY enthusiasts often use used car tires as a starting material. In summer cottages, you can see flower beds, swings, washbasins, garden decorations, and, of course, furniture made from this material. All these products fit perfectly into the country landscape, are very economical, but, most importantly, they are made by hand.
This does not require special skill, materials or tools. All you need is ingenuity, invention and non-standard solutions. Therefore, making furniture from tires is an inexhaustible source of creativity for every craftsman.
Round coffee tables
Tires are also used to create an unusual coffee table. There are many ideas: on wheels, with or without legs, with a glass or wooden surface, painted or natural.
The option with a gold plated finish on chrome legs and a glass tabletop looks harmonious if it fits into the color background of the interior.
The option with a wooden tabletop and wenge-colored legs is perfect for a classic style. The legs are screwed to the lower wooden disk, and the tabletop is fixed with hot glue.
Ottoman table made from car tires
I decided to present to your attention a master class on making an ottoman from car tires. This wonderful pouf is suitable both for the home and for the balcony, open terrace, gazebo. This ottoman is not afraid of the vagaries of the weather. Let's take a closer look at this interesting master class together!
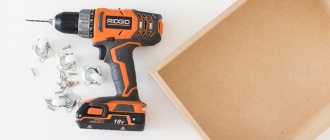
For work you will need: Car tire (or even better, a complete wheel) Hemp or jute rope - 100-250 m (depending on thickness) Board for legs - 24-36 mm (or ready-made legs) Plywood - 6-8 mm Waterproof glue Heat gun Screwdriver Drill Jigsaw Wood screws Wood stain Furniture cornersVarnishWide brushPaint
First you need to take a wheel of the desired size and wash it thoroughly and dry it.
But here the author clarifies that the lower circle should lie flush with the side surface, and the diameter of the upper circle should fit tightly into the wheel rim, i.e. be slightly smaller.
To make legs, you can take old legs as a template, trace them with a pencil and cut them out using a jigsaw, you can buy ready-made ones, or if you have a good imagination, come up with your own unique design of legs.
Then you need to make markings on a larger diameter plywood circle for the legs.
The author suggests initially gluing the legs with glue and then with self-tapping screws. For greater strength, since the weight of the ottoman is rather large, in addition to everything there are scraps of timber and metal furniture corners.
Then the author suggests staining or burning the wooden parts.
And finally, the most interesting part is the finishing of the ottoman (at least for me, as a woman!).
For finishing, the author used a rope; it needs to be glued in a spiral, starting from the bottom up from the bottom using universal glue; the rope can be used in different colors.
And at the final stage, we open the ottoman completely with varnish.
Such a masterpiece can be used not only as an ottoman, but also as a table.
Armchairs with wicker
Instead of simple poufs, you can make chairs with a back and armrests. The backrest rail is also attached with bolts or screws. Armrests can be made from strong, thick, varnished branches. When the structure is assembled, begin to close the holes in the center.
In addition to the methods already listed, you can use weaving. To do this, holes are made in a circle using a drill in increments of no more than 5 cm (more often possible). Subsequently, a strong rope or cord is threaded through the holes using an awl, intertwining each longitudinal row with a transverse one. You can experiment with the pattern, especially if you have weaving skills.
Curved steel tubes can be used as armrests. And for weaving, instead of rope, use soft wire.
You can make a bench from single chairs by connecting two sections with a common wooden frame.
Decor ideas
The appearance of the pouf depends on the design of the hallway and the entire apartment. For example, for a room decorated in eco-style, ottomans wrapped with hemp rope or twine in beige or grayish colors are suitable. Those who prefer a brighter color scheme should paint the pouf with quick-drying acrylic paint or use tinted ropes. A dark hallway will be refreshed by shades of turquoise, strawberry, and lemon.
Burgundy, purple, emerald green and deep blue poufs look stylish.
You can make a soft pouf out of car tires by putting a fabric cover on a rubber base and placing a round pillow in the hole. Such a product should be decorated with a frill or fringe; it will fit perfectly into a romantic or classic interior. It is better to use plain, dense fabrics with an interesting texture: tapestry, plush, velor, faux velvet or synthetic fur.
Homemade poufs made from tires are not only attractive, but also quite comfortable. Using this technique you can also make funny tables that will be useful on the veranda, balcony and even in the living room.
There are different ways to arrange “your” suburban area. Of great interest are the ideas of creating original objects from old things that have served their intended purpose.
Craftsmen make furniture from wooden pallets, polypropylene pipes, plastic and wine bottles. New uses are also being found for old car tires. They make armchairs, tables, ottomans and even sofas. Practical and durable furniture is used in the garden, to furnish the garage, and as an unusual accent in the interior.
Tires can be used without coating, but more often they are painted in bright colors, wrapped in jute, sisal, linen, cotton or hemp rope, and tied with fabric.
The rubber of car tires contains toxic substances, so you should not use it in a child's room or in a poorly ventilated area. But even without this, there is enough space left for improvement: in the living room of a private house, on the terrace, in the garage and utility room, in the open air.
Preparing wheels step by step
Before starting the work process, you need to draw a sketch of the future piece of furniture and prepare the material itself for use:
- Tires are thoroughly cleaned of dirt and washed with soapy water.
- To clean the wheels, it is recommended to use special products that will give them a beautiful and shiny appearance.
- Next, the material should dry well and for reliability it is recommended to treat it with a solution of acetone or alcohol .
- To create interesting design solutions, it is worth purchasing acrylic paints .
Tip: You can use textiles instead of paints. With its help you can hide all the defects of old tires.
Decor ideas
The appearance of the pouf depends on the design of the hallway and the entire apartment. For example, for a room decorated in eco-style, ottomans wrapped with hemp rope or twine in beige or grayish colors are suitable. Those who prefer a brighter color scheme should paint the pouf with quick-drying acrylic paint or use tinted ropes. A dark hallway will be refreshed by shades of turquoise, strawberry, and lemon.
Burgundy, purple, emerald green and deep blue poufs look stylish.
You can make a soft pouf out of car tires by putting a fabric cover on a rubber base and placing a round pillow in the hole. Such a product should be decorated with a frill or fringe; it will fit perfectly into a romantic or classic interior. It is better to use plain, dense fabrics with an interesting texture: tapestry, plush, velor, faux velvet or synthetic fur.
Homemade poufs made from tires are not only attractive, but also quite comfortable. Using this technique you can also make funny tables that will be useful on the veranda, balcony and even in the living room.
In the interior - something useful, beautiful and functional. It makes it much more convenient to put on shoes when leaving the apartment, it can be used as an additional seat, children can jump and play on it.
Ottomans are also often used as decorative elements.
. They are distinguished by bright colors, interesting shapes and a variety of designs. Making a pouf out of tires with your own hands is quite possible even for a beginner - the main thing is not to be afraid and to show creative ingenuity!
Handmade furniture always looks original and aesthetically pleasing. She is able to fill the house with a special atmosphere of warmth and comfort. The main advantages of making your own ottoman from old tires include
:
This ottoman will be comfortable and comfortable to sit on.
. Since the tires themselves are different:
- firmness and elasticity;
- resistance to mechanical damage;
- ability to withstand heavy loads.
Important: the only drawback of car tires is that when heated, they emit harmful substances. But for home furniture, this does not matter, since the ottomans will not heat up in the sun
Third way
If you don’t want to bother with the rope, no problem. To quickly make a seat, you can simply place an old cushion inside the wheel. In this case, also prepare:
- foam;
- fabric/mesh;
- lace or fringe;
- thick threads for sewing;
- self-tapping screws
If you want the pouf to be as tall as a chair, use two wheels. Connect them together with self-tapping screws. Cut a rectangle of foam rubber large enough to wrap around the wheel. Sew its edges. Thanks to this, the frame will become soft and beautiful.
Cover the top of the frame with thick fabric, and place a circle of foam rubber on top. Then cover the seat with one piece of upholstery material, and the side part with the other. Use strong thread. The product can be decorated with lace, fringe or other decorative elements. Look at photos of such products and borrow an idea.
And one more thing: so that the furniture can be easily moved around the room, you can attach handles to it. An old belt will do for this. Make loops out of it and attach it to the frame with screws. Thus, you have learned how to make beautiful poufs from tires in three ways.
Source
What materials and tools will be required
To make an ottoman from a car tire, you need the following tools:
- electric jigsaw;
- screwdriver;
- furniture stapler;
- glue gun;
- scissors;
- pencil;
- brush.
Materials you will need:
- plywood 10-12mm thick or chipboard;
- furniture wheels or legs;
- foam;
- fabric or leatherette;
- thick rope;
- self-tapping screws;
- colorless varnish.
We will divide the ottoman production process into three parts:
- Making the lower part.
- Making a seat.
- Work with the side part.
Initially, you need to determine the place where the ottoman will stand. If this is an open country area, then there is no need to install additional elements on the lower part. It is quite stable and is not affected by climatic precipitation. If you plan to use the ottoman on the veranda, in a gazebo or country house, then you need to make a bottom. To do this, you need to draw a circle on plywood or chipboard, the diameter of which is equal to the outer diameter of the tire, and cut it out with a jigsaw.
Then, using a screwdriver, legs or furniture wheels are attached to the bottom. The bottom of the tire is secured with self-tapping screws. The presence of a lower part also allows you to store things inside this furniture.
To make a seat, you need to draw a circle on plywood or chipboard, the diameter of which is two centimeters larger than the inner diameter of the tire, and cut it out with a jigsaw. Then place this blank on the foam rubber and draw a line along the edge of the circle with a pencil. Use a knife to cut the foam along the line.
Lay out a cloth on the table onto which cut out circles of foam rubber and plywood are laid. The fabric is stretched and secured around the perimeter to the plywood with a furniture stapler. Once completed, excess fabric is trimmed with scissors.
Side part works are the most creative. Their task is to give the ottoman a unique designer look.
- The easiest option is to paint it. It can be a solid color, pattern or ornament.
- You can also use fabric or leatherette for finishing. A piece of such material is placed on the side and the location of its connection is marked. Then a seam is made using a sewing machine along the mark to create a cylinder. The resulting blank is put on the tire and tucked under the bottom and seat.
- A very interesting type of ottoman is obtained when finishing with a thick rope. To do this, glue is applied to the tire around the perimeter of the seat, with which the rope is secured. It is applied in dense layers over the entire surface. For strength, the rope is coated with colorless varnish.
If an ottoman made from one tire is not very convenient in height, then you can use two or three blanks, which are fastened together using self-tapping screws or bolts.
This article contains instructions for making an ottoman from a car tire and some design solutions that will help everyone independently make similar furniture for their garden and unleash their creative potential.
In the interior - something useful, beautiful and functional. It makes it much more convenient to put on shoes when leaving the apartment, it can be used as an additional seat, children can jump and play on it.
Ottomans are also often used as decorative elements.
. They are distinguished by bright colors, interesting shapes and a variety of designs. Making a pouf out of tires with your own hands is quite possible even for a beginner - the main thing is not to be afraid and to show creative ingenuity!
Handmade furniture always looks original and aesthetically pleasing. She is able to fill the house with a special atmosphere of warmth and comfort. The main advantages of making your own ottoman from old tires include
This ottoman will be comfortable and comfortable to sit on.
. Since the tires themselves are different:
- firmness and elasticity;
- resistance to mechanical damage;
- ability to withstand heavy loads.
Important
: the only drawback of car tires is that when heated, they emit harmful substances. But for home furniture, this does not matter, since the ottomans will not heat up in the sun.
First way
You can make a pouf from one wheel, but it will be a little low for an adult. Therefore, we suggest trying to connect two tires together. To work you will need the following tools:
- jigsaw;
- screwdriver;
- file;
- construction stapler;
- scissors and knife;
- pencil or marker;
- screws.
The materials you will need are two tires, plywood, foam rubber for laying, fabric for covering, a belt or hose. We wash the tires thoroughly to keep them clean. On the one that will be the top, we cut out four small holes for further fastening the seat.
The wheels can be connected to each other using screws.
The seat is made of plywood. Draw a circle on a sheet of paper - the same diameter as the tire. Then cut it out with a jigsaw and file the edges.
Make a round pad from foam rubber.
Cover the seat with fabric, securing it to the plywood with a stapler on the back side.
Use a belt or hose to secure the seat.
Attach it to the top wheel with screws.
The rubber part can be painted in your favorite color. This is one of the options for making an ottoman from a tire. As you can see in the photo, it looks quite original.
Making an ottoman
Gluing
First of all, you need to wash your tires well to remove all dirt. Now apply glue to the highest point where the tires will touch. Place the tires on top of each other. Adjust the height yourself. In this instruction, 1 stool was made from 3 tires. Wait a day for the glue to dry.
Making a cover
Measure the height and diameter of the tire. Add 2-3 cm to the results obtained for the seams. Cut out a rectangle. Cut a circle smaller than the diameter of the tire for the bottom cover. Wrap the tires in a rectangle of fabric, wrong side up. Secure the pipe shape with pins. The shape should be a little tight. Now slowly remove the pipe and stitch it. Fold the resulting piece in half its width and make marks as shown in the photo. Thus, the pipe was divided into 4 equal parts. Now fold the circle in half and make marks. The circle is also divided into 4 equal parts. Connect the pipe and the circle at the marks. Distribute the fabric evenly and pin the pieces together. Sew the circle to the pipe. Unscrew the resulting cylinder and place it on the tires. Then you need to stretch the fabric tightly and staple it to the rubber, as shown in the photo.
Lid
Measure the tire diameter and reduce the measurement by 40mm. Take 9 mm plywood and cut a circle out of it with the resulting diameter. Now place the foam on top of the plywood circle, and circle the circle 25mm larger. Then you need to cut a circle of fabric even larger than the foam rubber by 25 mm. All that remains is to connect all the parts of the lid with a stapler, and then glue the lid to the base of the stool.
\
Storage box
The stool can also be modified to hold items. 1. Place a wooden disc on the tire. Mark the locations where the bolt holes should be. Remove the lid and make holes. They should be slightly larger than the diameter of the bolt, because... rubber has the ability to compress. 2. Apply glue to the cover, screw the bolts into the holes in the plywood and tighten the nut. Now apply glue to the foam and cover everything with a cloth. Remember that the foam should be slightly larger than the plywood, and the fabric even larger than the foam. Fasten the fabric to the plywood using a stapler. 3. The tire cover is made using the same pattern as shown above.
Now you need to make holes in the fabric in places where there were already holes in the tire. To do this, you need to pull the fabric towards you and punch holes through the fabric into the tire. Insert a bolt and nut into the resulting holes, and secure the staple fabric to the inside of the tires. Remove the bolt. The tire stool with storage space is ready!
Tires take on a new life when their original purpose has more than been exhausted. Thus, from tires you can make amazing furniture for your home, living room, cottage, and garden. Below we present 10 photos of models of a do-it-yourself tire ottoman.
Here is an original ottoman, covered with fabric, the frame of which is a tire.
Here the creation of an ottoman is presented in stages, step by step.
The next example is an original tire cover, an ottoman for everyone.
An ottoman made using chipboard, a glue gun, and twine.
This ottoman is even equipped with a backrest, the ideal solution for relaxation.
This ottoman is a modern delight, it even has legs, it is beautiful.
A set of ottomans and a round table made of tires.
A very extraordinary approach to creating furniture from scrap materials, the result is amazing.
Four ottomans, all ornamented, form a set, all with the same tire base.
And this is the embodiment of an ottoman in the style of creating a shabby-chic interior.
Tall poufs in the dining area of a private house
The two tires are connected with bolts or screws from the inside. Next, the structure is painted or left as is.
A wooden circle made of MDF or chipboard is nailed on top, which is also painted, and soft bedding is laid. Also, a wooden circle can be covered with foam rubber and fabric.
An excellent set will be made from high poufs and a table. The table is made according to the same principle, only its height is twice as large. Casual painting with white paint while maintaining a contrasting black tread pattern gives the furniture a stylish look.
We make an ottoman from chipboard or plywood with our own hands
This model is easier to manufacture. We will need almost the same set of tools and materials:
- Chipboard or plywood;
- Glue;
- Bars;
- Nails of the appropriate size;
- Filler (foam rubber, padding polyester or other);
- Upholstery is optional, but preferably furniture;
- File or jigsaw;
- Hammer;
- Drill;
- Furniture stapler with staples;
- Needle and thread.
The cubic ottoman has identical sides, it will fit perfectly into the nursery and any side can become its bottom. This is its main difference from a pouf with a hinged lid. Therefore, it is necessary to strengthen not only the 4 side joints.
The secret of the ottoman for the hallway lies in the simplicity of its manufacture.
Therefore, the operating algorithm is different. We cut identical blocks - 12 pieces to strengthen all the ribs. We assemble them into a cube, then cut out the sides for this figure from plywood or chipboard. The cube is glued together - the sides are glued to the frame, and then the sides can be nailed to the frame at key points with nails.
Make your own stylish and functional pouf.For better air circulation in all directions, it is worth drilling ten holes with a drill. We apply glue to the sides and lay down the filler, then the upholstery is applied. You can even apply upholstery of different colors or patterns to all sides of the ottoman. If there are noticeable gaps between the flaps of upholstery, you need to work with a needle.
The cylinder is a popular pouf shape.
DIY chairs made from tires - 12 photos (The best)
Furniture for the home, cottage or garden performs a completely natural function of convenience and comfort. However, the creation of furniture can be approached from an alternative point of view; furniture is created from the most controversial materials, such as tires or tires. Armchairs made from tires can be made with some designer finds, which we will present below in 12 photos.
Garden set of chairs made of tires with air-covered seats and backs.
Blue painted tire chairs, in which even the armrests are made of the same material.
Armchairs made from car tires, where the back smoothly transitions into the armrests.
A beautiful invention of armchairs and a table for a summer cottage, which ensures comfort and coziness in nature.
The fabric-covered tire smoothly turned into a mini chair.
And here are also variations of chairs made from tires with intertwined seats.
This “brutal” design of the chair will inspire its future owner.
Such a large set of chairs does not require a company of ten people.
The next chair can compete in style and beauty with other works.
The set “Armchairs, ottomans and table” invites you to have a tea party on the lawn.
Covered tires gave new life to obsolete items.
Such a chic red set of chairs and a table ensures 100 percent relaxation and a lot of positive emotions.
Read in full (link)
Not only a country house and a summer cottage, but also a garage or a garden gazebo needs arrangement and decoration. You can decorate your garden gazebo with various interior items. It's fun to decorate your garage with items you make yourself.
Necessary tools for creating a tire ottoman: Drill, plywood, glue and varnish, scissors, brush, rope.
These items will become truly original and exclusive solutions for arranging a garage or gazebo. You can apply all your imagination and creative ideas to their creation. One of these items can be an ottoman made from a tire. You can make it yourself, then the design will turn out original and stylish. Below are 2 ways to make this product yourself.
Materials and tools:
- used car tire;
- twine;
- plywood;
- self-tapping screws;
- glue gun;
Finishing
As for finishing, a tire chair can be decorated in different ways. If the furniture is intended for outdoor use, it can be painted any color . You can also apply any ornament or design to the product using acrylic paints.
When using the product under a canopy or in the house, it is better to decorate it with textiles . To do this, you can make a cover for the chair. For those who know how to crochet, the cover can be made from thread.
Tip : If you are attracted to non-standard materials, try making a chair, table or even a bed out of pallets. And in the garden, next to such a chair, you can put a simple table or a table in a gazebo.
How to properly assemble and finish soft square and round ottomans on a rigid frame
More complex work will require a little more time and carpentry skills. But there is nothing difficult in such work, just look at a few of our step-by-step instructions and you can do everything yourself.
With a little work, you can make a more solid design - a square ottoman with a removable lid on wheels. This is also an additional storage space for household items, toys, and you can also store slippers for guests in it. For work you will need the following materials:
- sheet of plywood 12-16 mm thick. Sizes are for children and adults;
- wooden block 20×40 or 40×40 mm;
- wheels;
- piano loop;
- foam rubber for soft seats up to 100 mm thick;
- padding polyester;
- upholstery fabric;
- carpentry tools;
- glue.
An ottoman up to 40 cm in height is suitable for children, and up to 55 cm in height for adults. In the table we have prepared the dimensions of the parts for an ottoman intended for children and adults.
| Detail | Quantity, pcs. | Dimensions for children, mm | Dimensions for adults, mm |
| Front and back panel | 2 | 350×250 | 400×370 |
| Side panels | 2 | 326×250 | 368×370 |
| Bottom and top | 2 | 350×350 | 400×400 |
| Wooden blocks for sides | 4 | 40×40×250 | 40×40×370 |
| Blocks for the top | 2 | 350×1450 | 550×1650 |
| Upholstery fabric for side panels | 1 | 350×1450 | 550×1650 |
| Sintepon | 1 | 300×1410 | 450×1610 |
| Foam rubber | 1 | 350×350×50 | 400×400×100 |
| Cover material | 1 | 500×500 | 650×650 |
Step-by-step manufacturing process
- Cut out blanks from plywood.
- Sand the surfaces with sandpaper.
- Assemble the workpiece into a square structure using bars and glue.
- Fasten the parts with self-tapping screws, the heads of which are recessed at a distance of at least 1 cm.
- Cut out the material and padding polyester, then wrap it around the sides with an overlap. Secure the upholstery fabric on top, the edges of which are secured with a stapler in increments of 30 mm.
- Stop blocks should be attached to the bottom of the lid blank at a distance of up to 22 cm from the edge.
- Glue foam rubber onto the lid and then cover it with material. Fold the edges inward and secure with a stapler in increments of up to 30 mm.
- Screw the wheels to the bottom.
- Install a piano hinge at the top.
You can make a universal ottoman with your own hands at minimal cost.
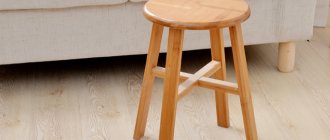
Second life of an old stool
Do not rush to throw away an old, but still strong stool. Just a couple of hours and you will add an interesting designer piece of furniture to your interior. The manufacturing process is as follows:
- Remove the seat and secure the grosgrain ribbon.
- You can make a decorative seat from an old sweater. First, it must be cut into strips 4 cm wide, woven into braids and secured to the base.
- Another decorative option is to wrap the stool in foam rubber and cover it with bright fabric.
Detailed master class on making a pouf on a wooden frame
This ottoman can be made of any geometric shape. Let's consider one of the simplest ways: making a round product. For this we need:
- chipboard sheet with a thickness of at least 15 millimeters;
- wooden block 20×40 mm;
- Fiberboard is suitable for side walls;
- foam rubber and synthetic winterizer;
- artificial leather;
- sawing tools.
Before you make an ottoman for the hallway with your own hands, you need to make a pattern. The process works as follows:
- Cut 2 circles from chipboard according to the pattern.
- Make markings for the bars in increments of about 16 cm and drill holes for future fastening.
- Drill several holes in the lid in random order. This is necessary so that air can escape from the foam while sitting.
- Cut the bars to equal lengths and sand them.
- Secure the blocks with self-tapping screws along the previously drilled holes.
- Cut a rectangle from the DPV sheet. Its width should be equal to the height of the product, and its length should be equal to the size of the circle.
- Secure the plywood to all the blocks with a stapler.
- Wrap the structure with padding polyester and cut a circle out of foam rubber for the lid. Secure everything with glue.
- Sew a leather cover, put it on the workpiece and secure it with a stapler.
- Secure the wheels.
Main stages of work
First of all, the car tire must be thoroughly washed using a cleaning agent and dried in the sun or using compressed air.
The author cuts two circles with a diameter of 47 cm from a sheet of plywood. The edge of the blanks will need to be sanded so that it is smooth and without burrs.
At the next stage, we glue a piece of foam rubber 10 cm wide onto the tire. After this, we glue the tire with a piece of foam rubber 30 cm wide.
Next, cut out a piece of foam rubber to fit the diameter of the pouf seat and glue it to the plywood. We cover the seat with genuine leather or leatherette.
After that, we cover the tire itself with leatherette. The second piece of plywood is the bottom of the pouf. You will need to drill holes in it for air.
We cover the bottom of the pouf with fabric, then install it in its “seat” and screw it on with self-tapping screws so that it does not fall off.
At the last stage, we screw on the furniture legs (a total of three pieces are required).
You can watch the video on the website for details on how to make a pouf from a rubber tire.
Source
How to decorate the finished product
- You need to take a bright plain fabric of several colors, cut out flowers or other shapes from it. Use glue to secure it to the ottoman.
- Take old beads, coins, flat plastic figures and attach them to the product with glue. For reliability, the decor is varnished.
- You can sew on cute pockets.
- Lace is useful; it is sewn over the base onto a plain material. You can apply paint to the fabric and remove the lace. It is also recommended to apply any shapes using a stencil.
Welcome to the website of crafts and needlework. Today we will describe how to create a creative pouf with your own hands from a car tire, thick rope and plywood.
The idea is very simple, but at the same time very useful and versatile: it is comfortable to sit on, and the ottoman can be used as a coffee table.
We have already written how you can use car tires: creating flower beds in your dacha, and in this case we will use car tires more practically. A pouf made in this way can be useful not only in a summer cottage, but also in a city apartment, in a cafe, or on a picnic.
To make a pouf from a tire you need:
- car tire,
- thick rope,
- 2 round pieces of plywood 55 mm,
- Upholstery fabric,
- glue gun,
- scissors,
- self-tapping screws
Tools: drill, screwdriver or screwdriver, jigsaw.
Second way
There is another method - using a rope. You will need:
- jigsaw;
- screwdriver or screwdriver;
- scissors;
- glue gun;
- self-tapping screws;
- chipboard;
- thick twine or hemp rope;
- upholstery fabric;
- varnish;
- brush.
In this case, we cut out two circles from a sheet of chipboard and attach them with self-tapping screws on both sides of the tire.
Then you can start decorating the future pouf. To do this we use a coil of rope. You need to start from the center of the top circle. Using a glue gun, the rope is secured in a spiral.
When the cover is ready, we proceed to the sides of the wheel. We wind the rope in a spiral in the same way. You need to work carefully, tightly pressing the new turn to the previous one. Leave the bottom as is.