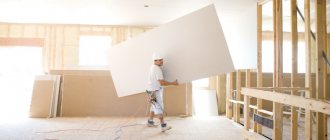
During the interior decoration of a home, there is often a need to install interior partitions or additional walls. For these purposes, a convenient material is gypsum covered with cardboard. It is in an affordable price range and is easy to use. If done correctly, a plasterboard wall can be installed with your own hands in 1 day.
DIY plasterboard wall
Types of drywall for partitions
Before making an interior partition from plasterboard, you should select the appropriate material. It is necessary to take into account the purpose and design features of the object.
Drywall for partitions is divided into several types:
- Standard. For dry rooms with humidity 30-60%.
- Moisture resistant. Has a greenish tint. Suitable for bathrooms, bathrooms, kitchens and other rooms with humidity within 75%.
- Fire resistant. For places where exposure to elevated temperatures is possible.
- Shockproof. For rooms where the walls may be subject to increased mechanical stress: children's room, storage room, corridor, etc.
Plasterboard sheet - what is it?
Gypsum plasterboard (GKL) is a modern building material that belongs to the so-called dry construction. Allows you to get a flat, smooth wall surface without resorting to the long and costly procedure of leveling the walls with plaster.
A gypsum board sheet consists of a layer of gypsum covered on both sides with sheets of cardboard. When choosing, you need to take into account that there are four types of drywall:
- Normal - for rooms with normal humidity, covered with gray cardboard.
- Moisture resistant – for rooms with high humidity up to 75%. Suitable for use in bathrooms and toilets. Painted green.
- Fire-resistant - used for the construction of hearths and fireplaces. Non-flammable, easily tolerates heat, painted pink.
- Acoustic - with increased density of the gypsum base and reinforcement. Has improved sound insulation properties. Suitable for finishing walls and ceilings of bedrooms and recording studios. Painted blue.
The advantages of gypsum boards include environmental friendliness, ease of installation, low weight, and the ability to create curved structures. The main disadvantage is fragility - drywall does not withstand impact loads well and crumbles easily.
Therefore, when using it in children's rooms, hallways and other rooms where critical loads on the walls are possible, you need to think through everything carefully. And if the strength of gypsum plasterboard is not enough, you can use gypsum plasterboard.
Calculation of the number of sheets and layers
How much it costs to make a plasterboard partition directly depends on the number of layers and sheets used. The frame can be sheathed in 1, 2 or 3 layers. The more layers, the more durable and reliable the structure will be, and the sound insulation characteristics also increase.
The number of sheets is determined by the area of the partition without taking into account the openings.
- For single-layer installation, the area of one side of the wall should be multiplied by 2 (since the sheathing is done on both sides).
- With two-layer cladding, the area is multiplied by 4 times.
The resulting value must be divided by the area of one sheet of drywall. You should always make a small reserve.
To calculate the reserve, it is convenient to use a coefficient depending on the area:
- Up to 10 m2 – 1.3;
- Up to 20 m2 – 1.2;
- More than 20 m2 – 1.1.
Advantages and disadvantages of plasterboard wall structures
To begin with, it probably makes sense to briefly highlight the positive and negative aspects of a wall frame structure made of plasterboard. Having understood them, it will be possible to competently decide whether such a partition is suitable for a particular case or not.
After finishing work, the plasterboard structure will look like a full wall.
So, the advantages of plasterboard partition structures include the following points:
- The materials used for the construction of such walls are quite light, so they will not weigh down the interfloor floors. Consequently, the mounted structure will be absolutely safe for the building.
- Walls and partitions made of plasterboard are not permanent, so their construction does not require obtaining a permit, the obtaining of which involves the loss of a considerable amount of time, money, effort and nerves.
- Drywall is produced in several versions - these are simple sheets (GKL), moisture-resistant (GKLV), fire-resistant (GKLO). Lightweight sheets are produced for ceiling structures. Therefore, walls and partitions can be erected from this material in any of the rooms, including in the bathroom or near the stove or fireplace.
- The affordable cost of both the drywall itself and the components for building the frame allows a family to purchase them for repairs, even with a modest budget.
- It is quite possible to design and install plasterboard walls that have complex decorative and useful shapes, such as arched doorways or functional niches and cabinets, allowing you to avoid purchasing furniture accessories.
- When leveling walls with this material, you will not need to remove the old plaster.
- The construction of walls made of plasterboard (or when leveling walls with plasterboard using a frame method) allows for immediate insulation and sound insulation work.
- You can hide electrical wiring in the frame of the wall being built.
- There is a complete opportunity to do without the involvement of a team of builders, since all the work can be done independently or with one assistant.
- The material is “breathable” and environmentally friendly, which is important for furnishing residential premises.
- A wall or partition erected using this method turns out perfectly smooth, suitable for any facing material, be it wallpaper, paint or ceramic tiles.
Moisture-resistant plasterboard sheets are used to level or line the walls in the bathroom.
Is it possible drywall in the bathroom? Yes, sure!
With proper installation and special preparation of surfaces, gypsum board sheets will not be afraid of the specific conditions of a bathroom or combined bathroom. And perfectly smooth walls are an excellent opportunity to tile them. Instructions for such finishing are contained in a special publication on our portal “Tiles on drywall in the bathroom” .
Drywall prices
drywall
Now, for the objectivity of the picture, it is necessary to consider the negative aspects of the plasterboard structure. It is advisable to know about them in advance, so that later, when using the rooms, you do not encounter some unexpected inconveniences. :
Wooden bookmarks in a metal frame of a plasterboard structure
- A wall made of this material will not be able to withstand hanging any heavy objects directly onto the plasterboard, since the sheets are quite thin (12.5 mm), fragile, and the gypsum itself is not particularly strong. Therefore, if in the future there is a plan to hang, for example, a TV or sconce on the wall, then their location must be determined at the design planning stage, and additional jumpers made of a metal profile with wooden bookmarks must be provided for fastening.
- The wall structure will have a minimum thickness of about 80 mm, and often much more. This reduces the area of the room somewhat. But think about it, what if you use other materials for the partition? Almost any other will give even greater thickness. Therefore, this drawback can be called very doubtful.
Expert opinion: Afanasyev E.V.
Chief editor of the Stroyday.ru project. Engineer.
As you can see, these shortcomings are completely solvable problems. From which we can conclude that a plasterboard wall for an apartment is the best option if it is necessary to divide the room into separate zones or even isolated rooms.
Profile Options
Before you make a partition for drywall, you need to build a frame. It is constructed from a U-shaped metal profile with zinc coating, which is divided into 2 types:
- Horizontal (guide);
- Vertical (rack-mount).
A profile can have the following parameters:
- Horizontal section – 50x40 mm, 75x40 mm or 100x40 mm;
- Vertical section – 50x50 mm, 75x50 mm or 100x50 mm;
- Length – 3 m, 3.5 m or 4 m;
- Wall thickness – 0.5-2 mm.
When selecting a profile, you need to consider the following factors:
- Structure height;
- Planned load;
- The need to install soundproofing material.
The guides and posts must be compatible with each other.
A vertical product must be securely mounted into a horizontal one. For example, guide structures with a cross-section of 50x40 mm are compatible with rack-mount structures with a cross-section of 50x50 mm.
Intermediate work
After completing the installation of drywall on one side of the frame, it is necessary to complete the installation of electrical, insulation and sound insulation. If these operations are not done at this stage, then it will be impossible to carry them out later.
- If you plan to insulate the partition and improve its soundproofing properties, then special insulating materials (mineral wool, polystyrene foam, etc.) are placed inside the frame.
Installation of mineral wool in the spaces between the rack profile
- If you plan to make sockets in the partition, then wiring is laid inside the frame. The wires are protected using corrugated fireproof casings.
It is necessary to understand in advance where the sockets will be located
When the installation of the “filling” of the partition is completed, you can attach the second layer of drywall on the other side. In this case, the seams at the joints on one side should not coincide with the seams on the other. If necessary, a second layer of drywall is installed; the seams should also not match.
Materials and tools
To construct partitions from gypsum plasterboard, the following materials are required:
- Steel profile;
- GKL slabs;
- Soundproofing filler (mineral wool and the like);
- Tape seal (damper);
- Fastening elements: dowel-nails, anchors, self-tapping screws;
- Acrylic based primer;
- Putty;
- Tape or mesh for reinforcement.
Basic set of tools:
- Building level;
- Roulette;
- Cord for marking and beating;
- Drill or hammer drill (based on the material of the walls and ceilings);
- Angle grinder (grinder) with cutting wheel;
- Profile cutter;
- Knife for cutting plasterboard (you can use a regular stationery knife);
- Planers for roughing and processing edges;
- Putty knife.
Gypsum fiber sheet - what is it?
Gypsum fiber sheet (GVL) is a building board made of gypsum mixed with cellulose and reinforced with reinforcing mesh. The material is very strong, high density. GVL is initially non-flammable, since its components are mixed with gypsum, and with the addition of special components it can also be moisture resistant.
High strength makes it possible to use GVL for leveling not only walls and ceilings, but also floors. And the high density allows you to mount furniture on the walls, easily withstanding a force of up to 80 kg per anchor.
- But these same advantages also determine its disadvantages. If drywall is easily fastened with ordinary self-tapping screws, then the gypsum board must be secured by pre-drilling holes or using self-tapping screws.
- Greater strength gives almost a third more weight and makes installation more difficult. Well, the cost of GVL is almost twice as high, which is also a very significant indicator.
Installation procedure
Before making a plasterboard partition in a room, you need to complete the basic rough work. It is extremely important to wait until the screeds are completely dry, otherwise the drywall may become deformed due to exposure to moisture.
Installation should not begin immediately after delivery of gypsum boards to the site. As a rule, the material is stored in cold rooms, so before construction the sheets should be left in a horizontal position for about a day.
Masking the joints - step-by-step instructions
After completing the installation work, all that remains is to hide the joints of the gypsum board sheets. For such purposes, it is necessary to purchase a reinforcing mesh that has an adhesive backing on one side to make it easier to work with.
Step 1. It is necessary to glue the mesh to all places where the panels are joined together.
It should look like this
Step 2: Now you need to cover these joints using rough putty.
It is necessary to level the surface and leave it to dry for a while.
Step 3. It is necessary to cover the locations of the fasteners with putty.
This is what the structure should look like after preliminary finishing
Step 4. When the surface has dried, you will need to apply a primer to the structure.
Prices for primer for decorative plasters
Primer for decorative plasters
Treatment allows you to prepare the surface for final finishing.
Step 5. Now the finishing putty is applied to the drywall.
It is necessary to carefully level the putty over the surface, and when dry, sand it with sandpaper.
Step 6. Finally, all that remains is to paint the structure.
It is allowed to use water-based paint
Note! If you plan to apply a layer of decorative plaster to the surface, then the structure should first be primed.
Video - Puttying drywall
To find out the answer to the question – Is it necessary to putty drywall before wallpapering, read our separate article, where we discussed in detail all the aspects of working with a drywall base.
Marking
The room must be marked to determine installation points. For marking, it is advisable to use a laser level to accurately maintain the evenness of the planes.
- But, you can get by with a ruler with a cord for beating.
- First, markings are applied to the floor, the partition itself and the area under the doorway are marked.
- Using the drawn lines using a plumb line or a laser plane builder, markings are applied to the ceiling and walls.
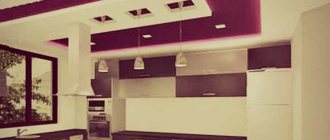
Style and design solutions
From gypsum plasterboard you can make structures that will not only decorate the interior, but also divide/connect the room. For example, an arch serves as a stylish interior transition and blends harmoniously with the interior of the entire room. To make the structure look complete, it can be decorated with wallpaper or masonry.
Plasterboard niches are gradually gaining popularity. They differ in depth, size and shape. For beauty, you can install lighting or colored glass. Kitchen and bathroom walls finished with plasterboard are most often covered with tiles, artificial stone or brick.
Installation of guides
The guide profile is fixed on the walls, ceiling and floor. Before installation, damper tapes are glued to the structures. They are required for sealing, improving sound insulation and eliminating the risk of deformation due to vibration.
- Dowel nails are used for fixing to walls and floors.
- The optimal step between fasteners is 40 cm, the maximum allowable is 100 cm.
- Even the shortest guide must be secured with at least 3 dowels.
Anchor wedges are used for fixing to the ceiling.
What materials are needed for the partition?
First of all, you need to select plasterboard sheets. In order not to make a mistake, it is necessary to consider the options in more detail.
Materials used in the work process are affordable
Table 1. Types of plasterboard sheets.
| View | Designation | Characteristics and Application |
| Standard | GKL | A suitable option for interior partitions in rooms with low humidity levels. |
| Fire resistant | GKLO | It is distinguished by the presence of reinforced reinforcement, the color of the sheets is pink. The material is also allowed to be used only in rooms with an optimal level of moisture. |
| Moisture resistant | GKLV | Contains special water-repellent additives, and the sheets are treated against fungus. The panels are green or blue. This material can be used in toilets and bathrooms. |
Prices for drywall and sheet materials
Drywall and sheet materials
There are other types of plasterboard sheets: combined types, resistant to moisture and fire , flexible . Of course, such panels will cost more .
GKLV
For installation, in addition to the sheets themselves, you will need the following materials:
- Wood profile and bars ( 7.5 centimeters if it is planned to lay soundproofing material between the panels and 5 centimeters if there is empty space or thin material) for the partition frame. It is worth noting that the thickness of the partition will depend on its width.
- Fastening elements for bases and wooden parts.
- Reinforcing mesh to strengthen connections.
- Gypsum putty, for rough work and finishing. It will be needed to cover the joints, and then level the surface if there are defects.
Note! Professionals note that working with plasterboard panels does not contribute to room pollution, as is the case with concrete. This greatly simplifies the cleaning process after installation is complete.
The quantity of certain materials is determined only after preliminary measurements. However, it is recommended to purchase them with a reserve of 10%.
What tools are needed to install a plasterboard partition?
In addition to the above materials, some equipment will be required during the work process:
- Screwdriver – will be needed to tighten a large number of screws, because it will be difficult to do it with a screwdriver.
- Metal ruler (long) – will be needed during preliminary measurements, marking, and also when cutting gypsum board panels.
- A bench square will also be required during the preliminary marking process, as well as for measuring the location of sheets during the installation process.
- Spirit level - will be required when measuring the correct location of the vertical frame parts.
- A cord plumb line is necessary to determine where to attach the frame parts when aligning the markings on the surface of the ceiling and floor.
- A simple pencil is used for making marks.
- Metal cutting tool - will be needed for cutting metal profile blanks for the partition frame.
- Jigsaw – needed for quickly cutting wood and plasterboard panels (if there are shaped parts).
- Tool for caulking joints.
- Fine-grained sandpaper - will be needed for processing joints after the putty has dried.
- Primer - needed to treat the surface at the final stage before applying paint.
- Loop saw with small teeth for gypsum board sheets.
- A stanchion with an oblique blade for processing edges.
- Riveter - this tool is necessary for connecting parts from a metal profile. Its use simplifies the installation process several times.
- Electric drill with drill bits.
- A studded roller is required if you plan to give the gypsum board panels a three-dimensional shape.
- Tape measure.
- Impact tool for fixing fasteners, screwdrivers for installing frame elements.
Tools used during installation of frame and plasterboard panels
It is worth noting that the above devices are sold in specialized stores and markets.
Prices for popular hammer drill models
Hammers
Installation of racks
The racks are usually placed in 60 cm increments.
- If increased load is expected or the wall is higher than 4 m, the distance should be up to 40 cm.
- Rigidity can be increased by installing double racks, consisting of two profiles connected at the ends.
- Do not connect the guides and posts with press washers. This will complicate the finishing process due to the protruding heads of the fasteners.
It is recommended to use a cutter that connects structures by cutting with a bend. During the installation process, the verticality of each support should be monitored.
Sealing of joints - the final phase of installation
When all the sheets are secured, you can begin the final phase of installation.
Puttying seams - the final touches when installing gypsum boards
- Before the final phase of work begins, the surface of the partition and seams must be primed.
- At this stage, a special reinforcing tape is installed on the seams.
- Putty is applied to the top of the tape using a spatula.
- The partition is covered with a leveling layer of putty.
- When the coating hardens, it is processed using sandpaper. After this, you can begin painting and further finishing.
Using drywall to create a partition is a fairly simple method of zoning that you can implement on your own. The use of special professional equipment can significantly speed up the installation process.
Doorway
Plasterboard partitions are usually not made blank. The design includes an opening for installing a door or constructing an arched passage.
- Before making a plasterboard partition with a door, you need to strengthen the base.
- To do this, wooden blocks are installed at the door installation site.
- Alternatively, you can use a more durable profile - 2 mm thick.
- A frame is constructed from timber or profiles, into which the door frame is then mounted.
A horizontal crossbar must be mounted on top of the opening. It is attached to the vertical profile using self-tapping screws. It is extremely important to mark the installation points of the vertical profile so that they do not then coincide with the racks that form the frame of the opening.
Otherwise, cracks may form around the opening in the future.
How to build a plasterboard wall yourself?
Materials for the construction of plasterboard walls
After drawing up a project or drawing based on the dimensions taken from the location of the wall, it is necessary to make a list of all the necessary materials so that during the work it does not turn out that something is missing and you do not have to interrupt work and run to the nearest hardware store.
| Illustration | Brief characteristics and purpose of materials |
| KNAUF metal guide profiles, for example PN 100×40 mm for fixing to the ceiling and floors. 100 – profile width in millimeters, which will determine the thickness of the frame. If you add two more thicknesses of plasterboard, the wall thickness will be at least 125 mm. If this is a lot, you can use other similar profiles with a smaller width, for example, PN 50x40 (finished wall thickness - 75 mm), or PN 75x40 (wall 100 mm thick) | |
| Rack-mounted metal profiles for vertical racks and lintels installed inside the structure. The illustration shows KNAUF PS 100×50 mm, but, as mentioned above, narrower ones, PS 50×50 or PS 75×50, can be selected. | |
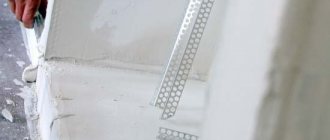
| Sealing self-adhesive sealing tape Dichtungsband of the appropriate width (95, 70 or 50 mm, depending on the width of the selected profiles). It is intended for gluing onto guides and rack profiles for their tight connection with walls, ceilings and floors. Thanks to this tape, the structure acquires soundproofing qualities - the effect of impact noise transmission is significantly reduced. | |
| GKL wall plasterboard sheets measuring 1200×2500×12.5 mm. For the bathroom, as already mentioned, gypsum plasterboard is used, and if the wall being erected is located in close proximity to the stove or fireplace, then it is better to use gypsum plasterboard. | |
| Reinforcing perforated paper tape for joints of drywall sheets. Fiberglass mesh can also be used, specially produced in narrow strips, and even often with a self-adhesive side. | |
| Dowel-nails measuring 6x40mm for attaching guides to load-bearing surfaces. | |
| Self-tapping screws for plasterboard for metal - for fastening profiles together (you can use “bugs” or self-tapping screws with a wide press head, as shown in the illustration), and for fixing plasterboard sheets to the structure. The most popular self-tapping screws are 3.5x35 mm or 3.5x25 mm. No longer required | |
| Drywall primer can be clear or white. The latter is most often used in cases where the surface is prepared for wallpapering. | |
| Drywall putty used to seal joints and screw holes, and then to apply a continuous thin layer to the wall surface. The putty can be purchased in paste form (much more expensive) or dry form (requires preparation). | |
| Mineral insulation with a thickness corresponding to the thickness of the intended wall. For living rooms, it is better to choose medium-density basalt material. Brands of insulation are directly intended for sub-frontal purposes. For example, “ISOVER Warm Home”, “KNAUF Acoustic Partition”, “URSA PUREONE”, “ROCKWOOL Light Butts SCANDIC”, “ACOUSTIC GROUPE Schumanet BM” and others have proven themselves to be excellent. | |
| A wooden beam, with a cross-section that will correspond to the width of the metal profiles for bookmarks, as well as for forming a door frame. |
Tools for installation
Without the necessary tools, as you know, it will not be possible to carry out any construction work. To erect a plasterboard wall, you will need a minimum tool kit, which includes:
| Illustration | Purpose of the tool |
| Laser (better) or regular bubble level for precise marking. A level is also necessary when installing the frame - to monitor the correct installation of parts. | |
| The painting cord will allow you to quickly and efficiently create a straight line on any surface. | |
| A plumb line, even if you have a laser level, can still help - with its help you can quickly and accurately project the lines of the wall from the ceiling to the floor, thanks to which the partition will be installed perfectly vertically, without tilting. | |
| A tape measure is necessary for any construction work; when erecting a plasterboard wall, you also cannot do without it. | |
| A construction square will be required for marking the wall, marking and cutting profiles and sheets of drywall. Squares are produced in different versions and you should choose the one that is more convenient for work. | |
| A hammer will be required when attaching guides to permanent surfaces (ceiling, floor, walls). They are used to drive dowel nails. | |
| A special knife for drywall or even its stationery “brother” is for cutting sheets. | |
| A hacksaw or electric jigsaw can also be used to cut sheets. | |
| Metal scissors or a grinder for cutting profiles. Hand tools are safer to use and do not damage the galvanized layer when cutting. | |
| A hammer drill is necessary if profiles have to be fixed to concrete surfaces. Sometimes it is quite possible to do without it if the material to which the profiles are attached is “pliable”. | |
| A screwdriver will help you quickly install profiles and drywall to the frame. | |
| A set of spatulas, 3÷4 pieces, from the widest (about 400 mm) to the narrowest (50 mm). necessary at different stages of wall filling. | |
| Roller or wide brush - for applying primer to drywall before finishing work | |
| A construction float with replaceable attachments is needed for grouting joints where the putty composition is hardening, and for smoothing the wall after puttying. | |
| Cutter. It is good to have this tool on hand, as it will significantly speed up the connection of metal frame elements. If it is not there, the profiles can be connected with metal screws. |
Some nuances of installing plasterboard partitions
Before moving on to a step-by-step examination of the process of constructing a plasterboard wall, it is necessary to consider the features of some of the work so as not to return to these issues further.
- The frame for plasterboard sheathing can be made not only from galvanized metal profiles, but also from ordinary wooden beams. The second option will cost a little more, but the strength of the structure will, perhaps, be even higher.
If timber is chosen for the frame, then the horizontal jumpers are attached to the vertical posts with metal corners, of which four pieces (two on each side) are required to fix one part. For reliability and stability, they must hold the block both above and below.
Prices for popular models of screwdrivers
An example of a detailed diagram of the installation of a wooden frame under plasterboard sheathing.
- Frame trim parts (frame) fixed to the permanent surfaces of the room.
- The vertical posts of the frame are necessarily made from solid timber.
- Horizontal frame jumpers that give rigidity to the structure.
- The jumpers are secured to the vertical posts and trim beams using metal corners fixed with self-tapping screws.
- Fastening the frame to permanent surfaces - dowels and nails.
- When attaching adjacent sheets of drywall, the edges of the two sheets are fixed to the boundary part of the frame, forming a joint.
If each vertical or horizontal row of plasterboard consists of several l, the joints of the plasterboard sheets should be spaced, according to the principle of bandaging in masonry. ists, then the joints of different rows should be spaced apart. The seams between the sheets must necessarily fall either on a vertical post or on a horizontal jumper. Hanging joints are not allowed.
The recommended pitch between the centers of vertical posts is 600 mm.
- Due to the fact that the standard width of a plasterboard sheet is 1200 mm, and it must be fixed along at least three lines, along the edges and along the center line, the vertical posts are positioned so that the distance between their axes is 600 mm.
The head of the screw slightly pierces the outer cardboard layer and plunges into the sheet by about 2 millimeters.
- Fixing gypsum board sheets to the frame is done using special screws for metal or wood (depending on the material of the frame). The head of the self-tapping screw, after screwing it in, should be recessed into the drywall by 2÷3 mm - special bits for a screwdriver with a “skirt”-limiter are convenient for this.
When screwing in a self-tapping screw using such a bit, the limiter will rest against the surface of the sheet and will not allow you to accidentally “rip” the sheet through.
The screw head will be exactly at the depth required by the technology. The space above the cap is left to be filled with putty - this way the fastener will become completely invisible. The sheets are fixed to all posts and lintels of the frame, screws are screwed in in increments of 150÷200 mm.
Prices for waterproof drywall
waterproof plasterboard
Cutting drywall is a simple process, however, it requires accuracy and precise movements.
- It is very important to cut drywall correctly: if you do not know how this process is performed, you can ruin the material. A broken or even slightly cracked sheet is no longer used for installation on the wall as a whole. True, from its entire part it will be possible to subsequently cut out the necessary parts of smaller sizes.
To obtain an even fragment of gypsum board of the required size, you must first mark it on a whole sheet. A line is drawn along the marked points. Then, applying a metal ruler to it, a cut is made along it with pressure with a sharp knife.
A break in a cut sheet of drywall along the cut line.
At this stage it is important to cut the top layer of drywall. After this, the sheet is laid so that the cutting line is on the edge of the table. Light pressure is applied to the area protruding beyond the tabletop with your hand, due to which the gypsum layer breaks exactly along the cut line. All that remains is to cut the bottom layer of cardboard with a knife.
Cutting the edge of drywall - forming a chamfer for subsequent puttying.
- If you have to join two pieces of sheet that do not have a factory chamfer, then you need to make cuts along their edges with a knife or a special plane. The total width of the cuts should be approximately 10 mm. This groove is necessary to fill it with putty, which, together with the reinforcing tape, will bind the sheets together.
Doorway in a plasterboard wall.
- If a doorway is planned to be installed on the wall being built (and this is most often the case), it should be reinforced with timber. This is done in different ways:
- instead of a galvanized profile forming an opening, you can immediately use timber;
— wooden parts can be inserted into the internal space of a metal profile;
- instead of one metal post on each side of the opening, two are installed, at a distance of 50 mm from each other, and a wooden door frame is then installed in such a reinforced doorway.
- Experts recommend attaching two layers of plasterboard to the installed wall frame - this will increase the strength and soundproofness of the structure.
Cuts on the metal profile and the possibility of subsequent bending.
- If it is necessary to form parts with corners from a metal profile, cuts on its walls must be made at an angle. It is easier to carry out this process with metal scissors, but you can also make cuts with a grinder, taking the utmost care.
To ensure an even bend in the metal, the cuts on both side walls must be identical.
The lower part shown in the figure is often made, for example, to form the lintel of a doorway.
The gap between the floor surface and the bottom edge of the plasterboard sheathing.
- When installing plasterboard sheets on the frame, it is necessary to leave a deformation gap of 10÷12 mm wide between the plasterboard and the floor surface. To simplify this task and make the gap even, several scraps of the same drywall can be laid on the floors before installing the sheet in place. After attaching the sheet to the frame, these liners are removed. And the gap, depending on the type of room, is filled either with sealant (for example, in a bathroom) or with polyurethane foam (in rooms with normal operating conditions).
These were general recommendations, and now let's look at an example of how a plasterboard wall can be erected.
Construction of a plasterboard wall - step by step
The table below will show you step-by-step the process of constructing an internal plasterboard wall.
| Illustration | Brief description of the operation performed |
| The first stage of work is always marking the surfaces of the room in which the wall will be installed. This problem is best solved using a laser plane builder. He will immediately determine and mark the necessary lines on the ceiling, floors and opposite walls. If this device is not at hand, then a building level, a plumb line, a metal ruler and a marker are used for marking. First, a line is determined on the floor surface. To do this, the same distance along the side walls is set off from the parallel wall in several places. Then the painting cord is stretched from one point to another, and with its help a line is struck on the surface. It should form a right angle with one and the second side wall. Next, the line must be fixed by drawing a marker along it, having first laid down a ruler. | |
| Focusing on the horizontal line of the floor, vertical projections on the side walls of the wall are determined from it - the most accurate thing in this matter will be a plumb line. The top line of the future wall is determined by connecting vertical lines on the ceiling on opposite walls - it is also easiest to mark it off with a paint cord. The ceiling and floor lines must be ideally in the same vertical plane. You can check their correct location using a plumb line - as shown in the illustration | |
| Now, on a line drawn on the floor, you should mark the location of the future doorway, according to the drawn up project. As a rule, the width of interior openings is 800 mm. There may be other sizes, but when leaving an opening, the width of the door and the parameters of the door frame must be taken into account. | |
| The next step is preparing profiles for mounting the frame. First, the necessary measurements are taken and, if required, cutting. It is better to immediately prepare all structural elements that will be attached to permanent surfaces. Then, on those planes of the profiles with which they will be pressed to the surfaces of the walls, floor and ceiling, sealing tape is glued. | |
| First, the guide is attached to the floor along a line marked on its surface. To do this, the profile is laid on the floor, 100 mm is retreated from the wall - the center of the hole is marked. Then the first hole is drilled through the profile in the floor. | |
| A dowel-nail is immediately installed and driven into the hole with a hammer. Thanks to this precaution, the profile will be fixed to the floor in the required position, and drilling the remaining holes will be much easier. | |
| The profile is fastened in approximately 500 mm increments. When drilling the following holes, you should ensure that the profile does not move from the drawn line. | |
| The edge of the profile facing the doorway is fastened with a distance of 200 mm from it. This is necessary so that there remains free space for fixing the vertical strengthening and forming doorway racks that are installed in this place. So that the head of the dowel-nail does not interfere with installation. | |
| Next, the metal profile is attached to the ceiling. It is desirable that the profile be solid, but if it has to be made up of two segments, then their joint should not be located above the doorway. | |
| When the horizontal profiles on the floor and ceiling are fixed, they are connected by vertical guides fixed to the walls. Vertical posts are inserted inside the horizontal guides. They are fastened using a cutter or metal screws. | |
| The next stage is marking and installing vertical rack profiles. As mentioned above, a distance of 600 mm should be maintained between the center line of two adjacent profiles. The racks are inserted into the guide profile and fixed with a cutter or metal screws. When installing racks, it is very important to control their vertical position using a building level or plumb line. Particular attention should be paid to the racks that form the doorway, as they must be secured perfectly perpendicular to the guides. | |
| The posts framing the doorway must be fixed more rigidly in the structure. It is desirable that they be additionally reinforced with a wooden beam, which is inserted and secured inside the metal profile. For the outer pillars of a doorway, it is more convenient to use reinforced perforated profiles, but regular pillar profiles are also suitable. | |
| Special strong perforated corners are screwed to the edges of the outer racks; they are fixed with screws and nuts, but the latter are not completely tightened, leaving the possibility of adjusting the height of the rack at the installation site. The ability to adjust the height is only possible if you use a perforated profile and corners - that is why they are more convenient during installation. | |
| The stand is installed on the corners in the guide profiles on the floor and ceiling. | |
| The end posts must be checked for perfect verticality using a building level. | |
| After this, holes in the floor are drilled through the holes in the corners through the guide profile - for dowel-nails. | |
| Dowel-nails are installed in the holes and hammered into the base. | |
| Next, the nuts are finally tightened on the mounting screws. This will secure the bottom of the rack. | |
| After this, the upper side of the rack is secured in the same way to the upper guide profile. That is, two holes are drilled in the ceiling through the corner and the guide profile, through which dowel-nails are driven. Then, after finally checking the correct position of the drains, the nuts on the mounting screws are tightened. | |
| Next, the height of the doorway is determined and marked on the vertical posts. Usually it lies in the range from 2100 to 2300 mm. The width between the posts is measured - it is necessary to make a horizontal lintel that limits the opening in height. | |
| A horizontal jumper is made - usually from a guide profile. You will need a segment, the length of which is the sum of the width of the doorway and the side folds, with the help of which the lintel will be attached to the vertical posts. The length of the bends can vary from 200 to 300 mm. The profile section is marked, and then cuts are made according to the markings using metal scissors. Then, the side parts of the profile are bent at right angles relative to the horizontal part of the part. An example of a cut was previously shown in the illustration when the basic principles of installation were discussed. | |
| The finished jumper is installed in the place marked for it, while its bent parts are put on vertical posts. Next, using a level, check its horizontalness. | |
| The jumper is secured with self-tapping screws on both sides of the racks. You will need two or three self-tapping screws on each side of the fastening, depending on the chosen length of the bends. Additionally, it is recommended to strengthen the lintel with a wooden tab, laid and secured in the horizontal part of the lintel. | |
| The completion of strengthening the doorway structure is the installation of vertical jumpers that will connect the ceiling guide and the horizontal jumper that limits the doorway. Typically, two parts are used for this. If a wooden tab is installed in the lintel, then the edges of the vertical posts are trimmed and the fixation is made outside the horizontal lintel. If a wooden insert was not used, then the vertical posts are inserted inside the upper and lower guides, and then secured with a cutter or self-tapping screws. The distance between the main vertical post and the auxiliary reinforcing post should be approximately 150 mm, which will also add additional rigidity to the structure. | |
| When the frame is completely ready, wiring is laid inside the structure, if necessary, the locations of sockets and switches are determined, and cables are connected to these points. To make the wiring safe, it is recommended to pass the cables into a special corrugated insulating tube. All connecting nodes must be well insulated. | |
| Having completed the installation of the frame, you can proceed to covering it with plasterboard. Installation of sheets usually starts from the main wall. The bottom sheet of material is attached first, and one should not forget about the deformation gaps that should be left between the gypsum board and the capital surfaces. If the first vertical row of sheets has horizontal joints, then in the next row the joints should “spread” at a distance of at least 400 mm from the joints of the sheets of the first row. The distance between the horizontal lintel of the doorway and the nearest joint between the sheets must be at least 150 mm. | |
| In order to prepare the part that will be fixed above the doorway and to the side post, dimensions are taken from the place of its planned location. And then a fragment of the required configuration is cut out from the gypsum board according to the parameters taken. In this case, it is necessary to take into account the location of the vertical posts above the doorway, as well as the fact that the edge of the cut panel should extend half the width of the first or second post - for fastening with self-tapping screws. | |
| Next, the second side of the doorway is sheathed - the work is carried out according to the same principle. After this, the next row of sheets is installed and so on until the end. The last sheet of mail will probably also require trimming to fit. At the same time, the recommended spacing of joints is observed - as mentioned above. Having completed the installation of drywall, those edges of the sheets that do not have factory chamfers are cut at an angle - this was discussed earlier. | |
| The next step is to seal the joints with putty, onto which reinforcing tape is glued. Another layer of putty is applied on top of the tape. On this bottom layer of drywall, it is not yet necessary to cover the screw heads with putty. | |
| After the putty composition has dried, a second layer of drywall is mounted on the wall (if so provided for in the project). When installing it, it is necessary to ensure that the joints of the lower layer of sheathing do not coincide with the joints of the upper one, both horizontally and vertically. Trimming the edges, filling and reinforcing the joints of the outer layers of the cladding is done a little later, already simultaneously on one and the other side of the mounted wall. | |
| If you planned to install a socket in the wall, then the socket for the socket box is drilled at this stage - this will require a special drill bit for drywall. Then the cables are brought out through the hole, and a socket box is installed into which the socket or switch will be mounted. The socket boxes for plasterboard have a special design and are fixed by tightening the screws that press the stops on the back side of the cladding. | |
| Having completed the covering of one side of the wall, insulation material is laid on the other side between the vertical posts. It should fit as tightly as possible to the frame elements. After laying the insulation, the second side of the wall is covered with plasterboard. It is clear that approximately according to the same algorithm as the first side. | |
| When the second side of the structure is sheathed with two layers of plasterboard, edges are trimmed on both sides at the joints of sheets that do not have a chamfer. Then they need to be treated with a primer. Next, putty is applied to the joints, reinforcing tape is glued onto it, onto which a layer of putty is applied. Next, the joint lines are puttyed and reinforced, and in addition, the holes from the heads of the fastening screws are also treated with putty. When the putty has dried, the areas where it was applied should be leveled with a float. | |
| The next step is first dust removal, and then continuous priming of the surface. This stage of work is preparatory for the final leveling of the entire surface with putty. | |
| For any finishing coating, a plasterboard wall must be filled with a thin layer of mortar. This must be done so that between, for example, wallpaper and cardboard there is a layer of putty. Otherwise, during the next repair, when removing the old, tired or unusable decorative wall covering, part of the cardboard will come off along with it. That is, the integrity of the entire wall can be seriously damaged. The putty layer, after it has dried, must be sanded well to perfect smoothness - both for painting the wall and for wallpapering. An exception can be made only for facing with ceramic tiles - here ideal smoothness is not needed. After the wall is completely leveled by sanding, it is primed again - for the subsequent finishing. |
How is a plasterboard wall prepared for finishing?
The instructions in the table only touched lightly on the operation of preparing the sheathed wall for finishing. And this is an important issue that requires considerable skill and deserves separate consideration. Therefore, we invite the reader to go to the instructional article on our portal “Puttying drywall under wallpaper .
* * * * * * *
So, erecting a frame partition wall and covering it with plasterboard is a completely doable task even for a novice builder. Feel free to get down to business - and if you try, everything should work out!
Let’s conclude the article with a video in which craftsmen share their secret of constructing a partition with soundproofing capabilities.
Frame covering
After the frame is erected, communications are laid - electrical wiring, low-current cables, pipes, etc. Next, they move on to covering the structure.
During the installation of gypsum boards, the following rules must be observed:
- Self-tapping screws should be 1 cm longer than the total thickness of the profile and gypsum board.
- Self-tapping screws need to be recessed into the drywall 1 mm, not deeper.
- The maximum pitch between screws is 25 mm. The optimal distance from the edges is 1.5 cm.
- The sheets must be joined on the frame profile.
- To cut drywall, it is advisable to use a sharp utility knife or a saw with fine teeth.
- On cut ends it is necessary to remove the edges. This is done with a special plane or a stationery knife.
To achieve solidity, joining seams are glued with a special reinforcing tape or mesh, and then covered with a layer of putty.
It is important to bring the putty layer on the same level as the base material.
It is advisable to use not an ordinary serpyanka mesh, but a special elastic tape, it is more reliable. After fixing the gypsum board and drying the putty, you can proceed to facing the partition - gluing wallpaper, installing decorative panels, etc.
Video description
The video discusses the issue of installing a frame under plasterboard sheathing:
Fastening drywall
To cover walls with plasterboard without a frame, adhesives are applied to the entire surface of the canvas in an even layer, pointwise or locally. The choice depends on the condition of the work site.
It is important to ensure fastening around the perimeter and in the middle. The fewer voids there are, the more reliable the result will be.
In the case of self-tapping screws, with any technology, the longitudinal arrangement of the fasteners is observed at a distance of 10-15 cm along the ceiling, 20-40 along the walls. If further tiling is planned, then it is better not to exceed 15 cm. The indentation from the edges along the perimeter is 15 mm, and from the corners 25-35 mm.
Cutting and finishing of ends
Cutting drywall sheets is done using a construction knife or a wood saw. In the first case, you will get less garbage. Alignment of the ends and adjustment of the edges is carried out using a rasp or grater. Plaster can be easily ground off, and cardboard can be trimmed with a blade.
Adjusting edges Source obustroeno.com
Processing a gypsum board surface
The painters cut the transverse joints with a small recess to place the fastening solution in the cavity. If there are differences, then additional leveling is carried out. Longitudinal seams and gaps more than 5 mm wide are first filled with plaster. Then the reinforcing fabric is glued. Putty is applied over the mesh or bandage.
If shrinkage of the mixture has led to the formation of a depression, then re-leveling needs to be done. It is important to accompany the entire process by priming the surface: before each treatment and after grinding.
Photos of plasterboard partitions
We choose and do it ourselves
Before placing a plasterboard structure, it is necessary to draw up a drawing with detailed indications of the dimensions and location of installation of the elements.
Grouping parts is not a complicated process, but to make it take as long as possible, it is recommended to follow some rules:
- Determine the center of the room, mark the guides. Then attach the profiles to the points marked according to the drawing. When constructing a profile arch, reinforce it with racks, maintaining a distance of 20-30 cm.
- Fix the upper guide arches.
- Make parts from gypsum board. To make them bend well, wet them a little with water.
- Cut off the protruding drywall with a knife and putty the structure. Primer and putty will help make the arch even.
Let's look at the most successful gypsum plasterboard designs used in various rooms.
Living room
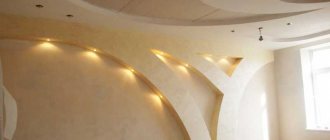
It is best to decorate a room with high ceilings with a suspended multi-level ceiling. In a small room, it is more rational to make a plasterboard niche. The design of plasterboard shelves, especially those decorated with lighting, will look good next to the sofa.
Bedroom
The design of this room is best based on simple shapes and clear lines. In addition to the ceiling, in a gypsum plasterboard bedroom you can decorate the headboard of the bed, creating an original false wall. Plasterboard bedside shelves, illuminated by bright lighting, will add romance and comfort to the room.
Bedroom
Bathroom
In this room, only moisture-resistant gypsum boards should be used. Hanging simple structures look good in a small room. Suspended ceilings with LED lighting are suitable for rooms of any size.
Bathroom
Hallway
A “boring” room like a hallway can be refreshed with a plasterboard structure. Before building a structure, it is important to accurately calculate its size and area of the room. Designers advise installing an arch, a multi-level ceiling or a false wall in the hallway. It is recommended to use non-staining materials for finishing structures.
Kitchen
Only moisture-resistant plasterboard sheets are installed in the kitchen. They can be used to create partitions or corner cabinets.
Kitchen
Leading manufacturers
Gypsum boards are produced by several factories in Russia. Some of them date back to the beginning of the last century. The most famous:
- Knauf. The company specializes in the production of dry mixes, gypsum boards and tongue-and-groove blocks. Products of consistently high quality.
- Mordovcement. It operates on German equipment and produces NG blocks, dry mixes and gypsum board.
- Volma. The history of the plant began in 1943. The products were used for the post-war reconstruction of Soviet cities. With the beginning of perestroika, the plant fell into decline, but managed to be revived under the name Volma in 1999. Several factories in different parts of the country produce gypsum boards, dry masonry and adhesive mixtures, and tongue-and-groove blocks for partitions.
Choose building materials based on the ratio of cost, quality and ease of delivery.
Features and speed of gypsum board masonry
The builder will appreciate the speed of installation and laying of gypsum boards. Compared to other materials, the process using Knauf tongue-and-groove slabs is the fastest due to the large size of the slabs: 667 mm by 500 mm.
Such blocks do not require additional plastering work, which saves time.
Completely finished gypsum masonry is also convenient because it can easily be used to attach or hang furniture products - cabinets, shelves, and the like.
The speed is also positively influenced by special grooves, through which the plates fit tightly to each other, leaving no openings or gaps. When joined together, tongue-and-groove slabs eliminate any deviations along the planes, quickly and easily creating a smooth wall, without the possibility of curvatures of even 1 millimeter.
Joining slabs in a partition
For comparison, drywall allows for larger deviations, although it is overall more expensive than Knauf tongue-and-groove boards.
Knauf tongue-and-groove slabs are chosen because:
- They are distinguished by low cost;
- They are small in volume and light in weight;
- They are easy to assemble and install;
- Offers high sound insulation.
To lay gypsum boards with your own hands, you do not need to be an experienced builder or have experience in this field; it is enough to carry out the preparatory work well, prepare the necessary tools and follow the instructions exactly.
This is how the wall is erected quickly and efficiently, without any defects. Such a solution will bring savings - there is no need to hire outsiders or pay for their work.
Useful tips
If you decide to work with plasterboard yourself, you need to remember a few simple but very important rules:
- Only sheets with a perfectly flat surface are suitable for work. The presence of microcracks makes the material unsuitable for use.
- Installation work must be carried out at a temperature of at least +10 degrees.
- When purchasing material, it is important to consider the humidity of the room and possible temperature indicators.
- It is prohibited to use nails to secure gypsum boards.
- Heavy objects should not be hung on plasterboard walls.
Specifications
Before purchasing material, it is necessary to calculate the amount of GWP. The working surface size of conventional slabs is 667x500x80 mm, the weight of a solid slab is 24 kg. There are three slabs per square meter of wall. Moisture-resistant ones have different dimensions: 900x300x80, weight 29 kg. 3.7 slabs are used per square meter of surface. The weight of hollow blocks is 22 kg. Due to its low weight and ease of handling, installation can be carried out by one worker. In addition to gypsum blocks, there are slabs from which gypsum concrete partitions are erected; they are added to the composition of these products along with sand, or completely replacing it:
- Slag or ash;
- Peat or straw;
- Rags or waste paper.
These slabs differ from plaster block slabs in size and the absence of a tongue-and-groove connection. Gypsum concrete slabs are laid with mandatory ligation of vertical seams to strengthen the structure.