We were all schoolchildren, and once stood at the school board, answering a lesson. Now such writing boards have migrated to offices and homes, because on such a surface you can write not only equations and formulas, but also schedules and to-do lists.
If you have a schoolchild in your house, then you can make him this convenient device and then he will be able to do his homework using a homemade school board.
Making a school board with your own hands is not difficult, the main thing is to follow the technology, and then the board will turn out almost the same as those available for sale.
Materials and tools
To make a school board with your own hands, you will need the following tools and materials:
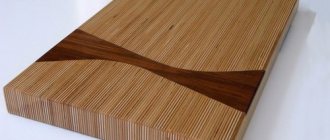
- For 16 mm thick chipboard base
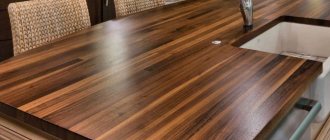
- For the front surface, frosted glass with a thickness of at least 3 mm.
- Aluminum U-shaped profile with a width of 25 mm and an internal distance of 20 mm
- The enamel is black or dark green. You can also look for paints with fine porcelain abrasive (for example, these are found in machine tool industry). This enamel is highly durable and will last for many years.
- Canopies for wall mounting
- Self-tapping screws
- Silicone sealant (you can use glass glue)
- Insulating tape for seal
- If you want to make a school board with opening sides, you will need butterfly hinges or piano hinges. But usually preference is given to ordinary rectangular boards without sidewalls and with dimensions of 200x135x2.5 cm.
Product care
Following some care recommendations allows you to preserve the functionality of the device for drawing and writing. With information about what your magnetic marker board is made of, you can properly care for the product by doing the following:
- Before first use, remove any remaining glue and protective film from the product using a special liquid. Acetone or solvent are absolutely not suitable for processing;
- You can apply text and images only with the help of special markers. If you have studied information about how to choose a magnetic marker board, then you already know the names of the leading manufacturers of these products. It is prohibited to use permanent markers, traces of which cannot be washed off from the surface intended for writing;
- Do not touch the working area of the board unnecessarily. This way, it is possible to avoid the appearance of fingerprints and accidental mechanical damage on it that would impede quality writing.
It is recommended to delete what is written with a special eraser.
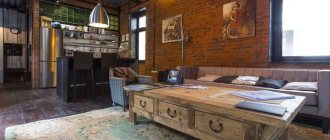
Representatives of the business environment know what a marker board is called and what it was created for. Demand for products is growing every year, and supply is expanding. Products are increasingly used not only in organizing office activities, but also at home. Children learn to write and draw on it. Parents often acquire a board, among other things, so that children’s creativity does not extend to wallpaper and furniture.
School board details
Since this product uses glass, it is better to entrust its cutting to craftsmen in a glass workshop. You can also order delivery of finished parts there. So, the school board consists of the following parts:
- Glass dimensions 1997x1347 mm
- Chipboard dimensions 1999x1349 mm
- Upper and lower profile (2 pcs.) 2002 mm.
- Side profiles (2 pcs.) 1347 mm.
Before starting work, all profile parts must be cut at an angle of 45 degrees and filed with a needle file or a fine file.
Work begins by gluing the base parts. These works are carried out on a table slightly smaller than the future board.
- Chipboard is placed on the table and the surface is cleaned of crumbs, dust and other contaminants.
- Next, glue is applied in the form of strips parallel to the long side of the board with a distance of approximately 50 mm.
- Glass is carefully placed on top of the glued base. Moreover, it is better to do this work with someone else, since it is unlikely that you will be able to lay it down straight yourself.
- The glass is moved slightly from side to side so that it rubs against the glue and is pressed against the base. Since the glass is smaller than the base, the allowances along all edges should be the same. After this, it must be attached around the perimeter with electrical tape, and it should be wider than the grips of the aluminum profiles.
- After this, the board is left to dry for a day, and then the glass begins to be painted. Since the glass is frosted, the paint should lie flat, but for a smoother surface you should use a spray bottle rather than a brush. For better atomization, the paint is diluted with a solvent in a ratio of 5 to 1. It is better to apply the paint in 2 layers, and the first layer should dry for at least a day.
- After the glue and paint have dried, an aluminum profile is fixed, which is attached to the ends of the chipboard with self-tapping screws measuring 4x16 mm along the entire perimeter of the board. Such fasteners will be sufficient, since the profile does not bear any load and is used more for decorative purposes.
Now the school board is ready. It can be hung on the wall using any suitable fastener, or you can screw on some mechanism or device. If you take a wider metal profile, you can get a hinged or rotating board, and if you use a metal sheet, you get a magnetic board. There are many ways to use a module on this basis.
One day, while looking at the paintings of the Swiss artist Albert Anker, I discovered a very interesting painting. It's called "Schoolboy in a Snowy Landscape."
... In the hands of a schoolboy is a slate board! A terrible name - slate board, isn't it? The imagination immediately pictures all sorts of vile asps. This is how in the old days they called huge winged serpents capable of spewing fire. Instead of a mouth, these reptiles had a bird's beak. Our grandmothers also called cunning, treacherous and evil people asps. In our time, this name has been retained by a fairly large family of poisonous snakes.
So, the black boards in the hands of schoolchildren of past centuries have nothing to do with dangerous reptiles. They are called slate due to the material from which they were made. Slate stone, or shungite, as geologists correctly call it, is a type of rock, a type of hard slate of dark gray or black color. We cut out such a frame 2-3 centimeters thick, framed it with a wooden frame - and the ideal school writing aid was ready.
For a century, the slate board served as a reusable notebook for children. By the way, and not only for children - banks carried out their calculations on it, scientists drew formulas, and innkeepers depicted menus.
They usually wrote on such a board with a stylus, so in some countries it was called a slate board. When aluminum became cheaper and more widely available, writing sticks began to be made from it. The aluminum left a beautiful silver-white mark on the slate board. Later they began to actively use ordinary chalk. But everything written was erased in a way familiar to us - with a damp sponge or cloth.
Why did I describe the use of this educational accessory in such detail? Yes, because the slate board became the “parent” of the most famous school part - the blackboard. After all, it was invented relatively recently - at the beginning of the 19th century. Before this, teachers explained the material, so to speak, on their fingers. Remember how Archimedes did it - with a twig in the sand.
Scottish school principal James Pillans is considered the creator of the traditional blackboard.
One day he was teaching a geography lesson and decided to draw the outline of the country he was studying for clarity. But he didn’t fit it on one board, and then he took several pieces and put them together. Then an idea came to his mind: what if we placed several slate boards in several rows on the classroom wall? Yes, install them higher so that all students can see! So he did, and so, in 1814, the idea of the chalkboard familiar to us all was born.
Moreover, this Scottish teacher also invented colored crayons. And do you know why? To make it beautiful! He drew the outlines of states in white on the board; mountains - green; rivers, lakes and seas - naturally blue; and he painted over the places of military battles generously with red chalk. In those years, it was still impossible to go to a stationery store and buy colored crayons there, you understand, and therefore the inventive Scot came up with his own recipe for making them. He ground the chalk and added to it not only coloring agents, but also a secret British additive - oatmeal. I guess it was needed for viscosity.
It should be noted that around the same time, overseas in the North American States, mathematician George Baron also began using the traditional blackboard in a large auditorium while delivering his lectures at the Military Academy. An interesting fact is that in America in the 19th century, school boards were made from pine and their surface was covered with a composition of egg whites and ground charred potato peels.
Throughout the entire period since its invention, the main color of chalkboards was exclusively black. Schoolchildren and students wrote in white on black. And, in my opinion, white on black is the most elegant, classic color combination. In the middle of the 20th century, another color was added - brown. Nowadays, in schools and universities, almost everywhere the blackboards are green for some reason.
Slate boards finally stopped being used also relatively recently - in the 30s of the last century...
Source
School boards for educational institutions
The board is an integral attribute of any classroom. This is one of the main tools that allows children to transfer knowledge in various fields.
The function of the product is visualization. An old proverb says “it’s better to see once than to hear a hundred times.” By accompanying the presented material with drawings and inscriptions and recording important points, the teacher manages to achieve understanding of the subject by the students.
It has been proven that a child can listen carefully to oral speech for about 7 minutes, after which he becomes distracted. An adult is able to perceive information by ear for about 15–20 minutes.
Correct work with the board allows you to keep students' attention throughout the lesson.
Number and type of sections
The classic option is a single-section board. All other things being equal, it costs less than other options. The problem with single-section devices is that their area is often not enough to supply the material efficiently. Problems arise if the class covers a complex topic, when many new concepts, terms, and definitions appear that need to be handled.
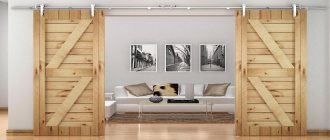
Multi-section boards have one main blade and two additional ones, made in the form of sashes. Additional sections are double-sided. Each of them has a length equal to half the length of the main fabric (as regulated by GOST 20064-84). It is easy to calculate that in this way the useful working surface of a three-section board increases by 3 times.
Sections are made in the form of sashes or sliding elements. The latter are not popular because they have unreliable parts: guides and wheels. They break much faster than hinges.
The boards are:
- Wall-mounted. They are distinguished by large dimensions. They are convenient because they do not take up classroom space and have a low price.
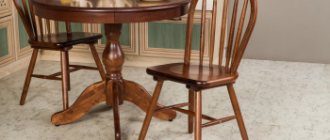
- Floor-standing. Floor boards are easier to move. They are usually double-sided, so with half the length, a floor board has the same usable area as a wall board.
- Mobile. The canvases are mounted on stands with wheels. Such boards are needed for conducting lessons where, for some reason, stationary ones are not practical. For example, in the assembly hall.
“Rector” is ready to supply the school with everything necessary
All types of boards described above are in our assortment. The main advantages of cooperation with the company:
- quick response to orders;
- wide range of products;
- convenient delivery conditions;
- the ability to order turnkey school equipment - the company’s specialists will take care of everything, from selecting the necessary equipment to installation.
Order our products right now by phone 8 (495) 789-46-84, email or using the order form on the website.
Interactive whiteboards: useful technology for children's development
The interactive whiteboard is a large touch screen with a projector. For each subject there is software, including theoretical material and various tasks that are performed directly on the board.
This technology takes the learning process to a whole new level. Students perceive the material more easily because information from the teacher’s abstract story turns into a visual video. There are many programs that involve student interaction with the board - moving objects, syllables in words.
Variety of marker boards
There are the following types of marker boards:
- plain boards. As a rule, these are products with a white surface, on which text or an image written with a bright marker is clearly visible;
- products with logo. Many modern corporations put a logo on the product in order to subsequently use the board during presentations not only in the office, but also at exhibitions, during visits to current and potential partners. The corporate image is placed in the corner of the board so that it does not interfere with the application of the main information.
- glass magnetic marker boards. They differ in surface. From the name it is clear that it is made of specialized glass on which you can write with markers and attach magnets.
The products are also used in the design of public catering establishments. A common sight is a board on which the names of dishes are written with a marker.