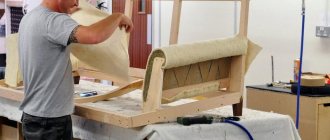
Despite the large amount of ready-made furniture that is currently on sale, the issue of self-assembly, for example, kitchen cabinets, is more than relevant.
Furniture assembled with your own hands is several times cheaper than store-bought furniture, and, of course, making furniture yourself gives you the opportunity to purchase furniture accessories of the required size and color from your household.
Brief overview of the article
Advantages of making kitchen furniture yourself
To answer the question of whether it is worth spending time and effort on making furniture yourself, all you need to do is search the Internet for photos of kitchen cabinets with your own hands.
As they say, appetite comes with eating: considering what amazing, original, unusual things ordinary people can make, you will certainly want to make something similar for yourself!
It is no secret that most of our kitchens are small in size, and often it is the independent production of furniture that will make the most efficient use of limited space, making the furniture functional and comfortable.
Making furniture yourself is practically the only possible option if the kitchen is “completed”, i.e. there was a need for an additional locker, for example, after moving.
Types of cabinets in the toilet
When planning bathroom storage, you have a choice between wall and built-in cabinets. Both options fit beautifully into the interior, but are manufactured and installed differently.
The wall-mounted one is made completely with all walls. The cabinet box is hung on the wall behind the toilet with loops on hooks. Metal lugs are attached to the vertical walls on the rear side of the housing. Special dowels with curved ends are installed as hooks. The best option is to secure the locker to the tire with hook brackets.
The design of a built-in wardrobe differs favorably from wall-mounted furniture in that the walls and ceiling of the toilet act as the top plate and sides. A facade frame with doors and a bottom (if necessary) are attached to them. In addition to hinged curtains, you can install roller shutters.
An example of a built-in closet behind a full-wall toilet
If you have no experience at all in this matter, and the desire to make a cabinet yourself overwhelms you, ask for help from neighbors and friends who already have practice in making and assembling furniture.
Preparatory work
Preliminary preparation plays a very important role when making furniture yourself: it is necessary to complete a drawing of future kitchen cabinets. Here again the Internet will come to the rescue: the network is replete with drawings for making kitchen cabinets.
However, it doesn’t hurt to check the drawings first to see how accurate the measurements are - “home craftsmen” may make mistakes.
Installation instructions
Initially, you choose what and how to fasten the kitchen set in order to buy suitable fasteners.
Then the following steps are performed:
- hooks are attached to the walls with self-tapping screws according to the markings, aligned in one line;
- canopies are fixed;
- if tires are used, then blanks are made for which holes are formed in the walls;
- The cabinet body is installed on the bus;
- the following parts of the headset are fixed in orientation to the already fixed elements;
- To avoid damage, it is recommended to use insulation;
- consistent fixation is ensured by a clamp;
- holes are made in the cases for fastenings; it is advisable to use a wood or plywood cover to protect against cracks and chips;
- The parts are connected with ties.
Once all the wall cabinets are hung, the doors are attached. Loops are attached to them.
Material selection
The most accessible for home “furniture creativity” are laminated chipboards (LDSP) or fine fraction boards (MDF). These materials are affordable, have a decent appearance, and come in a variety of colors and textures. Solid wood is an expensive material; it is best to work with a professional.
The same can be said about glass - although kitchens with glass surfaces are very beautiful and popular, this material is probably not suitable for self-production.
Selecting materials for the future cabinet
All materials are good and beautiful in the market and on TV, until a neighbor accidentally floods it with water. Make furniture from solid wood.
Of course, it is difficult to process oak, alder or cherry wood for a kitchen facade, but this is forever. Contact specialists if it doesn’t work out, and they will do as you say. But the dimensions must perfectly match the drawings, otherwise the production of expensive parts will require modifications. This is not always humane in relation to the price.
The wood must be prepared for the manufacture of furniture and its type. And it can be different:
- soft - pine;
- hard - larch, oak, birch, apple, walnut, maple;
- very hard - iron birch, acacia, dogwood, hornbeam.
Each of these breeds has its own pros and cons.
But furniture made of chestnut, oak, larch and walnut last for centuries. Artifacts made from them are stored for thousands of years. If you manage to find bog oak that is enough to build a cabinet, then this is a great success.
Construction:
After you have made sure that the dimensions match and the diagrams correspond, you need to start marking and cutting the material. To do this you need to have:
- carpentry workbench;
- electric plane;
- clamps;
- glue;
- jigsaw;
- milling cutter for forming ends.
The main task is to connect the boards. To do this, splines are formed on the workbench with a milling cutter on one side and similar grooves on the other. So that when connecting the boards tightly hold each other. Then they need to be grouped three or four into one block, coated in the grooves with epoxy glue and clamped with clamps for a day.
Monolithic wood panels are obtained from boards bonded with transparent resin. Any remaining adhesive must be sanded off. Now you can build the cabinet.
Furniture terminology
Kitchen cabinets come in several types. Depending on the location, the cabinets can be floor- or wall-mounted, respectively located on the floor or hung on the wall.
Note!
- Do-it-yourself wardrobe: a review of ways and methods on how to build a stylish and original wardrobe (video and 145 photos)
- Do-it-yourself furniture restoration - removing chips and scratches, restoring surfaces. Instructions with photos and video tips
DIY ottoman: how to make it at home. The best ideas, master classes. Photo + video review of beautiful ottomans
According to the cabinet configuration, kitchen cabinets can be straight or corner. Also, lockers can be either open or closed. Closed cabinets come with hinged doors or using pull-out structures.
Having carefully analyzed the available space and thought through the functionality, you can decide what types of homemade kitchen cabinets need to be made.
How to install modules and embed a sink
Hole cut out for sink in countertop
At this stage, the finished product is placed in a corner. If we are dealing with an attached lower module, then first we should install a cabinet with a sink with a ready-made hole for the pipes. Only then do you need to install a cabinet with a door.
You will need furniture intersection links when the time comes to connect cabinets to each other. A total of four fasteners are required.
If we are talking about a corner kitchen cabinet in which a sink will be installed, under this sink you will first need to make a hole in which the sink will be placed.
To make a cutout for the sink, attach it to the countertop and create a marking with a pencil, and then at the edge of this marking line, drill a hole of such a diameter that a jigsaw file can easily fit into it.
Once the socket is cut, the sink is inserted into it and screwed using the special fastener supplied in the kit. The cut line after this operation is treated with sealant.
Assembly order
As a rule, ready-made parts are used for self-assembly of furniture. They can be ordered in the desired size in stores. This is where an accurate drawing is simply necessary! It is necessary to think over and provide for methods of fastening parts, places for wires and sockets.
The instructions on how to make a cabinet with your own hands are almost the same as the instructions on how to assemble factory furniture yourself. Assembly begins with the box. When connecting parts using a screwdriver, it is important to prevent through drilling - you must work carefully and slowly.
Next, the back wall is attached to the finished box - it seems to fix and strengthen the structure. At each stage of furniture assembly, it is necessary to check the symmetry of the arrangement of parts and the perpendicularity of the corners. The top wall is then installed in the wall cabinet.
Note!
- DIY stool: master class on how to make it from wood. Instructions for preparation, assembly and beating (video + photo)
Do-it-yourself bench made from logs, pallets, beams or logs: photo master class on how to create. Video advice from the best masters
- How to make a backlit mirror with your own hands: necessary materials, tools. Tips for choosing lamps and LED strips
How to correctly calculate the detailing of the lower modules of a straight kitchen
The internal structure of tables/pedestals is designed as follows.
The sides of kitchen tables rest against the bottoms and are placed on adjustable legs. On top, the sidewalls are tightened with slats, to which the tabletop is in turn attached. Inside kitchen cabinets there may be shelves and drawers. The sink table and cabinet for the built-in oven have a special, specific design.
Also, according to the generally accepted ergonomic standard, the height of the bottom row of the kitchen is designed to be 850mm. Minus the thickness of the countertop and the height of the kitchen legs, the height of the box will be 720mm. The depth of the cabinet varies from 500-550mm with a tabletop width of 600mm. Let it be 500mm in our case - this is quite enough for installing a sink and installing an oven.
How to make a kitchen sink table with your own hands
The kitchen table-cabinet for the sink is made without a back wall. The slats for attaching the countertop are turned edgewise so as not to interfere with the insertion of the sink. The back bar acts as a stiffener (since there is no fiberboard back wall in the sink) and goes down slightly lower.
The details of the sink table can be easily calculated independently, knowing the thickness of the chipboard - 16mm.
- Bottom 600x500 – 1 piece.
- Sidewalls 704x500 – 2 pcs.
- Planks – 568x80 – 2 pcs.
The visible ends of the parts are rolled up with an edge. For a sink table, the “bottom” part is rolled with a circular edge, and the sides and slats are rolled along the two long sides.
How to make a kitchen table-cabinet with a shelf with your own hands
The kitchen table-cabinet with shelves next to the sink is calculated in exactly the same way.
The shelves are usually buried 10-20mm relative to the sidewalls. The back wall is stuffed with an overlap around the perimeter of the back part.
Calculation of the details of a chipboard table-cabinet with shelves will look like this:
- Bottom 600x500 – 1 piece.
- Sidewalls 704x500 – 2 pcs.
- Planks – 568x80 – 2 pcs.
- Shelf – 568x480 – 2 pcs.
The fiberboard backdrop is slightly reduced around the perimeter so that its edges do not extend beyond the table-cabinet. That is, with a dimension of 720x600, the size of the backdrop will be 718x598.
How to make a kitchen table-stand for a built-in oven
You can read about the nuances of designing a cabinet table for an oven here. The article discusses all the points for calculating the detailing for this kitchen module.
In our case, the chipboard parts for making a table-cabinet for the oven can be written as follows:
- Bottom 600x500 – 1 piece.
- Sidewalls 704x500 – 2 pcs.
- Shelf – 568x500 – 1 pc.
- Drawer side – 450x60 – 2 pcs.
- Drawer front – 510x60 – 2 pcs.
The only caveat is that you don’t have to install the top bar, as it may interfere with the insertion of the hob above this module.
How to make a kitchen table-cabinet with drawers with your own hands
The details of the kitchen table box are calculated in a completely similar way. But to calculate the detailing of drawers, you need to decide on the choice of guides - the drawer mechanisms themselves.
- Telescopic guides. Standard drawer with chipboard frame (sides and front), fiberboard bottom.
- Metabox guides. The bottom and back of the drawer are made of chipboard, and the sides are metal; they are the extension element.
- Tandemboxes. The design of the drawer is similar to the metabox, the difference is in the external design of the metal sides, inside of which additional mechanisms for smooth closing, finishing, opening by pressing, etc. are “hidden”.
Let's assume that telescopic guides for drawers are selected (a completely acceptable option for a budget set and such a module width). When choosing other retractable mechanisms for roll-out drawers, when calculating chipboard parts, refer to the manufacturer’s instructions. It is attached to any furniture fittings of this type, indicating all the necessary dimensions for installation.
All that remains is to decide on the height of the drawers. Let the lower large drawer be 300mm in height, then the other three (720-300)/3=140mm.
With this distribution, the internal height of the box can be made 100mm. At the same time, for more reliable fastening of the high front of the lower drawer, it is necessary to provide such a detail.
We write down the details of how to make a kitchen table-cabinet with drawers from chipboard with your own hands:
- Bottom 580x500 – 1 piece.
- Sidewalls 704x500 – 2 pcs.
- Planks – 548x80 – 2 pcs.
- Side of the box – 450x100 – 8 pcs.
- Drawer front – 490x100 – 7 pcs.
- Drawer bottom forehead – 490x270 – 1 pc.
How to make a combined kitchen table-cabinet with drawers and shelves
Let's consider a non-standard case when a kitchen table-cabinet has two top drawers and two hinged doors underneath them. This design is rarely used, since dividing the space into two small drawers is quite irrational - too many “centimeters” are lost in the gaps for the movement of the mechanism.
In addition to the gaps, the thickness of the central partition is also added. Its height is made approximately equal to the height of the fronts of the drawers and is attached to the upper strips. In our case, the height of the partition is 140mm.
The width of the niches for installing drawers is (580-16x3) = 266 mm, which means that the width of the front part (forehead) of the drawer is (266 + 32) - 90 = 208 mm. This is perhaps the only nuance in the calculation of such a kitchen module.
The rest of the kitchen details are calculated according to the same principle:
- Bottom 580x500 – 1 piece.
- Sidewalls 704x500 – 2 pcs.
- Planks – 548x80 – 2 pcs.
- Partition – 140x500 – 1 piece.
- Side of the box – 450x100 – 4 pcs.
- Drawer front – 208x100 – 4 pcs.
- Shelf – 548x480 – 1 pc.
A plinth is also added to the bottom row of the kitchen. The length of 2960 mm does not fit into the format of a standard chipboard sheet, so it is divided into two parts arbitrarily. You can allocate a separate plinth for the sink - since theoretically this part will be removed more often - if some plumbing work is necessary.
- Sink base 600x100 – 1 pc.
- Kitchen plinth 2360x100 – 1 piece.
Assembly of fronts and drawers
Working with kitchen cabinet doors with your own hands requires special care. Even the highest quality fittings are unlikely to last long if they are poorly secured.
It is necessary to select self-tapping screws of the optimal length: with short ones the door will not hold securely, with long ones there is a risk of damaging the side parts of the frame. Modern hinges allow you to adjust the doors in three directions - this greatly simplifies the work when assembling cabinets yourself.
When placing handles, you must remember the golden rule - measure seven times, drill once. The same principle should become the guiding principle when attaching guides when using drawers in kitchen furniture.
Which product shape should I choose?
Trapezoidal shape corner kitchen cabinet Attached shape corner kitchen cabinet L shape corner kitchen cabinet
Once you decide on the dimensions, it’s time to think about what shape of the product you would like to fit into your kitchen space. We list the three most important varieties:
L-shaped cabinet - this form of cabinet is distinguished by the fact that the best door shape for it is folding, like the one used in trolleybuses. This way you can view the internal space to the maximum, which, by the way, can be turned from ordinary shelves into a carousel with the best angle of rotation.
A wall cabinet of this shape will serve as an excellent space saver. The cabinet itself is also good because it can successfully accommodate a sink. Since in Soviet apartments water supply and sewerage communications are usually located in the corners, you do not have to extend the pipes.
The attached design is a less convenient option for locating the cabinet. A small cabinet with a door at an angle of 90 degrees is added to the blank cabinet located in the corner. The problem is that with this arrangement you only have access to the interior of the smaller cabinet. This design also allows you to place a sink, but the plumbing fixtures are placed in a blind module, and space for dishes and kitchen utensils is provided in an accessible one.
Remember that when placing the sink in a blind section, you significantly complicate access for a plumbing specialist in case of need for repair work, and if the sink is removed from the blind cabinet, it will remain empty and useless.
However, practice shows that it is better to place the sink in another place, and equip the empty cabinet into a place for cooking or put a microwave oven there.
The space in the accessible module can be equipped with a carousel with a slight rotation angle or pull-out baskets.
A cabinet in the shape of a trapezoid is an original and stylish option, which however has its drawbacks. This form has one door, and sections of the kitchen unit are adjacent to it on the sides. The trapezoidal cabinet looks quite solid, especially in kitchens with a large area, but it is not entirely rational.
Firstly, the straight door makes it difficult to access some areas of the cabinet, especially near the wall. And secondly, it is better to avoid installing a carousel and a sink at the same time in such a cabinet at the same time, since the first, due to the force of friction, will constantly damage the second. So it’s better to put a microwave or other equipment on the cabinet.
Ready-made corner kitchen cabinet
Convenient furniture accessories
With the variety of additional accessories for assembling furniture, the question of how to assemble a kitchen cabinet with your own hands ceases to be difficult and intimidating. When assembling furniture for yourself, you can use special closers - they will make the process of closing furniture doors smooth and silent.
Lift systems are convenient in horizontal hanging cabinets. In ready-made kitchens, all these “bells and whistles” are not very cheap. When making furniture yourself, they even use simple materials - it is possible to make the kitchen very functional and comfortable.
Note!
- A simple and beautiful DIY bathroom shelf made of MDF, glass, plasterboard: straight and corner options. Photo instructions, tips, video master class
- How to make a computer desk with your own hands from wood or chipboard. Photo/video master class + description of models
- Do-it-yourself folding table: description of types, calculations and selection of tools and materials. Video master class for beginners
On wall cabinets it is convenient to place hanging accessories - shelves-holders for glasses, lids, sets for spices.
How to assemble boxes
- The walls for the boxes are tightened with screws. As soon as you assemble three walls, insert pieces of fiberboard into their bottom, which were created according to the parameters of these walls.
- The fronts of the drawers must be secured using eccentric ties. In this case, the screws are screwed into the facade, then the side with the head is inserted into the bushings located on the sides of the drawers. The main thing is to make nests in them first. Once the bushings are in the holes, rotate them until they engage the screw heads.
- If we are talking about a corner cabinet, you need to screw guides for rollers onto the lower corners of the drawers.
If we are talking about assembling an oven, the last stage is excluded due to the lack of drawers in this type of cabinet.
Kitchen lighting
Good lighting in the kitchen makes it beautiful and cozy. Lamps are placed along the perimeter of the wall cabinets. They can illuminate the cooking area precisely.
You can decorate the bottom of the cabinets on the wall with beautiful LED lighting. Such dim light will create an atmosphere of mystery in the kitchen and will encourage long intimate conversations.
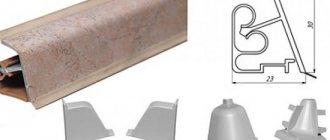
Selecting fastening materials and accessories
An example of fixing shelves in a corner cabinet
The screws and accessories needed to attach the hardware are usually included and are available at any hardware store, but they vary. With single-start threads - they have a large pitch, are screwed in with two turns of a screwdriver, but require:
- holes of special diameter;
- frame screws are equipped with thin winding on a thin axis;
- washers, pressure caps, sockets.
This group of products is not always treated with due attention, but you can often fall for counterfeits of fasteners from reputable companies. As a result, you have cut off screw slots and a spoiled mood.
It is also necessary to provide lower and upper spacers for long shelves. They can be made stationary, but furniture stores also sell mobile, adjustable stainless steel ones.
Photos of DIY kitchen cabinets
Design Features
A corner kitchen cabinet is a rational solution that allows you to use unclaimed parts of the kitchen. There are many placement options for this simple system, making it easy for the planner. The positive aspects that such a cabinet will bring:
- The corner is a rarely used place in the room, therefore, in addition to useful storage compartments, the cabinet will also improve the design of the kitchen, giving it an original look:
- For owners of Khrushchev-era apartments and other apartments with a small area, thoughtful use of every square meter is important. A corner cabinet will add up to 0.5 cubic meters of useful volume, which will allow you to install additional equipment and fittings. You can read more about kitchen furniture fittings here.
- Stores offer many types of corner kitchen cabinets, and some of them transform (into a bar counter or additional seating) and have a pull-out section.
Expert opinion
Svetlana Kolesnikova
Designer
Some designers suggest placing an oven, dishwasher, etc. in corner cabinets as an “ergonomic” solution. In fact, such a design is irrational, since most household appliances have rectangular shapes, which is why a lot of useful space disappears.
This type of furniture also has disadvantages. They apply only to certain types of kitchens. Among them are:
- Pipes and other communications in the corner of the kitchen. This applies to Khrushchev houses, since it was customary for designers at that time to place heating systems, sockets and other structures that required constant access to the wall.
- Problems opening the locker. Developers already solved this issue several decades ago by inventing accordion doors. A smart solution: make the cabinet open over the entire surface. This, in addition to convenience, gives scope for design ideas.
Measuring the room for kitchen installation
How to correctly measure rooms for installing kitchen furniture.
1. Draw a kitchen plan on paper.
The following dimensions should be indicated in the figure:
height and length of walls, dimensions of partitions and window sills.
In addition, the drawing should include a communications diagram: where the gas and water pipes are, where the batteries, sockets and wiring are located.
The measurement diagram for our room will look like this:
| Fig.1 | Fig.2 |
As you can see, when measuring the space for kitchen furniture, you must indicate all the existing features of your walls.
Based on the drawing, you determine which kitchen shape will be ideal for you:
| Fig.3 Linear form | Fig.4 L-shape | Fig.5 U-shape |
2. After this, determine where you will place dishes and utensils, where you will store food, where you will place the sink, where you will place the work table, where you will place the stove.
Note: the sink, washing machine and dishwasher should be located closer to the sewer and water pipes, the gas stove should be located near the gas pipe, and the refrigerator should be as far as possible from the stove and close to the outlet. A very important planning point - pay attention to whether the opening window and door will interfere with the work area.
Kitchen furniture consists of only two products: wall-mounted modules and floor-standing modules.
They differ only in size and internal filling.
As a rule, the appearance and material of the facades are first determined.
Many manufacturers of facades, especially for facades made of solid wood, have a dimensional grid for width and height, the so-called step.
Many sizes of kitchen boxes are standardized, that is, they have standard dimensions that can be taken as a basis.
The height of the lower modules is 850 mm (720 mm box + 100 mm kitchen legs + 38 (28) mm table top), depth is from 450-560 mm depending on communications (pipes, sockets, etc.).
The standard dimensions of the upper modules in depth are from 300 to 315 mm, and the height of each facade manufacturer is different, as a rule, the first size is 720 mm, and the second size can be 910 mm, 920 mm, 960 mm; Italian manufacturers have a height of 1035 mm.
3.Now we make a drawing of the future kitchen.
In our example, we will consider a corner option placed along two walls:
| Fig.6 | Fig.7 |
Draw the modules, where and how they will stand, the sizes of cabinets, drawers, cabinets and tables.
We begin arranging the lower elements from the corner where the water and drain inlets are located. As a rule, a sink is located in these sections.
Corner boxes can be of two types:
1) direct-transitional, the width of this element depends on what the façade will be on it, and what depth of the countertop will be adjacent to it on the other side, you also need to take into account the peculiarity of the corner of your kitchen, it may not be ideally 90 degrees, for this your box should not reach the wall by 50mm. It will be covered on top by a tabletop, which can be cut to fit the corner of your kitchen.
| Fig.8 | Fig.9 |
2) The second option for corner lower boxes is a 900x900mm trapezoid table. The peculiarity of this box is that it requires a tabletop with a depth of 900 mm, while the standard depth of tabletops is 600 mm.
| Fig.10 |
3. Next, we begin to arrange straight lower boxes based on the length of your walls and the size of the facades: see the example in Fig. 11 and Fig. 12.
| Fig.11 | Fig.12 |
4. Using the same principle, we place the upper wall cabinets; we must take into account where the stove and sink are located in the lower modules, in order to place the drying and exhaust hood above them. See example in Fig. 13.
| Fig.13 |
The standard distance from floor cabinets to wall cabinets is 600 millimeters. But this size can be changed to suit the height of the housewife and the features of the kitchen space.
5. After we have planned how our modules will be placed and what their purpose is, we proceed to CALCULATE THE SIZES OF THE DETAILS of our kitchen boxes.
This stage of work is the most important, here you need to turn on all your attention. Each drawer, each cabinet, each cabinet is calculated separately. All furniture elements must be detailed, that is, each element must be divided into components. This will include side walls, bottom, roofs, rear panels, shelves. If you plan to install drawers, then they are also detailed, and the installation locations of the fittings must be taken into account.
Let's look at the example of one cabinet.
| Fig.14 | Fig.15 |
Since we use 16mm laminated chipboard, the calculation of our module will be as follows: Part No. 1 - the side panel of the box is equal to the height of the box 720mm -16mm, that is, we subtracted the thickness of the bottom (all lower cabinets are assembled according to the principle of a false bottom, that is, the sidewalls stand on the base ), we get the part size 704x560. Now we need to put an edge on the visible parts of our sidewalls. The edges in kitchen boxes, by default, use 0.4mm PVC, so there is no need to subtract anything from the resulting size of our part, we simply mark those sides where the edge will be, that is, the front edge, the back edge and the top edge.
| Fig.16 |
Part No. 2 - the bottom of the box is equal to the dimensions of our product in width and depth 440x560, and since all sides of the bottom are visible, we place the edge along the perimeter of the part.
| Fig.17 |
Part No. 3 - upper false panels (F.P.) of the box: length of F.P. The width of the box is 440mm-32mm (two side panels are 16mm each), the width of the false panels is 80mm, we get a size of 408x80mm, the edge is also on the visible sides, that is, in two lengths.
| Fig.18 |
Part No. 4 - removable shelf of the box. In kitchen modules, for the convenience of placing kitchen utensils, removable shelves are used that can be adjusted in height. Let's calculate the size of our shelf: width 440-32-2, where the box dimensions are 440mm, the side panels are 32mm (16+16mm), and 2mm is the technological gap used for removable shelves. Shelf depth 560-14-6, where 560 is the depth dimension of the box, 14 mm distance from the back wall, because We don’t have it on an overhead, but in a groove (we’ll talk about this below), and a 6 mm indent from the front edge, we get a size of 404x540 mm. The edge on removable shelves is always placed around the perimeter.
| Fig.19 |
Part No. 5 – back wall of the box. The back walls, both on the lower and upper modules, are made of HDF (hardboard), 3mm thick. They can be overhead or made into a groove. On lower modules, it is not necessary to make the back wall into a groove (if the back wall is overlay, then you don’t have to put an edge on the back of the parts). It is necessary to make a groove on the upper boxes, otherwise when installing the kitchen box on the wall, the back wall will be visible from the end.
How do we make grooves? We retreat 10mm from the edge, make the groove itself 4mm wide and 8mm deep.
In our example, we make the back wall into a groove, calculate its size in height: for a 720 mm box, subtract 32 mm (we calculate the internal opening of the box), and make 7 mm entries into the groove at the top and bottom, that is, 720-32+7+7= 702 mm;
It also calculates the size of the rear wall in width 440-32+7+7=422 mm.
If the back wall is overhead, then the size is calculated as follows: height 720-2 = 718 mm, width 440-2 = 438 mm.
All parts of the remaining boxes are calculated according to the same principle.
For your convenience, on our website you can “Cutting chipboard”
| Table 1 |
The first size indicates the length (along the direction of the fibers of the material), the second the width of the part (across the direction of the fibers). Next we indicate the number of identical parts. Then there is an edge of 0.4 mm (designation in the table - O), we put O on those sides where we have an edge.
Since our back wall is made into a groove, we must indicate this in our table. In the note column, we write the word “groove” and indicate 10 (distance to the groove), 4 (groove width), 8 (groove depth).
| table 2 |
All details of the remaining boxes are calculated and entered into the table according to the same principle.
6. How to pick up a finished order:
The most convenient way is to order the assembly of kitchen boxes from us and their delivery. In this case, you receive assembled boxes, which you just need to unpack and put in place.
If you plan to pick up the order yourself, then it is more convenient to pick up the order unassembled. For ease of assembly, we recommend ordering from us an additive for holes for assembly fasteners. You can purchase the fasteners and accessories from us.
Recommendations for preparing a room for installing kitchen furniture.
Think about what kitchen appliances need to be connected to the power supply system and how you will connect it (through sockets or directly through sockets). What is the power of the equipment and, accordingly, what wires and sockets should be included in the power supply circuit. When placing sockets, it is necessary to consider their ease of use and ensure that they are inaccessible to water even during an accident.
Attention! Electrical sockets must not be located:
- behind built-in kitchen appliances (oven, dishwasher, washing machine); in the area where they are exposed to heat (near the stove) and moisture (sink, taps and pipe connections of water supply and sewerage systems).
Sockets (or a wire outlet of at least 1 meter) for connecting equipment to the electrical network can be located:
- behind the back wall of the adjacent cabinet (a hatch must be cut out in the back wall to provide convenient access to the outlet for quickly turning off the equipment).
— under the furniture behind the plinth (accessible opening 100-150 mm from the floor level, depending on the height of the kitchen plinth) (a washing machine, a dishwasher, a refrigerator, and a separate stove are on the floor, so their connection points can be located under adjacent cabinets).
For a water heater, dishwasher or washing machine located next to the sink, the electrical connection can be arranged on an open wall in the sink cabinet in a place inaccessible to water during a possible leak. The sink bowl and drain pipes should not block access to sockets.
For a free-standing hood with a direct connection to the electrical network, a wire outlet of at least 1 meter is required at a height of 1.8 m–2 m along the axis of the hood; for a built-in hood - the socket for connecting to the electrical network should be located 70 mm above the kitchen cabinets outside the area where the air duct duct passes to the ventilation shaft.
For a non-built-in refrigerator, the electrical connection can be arranged on the side wall (there should be enough space between the refrigerator and the wall to unplug the plug from the socket). Sockets should be located conveniently to quickly disconnect devices from the power supply.
Working sockets (for connecting kitchen electrical appliances)
Think about what household appliances you plan to use on the work surface, what their power is (and, accordingly, what the power of the outlets should be), where the appliances will be located and how many outlets should be on the wall.
The recommended height from the floor level to the center of the working sockets is 1100 mm from the floor level.
Ventilation of kitchen appliances
For kitchen appliances built into furniture, ventilation is required (usually described in the technical data sheet for the appliance).
Proper ventilation of the motor and cooler is very important for a refrigerator, so it cannot be tightly built into a niche.
Water supply
Consider what equipment requires water connection (faucet, drinking water filter, water heater, dishwasher and washing machine, etc.), and where it will be located.
Attention! Water supply pipe outlets cannot be placed behind the washing machine and dishwasher, since most models have a body behind which there is no space for water outlets and sewerage pipes.
Preparing the walls, placing tiles on the walls.
It is advisable to align the walls for placing kitchen furniture, and make the angle between the walls on which the furniture will be placed straight. If there is a deviation in the angle between the walls, then problems will arise when installing furniture.
Deviation of the floor from horizontal by more than 1 cm along the length of the kitchen leads to the formation of visible gaps between the base and the cabinets.
Ceramic tiles in the kitchen can be installed both before and after furniture installation.
Information for reference:
The main dimensions of kitchen furniture that must be taken into account when designing communications:
h1 - height of the plinth from the floor level 100 mm or 150 mm.
h2 - the height of the base cabinets, most often 720 mm.
h3 - tabletop height, most often 28 mm or 38 mm.
h4 - plinth height, from 12 to 40 mm.
h5 = h1+h2+h3 - height from the floor level to the top of the tabletop.
h6 - the distance from the countertop to the wall cabinet, most often from 500 to 600 mm (depending on the height of the housewife and whether the kitchen has a cabinet-column along which the height of the wall cabinet is equal).
h7 = h5+h6 - distance from floor level to the bottom of the wall cabinet.
h8 - height of wall cabinets, most often 720 mm. (can be 360 mm, 460 mm, 910 mm, 960 mm, etc.)
h9 = h5+h6+h8 - distance from the floor to the top of the kitchen, most often 2080 mm (base 100 mm, lower cabinet body 720 mm, countertop 40 mm, distance from the countertop to the wall cabinet 500 mm, base cabinet body 720 mm).
The recommendations provided in this article are nothing more than the opinions of furniture makers and may not comply with building and other codes.
Suspension height
The height of hanging cabinets will depend on the height of the person. Therefore, there are certain recommendations regarding these two values: height and suspension height.
- If a person’s height is 160 centimeters, then the cabinets are hung at a height of 175 centimeters.
- Height 170-175 centimeters – height 185 centimeters.
- Height 180-190 centimeters, hanging height 200 centimeters.
Consequently, taking these ratios into account, the required height is measured on the wall: the required distance is set aside from the floor, which is marked on the wall with a horizontal line. The horizon is drawn according to the building level.
Tabletop installation
Having a durable work surface is a must in the kitchen. It is easy to make it yourself. Tabletop dimensions:
- width 60 cm;
- thickness 3.2 cm;
- the length depends on the size of the cabinets.
It is installed on top of the edge of floor cabinets. Using self-tapping screws, secure the tabletop from below, ensuring that it does not move.
Then the sink is installed, cut a hole for it with a jigsaw, taking into account a small allowance. After installing the sink, all cracks must be thoroughly lubricated with silicone to ensure complete tightness.
List of materials for making a base cabinet
Cabinet body and front frame
- Side walls (plywood, chipboard) – 1.9 x 59.1 x 89.5 cm – 2 pcs.
- Bottom (plywood) – 1.9×58.1 x43.2 cm – 1 pc.
- Back wall (plywood, chipboard) – 0.6 x 43.8 x 89.5 cm – 1 pc.
- Shelf (plywood, chipboard) – 1.9×54.0×40.6 cm – 1 pc.
- Protective panel – 1.9 x 12.7 x 45.7 cm – 1 pc.
- Mounting plate – 1.9×3.8×41.9 cm – 1 pc.
- Cross members (plywood, chipboard) – 1.9×12.7×41.3 cm – 3 pcs.
- Guide holders (solid wood) – 1.9 x 8.3 x 58.1 cm – 2 pcs.
- Front cover for shelf (solid wood) – 1.9 x 1.9 x 40.6 cm – 1 pc.
- Stands – 1.9 x 3.8 x 78.4 cm – 2 pcs.
- Crossbars – 1.9×3.8×38.1 cm – 3 pcs.
- Door – 1.9×40.0×59.1 cm (overlaid on the opening by 9.5 mm on each side) – 1 pc.
Kitchen cabinet drawer
- Side walls (plywood, chipboard) – 1.3 x 7.6 x 59.7 cm – 2 pcs.
- Front wall – 1.9×7.6×34.3 cm – 1 pc.
- Back wall – 1.9×6.4×34.3 cm – 1 pc.
- Bottom (plywood) – 0.6×34.3×58.7 cm – 1 pc.
- Decorative facade – 1.9 x 12.1 x32.4 cm – 1 pc.
Kitchen work surface
- Table top (chipboard) – 1.9 x 59.3 x as needed – 1 pc.
- Sheet plastic laminate (approximate size) – 63.5 x as needed – 1 pc.
- Front edge trim – 1.9×3.8 x as needed – 1 pc.
- Side edge trims – 1.9 x 3.8 x as needed – 2 pcs.
- Backdrop (solid wood) – 1.9 x 12.7 x as needed – 1 pc.
Cabinet fittings and fittings
- Finishing nails 38 mm.
- Finishing nails 50 mm.
- Pins for adjustable shelf – pcs.
- Side guides for the drawer – 1 pair.
- Finishing nails 22 mm.
- Overhead loops – 1 pair.
- Handles for doors and drawers – 2 pcs.
- Wood screws with countersunk heads No. 6 50 mm.
- Wood screws with countersunk heads No. 6 32 mm.
Necessary accessories
The components you will need are the following:
- Adjustable canopies in the amount of 2 pcs. Although they can be replaced with ordinary awnings that are screwed on from the back. Such a kitchen cupboard will not be adjustable, but this will save on the purchase of accessories.
Adjustable awnings are not only practical, but also aesthetically pleasing
- Fastening strip. Its length should be equal to the width of the kitchen cabinet.
- Hinges for the facade. 2 pieces are enough for one door.
- Handle on the facade.
- Dish dryer set.
For your information! There are many different models of dish dryers on the market, ranging from pull-out ones with plastic trays to chrome plated ones with a metal backing.