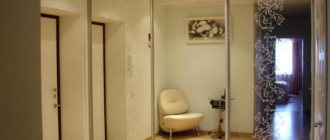
A mirror on the closet door greatly simplifies the process of selecting the optimal clothes; all the results of fittings can be seen immediately and the final decision can be made. Some types of modern furniture cabinets have a large mirror on the front door, but not all.
In addition, most old designs did not provide this element. It is not advisable to buy a new cabinet just because of the mirror; it is much more profitable to reconstruct it and glue it to the front door. Let's look at ways to solve the problem and give practical advice.
How to glue a mirror to a cabinet door
Methods for gluing a mirror
Modern building materials and technologies make it possible to glue mirrors in several ways, while ensuring reliable fixation and inadvertent falling of the mirror is completely eliminated. But under one condition – all recommendations are followed and generally accepted technology is not violated.
| Gluing method | Brief description of technology and performance characteristics |
| The mirror can be fixed with liquid nails, silicone, sealant, special glue and other chemical compounds. They have high adhesion rates and, after hardening, are characterized by high stability. Frozen compositions can be hard and plastic, transparent and colored. Hardening occurs due to the evaporation of moisture or as a result of complex chemical reactions, in some cases there is a risk of damage to the back surface of the mirror. The most reliable method of fixation is considered to be adhesive. |
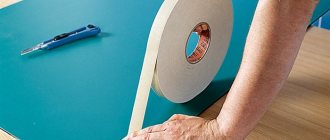
| Most often used as a temporary or additional mount for small mirrors. Glue is used at the same time as the tape. Double-sided tape has a limited use time, it is much shorter than the life of the cabinet. |
How to glue a mirror with double-sided tape
Method No. 2: Decorating wardrobe doors with corner patterns
If you don't want to cover the entire surface of the door, we recommend using vinyl decals with elegant angular patterns. Here you will get additional benefits:
— corner patterns are smaller, so the sticker will cost less;
— small elements are much easier and faster to apply;
— by decorating the corners, you will allow the mirror to serve you as a mirror.
When applying a small vinyl decal, we recommend removing the backing first. Place it on a flat surface with the pattern down, pick up one of the corners and carefully remove it at an acute angle. If any element sticks to the backing, return the area to its place, iron it again with a squeegee and try to remove further. The sticker should remain on the transparent film with the adhesive layer facing up.
When applying the sticker, take the upper corners of the mounting film and stick it, smoothing it from top to bottom along the marking lines. It’s good if you have a second person helping you to support the sticker from below so that it doesn’t stick prematurely.
Step-by-step instructions for gluing a mirror
For example, we will consider the classic option - gluing a mirror to a cabinet door; the mirror is large and requires high reliability of fixation.
First you need to drill holes in the doors for the hinges . This is not difficult to do, you just need to pay attention to the distance and symmetry.
Doors have holes drilled for hinges
Step 1. Place the mirror on the door and check the dimensions of the elements.
Checking dimensions
Practical advice. Protect the amalgam layer from damage; through scratches are visible on the front surface.
To prevent mechanical damage to the back of the mirror, place a soft cloth or other protective pad between the door plate and it. Amalgam is an alloy of mercury with metals; it is a heterogeneous or homogeneous system; it can be liquid or solid. To make cheap reflective coatings, tin or zinc, and less often silver, are most often dissolved in mercury.
If the doors have curves around the perimeter, then the edge of the mirror should not reach their turn. Otherwise, a gap will appear between the parts, dirt will accumulate in it over time, and the appearance of the furniture will be significantly damaged. It is best to check the position of glass and furniture boards with your fingers; this is the most accurate and sensitive tool; professional furniture makers very often perform final checks of various connections only with their hands. This makes working convenient, fast and very accurate.
Mirror edge
Step 2. Check the correct location of the hole according to the previously drawn sketch.
Sketch
If a door handle is planned on the mirror, it is recommended to drill the hole in special workshops. Doing such work yourself is not recommended for several reasons.
- Firstly, to drill glass you need to have a set of special tools and devices.
- Secondly, such work can only be done by experienced craftsmen; the first attempt is most often unsuccessful.
- Thirdly, the cost of professional services is much less than the price of a new mirror. And you will have to buy it to replace the damaged one.
Step 3. On the cabinet door, mark the location of the holes on the mirror. Such manipulations must be performed on the second door.
Marking
It is not recommended to remove the mirrors before final marking; let them remain in place. This will make it possible at any time to check the correctness of their placement and the correspondence of the marks made.
Step 4. Remove the mirror and drill through holes for the handles. Constantly check the position of the elements.
Drilling holes
At this point the preparatory operations are completed, you can proceed directly to gluing
Gluing the mirror
Prepare the work surface of the table; it should be smooth and clean.
Important. The dimensions of the work table are selected in such a way that the door fits completely in length.
The fact is that laminated boards are not very durable. If the edges hang down, then under the influence of its own weight the slab bends slightly. The mirror is made of glass, which is much stiffer than slabs and hardly bends at this distance. As a result, a gap will appear between the surfaces, which will have an extremely negative impact on the quality of gluing of the elements.
Do not allow a gap to form between the mirror and the door.
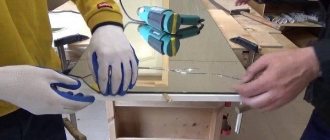
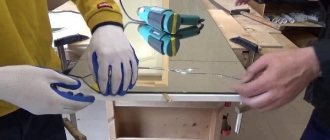
Step 1. Prepare the glue for use. The composition is sold in plastic tubes and is squeezed out using a special gun.
- Using a sharp knife, cut off the sealed end of the tube, but do not touch the threaded part. The glue is sealed completely hermetically, which increases the storage time. Before use, carefully look at the date of manufacture and expiration date; never buy low-quality or expired materials.
- Screw the cone onto the thread, cut the end at an angle of approximately 30°. Please note that the cone can be cut at different distances, thus adjusting the diameter. If you are gluing large surfaces, then increase the diameter of the cone, and for small elements, reduce the hole.
- Insert the prepared tube of glue with the screwed end into the gun, carefully adjust its rod to the glue piston and press until the glue appears.
After each application of glue, release the piston lock lever as quickly as possible and remove the load from it. If you don’t do this, quite a lot of material will come out after the gluing process is completed. It can stain the surface of a mirror or cabinet, and once it hardens, it is very difficult to remove the glue. In addition, unproductive losses increase; it is better to save the composition and use it for good.
What types of sealant guns are there?
Step 2. Very thoroughly degrease the surfaces of the elements; the adhesion strength largely depends on this. You can use special products or ordinary solvents. After degreasing, the surfaces must be completely dry. Work with the compounds carefully, some of them are quite poisonous.
Surface cleaner
Step 3. According to the attached instructions, apply glue to the surface of the door. Often these are longitudinal stripes at a distance of about 10 cm. But in practice, to increase the reliability of fixation, it is recommended to increase the dimensions; if possible, then it is necessary to fill the maximum area of the joined parts.
Applying glue
Step 4. Place a mirror on the door and carefully check its position. Be sure to pay attention to whether the holes in the glass and the furniture board match. Experienced craftsmen recommend inserting any objects of suitable diameter into them; they center the holes and completely eliminate accidental movements. If after movement the glue completely hardens, then the defect cannot be corrected. Modern high-quality compositions have very high adhesion; it is even theoretically impossible to tear glass off the surface of a furniture board; it will definitely crack. You must always remember this and work extremely carefully.
If a problem does occur, then you need to try to save the door; in any case, the mirror will have to be changed, even if it cracks. Remove it in pieces; if necessary, use thin metal devices or tools.
Gluing the mirror
Step 5. After gluing is completed, it is recommended to press the cabinet parts a little; use pieces of slabs or other large objects for this purpose. Allow time for the composition to dry or harden; specific parameters are indicated by the manufacturer on the surface of the tube.
Finished products with mirrors
First steps. Slab countertops
Sano published a blog entry in Furniture made from slabs, solids, and various differences, October 6, 2022, blog entry
The first attempts to make something from the brought slabs. Although there may be some attempts, the material costs money and the right to make mistakes is as much as there is money in your pocket. Train at your own expense, as they say.
Therefore, each board is carefully inspected and tried on; the proverb about measure seven times is in action.
The work itself is not tricky, creative, there are several boards and they need to be selected so that they look beautiful and there is no overspending. All sizing and trimming is done with the minimum possible removal of material, simply sawed off a little here, cut a little there with a chisel.
Glue selection
Currently, the construction industry offers consumers such a wide range of different sealants, liquid nails, adhesives, etc. that beginners cannot settle on the only correct solution due to lack of knowledge.
- Acrylic sealants. By and large, these are not adhesives; slight adhesion is designed to hold only the sealant itself, foam baguettes and other light, non-critical and small objects. Such materials should only be used by builders; they are not used by furniture makers due to their low quality. Do not buy them and never use them to glue a mirror. This applies to all types of acrylic compositions without exception.
Acrylic sealants - Glue "Moment Montazh". After hardening, it forms a hard seam; it is not recommended for gluing mirrors, although the adhesion parameters are quite acceptable. Contraindications are the hardness of the seam and the complete lack of plasticity. Wood and glass have different coefficients of thermal expansion; during temperature fluctuations, the mirror and cabinet door change their linear dimensions to varying degrees. Hard glue cannot extinguish them; large internal stresses appear between the planes. If adhesion with the surface of the door is less than with the surface of the mirror, then there are no big problems, the composition will shift slightly along the door. But if it’s the other way around, then there’s a high probability that the hard glue seam will tear off the amalgam and you’ll have to completely replace the mirror.
Glue “Moment Montage Superstrong” - SOUDAL 47A. According to the instructions, the special glue for mirrors has proven its good quality in practice. But it has one drawback - the surface must be rough and absorb moisture. This means that it can only be glued to doors made of natural wood that is not coated with varnishes or paints. There are very few such cabinets; most are made of laminated furniture board. The manufacturer does not recommend gluing to smooth, moisture-proof surfaces; you should not take risks and violate his advice.
SOUDAL 47A - SOUDAL Fix ALL. Glue from the same company, but with a different chemical composition. Excellent in all respects, it is often used in the furniture industry. Minor doubts are caused by insufficient plasticity indicators. This worries some furniture makers.
SOUDAL Fix ALL - SOUDAL MIR-O-BOND. In terms of all operational and technical characteristics, it is the best material for gluing mirrors. The only drawback is the rather high cost.
SOUDAL MIR-O-BOND
To glue mirrors, you don’t have to save on the price of glue and use low-quality compounds. In relation to the price of furniture, this is an insignificant increase in cost, but losses can be quite significant and exceed the price of the mirror.
Fastening process
Let's get started with the work:
- First of all, it is recommended to prepare the workplace. It is better to place the door on some kind of flooring, so as not to worry about the surface of the floor or table on which the work will be performed.
- On the door you need to draw the correct placement of the mirror using a template. If you glue it unevenly, it will ruin the appearance of the cabinet.
- Let's move on to degreasing the surface: to do this, wet a rag with a special solvent and apply it to both surfaces that will be bonded in the future. Moreover, when working with a mirror, you need to be extremely careful so as not to damage it. To do this, it is recommended to spread some kind of blanket and only place our workpiece on it. And then start treating the back of the glass with a degreasing agent.
- Insert a tube of silicone into the gun, cut off its edge and you can start applying the product to the surface. It is better to do this in a zigzag pattern in increments of no more than 10 cm.
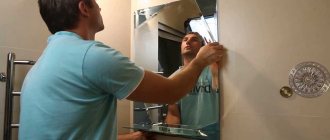
- As soon as silicone has been applied to the back side, the workpiece must be placed on the door according to the drawn marks. To do this, it is recommended to place the edge of the glass in the drawn corner and align the sheet along the side line. If the mirror blank is large, it is better to use the help of a friend.
- The glass is gently pressed against the surface of the door. Care must be taken to ensure that it does not move or warp. All lines along the mark must coincide with the edges of the workpiece.
- The final fixation on the door will occur in a day. During this time, you need to place heavy objects on the surface that will improve the adhesion of the materials. The main thing is that it is a uniform load.
After gluing the mirror, wait a few minutes to check that it is securely attached.
General Tips
- When working with glass, always wear gloves; it is advisable that they have rubber pads on the palms. The gloves reliably hold smooth hard surfaces, thereby minimizing the likelihood of them slipping with all the negative consequences.
Always wear gloves when working with glass - It is recommended to cut off the fingertips of gloves. As we mentioned above, professional furniture makers often check the quality of various connections and connections with their hands. And for this, the finger pads must be open.
- If you glue the mirror with double-sided tape, then you need to work very carefully. The fact is that once the glass is lowered onto the door, it is impossible to correct the position. If the glue allows you to move the planes for alignment before hardening, then the tape immediately fixes the elements and immobilizes them. You can place small strips of fiberboard between the door and the mirror and, after alignment, carefully pull them out, but this technology does not guarantee one hundred percent success.
Remember - the tape immediately fixes the elements and immobilizes them - On all vertical surfaces, make the strips of glue and tape vertical as well. Wood breathes, and relative humidity levels change in rooms. If the strips of glue or tape are horizontal, then pockets are formed between the mirror and the door, in which there is no natural air ventilation. As a result, humidity increases in these places, the slabs peel off, mold may appear, etc.
- If the cabinet door is white, then drawing lines on it is prohibited. To indicate the position of the mirror, use narrow masking tape; after gluing, it comes off easily and does not damage the surface of the furniture.
Masking tape
At first glance, it seems that anyone can glue a mirror; there is nothing complicated here. But only those who do not understand furniture production at all think so. And real professionals know many nuances, non-compliance with which causes elements to peel off.
Video - How to glue a mirror to chipboard
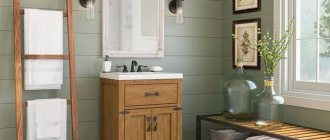
A mirror on the cabinet door significantly improves the appearance of the furniture and makes it more convenient to use. Currently, designers pay great attention to the functionality and environmental friendliness of interiors; they use unusual solutions for their design. It is recommended to place an original pallet bed near such a beautiful closet. You can read how to do it on the pages of our website.
Questions and answers
Those who are doing this kind of work for the first time may have various questions along the way. It is better to get answers to them in advance in order to more accurately determine the chosen method of mounting the mirror on the cabinet doors.
What tool can be used if there is a need to drill several holes in the mirror?
To do this, you will need special arrow-shaped drills; they are usually used to drill ceramic tiles. Cardboard washers with holes of the required diameter are glued on both sides at the drilling site. A piece of rubber is placed underneath. The drill speed should be minimal, and the surface should be degreased. During the drilling process, the mirror is watered. You need to pause while working every 10 seconds to prevent the glass from overheating.
Why do we need metal feet and stops?
These devices are used to fasten heavy mirrors mechanically. To ensure maximum tightness, rubber gaskets are additionally used. First, the legs are attached, then the mirror sheet is laid, after which the devices press the mirror to the surface.
Any craftsman with minimal skills in men's housework can handle gluing a mirror to a closet. It is important to choose the right fastening method and do all manipulations slowly, because glass requires careful and careful handling.
Method No. 5 Matting glass and mirrors using paste or aerosol
Drawings on the mirrors and glass of the wardrobe, applied using the matting method, look very noble and elegant. Matting is a technology that allows you to give a smooth glass surface roughness and opacity. To do this, a special chemical composition is applied.
Matting is usually done to order and is quite expensive. We want to tell you how to make this spectacular decor for a wardrobe with your own hands.
- Disposable (adhesive) or reusable stencil for wardrobes;
- Paste or aerosol for matting;
- Spatula for applying paste.