Furniture, being a traditional home furnishing, can be designer or mass-produced.
Furniture made by yourself, using unusual technologies or technological solutions, looks especially original, which makes it possible to completely transform your home.
The photos of a DIY folding chair presented in this article will help you implement a project to create universal furniture.
Such designs will help to equip a house or cottage, are suitable for use on a personal plot or in a garden, and will provide a comfortable pastime on a picnic or fishing.
Ease of use of folding furniture for home and garden
The technology for making a folding chair with your own hands is not complicated or requires the home craftsman to have special skills.
Chairs with the ability to change configurations are characterized by a whole range of operational advantages, these include the following:
- Compact when folded and easy to store;
- when using a chair, the load on the back is effectively distributed;
- stability and ease of use over a long period of time;
- ease of transportation, unfolding and folding of the finished structure;
- ease of manufacture, combined with inexpensive materials.
Compared to the store-bought version, a hand-made chair is distinguished by increased strength and reliability, and a long service life.
Buying an unreasonably expensive designer chair can be replaced by making beautiful and comfortable folding chairs for decorating your home and garage, cottage and garden.
Let's start with the basics: making a stool
Fig.1. Samples of stools
Assembling a simple wooden stool is no more difficult than putting together a box. In Figure 1, position 1 shows the classic design, pos. 2 – the same, but artistically decorated. Pos. 3-8 are lightweight stools in which the legs are attached to sockets in a durable thickened seat or to sockets created by side gussets. The greatest strength and comfort for a seated person is achieved by using an X-shaped tie system (item 8).
Fig.2. Construction of a simple stool
Fig.3. The drawer is the main structural element, along with the legs and prongs. For its fastening, tenon joints, bolts and ties can be used. Serves to support the seat and connect the legs. The figure shows options for the design of the drawers. Position 1 shows a stool with legs in sockets.
To prevent the legs of a lightweight stool from breaking off, they must be slightly moved outward from the axis of symmetry (by 7-12°) or bent in an arc and expanded upward. To trim the heels and heads of the legs to the desired angle, the workpieces are tightly clamped and cut in 1 pass. It is very difficult to achieve the required accuracy with further adjustment.
Stool designs that are easy to manufacture
Positions 9 and 10 of Figure 1 show heavy, material-intensive, but very durable stool-pedestals. They are easy to make, so we pay attention to these designs for beginners.
Fig.4. Drawings of heavy stools
The picture above shows different types of heavy stools. On the right, the cabinet parts cut into half the tree (the groove for cutting is not shown). The shape of the seats is centrally symmetrical, fastening is on dowels. If you use soft covers on round stools, they will be indistinguishable from more labor-intensive poufs.
Fig.5. Drawings of panel stools made of 4 parts
Panel (box-shaped) stools are lighter in weight, more comfortable, and require the use of only 4 parts. Assembling them is not difficult, all connections are on dowels, the structures can be extended in length until they turn into a bench. The height of the stools, as can be seen from the drawings, can be different, depending on the needs: for children, for household needs, for the room.
Fig.6. Scheme of a reinforced utility stool. To give an attractive appearance, the sidewalls can be veneered, as shown in position c. The design is ideal for a country house and garden: simple, lightweight, inexpensive to manufacture, looks good, durable and convenient.
Other stool models
Positions 13-14 of Figure 1 show stools similar in appearance to box stools, but mounted on 4 wide flat legs. Similar designs are made with plank or cobblestone sides; the legs are fastened with one leg, located so as not to interfere with the legs.
Positions 15-16 represent step stools with X-shaped legs. To give them the required strength, 2 mutually perpendicular drawers and 2 prongs (item 15) or 4 drawer-beams are used, forming the upper frame, as well as a tie between the crosses (item 16).
Fig.7. Folding stool: drawing, folding method
Positions 17-20 present creative designs of stools in different styles. We recommend the execution of such structures after mastering the initial carpentry skills. The designs of the stools are quite flexible, tolerant of changes in the configuration of parts, and therefore provide scope for the implementation of original creative ideas.
Do not use soft, easily rotting wood for country furniture; avoid poplar, aspen, willow, and alder. To make the seat, it is permissible to use pine or spruce, but the entire structure can also be made from hardwood: birch, oak, maple, beech.
Methods for joining wooden parts
Making a chair for a summer house with your own hands from wood will require the ability to assemble elements:
- insert into half a tree;
- tongue-and-groove connection;
- tongue-and-groove connection;
- connection with dowels.
Fig.8. Inset into half a tree, 1 – closed connection (cross), 2 – open (corner), 3 – blind (half-closed) for insertion on the purlin, 4 – connection along the edge (support for a stool-cabinet).
The connection shown in the figure above is the simplest, but it is quite reliable with additional fastening with dowels, bolts, screws, nails (2-3 per connection). Strengthens the structure and sizing. The procedure for working with a hand tool is as follows: a cut is made along the edges of the recess (leaving 0.5-1 mm to the required depth), all excess is cleaned out with a chisel. Making deeper cuts to knock out an array with one blow is considered a manufacturing defect.
Fig.9. Tongue-and-tongue joints and tenon-groove: 1 – open single tongue-and-groove, 2 – open double, 3 – closed, 4 – tongue-and-groove
The tongue-and-groove joints shown in positions 1-3 are strong enough with one attachment point, or even without it, only with gluing. It is more difficult to make a closed connection (it will require a long period of careful gouging out of the array drilled along the edges), but it will be more reliable and durable.
The tongue-and-groove connection is mechanically similar to the tongue-and-groove connection; they are often mistaken for one another. However, the shoulder of the spike goes around it on all sides, which is radically different from the design of the ridge. Such a connection is permanent, very strong and does not require additional fastenings other than glue.
Fig. 10. Connection on dowels: 1 – marking the end, 2 – drilling holes in the end, 3 – marking, drilling holes in the face and connecting
Dowels are round or octagonal tenons made of hardwood, which are made separately from the elements being connected. Dowels that are wedged during assembly are called dowels; such connections are strong, reliable, and inseparable.
Existing varieties and types of folding chairs
Before you start making a reliable and stable chair, you need to choose its configuration and model:
The presence or absence of a backrest. The back of the chair itself is made of wood or dense fabric; the presence of such a supporting element can increase the weight of the structure, but at the same time the comfort of using the chair improves.
Different leg configurations. The legs of a chair with a folding design can be straight, crossed or solid; to fix them, clamps of different costs and principles of use are used; they can be bought at a hardware store.
Materials for production. To create folding chairs, you can use a variety of materials and even combine them in one design; the home craftsman will need wood and metal, thick canvas and wicker base, and PVC pipes.
To make your own, combining comfort and accessibility, you can choose the option of a folding stool with cross-shaped legs made of wood.
Let's summarize - the cost of a homemade chair
If you use the minimum set of tools that we talked about initially, you will spend about 8 hours preparing all the parts and connecting them. But if you have a more or less advanced tool, the time can be reduced to 4 hours.
Cost of materials:
A board and beam for one chair will cost you about 500-800 rubles. Consumables (sandpaper and glue) - 100 rubles. Marilka or varnish - 150-300 rub.
Of course, it’s not realistic to buy wooden chairs in a store for that kind of money, but it’s up to everyone to decide what’s more important to you: your time or money.
How to make a simple folding chair with your own hands
Simply making a DIY folding table requires the use of specific tools and materials for your chosen project.
Compliance with all instructions and step-by-step implementation of the necessary construction measures in compliance with safety regulations will help you cope with the task.
Preparation of the drawing
A sketch and drawing are necessary for every craftsman for the preliminary design of a future product and the correct calculation of the necessary materials.
DIY furniture from pallets - how to make beautiful and stylish furniture with your own hands from scrap materials (115 photos)Door decoration ideas - how to create a modern design for interior and exterior doors (100 photos)
- New furniture design: photos of beautiful design and combination in the interior
On the finished drawing, it is recommended to immediately indicate the dimensions of the product, selected based on standard parameters and ergonomic models with a similar design.
Selection of materials
When creating even the simplest project of a folding chair, in the form of a stool made of wooden blocks, you need to take care of preparing the necessary materials:
- bars or processed boards for forming a seat;
- wooden legs from boards, cut to the required height;
- impregnation and varnish for processing wooden surfaces;
- nuts and wood screws for fixing folding elements;
- thin strips to strengthen the legs and give them stability.
In addition to the basic materials, the master will need power tools, such as a drill and screwdriver, a hacksaw for trimming wood, a file and sandpaper.
What tools will you need?
As I wrote above, the main idea here is to use a minimum number of carpentry tools, but only those that everyone can find in their carpentry. You will need:
- wood hacksaw;
- drill;
- wood drill with a diameter of 2.5 mm;
- wood drill with a diameter of 8 mm;
- a bit for self-tapping screws (you can also use a screwdriver);
- 100 grit sandpaper;
- carpenter's square;
- roulette;
- simple pencil.
Among the tools that can speed up the creation process, but not the fact that they are available in your carpentry, you can use:
- jigsaw;
- a circular saw;
- electric plane;
- Sander;
- carpentry clamps.
However, you can make a high-quality garden chair without them.
Assembly technology
A simple technology for making a folding wooden chair will help you connect all the elements and assemble ready-made folding furniture:
- holes must be drilled at the joints on the wooden parts marked in the drawings;
- using nuts and screws it is necessary to fasten all the elements, forming a finished chair with a folding structure;
- areas with damaged wood are processed with a file and sandpaper and polished.
Experienced advice on making a folding chair from craftsmen includes carrying out a mandatory procedure for treating the finished chair with impregnations and varnish to preserve all the properties of the wood.
Let's start manufacturing: marking features
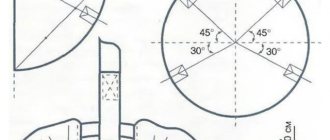
To make all the details look neat, you must first round the corners of the legs and supporting elements. To do this, we make markings. We move it away from the end to a distance equal to the width of the slats, and draw a line perpendicular to the slats, after which we divide it in half. Now we have the center of the circle, the radius of which is equal to its width (in our case it is 40 mm). It needs to be drawn, because it is on it that the corners need to be removed from the blanks. Perhaps in words it looks a little sloppy, but by looking at the photo example, you will immediately understand what I am talking about.
This is what the marks on the legs and support bars should look like (40 × 20 × 320 mm)
Here it is worth paying attention to the fact that if on the legs (they are long) such markings are made only on the top, then on the support rails both sides are processed in this way.
The marks I made are not just for uniform rounding of parts. It is in the center of the circle that a hole for the bolt will be drilled, from which a movable hinge will be obtained.
Connecting the support slats to the legs of a folding chair
The first step was to make a hole in the support bar and leg. After that I removed them using a bolt. This was a temporary measure, so I didn't go into detail about the bolts - that can be done later. Due to the fact that I did all the work by trial and error, without yet knowing what the result would be, this was necessary.
The support rail was screwed to the leg
We combine the legs crosswise
Having figured out what to do next, I drilled the second support rail. The second leg was also punctured. Once I was sure I was on the right track, I decided to fully assemble one of the double chair legs with a second support bar that I pulled up with a clamp. I was pleased with the result. There remained the problem of the length between the crossed legs, which would ensure the stability of the chair when open. But this problem was resolved quickly. Crossing the legs of the stool, I placed it on the ground, positioning it so that the distance above and below was the same. It became clear that the required length before joining should be 215 mm. Finally, when the folding chair was assembled, I realized that I was right.
We measure the required 215 mm and make a hole in the center
All that remains is to connect the legs in the drilled places with a bolt. The loop is good. At this point I haven't pressed the bolts flush with the wood yet. Despite the fact that up to this point everything went as it should, you should always be prepared for the fact that all connections will have to be disassembled, which means there is no need to rush with such things.
The legs are fixed with a bolt, which should not fit into the tree yet
Now I could begin a job that I hadn't fully thought about: connecting the two legs to create a piece of furniture.


