general information
In different countries of the world, with the development of weaving craft, people tried to make good use of every piece and scrap of fabric, the production of which required a lot of effort and labor. This is how patchwork sewing appeared.
Products made from sewn scraps of various materials were discovered during excavations in Egypt. Scientists dated the ornament made from pieces of leather found there to 980 BC.
Paintings made from fabric, scraps of fabric - birds and flowers
Paintings made from fabric, scraps of fabric - landscape
Paintings made from fabric, scraps of fabric - landscape
In England, products sewn from scraps appeared in 1712. In America in 1620, settlers from other countries brought quilts, which were sewn from scraps of old clothing. This marked the beginning of the production of scrap quilts. This technique is called quilt, which literally translates as quilting.
Later, applique from pieces of fabric appeared. The British began to use their crazy technique, which made it possible to create works from expensive fabrics and materials, using embroidery to connect parts.
The products were decorated with fringe, tassels, lace and ribbons. However, English technology did not take root in the world for long. In many countries around the world, craftsmen preferred traditional patchwork methods.
In the 70s last century in the USA there is a revival of interest in this handmade product. Whole hobby clubs began to appear, where quilting was practiced. Kits designed for this type of needlework with all the necessary attributes have appeared in stores. Some couturiers used the patchwork technique in their fashionable clothing designs.
Paintings made from fabric, scraps of fabric in the Russian style
Paintings made from fabric, scraps of fabric in the Russian style
Paintings made from fabric, scraps of fabric in the Russian style
In Russia back in the 16th century. in the collection of rules, advice and instructions called “Domostroy”, detailed instructions were given on how to cut and sew dresses from scraps, how to select scraps for cutting, how to sort and save them.
Patchwork reached its peak of development and application in Russia towards the end of the 19th century, when chintz began to be imported into the country from abroad. Until this time, this technique was used mainly for sewing quilts from old, worn items and was only of a practical nature.
At the beginning of the 20th century. Three-dimensional patchwork sewing techniques appeared in Rus'. At the same time, this type of applied creativity became one of those that was supported at the state level, like decorative and applied arts.
In the 90s interest in him increased with renewed vigor. Patchwork is no longer just a passion and a hobby. It becomes an independent genre in applied art. In Russia, since 1997, various festivals and exhibitions of works by real patchwork craftsmen have been regularly held.
Materials and tools for work
DIY fabric paintings can become a worthy decoration for any interior. Performing them is not as difficult as it might seem at first glance. But you will have to put in effort and work. In addition, you will need desire, patience, imagination, as well as materials and tools that are found in every home.
To perform work using different techniques, different tools and materials may be required - the main ones are:
- fabrics; they can be artificial and natural: linen, wool, viscose and synthetic; in addition, they can be plain painted or with printed patterns of various types: floral, geometric, abstract or thematic;
- sewing machine or needles and threads of different colors;
- silicone mat (mat) for needlework;
- rulers of different lengths and configurations, protractor, compass;
- checkered or graph paper (with their help you can make markings and build diagrams of products);
- scissors and fabric cutters;
- pins for preliminary fastening of parts;
- iron (with its help the seams of the connected parts of the work are smoothed);
- materials for finishing and final design of the work; these can be ribbons and braid, fringe and lace, beads and buttons.
Paintings made from fabric, scraps of fabric (patchwork) - materials and tools.
In addition, for the work, depending on the technique and ideas of the master, you may need:
- picture frames;
- Styrofoam;
- plywood or cardboard;
- paper;
- PVA glue);
- stapler;
- small nails.
It should be said that today in art stores you can purchase ready-made kits for creating paintings using the patchwork technique.
How to care for fabric paintings
Like any other product, a fabric picture requires care. It is important to take into account that the materials from which the panel is made must be washed and ironed before starting work. It is better to place the finished work in a frame with glass - this way the product will not get dirty or collect dust. If the artistic design hangs on a wall without glass, you need to periodically brush off the dust with a soft brush.
Modern directions
You can make your own fabric paintings using various techniques.
Patchwork, otherwise known as patchwork, has been known to many for a long time. However, along with the old styles and techniques of this type of needlework and original art, new modern trends have appeared that are very interesting and accessible for independent creativity.
The names of these directions are most often associated with methods of connecting flaps of fabric, applying it to the base or the shape of the pieces of material themselves.
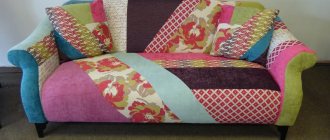
Crazy
Despite its centuries-old history, this style is still popular today. It is characterized by: freedom in choosing colors and applying pieces of fabric and seams, as well as a complete absence of geometric canons.
Crazy patchwork
Crazy patchwork is mainly used to make blankets, pillows and rugs. The style is very simple to perform, even a novice master can handle it.
English
Another one of the most accessible styles to perform is English. It uses scraps of fabric of geometric shapes. Previously, these were only squares, which were placed strictly in a checkerboard pattern when stitching.
English patchwork
Today, triangles and diamonds are used in this direction, as well as various colors of these figures.
Quilt
This type of patchwork, as in the old days, involves a "quilt" style, where the top layer of the product is sewn together from pieces of fabric of different colors, shapes and sizes.
Quilt
The 2nd thick layer and the 3rd lining layer are subsequently quilted together with the top decorative layer.
Japanese
The Japanese patchwork style also has a centuries-old history. The technique is considered one of the most difficult and requires perseverance and a certain skill in work.
The execution requires a selection of fabrics and shapes, from which, by stitching, various figures of animals, people, plants and buildings are obtained. Today there are several trends in Japanese patchwork.
Japanese patchwork for beginners - belts
Japanese patchwork for beginners - yosegi
Japanese patchwork for beginners - applications
Japanese patchwork for beginners - sashiko
Japanese patchwork for beginners - yo-yo
"Kinusaiga" (patchwork without a needle)
Among them:
- "Belts";
- "Yosegi";
- "Sashiko";
- "Yo-yo";
- applications;
- “Kinusaiga” (patchwork without a needle).
A distinctive feature of Japanese patchwork is the use of only manual labor without the use of a sewing machine. Therefore, patchwork works from the Land of the Rising Sun always have a fairly high cost.
"Boro"
This technique is a variation of the Japanese style. All work is done manually. The scraps of fabric can be of different textures and colors.
Patchwork Borough
They are not simply stitched together at the edges. They are sewn on top of each other with overlapping stitches over the flaps. The result is an unusual and semi-volumetric picture.
"Watercolor"
This style of patchwork is very popular among needlewomen, and is considered one of the simplest and most beautiful.
Patchwork watercolor
In the process of stitching together scraps of different shades, while following the color combination scheme, beautiful paintings with a gradient are obtained.
"Bargello"
A very interesting direction, where when sewing scraps of different colors in a certain direction, you get a beautiful transition from color to color with the illusion of movement.
Patchwork Bargello
This is not a very simple technique, but the result is very beautiful.
"Pizza"
This is a fairly simple version of the patchwork technique, which does not require a pattern or strict geometry. Here, on a piece of fabric, scraps of the desired color are laid out in a chaotic manner along the contour of the selected pattern.
Patchwork pizza
Organza or tulle is applied on top. The work is ironed and secured with pins, after which it is attached by machine.
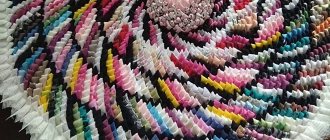
"Lyapochika"
This is an old trend in patchwork, the name of which translates as “piece of rag.” This technique produces excellent three-dimensional paintings.
Patchwork frog
In this case, scraps of fur, pieces of yarn or fabric are used to create them. They are sewn on top of some fabric base.
Traditional
In this technique, the remaining pieces of fabric are sewn in a circle to the central piece of fabric of the selected figure onto the base according to the selected pattern. There are several types in this direction.
Traditional patchwork - Russian square
Traditional patchwork - sunflower
Traditional patchwork - multi-colored spiral
Traditional patchwork - pineapple
Traditional patchwork - star
Among them:
- "Russian Square";
- "Sunflower";
- "Multi-colored spiral";
- "A pineapple";
- "Star".
All subtypes use scraps of fabric of different geometric shapes, which are sewn in a certain order.
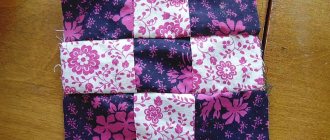
"Chess"
This is a popular and not very difficult direction in patchwork sewing. Here, squares are used for stitching in the required quantity and color, which are determined in advance. They are stitched alternately into strips, which are subsequently combined into one fabric.
Patchwork checkerboard
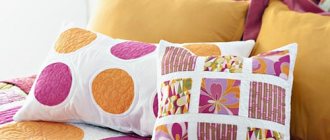
When working, it is important to clearly maintain the joints of each figure. This technique is used to create blankets, bedspreads, decorative pillows and pillowcases, and also as frames for pictures from scraps.
"Corner"
This direction of patchwork is reminiscent of Japanese origami paper art. In this case, squares of the same size are cut out of fabric of different colors. Each of them is folded several times into triangles.
The finished figures are placed one on top of the other, pre-fastened with pins, and then stitched. As a result, you can get a beautiful three-dimensional patterned panel, napkin or rug.
Patchwork corner
The easiest to follow, well-known and popular directions:
- squares;
- triangles;
- stripes;
- honeycomb
Their names indicate the shape of the flaps used in the work. Today, in addition to the method of sewing together pieces of fabric, patchwork appliqué is used.
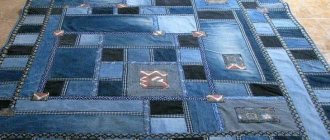
Quilt - patchwork sewing
Another type of needlework that is used to create original paintings that fill the interior with warmth and homeliness. The essence of the procedure is to sew together three or more layers of fabric (using a sewing machine or by hand), resulting in a three-dimensional relief pattern on the surface. The picture gives the impression of a 3D effect.
“Quilting” is a borrowed foreign word; this handicraft is simply called patchwork. This technique appeared a long time ago; it could be seen in the interiors of village houses of the last century. Our grandmothers, collecting all kinds of scraps of fabric, sewed multi-colored blankets, bedspreads, and pillows.
An original painting made from scraps of fabric will decorate any interior.
Similar products can still be found today. They are characteristic of country and Provence style interiors, identified with rural life. All these gizmos currently play more of a decorative role than necessities.
Somewhat later, using patchwork, craftsmen began to produce paintings, and some of them are made so skillfully that they amaze the imagination. A quilt can be a kind of abstraction or convey a specific plot.
A fabulous panel of rags in bright colors
How do layers differ from each other in quilting?
- The first layer is the lining, for which, as a rule, cotton scraps of fabric are used. To create the second layer, batting or padding polyester is used. It is this layer that is necessary to add volume. The third layer (top) is decorative. It is combined with applique, collage, embroidery.
The layers must be quilted together with a seam.
Homemade painting with New Year's mood made from scraps
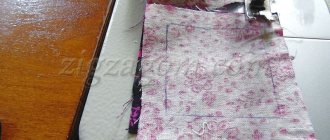
Patchwork pattern made of denim using the “Pizza” technique
Pictures made from denim are very interesting. Anyone can easily create unusual products with their own hands. The “Pizza” technique is quite simple to perform and is suitable for beginners.
Picture made of denim using the pizza technique
To work you will need:
- a piece of fabric 30x30 cm (cotton, linen, matting) as a base;
- interlining or web according to the size of the base;
- organza or tulle according to the size of the base;
- a picture with any image (it can be flowers, animals, children - if desired);
- small scraps of denim in different colors;
- small scraps of fabric in bright colors;
- pins;
- scissors;
- sewing machine;
- picture frame or passe-partout.
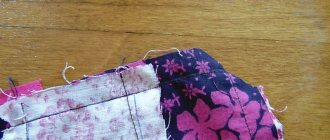
A picture made of denim using the pizza technique
. Work procedure:
- Place interlining on the base fabric, and on top of it - a picture with an image.
- Place pieces of denim fabric in a chaotic order around the image.
- Place bright multi-colored scraps in some places on top of the denim layer.
- Place a piece of organza or tulle on top of the resulting picture.
- Iron with a hot iron.
- Secure the work with pins.
- Sew the picture on a machine diagonally, from corner to corner, in 1 cm increments.
- Trim all sides with scissors.
- Place the picture in a frame or mat.
A painting made from denim using the pizza technique.
A painting made from denim scraps is ready.
"Girl spring"
This wonderful arrangement is made of fabric flowers. You can purchase them at a craft store or make them yourself using scraps of fabric, needles and threads. Video tutorials will help you in making these elements.
Having mastered the technique of making flowers from fabric and having prepared more of them, you can begin to work. To complete it you will need:
- Photo frame 45 by 55 cm;
- Thick cardboard;
- Acrylic paints;
- Roller, brushes;
- Female figure template;
- Scissors;
- Hot glue;
- Prepared flowers and decorative elements (beads, seed beads, ribbons).
Cut a sheet of cardboard to the appropriate size. Paint it with a roller with white acrylic paint.
If you do not have artistic talent, use any of the suggested templates to draw a female silhouette.
Using a simple pencil, carefully transfer the drawing onto the cardboard. Draw black acrylic paint along the outline and paint it completely.
Decorate the figurine with decorative elements by gluing them to the picture with hot glue. Adjust the arrangement of colors yourself.
The hairstyle richly strewn with flowers and the trim of the dress look quite beautiful. Add a few elements to the background of the picture, this will bring the plot to life.
Frame your creation and decorate your favorite corner of the apartment.
Painting in patchwork style “Sunny Summer”
To work you will need:
- image of a summer landscape (from the Internet, book or postcard);
- white paper for a sketch of a painting;
- white cotton fabric for the base;
- interlining (web);
- fabrics with floral and other bright plant elements;
- pencil;
- scissors;
- iron;
- frame or passe-partout.
Painting in patchwork style “Sunny Summer”
Painting in patchwork style “Sunny Summer”
Work procedure:
- On a sheet of paper, draw a sketch of the future painting, using the selected ready-made images for clarity.
- Cut out green fragments from colored pieces of fabric for hills, grass and tree crowns, blue ones for the sky, flowers for flower meadows.
- Place prepared shreds on a white base: sky, mountains, trees, bushes, flowers in a clearing. When choosing a location for placing fragments, you should take into account the play of color, the scale of distant objects and the law of perspective.
- Secure the parts with adhesive web, placing it under each of them and ironing it with an iron.
- Sew everything onto the base, stitching each detail with a zigzag stitch on the machine.
- Trim the edges of the painting to the desired size.
- Place the picture in a frame or mat.
Quilting
If the previous work is supplemented with several more stages, you will get a picture in the quilt style. To do this, just add 2 layers under the decorative front image.
| № layer | Layer composition |
| 1 | The resulting decorative painting is made in the patchwork style. |
| 2 | Sintepon, batting or holofiber for volume. |
| 3 | It will act as the reverse side of the picture. |
All 3 layers are connected to each other with pins or basting, and then machine stitched along the contours of the shapes. The result is a three-dimensional and very expressive picture.
Japanese version
DIY fabric paintings in the Japanese style are very diverse in their execution techniques. “Kinusaiga” (patchwork without a needle) has become very popular all over the world. It looks like patchwork, but the pieces of fabric are not sewn together.
In ancient Japan, they treated everything with care and did not throw away old clothes. Worn kimonos were torn into shreds and created into paintings. Previously, only silk was used. Currently, various fabrics and leather are used in “kinusaiga”.
To work you will need:
- foam sheet;
- craft mat;
- selected pattern or stencil;
- pencil;
- stationery knife;
- pieces of fabric;
- scissors;
- stack (you can take a regular nail file).
Operating procedure:
- Transfer the design or stencil onto a sheet of foam plastic.
- Cut through all the details of the image on the foam with a knife to a depth of no more than 5 mm.
- From pieces of fabric, cut out details for the image, taking into account allowances (up to 5 mm).
- Place each part in a specific place, focusing on the prepared image, and filling the left allowances with the stack into the slots on the surface of the foam (you can pre-treat the slots with a glue stick for a more durable fixation).
- If you make slits around the perimeter of the outline of the picture, you can make a fabric frame. You will get a frame.
DIY fabric paintings using this technique are very popular. They can be of any complexity and number of parts. The volume and beauty of the work performed depends on the density and texture of the fabric.
Some tips and recommendations for working with the Kinusaiga technique:
- To add more volume, filler should be placed under thin fabrics. For this purpose, you can use cotton pads or padding polyester.
- Instead of polystyrene foam, you can use foam insulation or foam rubber glued to plywood or board as the basis for the picture.
- Volume should be given only to figures located in the foreground of the picture. In this case, it will acquire a 3D effect.
- The picture, the places of slots and joints in the image can be decorated with cords, ribbons and other elements.
- Natural ingredients can be used as an adhesive for coating slits in the base: egg white, starch paste or gelatin dissolved in water.
- To give the picture three-dimensionality, you should use additional elements that are superimposed and attached to the finished image: leaves and twigs for plants, folds of ribbons for clothes, buds for flowers, and others (depending on the subject).
In order for the work made by yourself to look harmonious in the interior of the house and not stand out from the general ensemble, you should correctly select the colors of the fabric used in the work, choose the shape of the painting and choose its rightful place.
It should be said that paintings made from fabric can be a worthy gift for friends and family, as they are not only interesting and beautiful. They are unique.
Homemade interior decor items are always a worthy decoration for your home. Paintings made from fabric using various traditional and modern techniques look very harmonious. Everyone can choose the option that suits them and start creating, turning on their imagination and desire to create.
Choosing a theme to create a panel
Before you start work, you should understand that the panel must be designed in a certain style. It should resonate with the decor of the room in which it will be located. Otherwise, the product may stand out from the general theme and amaze everyone present with its tastelessness.
Many ideas and stylistic solutions can be gleaned from various articles, which are accompanied by a large number of photos. All that remains is to choose the idea that you like best and that fits the existing interior.
Classic, country, Provence
The ideal theme for panels for rooms decorated in classic, country, and Provence styles are various still lifes or floral motifs. Compositions in the form of landscapes also look good. Try to avoid pretentiousness; it is better to give the appearance of the product maximum simplicity and cheerfulness. The composition should bring an atmosphere of relaxation to the interior and evoke only positive emotions.
Abstraction is also appropriate in the interior of the appropriate style. It can be noted that it is a universal option, as it suits, in principle, any style.
Modern
Modernism is distinguished by the presence of strict geometric lines. That is why panels in the Art Nouveau style should contain compositions with different clear patterns. The design of the product should also be moderate. The frames used to frame the panels are quite simple, almost invisible.
Scandinavian style
One of the rare themes in the Slavic expanses is the Scandinavian style. It implies brightness and practicality, and is distinguished by the presence of appropriate ornaments and motifs. Even a novice craftsman can create such a fabric panel for the wall using various available materials, such as beads, shells, and ribbons.
Also on the fabric panel there can be images of deer, Christmas trees, letters, lines, cages and other things.
Loft style
Design solutions in the loft style are very popular in the design of modern interiors. There are also certain requirements here. The subject matter is quite varied, but the panel should be done only in two or three colors.
Despite the strict and laconic lines, the loft-style panel attracts the eye and looks perfect in the interior.