Multifunctional furniture is necessary not only in small apartments. It is always in demand in dachas and garden plots. And one of the most popular designs is a garden bench, which in a couple of seconds turns into a comfortable table with benches. If you are interested in how to make a transforming bench with your own hands, you will find drawings of similar products and instructions for their manufacture in this article. You can choose a “folding bed” with a metal frame or a wooden one – whichever is closer and more accessible to you.
It's hard to believe, but this elegant bench can turn into a dining set for 6 people Source lavka.sdelaimebel.com
Transformable bench - design description, operating principle
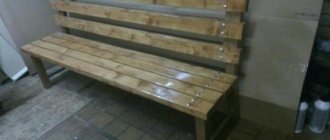
This garden bench is a fairly simple design that can easily be transformed into a table with two comfortable benches. And when folded, it is an ordinary bench with a back and handrails. It will not take up much space on the territory of the personal plot, and at the same time it will be able to fully perform all its functions.
Transformable bench assembled for a country house
Functions and convenience of the bench
This is a compact and practical bench that can easily be converted into a fairly spacious table and two comfortable benches. Thanks to its high degree of mobility, it can be installed anywhere in the garden.
The only drawback of such a bench is its rather large weight, since a lot of wooden boards will be needed to make such a complex structure, but it will be quite stable, reliable and durable if everything is done correctly and exactly according to the development instructions in accordance with all technological processes.
Bench - disassembled transformer for a picnic
Table with benches: design options
Basically, there are two ways to make a table with benches. The first method is to make a monolithic product in which the table and benches are a single whole.
The second option involves making benches as separate items. Then you can use them yourself. But no one forbids combining these approaches.
Stages of manufacturing popular models
The most popular model designed for summer holidays is a dining table with two benches on the sides. Such a product is easily transformed and practically does not break due to the simplicity of the design. Even an inexperienced master can handle the job. However, there are other interesting patterns. A nice transformable coffee table will look good at the dacha; it is made with your own hands according to the same principle as a dining table, but the shape and dimensions will be slightly different. Such original furniture will become a real decoration of your personal plot.
The nuances of making bench presses with your own hands from wood and pipes
Dining table with benches
The main advantages of such a table-bench are light weight, compactness and ease of movement if necessary. Do-it-yourself drawings do not contain complex elements; standard sizes are used. To make a transforming table with your own hands, you will need a hacksaw, a grinder, and a screwdriver. It is also worth preparing an electric drill and a building level. Step-by-step instructions for making a bench with a table:
- Sand the boards.
- Make a seat and back.
- Connect the legs to each other with iron plates.
- Make the second bench in the same way.
- Cut out the inner guide.
- Connect the seat to the base.
When the bench-table is ready, you can connect the two benches together. In this case, you will get a spacious seat, which consists of four boards of the same height. The tabletop is installed on supports and pressed as tightly as possible against the legs. A hole with a diameter of 7 mm must be made in the vertical bar. The parts are connected with furniture bolts with a caliber of 80 mm. Iron washers are fixed between the brackets. The heads of the bolts should never be allowed to come out; they should be well hidden in the thickness of the wood. The threaded connection must be movable, since its position determines the angle at which the tabletop is tilted.
To check whether the table with benches is installed correctly, the oven can be moved slightly.
For the manufacture of armrests, timber of a standard section will be used. The blanks are glued together according to the pattern and attached to the protruding parts of the legs of the garden bench. To connect the transforming bench and the table with the back, special levers are used. They are secured on both sides of the seat, after which the reliability of the fastening is checked. The levers are attached to the legs and to the back of the product with furniture bolts, with factory markings.
Finished furniture is first varnished and then painted. Additionally, you can apply a moisture-repellent chemical composition, this will extend the life of the product. The color of the folding transforming bench can be any, depending on the design of the internal field. The most fashionable shades are metallic, light brown, pearl gray. You should not skimp on finishing chemicals; they must be of high quality.
Sand the boards
Make a seat and back
Connect the parts together using metal plates
Make a second store by analogy
Connect the legs with self-tapping screws and metal corners
Make sure the benches are the same height
Also read:
Assemble the tabletop
Include it in the database
Secure the structure with furniture screws and check for correct installation. The product must open and close freely
Coffee table
In this model, the tabletop can be round or oval, depending on the wishes of the master. How to make a transformer bank of this type step by step:
- Cut out eight identical pieces for the legs.
- Assemble two bench frames from cut wood.
- Reinforce the frame with timber.
- Secure your back.
- Screw the legs to the seat.
The next stage of assembly is connecting the parts into a monolithic prefabricated structure. It is better to do this together, since the constituent elements are quite impressive in size.
How to make a universal bench for the garden and dacha with your own hands
Such a bench can be placed not only in a summer cottage, but it will also look beautiful in an apartment (house), for example, in a kitchen decorated in Provencal (country) style. In this case, finished furniture is painted, but it is advisable to do this outdoors. The color or tone of the transformer should match the wallpaper and other accessories that are in the room. In order for the countertop to retain its elegant appearance for a long time, it must be periodically polished without the use of aggressive agents.
From two benches
Making a transforming bench-table with your own hands is a win-win option for a family with children. This design can be used for various outdoor games. Algorithm of actions step by step:
- Cut boards and lumber into pieces of the required shapes and sizes according to the drawing.
- Make blanks for legs with supports.
- Cut inside the crossbar onto which the tabletop will be attached.
- Clean all wood surfaces thoroughly.
The inner side of the bank is processed last. When folded, it becomes a large seat that can easily accommodate three adults or four children. The back and armrests of the product are made of narrow timber of standard section. The gaps between the bars should not be large, otherwise sitting will not be very comfortable. This product can be placed on the playground. With proper care, a garden sofa will serve its owners for more than ten years. The main thing is to choose high-quality wood to make a table in the form of a transforming bench. And, of course, the product diagram should be simple and understandable.
What material can it be made from?
In order to make a folding table-bench with your own hands, you need to choose the right materials. The most commonly used materials are wood and metal.
To make such a table yourself, you will need wood and metal. The latter can be made in the form of straight pipes or artistic forging. The first option is more stable and much easier to manufacture, and it is also convenient to use. But over time, the pipes begin to bend and deteriorate, which requires their replacement.
For such furniture you can use forged legs. Wrought iron is more attractive in appearance, but an excessive amount of metal makes the structure very heavy and creates some inconvenience (it is more difficult to repaint and repair). In addition, to create artistic forging you need special skills; if you don’t have these, you will have to turn to a specialist, and this is quite expensive.
Wrought iron looks very beautiful, but it requires some skill to create it. The seat and back should be made of wood for greater comfort. It is recommended to choose spruce, since it does not deteriorate under the influence of temperature changes and is not susceptible to destruction by fungi.
To make a transforming table, it is recommended to choose spruce material. If spruce is not available, the following varieties can be used:
- Maple. Durable and reliable material that can withstand aggressive environments.
- Birch. It has an attractive shade and unique patterns. Easy to process, but requires frequent coating with a special solution to extend its service life.
- Ash. Does not deteriorate when exposed to moisture, but is susceptible to woodworms.
You can also use maple, birch and ash. In addition to wood, you will need timber and a special processing agent.
Preparation for construction of the structure: project drawings with dimensions
Before you start building a transforming bench, you need to prepare all the materials and tools, as well as make a good drawing or find it on the Internet.
We offer you a standard drawing, a diagram of a transforming bench with the dimensions indicated on it. The most difficult step is creating a mobile mechanism, so initially it is necessary to prepare all the blanks, which will subsequently be assembled into a single transforming structure.
Drawing of a set of wooden elements for making a transformer bench
Typical drawing of a transforming can
Video description
In the following video, the master shows in great detail the process of making folding garden furniture on a metal frame from bent elements, indicating all the dimensions and methods of connection:
If you calculate the cost of such a bench, made by yourself, and compare it with the price of similar products sold on construction markets and through Internet, then it will be almost three times lower. The benefits are tangible, and you can choose the most suitable design for yourself, rather than buying what is on sale.
Selection of material for manufacturing, advice on selection
To make a transforming bench, you will need to purchase boards and wood with planed edges. Larch, birch, pine, beech, ash or oak are best suited for this design (if possible, as this is very expensive).
The board must be well sanded, of high quality and meet all compliance standards. If you buy a board at a sawmill, be sure to ask for a certificate of quality for their products, because under the guise of an oak edged board they can sell you a completely different product, and if you are not very knowledgeable about wood, it is best to hire a carpenter who understands the types of boards and their quality.
Working with a drawing
To choose a suitable drawing, you need to accurately determine the design of the product. You should also take into account the maximum load on the transforming bench (depending on who will use it - children and adults, or just kids). It is not difficult to read the diagram; in most cases, the drawings are of the same type and represent a garden bench in two projections: side and front views. Dimensions are plotted in centimeters on lines delimited by arrows. The vertical line indicates the height, the horizontal line indicates the length. To make a transforming bench with your own hands with details according to a diagram or drawing, you need to clearly imagine what the finished product will look like. All components of the product and dimensions are applied to the drawing (not only the main ones, as in the standard diagram). The locations of additional decorative elements (if any) are also indicated.
To create a drawing of a transforming bench, you can use special computer programs. If you need a product of non-standard shape or dimensions, it is better to draw up a diagram manually, taking into account all the necessary nuances.
Connect the legs using self-tapping screws and metal corners
Material calculation and tools
To assemble the transformer bench we will need:
- Two-section beam 90x45x1445 mm;
- Five bars with a section of 90x32x1480 mm;
- Two beams with a section of 90x45x1445 mm.
To work we will need the following tools:
- Hacksaw, grinder or sharpened for wood;
- A universal screwdriver or screwdrivers of the required diameter;
- Electric drill;
- Construction level, square, hacksaw, chisel;
- Sandpaper (320) or sander;
- Self-tapping screws, bolts, nuts and other fasteners;
- Electric or gasoline saw;
- Paint or varnish, brush or roller.
Fasteners for making benches - transformer
Design options
Despite the fact that almost all models of transformers use the same scheme, almost all home-made workers try to design a folding bench in their own way, to make its design more individual and attractive.
Varieties and interesting design options
To choose a suitable transforming bench, you need to take into account the number of people who will sit on it. The number of seats depends on the type of construction:
- Bench-table with benches. This variety is the most common. With the help of simple manipulations, the model turns from one bench into two with a table. Advantages: accommodates up to 6 people, does not clutter up the space. The disadvantage of the bench is that when folded it does not look very attractive.
- Bank developer. When disassembled it provides seating for up to 6 people, when folded - for two; supplemented by a table. Advantages: ease of use, functionality. The disadvantage of the power bank is its more modest capabilities compared to the previous version.
- Flower bank Similar to a construction set, but there are differences: when assembled, it has the shape of a cocoon. Advantages: adjustable backrest elements, accommodates up to 5 people. The downside is the gaps and cells in the seats.
There are other transformer options. The model with two benches is simple in design and manufacture. The corner product can include a different number of turns and provides a large number of seats. The option in the form of a coffee table has an original design, suitable for relaxing, reading, or working on a laptop. The hexagonal bench table is eye-catching and seats 8 people.
Connoisseurs of non-standard solutions will like the model of two chairs, which turns into a regular bench, a bench for placing a couple opposite each other, as well as a product with a side table.
Bench-table with benches
Builder
Hexagonal bench
Table dimensions and construction features
To make the garden table as convenient to use as possible, you need to accurately determine its dimensions:
- length 120 cm;
- width – 80 cm;
- height – 70-80 cm.
This table can accommodate from 8 to 10 people freely and without constraining each other. If the tabletop is smaller, the product will not be functional. A large tabletop will be too bulky.
It is best to make country furniture from wood. The main thing is that these are breeds that are resistant to negative factors. If boards are chosen as a consumable material, the product will be inexpensive, but at the same time practical, aesthetic and durable (with proper care of the wood).
Also among the advantages of building a table from boards is the fact that the materials for constructing country furniture can easily fit into a car. Since the length of the tabletop will be only 1.2 m.
Decorating Tips
The transformable bench can be covered with stain and then with water-repellent varnish, which is used to paint yacht decks. The varnish dries in about 36 hours. But it is still not recommended to keep the varnished bench outdoors in rain and snow.
If you still plan to install it in a permanent place on the site, you can paint the structure with waterproof paint, which will dry for about a day. Every few years, the paint needs to be renewed so that the wooden elements do not begin to rot, mold, or become infected with various parasites.
If the structure is made correctly and you take care of it, it will serve you for at least 20-25 years. Very often, craftsmen replace wood with metal, which does not look as beautiful and aesthetically pleasing, but the service life increases significantly.
We paint all the elements of the bench with dye
How to process wood
Since many tree species are not “friendly” with a humid environment that causes rot, products used outdoors must be carefully processed. Such protection will also protect against exposure to ultraviolet radiation, from which the material can fade and change its true color. Finishing is also done to transform the appearance of the wood. To do this, take the following compositions:
- Colored opaque paints that completely hide the wood texture. Various compositions are used, from which we want to highlight acrylic-based options. This material creates a durable and long-lasting coating. It comes in different colors. The material hardens in the form of a film.
Opaque paints
- This material looks like varnish, but it is not. In contrast, a vapor-proof film is not created on the surface - the wood still breathes. Azure saturates the wood with deep tones. It penetrates its structure and reliably protects it from moisture and ultraviolet radiation.
Azure
- Varnishes create a film on the surface and prevent water from getting under it. This material can be transparent or colored. For outdoor use, it is best to choose the option for yachts, as it will last a very long time and create an even, glossy finish that shines very beautifully in the sun. Clear varnishes are used in combination with various impregnations, for example, stain.
Wood varnish
- One of the oldest and best ways to protect wood is to coat it with oils. This material penetrates deep into the wood structure, giving it water-repellent properties and a beautiful deep shade. Oils are used to treat decking near swimming pools and even on piers, which indicates a high degree of protection (the choice of oil for garden furniture is discussed in the article).
Wood oil
The fourth version of a transforming bench made of metal profile and wood
Materials and tools for construction
A transforming bench made of a metal profile is made similarly to a wooden one, but only with minor changes.
Drawing of a metal bench - transformable with wooden seats
To make such a bench we will need:
- Square metal pipe with a cross section of 25x25x1.5 mm (4 pieces of two meters each and 2 pieces of 1.5 meters each). This way we can save money and have minimal waste.
- Wooden boards - about 8 pieces.
- In addition to the basic tools, we will need a welding machine and a set of electrodes.
- Bolts, nuts, washers.
- Metal paint or water-repellent varnish.
- Antiseptic impregnation for wood.
- Grinding.
Metal profile for making benches - transformer
Making a transformer tabletop
According to the drawings, the wooden tabletop will have dimensions of 126 by 57 cm. To assemble it, you will need 5 boards of suitable sizes, as well as 2 planks 57 cm long and any width (we take 4 cm wide planks as an example). The planks must be placed vertically, the boards must be attached to them with self-tapping screws so that there is a distance of 4 cm on each edge.
The tabletop is then attached to the base. To do this, you will need to cut 2 support boards for the tabletop, each measuring 40 by 10 cm. On one edge of each support you need to make a cut at an angle of 115 degrees, this is the angle at which the back of the chair will be located. It is necessary to retreat 14 cm from the edge of the tabletop, secure the stops on the inside of the plank using self-tapping screws. At the next stage, the master needs to place the back of the bench on the leg supports, drill holes with a diameter of 7 mm in the support and vertical board. Then the elements are connected using a furniture bolt 8 mm long and 6 mm in diameter, as well as a self-locking nut. Metal washers must be placed between the stops. When the structure is assembled, the master must himself check the correct installation of the tabletop-backrest. If the device opens and closes freely, then you can connect two benches together. For this purpose, armrests are installed on the protruding boards of the legs. To make them, you need to cut 2 boards measuring 8x22 cm and another 4 - 6x27. To figure out how to make a transforming bench yourself, you need to use master classes. The detailed description includes drawings with dimensions and photographs of each stage. The easiest way is to make your own models of benches from wood and metal. For work you will need the following materials and tools:
- boards and beams;
- building level, tape measure;
- screws;
- self-tapping screws;
- marker or pencil;
- sandpaper;
- metal fasteners;
- Bulgarian;
- screwdriver;
- drill.
To make a high-quality bench-table, you must carry out all the steps according to the instructions:
- Two boards 120 x 12 cm for the seat are carefully sanded. Two more - 37 x 10 cm (for the legs) are connected to metal fasteners so that they take on a triangular shape.
- A pair of prepared boards are screwed to the legs with self-tapping screws. The holes are drilled in advance.
- The lower part of the seats is strengthened with spacers, which are fixed with corners and screws.
- For the second bench, boards with dimensions of 110 x 22 cm are required. The legs are made of timber and attached with self-tapping screws.
- The boards are screwed to the base, the seat is secured, then the spacers are secured. The correct assembly of the structure is checked.
- For the tabletop, take 5 boards and 2 planks. All elements are connected to each other. The tabletop is fixed to the base.
- A lever responsible for transforming the model is installed. To do this, you will need two boards of any width, 88 cm long. Their ends are rounded.
- Holes with a diameter of 7 mm are drilled in the lever, leg and bar. All elements of the transforming bench are connected using furniture screws and nuts.
The accuracy of the construction of the table with benches is determined by checking compliance with the drawing. The internal width of the structure should be 115 cm, external - 120 cm. If these parameters are violated, the product will not fold. Creating a transformable table-bench with your own hands is an exciting activity. For work you will need the following tools and materials:
- square pipes 25 x 25 x 1.5 mm, six pieces in total;
- boards - 8 pieces;
- drill;
- Bulgarian;
- screwdriver;
- Sander;
- welding machine with a set of electrodes;
- washers, nuts, bolts;
- metal paint.
Step-by-step instructions will help you complete each stage of the work correctly:
- Metal profiles are cleaned and rust is removed. The blanks are cut according to plan.
- To create the frame of the bench, the tubes are welded. Holes for furniture bolts are drilled. Washers are used for easier unfolding.
- For the legs, elements 50 x 50 mm are cut out of a metal sheet. All frame parts are treated with a special compound.
- The boards are cut according to the parameters of the bench, sanded, impregnated with antiseptics and fixed to the body.
The metal structure can be made by experienced craftsmen and beginners who are encountering the manufacture of garden furniture for the first time. It is advisable to have experience with welding. Otherwise, the product may not be strong enough.
Types of tables for gazebos
Based on the shape of the tabletop, there are 3 types of tables:
- square (rectangular);
- round;
- polygonal.
Round tables are considered the most popular and convenient. The smooth shape makes them ideal for all types of gazebos.
Several materials can be used in the manufacture of tables: metal, plastic, wood, as well as their combinations. Each option has its pros and cons. Metal tables are durable, but they are expensive and get very hot in hot weather. Plastic options are inexpensive, but will not last long.
The combination of wooden tabletops or seats with brick bases looks very interesting, especially if the same materials were used in the construction of the gazebo.
Wood is considered the most affordable material for making gazebo furniture. Wood is environmentally friendly, easy to process, and has an affordable price. A wooden table can be bought at any specialized retail outlet, but the owner’s special pride will be furniture made with his own hands.
Table made of wood based on a glued top
This design has L-shaped legs, which are also obtained by gluing together boards 20 mm thick. To make the legs reliable, they are fastened together with 5 self-tapping screws. There is no way to do this without drilling preliminary holes. Firstly, the fastening is reliable, and secondly, the heads of the screws can be hidden by drilling recesses of a suitable diameter for them. You can close the caps in several ways: putty or make plugs from wood and place them on glue. As putty, you can use PVA glue with the addition of wood dust. As a result, after the putty has dried, it will hardly be possible to find the place of attachment.
Legs with markings for fasteners
When making such blanks for the legs, you need to ensure that the mounting angles are 90 degrees. After the glue has dried, the legs are sanded and coated with varnish or other paintwork. Finally, the finished pieces for the legs are dried.
Table legs are ready
While the legs are drying, you can start making the tabletop. For this, boards of the same thickness are used, but their width can be different. To begin with, you just need to assemble the tabletop, making sure that the boards fit together without gaps and that their edges are smooth.
It is very important to find a flat surface, which determines the quality of the countertop. After coating the joints with glue, the boards are connected and tightened with clamps. Although the picture shows one clamp, it may not be enough. As a rule, you need to use two clamps, which will make the tabletop better and more durable. After the glue has completely dried, the clamps are removed, and the tabletop is trimmed and sanded. As a rule, such work is not in vain and the results of this work are simply pleasant to look at.
Gluing a tabletop from boards
This technique allows you to get a tabletop of any shape; just cut the boards along a pre-drawn line.
If the tabletop is framed, it will look more attractive, although it is not so easy to frame a round or oval tabletop. As a frame, you can use thinner boards that cover the tabletop on all sides. Naturally, the workpieces are polished before this. It is better to use finishing nails as fasteners, and the ends of the tabletop are coated with glue to ensure secure fastening.
We fasten the bar around the perimeter
Once the glue has dried, the joints are sanded using sandpaper.
This is what the finished tabletop looks like
After this, they begin to attach the legs, but first of all, from the bottom of the tabletop you need to secure a frame made of 4 boards. Frame mounting may vary. The best option is to use metal corners, a couple of pieces on each side. They are installed on the inside of the frame.
The legs are attached to the inside of the frame in the corners, especially since the legs are L-shaped and fit exactly into place. The legs are attached using self-tapping screws, a couple of pieces on each side. L-shaped legs are more stable, so you can do without additional jumpers between them.
How to make a country table “Four Elements”. Stroyhak
Preliminary preparation
Approximate diagram of the construction of a wooden rectangular table and bench
Before starting work, you need to consider several important points:
- The size of the table must match the design of the gazebo. If the space is small, then it is better to go with the classic version - a tabletop fixed on a durable stand. If space allows, you can install a table on two supports.
- The shape of the tabletop should be in harmony with the configuration of the gazebo. For example, polygonal or round tables are considered a good option for 6-sided buildings.
- The optimal table height is about 80 cm. But here you need to focus on the average height of family members.
- It is advisable to think in advance whether the table will be portable or stationary and decide on the number of legs.
- The size and placement of furniture should not impede movement within the building.
Portable furniture is a great option for small gazebos. If necessary, it can simply be removed or moved to another location.
