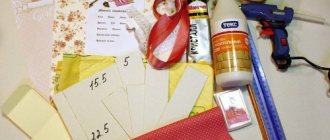
Hi all. I would like to show you a workshop for making a doll-box. After looking through a bunch of information on making boxes on the Internet, I came up with this option. So, we will need the following materials: 1. base for the box (I have a Raffaello box) 2. top from a large bottle (2.5-3 liters) 3. doll 4. fabric, lace (for decoration) 5. padding polyester or foam rubber 6. cardboard 7. glue 8. polystyrene foam
- Share
- Share
- Share
- Share
- Share
I glue a doll on top of the neck
- Share
I cut out a circle from cardboard with a diameter the size of the base of the box and glue this circle to the bottle with the doll. The bottle should be in the center of the circle
In every family where girls grow up, there are toys that are a pity to throw away, and they are no longer suitable for games. You can have fun with your children and make a doll-box together with your own hands. This way, your favorite toy will find a new life, and the child will receive a wonderful casket for his treasures. No one will guess at first glance that the beautiful doll is a homemade box made from plastic bottles. It's worth learning!
Required materials and tools
Among the list of raw materials used to make a doll-box, it is worth highlighting the basic components of the product, namely a store-made doll or a do-it-yourself doll, as well as any container that will act as a compartment for storing small items.
This role can be played by the lower compartments of boxes whose lids have become unusable for one reason or another; plastic containers, containers, bottles, etc. are also usually used for production. These two components will play the role of the frame and two main parts - the top and bottom of the doll-box. As for the rest of the set of useful materials for creating a box, the master can select it based on his personal preferences, as well as the main idea and work skills. It can be:
- pieces of fabric of any density, color and texture;
- ribbons and lace;
- padding polyester or any other filler for the lower compartment;
- rhinestones and beads, beads;
- sequins, buttons;
- braid.
To make a box using the kanzashi technique, special kits are usually used.
However, all these materials will require reliable fixation with each other, as well as with the base. Therefore, for work they usually use:
As important tools, without which it is unlikely that such an idea will be realized, it is worth noting a stationery knife and scissors.
Features of the box
It’s not difficult to make a Barbie box with your own hands. The principle is to make a storage container - a box. It is made from any materials that can stick together. They are subsequently covered with fabrics: velvet, chiffon, lace, ribbons and much more. The finished shell is decorated with various elements: beads, buttons, rhinestones and sparkles.
You can create such beauty yourself if you have free time and desire.
Barbie herself will be attached to the lid, but without legs. Her skirt is the box that is made first. Options with clothes from different eras look beautiful and elegant. These are fluffy skirts, lace, corsets, hats and jewelry.
There are many options for creating a box doll.
External design depends on the imagination of the master.
Important! There is no need to buy a ready-made dress for the doll. When making boxes, clothes for Barbie are made independently
Doll box made from a bottle, details with photo
- Cut off the top of the liter bottle. To ensure an even cut, pour water as shown in the photo, draw the outline with a marker, and then drain the water.
- Next, cut off the bottom like the top.
- Cover the bottom part with white crepe satin with hot glue.
- To make the box stable, take a metal lid with a diameter slightly smaller than the diameter of the bottom of the bottle, and cover it with the same cloth.
- Glue the parts together with hot glue.
- Cut the doll to the hips.
- Cut the neck from the top of the bottle so that it is a few millimeters larger than the doll’s belt.
- Glue the doll to the part cut above.
- From a ceiling slab or cardboard, cut a circle equal to the diameter of the lower part of the workpiece with the doll. Glue it.
- From that crepe satin, cut a circle of such a size that when assembled, the edges are at waist level.
- Place the part with the doll in the center of the circle, gather the fabric on the belt, secure it with thread and additionally apply hot glue.
- Cut 2 strips of fabric 1/2 cm wide, glue them to the top and bottom parts on the back side of the doll.
- Tie a piece of satin ribbon 2.5 cm wide and equal to the bottom of the box +5 cm with thread and glue it at the very bottom of the box.
- Next, glue the lace onto the same piece of tape, gather it with thread and glue it with the next layer.
- Glue the next ruffle of ribbon of the same color to the edge of the top of the box.
- Glue the ruffle with lace. You can use the same tape as for the lower layers, or you can choose another suitable shade and mix the colors.
- Use a piece of tape to form the upper part of the dress, covering the doll with it. Glue lace onto your hands.
- Cover the shoulders with a piece of lace, forming a cape, as well as the lower part of the top of the dress.
- Glue on the last layer of ruffles. Form a fan from the lace. To do this, cut a circle out of it, fold it in half several times, and tie the center with a thread.
- Cover the bottle cap with matching fabric. Cut a circle out of cardboard with a larger diameter than the lid so that it looks harmonious with the size of the doll. Cover it with fabric, glue it to the lid, and decorate it with braid. Glue a 0.5 cm wide tape to the bottom.
- Give the doll a hairstyle and glue on a hat.
DIY box from a plastic bottle. Master class
We cut a 2.5 liter plastic bottle to a height of 8-9 cm, and melt the holes around the circumference with a thin knitting needle.
Cut out 2 circles from thick cardboard. A large one (diameter 11.5 cm) is for the lid and a smaller one (diameter 8.5 cm) for the bottom of the box. Alternatively, glue 2 circles together if the cardboard is not very thick.
From the main fabric we cut out a circle for the lid with a diameter of about 20 cm.
We cut out a circle for the largest box with a diameter of 26 cm.
We gather a large fabric circle along the edge into a gather.
We insert the plastic base of the box into it and tighten the threads so that the fabric fits tightly around our base.
This is why we made holes in the plastic. But in principle, you don’t have to melt the holes. The needle pierces the plastic. But with effort!
We wrap the upper part of the fabric inward and stitch it again.
We get a blank for the box. Now we cover the lid with fabric.
And we sew the fabric along the edge again to better secure the gathers.
We decorate the blanks.
We cut out the lining. Choose a contrasting color.
The size of the lining will depend on the size of your base. The length of the lining is equal to the circumference of the bottle, the height of the lining is equal to the height of your box plus a seam allowance of about 1 cm or 1.5 cm. The circle is equal to the diameter of the bottom of the bottle plus a seam allowance. Place the lining in the box.
- Sew on the lining, carefully securing it together with the lace.
- Now you can sew on beads.
- We also sew lace around the bottom circumference of the box.
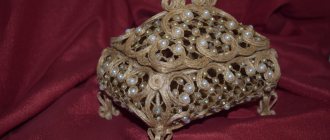
- The box was decorated with lace and beads.
View inside the box. We attach the lace to the lid.
Cut a circle from the fabric to hide the remaining “hole”. Carefully hide the edges of the small circle under the lace and sew everything on.
We also decorate the lid with beads. The lid is almost ready. All that remains is to make a decoration for the lid. A voluminous flower as a decoration for the box. We cut out 5 petals from crepe satin and another 5 slightly smaller ones. Burn the edges with a lighter.
- And we collect a flower.
- Source
Doll box made of satin ribbons, step by step with photos
For this box you will need 5 rings from furniture edges, spools of adhesive tape or a PVC pipe.
- Glue the 4 rings together with Moment glue.
- On cardboard, outline the inner radius of the remaining ring and cut out 2 blanks. They will be needed to create the bottom and lid.
- Wrap the glued rings over the edges with 3 cm wide tape, gluing in places with hot glue. Wrap the remaining ring in the same way with a ribbon of the same color, only 2.5 cm wide.
- Cut off the top part of a five-liter bottle and also wrap it over the edge with 5 cm of tape.
- Insert cardboard circles into blanks covered with tapes and glue them with Moment glue; you can also use hot melt glue.
- When the blank for the lower part is dry, cover the edge with braid.
- Glue a circle of decorative cardboard in the center of the bottom.
- Glue the small ring to the decorated part of the bottle with hot glue.
- Glue the lower part of the box with a ruffle of a suitable shade using hot glue. You can first secure each of the rows with tailor's pins, and only then glue it to the box.
- Blow out the middle of the upper part with foam and insert the doll into it in the center. Let dry overnight. If there is no mounting foam, glue the doll's hips to the edges of the top with hot glue.
- Also cover the upper part with ruffle.
- Make a top for the doll using matching lace. To do this, cut a piece of ruffle equal to a full turn of the doll’s chest and glue it to the back of the doll with hot glue.
- Make sleeves from the same lace. To do this, measure the circumference of your shoulder, cut out the corresponding piece of lace, and sew with thread. Turn it inside out and put it on the doll. To prevent the sleeves from falling off, fix them at the very top point with glue.
- Criss-cross glue the folded pieces of lace to the back and belly of the doll.
- To disguise the transition between the doll and the top of the box, string the ruffle on a thread, assemble and cover the doll.
- Tie a belt around your waist from a 1 cm ribbon.
- Give the doll a hairstyle.
Sequence of work
- Cut off the bottom of the plastic bucket - approximately in the middle. We line the inside with cotton pads and the outside with a piece of foam rubber.
- Using a sewing machine or by hand, we sew a cover for the bottom of the box from fabric intended for a dress. Then we glue it to this part of the bucket with a heat gun.
- We cut off the doll's legs at mid-thigh level. Glue the doll to the lid. We wrap the part from the waist with foam rubber to form the upper part of the skirt. We stick the foam to the bottom of the lid. We sew a cover for this part and glue it with a heat gun.
- We sew a cover for the middle part of the box and glue it with a heat gun, having previously wrapped the surface of part of the bucket with foam rubber. We connect two parts of the lid: the upper one with the doll and the middle cylindrical one. The result is a skirt consisting of two parts.
- Next, we proceed to the most creative part of the process of creating a box doll. Using a heat gun, glue on several layers of lace. We create the upper part of the dress - the corset and lace sleeves. We decorate the dress with beads or rhinestones. To create the image of a young lady, we give the doll an appropriate hairstyle. If this is a bride doll, then instead of lace for the skirt, you can use tulle, making gathers on a thread. Here you can show your imagination and use any decorations for the dress.
- We sew beads to the bottom and lid at their junction, which are connected by loops to each other. Due to this, the lid of the box will open.
The doll-box is ready. It is soft inside, you can store all sorts of things in it, including jewelry - they will not get scratched. A box made with your own hands will take its rightful place on your shelf or will be an excellent gift for someone.
Kanzashi technique for creating jewelry
The kanzashi technique is an entire art that was invented in Japan. It involves the origami process, but using silk. The basis of this technique is folding triangles from individual fabric cuttings. Box dolls using the kanzashi style will take on a new life.
In appearance, this is an ordinary Barbie doll in a fluffy dress, but few will guess that this is actually a treasure vault.
Not only your child will like such a small chest for small items.
To make decorative elements for Barbie using the kanzashi technique, you will need a small amount of fabric, scissors, glue and thread with a needle. Silk flowers will look best. For example, let’s carry out a tutorial on making a flower with round petals.
A chic box for trinkets can be made from ribbons using the kanzashi technique.
Fold the square piece of fabric in half. We bend the corners to the bottom vertex to form a rhombus. Turn the workpiece over with the smooth side up and the corners toward the center of the diamond. Fold it in half. Next, straighten the petal, holding the bend.
Popular articles Refilling inkjet printer cartridges
It’s very easy to master; any novice craftswoman can handle it.
We treat the wrong side with glue, connecting the corners to each other. Excess fabric needs to be trimmed to make the flower look neat. Make several such petals. The last stage is joining the petals into a whole flower.
This decoration is added to the doll’s skirt, hat or belt.
Decorating the bottom of the box
Do-it-yourself box dolls are quite simple to make, and, perhaps, the stage of decorating the bottom part will be the most difficult, because the rest can only be done with glue. Here you will also need sewing supplies, fabric, foam rubber or padding polyester. First, sew the inside of the upholstery. To do this, the bottom of the base is outlined on the fabric, seam allowances are made and cut out, the bottom of the fabric is duplicated with a soft filler and stitched with beautiful stitches. Next, measure the height of the plastic base and the resulting circle around the perimeter, cut out a strip of fabric, lay a side seam and sew the finished bottom into this part. After all these manipulations, the stitched inner upholstery is placed inside a plastic base, the bottom of which is pre-coated with glue. Next, a circle of foam rubber is glued to the bottom from the outside to hide the ribbed surface. In this form, the base is placed on top of a pre-cut circle of fabric, folds are laid, and the outer sides of the bottle are covered. At the junction, the inner and outer upholstery are folded, stitched and masked, covering it with a beautiful braid. At this stage, you need to remember to insert a piece of silicone tape into the seam, which will connect the upper and lower parts of the doll-box. It’s easy to make another fastening with your own hands, for example on a chain, which will add charm to the craft.
Material for the craftswoman
While empty plastic bottles are typically reused, mayonnaise buckets go straight into the trash when emptied. Then they will have a short journey to a landfill and further pollution of the environment for 80-200 years. What if we break this sad algorithm and give these containers a new, rather uncharacteristic life?
You can easily and not very labor-intensively create a doll-box from a plastic bottle.
Let's consider the stages of creating a product.
Take an empty plastic bottle with a capacity of five liters (in the future you can use other types of bottles). From above it is cut parallel to the bottom where the neck goes into the main part of the container, from below - at approximately a height of 15 cm. Excess plastic can be thrown away. At part of the neck, the hard part is cut off along with the place where the thread is located.
The doll's legs (standard Barbie) are cut off at about mid-thigh. Next, the doll is glued to the top of the bottle. To do this, you can use an O-ring (or other available material) and glue or electrical tape. All plastic parts are covered with padding polyester. This work can be done using glue or a stapler, whichever is more convenient for the craftswoman (see photo below).
2 circles with a diameter slightly smaller than the diameter of the bottle are cut out of cardboard.
Satin (it will look best, but if you don’t have it, you can use another fabric) is used to line the top and bottom of the bottle, as well as both cardboard circles.
Using glue, one circle is mounted inside the future box, and the second on the bottom outside. This will give the box neatness and stability.
Next, the top of the doll is shaped. You can sew a top, which will later be connected to a skirt, or you can make a top from ribbons. At this stage everything is in the hands of the craftswoman.
A strip of satin fabric is glued on the outer and inner parts of the bottle, which will act as a connecting element between the top and bottom of the box.
The last stage is the final decoration process. The skirt is decorated with lace ribbons or other materials. This will hide the ignoble origin of the source material and make the finished product look expensive and vintage.
The design in the form of a wedding dress will look very relevant. This bride doll will be an excellent gift for a wedding or anniversary. As an additional bonus, put money or a gift certificate in it. Such a gift will outshine all boring and boring envelopes, even of the most modern design.
During the New Year, it will be very appropriate to decorate a doll-box in the shape of the Snow Maiden. It will be an excellent independent gift, and if desired, it can be filled with something, for example, sweets.
The same principle is used to make a doll-box from a mayonnaise bucket. The peculiarity will be that the top of the box will be the bottom of the bucket, and the bottom of the product will be the lid.
Making a box doll from newspaper tubes will be especially chic for advanced craftswomen. This is very painstaking work, but it will allow you to create a unique product of the highest level. You can get acquainted with the technique of weaving from this material in this video.
The finished product will show how much work the craftswoman put into it and, accordingly, it will be valued much higher.
Box made from scrap materials
To make a beautiful box from a Barbie doll, you need to prepare a workspace. They allocate a table for work and provide themselves with all the necessary materials. Now let's look at a step-by-step algorithm for creating a box from a bucket.
It would not be a shame to give such a doll-box to your friends for any holiday.
- Take any medium-sized bucket, for example, a mayonnaise container. The inside is covered with soft cloth or cotton pads so as not to spoil the future contents. The outer part is covered with fabric of the selected color.
- The bucket lid is used to attach the doll to it. Cut off Barbie's legs and glue them to the lid with a glue gun.
- The skirt is made of foam rubber, the length of the lid. The upper part of the foam rubber is attached to the doll's waist, forming the top of the dress. Cut off the required amount of fabric and sew it onto the workpiece.
- To close the hole under the doll, take a small piece of cardboard and wrap it with the same fabric as the girl’s skirt. Next, attach the finished element to the bottom of the finished lid.
- The final stage involves attaching the lid to the base of the box. They can be sewn with plain threads, and the seams can be decorated with beads.
You can easily and not very labor-intensively create a doll-box with your own hands.
The skirt is decorated with lace ribbons or other materials.
Note! If the doll is made with a rotating waist, then it must be fixed. This way the box will be more practical and last longer.
Beautiful design will make the finished product look expensive and vintage.
Now you can safely start decorating. The base of the product is decorated with lace, complementing the princess skirt. You can sew gloves on the girl’s hands to match the color of the dress, and add a small bow at the back. Craftsmen weave Barbie elegant hairstyles and put on hand-made hats. This makes a beautiful box for storing jewelry.
The finished product will show how much work the craftswoman put into it and, accordingly, it will be valued much higher.
This is very painstaking work, but it will allow you to create a unique product of the highest level.
Doll box from a Barbie doll, step by step with photo
This box will require 2 plastic bowls of the same size. Measure the height and diameter of the top of the bowl. To fit the bottom, cut 4 circles from foam rubber and 2 circles from satin with an allowance of 1 cm.
Sew 2 foam circles and 1 satin circle together so that the satin is the top layer.
Cut a strip of foam rubber with a length equal to the circumference of the edge of the top of the bowl and a width equal to its height. Glue the ends together and cover the workpiece with fabric. Glue to the previously made circle.
Glue the second circle to the bottom of the bowl, which will serve as the bottom of the box. Then cover both parts with fabric.
In the part that serves as the bottom, glue a previously made piece of foam rubber into the middle.
Connect both parts together with thin strips of fabric, as in the previous master class. Cover the edges of the top and bottom of the box with tape to hide the transitions. Then gather pieces of lace of different colors onto a thread and form a dress, alternating shades. Leave the top of the box untouched.
Cut the doll to the waist and glue it to the center of the top of the box with hot glue. To secure the doll more securely and form an outfit, glue 2 strips of satin ribbon on both shoulders of the doll, fixing their edges to the box.
Cover the doll's shoulder with lace.
Cover the bottle cap with lace, make a brim out of it, decorate it with beads or other decorative elements as desired, and glue it to the doll.
Accessorize your doll with accessories such as a bracelet and beads.
Using a Barbie doll
You can make an amazing thing with your own hands from a plastic bottle and a Barbie doll. It will serve both adults and children, and will keep secrets or little secrets of girls in its depths. You can make it small or spacious and put small things there that are usually scattered on the floor in a child’s room.
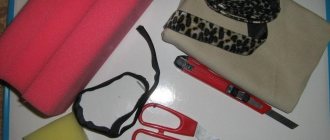
Available materials can easily be found in any home, with every housewife. You will need:
Barbie doll or regular doll;
- felt-tip pen or marker;
- glue;
- glue gun;
- stationery knife;
- scissors;
- padding polyester;
- needles and threads for sewing;
- satin for a doll's dress;
- lace, beads and beads for decoration;
- lining fabric.
Available materials must be prepared in advance . This will significantly speed up the production of the box and teach the child how to work well with materials.
Mark the bottle with a marker, divide it into three parts and cut it, separating the bottom and top from the middle. The middle part is set aside; it will no longer be needed. The frame of the box will consist of the lower and upper parts of the bottle. Their diameters must match.
The neck of the bottle is cut off. For work, only the upper part of the doll is taken - the head and body. At this stage, you need to carefully calculate the height of the doll, taking into account the height of the future box. The doll is glued to the neck of the bottle and left to dry.
The padding polyester is cut to the size of the internal and external parts of the box. Glue the cut out parts with a glue gun. Then they sew a lining for its inner part. The lower part is covered with satin on the outside.
The top of the box will serve as the doll's skirt . The dress is sewn from satin, making the bottom of the dress fluffy. The length of the skirt should be such that it covers the bottom of the box. The outfit is decorated with lace, beads and seed beads as desired. Decorating a doll-box made of satin ribbons will be very beautiful and unusual. Master classes on such jewelry can easily be found on the Internet. A fashionable hat is placed on the doll's head .
Doll box in a ball gown, detailed description
1. Cut off the top and bottom parts of the bottle, choosing the optimal height of the future box at your discretion. Also make sure that the doll is the right size.
2. Separate the legs from the doll, insert it into the neck of the upper part (if necessary, widen the neck), and glue it with hot glue.
3. Cover both parts of the future box with fabric and glue cardboard circles covered with the same fabric into the middle.
4. By hand or machine, sew strips of satin ribbon with matching lace. The length of the strips should be the diameter of the bottle in the place chosen for gluing + 4 cm for folds, and the width should be 3.5 cm.
5. Gather the strip onto a thread and glue it to the bottom of the box.
6. Cover the top part of the box with lace according to the same pattern.
7. Form the bodice of the dress from a strip of matching satin ribbon and glue it to the back.
8. Cover the junction of the bodice and dress with a lace frill. Glue a cape in the form of a piece of lace to the shoulders.
9. Tie the satin ribbon sewn with the lace with a thread, forming a ring. Make another smaller ring from tape and glue it together.
10. Decorate the hat with a bow and glue it to the doll.
Doll box in a royal dress, step by step guide
Cut off the top and bottom parts of a five-liter bottle. At the top, cut off the neck so that the doll without legs fits into it. Glue the doll to the top of the bottle.
Apply glue to the lower part and cover it with padding polyester outside and inside.
Glue the top part from the outside in the same way, do not touch the middle.
Glue a circle of cardboard to the top part, with a diameter equal to the diameter of the bottom part.
Cut a circle from fabric with a diameter 2 times larger than the diameter of the bottom of the bottle. Gather it on a thread and cover the bottle.
Cut out another circle with a diameter 2 times larger than the diameter of the upper part with the doll, assemble it on a thread, and glue it.
Cut a circle according to the shape of the bottom of the box, cover it with padding polyester and fabric, then glue it into the middle, forming the bottom.
Fold a piece of fabric 10 cm wide and 2 times longer than the diameter of the bottom of the bottle in half, with the front part facing out, and gather it with a thread, making folds. Glue both blanks to the doll's waist.
Make a dress bodice from braid or fabric and cover the doll with it.
Decorate the junction of the bodice and skirt with matching braid. Cover the top of the bottom of the box with the same braid.
Form a bow from the fabric, decorate it with rhinestones or ribbon, and glue it to the back of the doll.
Cover the back of the doll and arms with sequin braid, forming a cape.
Fold a piece of fabric 8x60 cm in width in half with the wrong side in the middle and gather tightly with a thread along the length. Roll to form a rose.
Glue the rose to the doll's head, and glue a piece of tulle under its lower part.
Decorate the box with beads.
Barbie box
Sweet and friendly Barbie is perfect for the role of the keeper of girlish secrets. For the box you only need the top half of the doll.
You shouldn’t deliberately break a toy, but if you already have an abandoned, damaged Barbie, now is the time to revive it.
The box itself is based on a variety of round containers made of any material - a jar, bottle, cup, bucket, cardboard box - everything that may be at hand and useful in the craft.
Popular articles Homemade installation for growing green onions.
So, let's prepare the following materials and tools:
- round jar (in this case plastic);
- pieces of fabric for the inner lining and decoration of the doll itself, padding polyester, lace, satin ribbons, etc.;
- chrysalis;
- glue.
And we will make this beauty in a velvet dress:
1) Create a storage space - put padding polyester on the bottom of the jar, then wrap the inside of the glass with lining fabric, bending it outward.
2) Sew the fabric along the edges and glue it.
3) Preparing the skirt for the dress - it should be fluffy. It is necessary to cut a circle out of fabric, and the diameter of the circle will be equal to the size obtained by measuring the height of the jar on both sides, adding 1 centimeter.
4) Cut out a circle and gather the edges with thread.
5) In order to attach the skirt, you need to wrap the can with padding polyester, maybe twice.
6) Next, insert the base of the box into the assembled fabric, tighten the thread into a knot and straighten the skirt.
7) Sew on the lace, thereby masking the knots and joints.
We take the upper part of the doll and immediately dress it up in suitable clothes.
9) The doll will be attached to padding polyester, which needs to be prepared by laying it in several layers.
10) In the center of the padding polyester pillow, make a hole and insert the doll into it.
11) Ordinary cardboard will serve as a lid and at the same time a stand for the doll; cut out a circle of the required size.
12) Cut out a circle from the same fabric as the skirt itself, with such a margin that the folded edges cover the entire circle.
13) Place cardboard in the center of the circle and gather the edges of the fabric with thread as before.
14) Insert the padding polyester with the doll into the lid.
15) Pull the thread and secure it.
16) We decorate the waist with fabric or satin ribbons.
17) If desired, you can sew a braid on the back of the box so that the lid does not fly off.
18) The doll’s hair can be decorated with a ribbon or a small beret can be sewn on.
This is such a cute Barbie doll-box!
Doll-box
I was inspired to create such boxes by Yulia Stefanyuk’s master classes. I can’t say that I do everything the same way; each master has his own way. I want to tell you how I make my boxes.
For work we will need:
- any container (a sour cream cup or another jar),
- thin foam rubber,
- doll,
- any satin fabric for a dress or other material you like,
- fabric for the interior of the box,
- satin ribbon in fabric color,
- lace in the color of the fabric,
- a pair of beads (for clasp),
- organza,
- cotton pads,
- stopper from a plastic milk bottle,
- building plaster (alabaster),
- scissors,
- glue moment.
Step 1: Separate the bottom from the jar; we will need it later. Let's take a look at the jar lid for now.
We dilute the alabaster to the consistency of thick sour cream and pour it into the lid of the jar. This is the bottom of our box. The plaster is needed so that in the future, when opening, our box will be stable and will not fall back.
Step 2: Cut out two circles from foam rubber, along the inner and outer diameter of the can.
The edges can be padded with cotton pads. I use instant glue, as it does not leave lumps on the fabric and is distributed evenly over it.
- Step 3: Cut the fabric a little larger and wider than the can's circumference and glue it on the side of the lid, right side out.
- We bend the edges around the top of the base of our box.
- Step 4: Place the lid on the fabric and cut it out with a small allowance.
- Step 5: Coat the top of the jar with glue and put the lid on the jar.
- Glue the second circle of foam rubber on top of the lid.
Step 6: Cut the foam strip to fit around the can. And glue it to the jar.
- Step 7: Cut another fabric circle.
- We fold the fabric outward and sew it on; for convenience, you can use French pins.
- Step 8: Cover the foam with another piece of fabric.
All imperfections can be hidden with a satin ribbon that matches the color of the fabric you are using. Also using quick action glue.
Step 9: Cut off the doll's legs. It's necessary. ????
- We take the bottom of the jar, which we prepared at the very beginning, turn it over and glue the doll, as shown in the photo.
- I also glue it around the waist so that the doll always stands straight.
- We line the nutria lid with cotton pads.
- Step 10: Take a piece of foam rubber, the length of which covers the lid, and the width from the beginning of the lid to the doll’s waist.
Glue it to the lid. We form a skirt for our doll, as shown in the photo.
- Several cuts need to be made.
- We tighten the foam at the waist.
- Step 11: We measure out a piece of fabric for our future skirt.
- We make a cut crosswise and put it on the doll.
- We tighten the fabric at the waist, and bend it inward from the bottom.
- Step 12: Cut out a circle of foam equal to the inner diameter of the lid.
- We glue a circle of fabric to it with a small allowance, bend the edges and glue the front side to the top of our box doll, as shown in the photo.
Step 13: We put the beads on the hat elastic - this is the future clasp of the box. Cut out several pieces of fabric.
Glue the top and bottom of the box together. We glue a large strip on the outside. Small - from the inside.
We glue the rubber bands, covering them with pieces of fabric.
This is a clasp. For now, everything doesn’t look so beautiful, but then everything will close.
Step 14: Dress the doll up to the waist as you wish. Let's start decorating the skirt.
Here you can also get creative.
From strips of organza we make assemblies on thread. Sew several rows at the bottom. To hide all the irregularities we sew on lace.
- That's it, the bottom is ready.
- We close the waist with a satin ribbon to hide any imperfections.
- Attach a bow to the back.
- We take another cap, glue a piece of fabric to it - this is the future hat.
- Add beads, feathers, flowers, ribbons...
- Let's do the doll's hair.
- In general, fantasize as you please!
- Ready.
- A few more options for doll boxes:
- I will be glad if you like my MK.
- You can also look at finished works on the theme “Dolls-boxes”.
Do-it-yourself doll-box: master class with photo and detailed description
Modern children have a lot of toys. Many parents have faced such a situation that they often end up with even more than they need. Therefore, a lot of broken toys remain out of use. For dolls that are no longer possible to play with and would be a shame to throw away, there is an excellent solution. A master class on do-it-yourself doll boxes will help you implement it.
In the photo we see that externally such products look like toy young ladies in fluffy dresses. In fact, they have a spacious container inside that can become a treasure trove for little girls, as they love to collect all sorts of cute little things.
There are many options for doll boxes. These include young ladies with porcelain faces, made using one of the folk toy techniques, and simply children's plastic toys. The Barbie doll box won particular love among craftswomen. Since such toy ladies have a thin waist and long legs, a lush, voluminous and long hem will look very impressive on them. Most often, box dolls look like retro beauties, which will look very cool in a girl’s room with delicate colors and shapes. Such a box also has practical significance - the more containers for storing small items, the more order there is in the child’s room.
Each craftswoman also decides individually what to make the box itself inside the doll's hem from. These can be mayonnaise buckets, plastic bowls or bottles. The point is that these are two identical containers that can be closed to form a box with a lid.
To successfully hide the box itself, you need to build a fluffy hem for the doll. It is most often made using the kazanshi technique, which involves the use of many satin ribbons and lace, as well as beads and rhinestones of various sizes.
If you put in a little effort and patience, you can get a wonderful doll box made from bottles with your own hands. Plastic bottles for water and drinks are waste material, so you will only have to spend a little money on materials for decorating the craft.
Firstly, we only need the upper body of the doll. Therefore, we get rid of her legs. But you need to cut it a little below the waistline, otherwise the full skirt will look disproportionate.
There are two options for attaching parts. The craftswoman chooses for herself the one that is familiar and convenient to her: either a needle and thread or hot glue. This is not important.
Who is the master class suitable for?
At first glance, it seems that this is a difficult job, but under the guidance of experienced craftsmen who will demonstrate examples of finished work and step-by-step photos of the master class, even a child can cope with the task. You can safely order a master class on creating a doll-box from satin ribbons with your own hands for a child’s birthday or any other creative event where there will be a lot of children and adults. No one will be bored at your holiday; each participant will have a unique opportunity to learn the secrets of amazing oriental decorating techniques and make an original gift for family and friends.
If you want to breathe new life into an old doll, make an original and non-trivial gift out of it, turning your fantasies into reality, we suggest making a doll box. The box serves as a universal gift that will be appropriate on the occasion of any holiday, because it can store not only banknotes, but also a variety of things, such as jewelry.
Content
Kanzashi technique for creating jewelry
The kanzashi technique is an entire art that was invented in Japan. It involves the origami process, but using silk. The basis of this technique is folding triangles from individual fabric cuttings. Box dolls using the kanzashi style will take on a new life.
In appearance, this is an ordinary Barbie doll in a fluffy dress, but few will guess that this is actually a treasure vault.
Not only your child will like such a small chest for small items.
To make decorative elements for Barbie using the kanzashi technique, you will need a small amount of fabric, scissors, glue and thread with a needle. Silk flowers will look best. For example, let’s carry out a tutorial on making a flower with round petals.
A chic box for trinkets can be made from ribbons using the kanzashi technique.
Fold the square piece of fabric in half. We bend the corners to the bottom vertex to form a rhombus. Turn the workpiece over with the smooth side up and the corners toward the center of the diamond. Fold it in half. Next, straighten the petal, holding the bend.
It’s very easy to master; any novice craftswoman can handle it.
We treat the wrong side with glue, connecting the corners to each other. Excess fabric needs to be trimmed to make the flower look neat. Make several such petals. The last stage is joining the petals into a whole flower.
This decoration is added to the doll’s skirt, hat or belt.
A simple option with a plastic bottle
We are not unique in our desire to decorate our home with dolls. Our ancestors successfully did the same. They made dolls from scrap materials, and they served as amulets for the home, protectors of adults, children and the family hearth. They were often used in religious rituals, to decorate the house, and simply given to children for games.
The easiest way to make a doll is from a plastic bottle. This process will bring children and parents many pleasant minutes spent working together, and the result will be a baby’s favorite toy - a doll or rattle for a younger child.
To work, you will need a plastic bottle, a new nylon stocking or cotton sock and foam rubber. The bottle is cut into three parts and the upper and lower parts are connected with tape, after pouring peas, beans or rice inside. This will create a noise effect, and it will be much more interesting to play with the doll.
Master class doll-box
Details
DIY ribbon flowerLeotheme templates
Such a doll-box will make the dream of any female person come true. Making such a box is not difficult, but you will have to sit. There are a lot of master classes for such boxes on the Internet, and they are almost all similar. It’s just that each master offers his own way, and I will show you how I do it.
So, let's begin.
You can hardly do without a trip to the store, so you will need to purchase:
A) bowls, cups, bread bins and the like – 2 pcs. (size at your discretion).
B) fabric – about 1 m “+ -“, dense silk, crepe-satin, crepe-satin, satin, etc. are suitable.
C) thin foam rubber or padding polyester or batting or something like that.
D) lace.
D) braid, fittings, etc.
E) doll.
I use a glue gun, it’s very quick and easy to work with, but with other glue it’s more difficult to make such a box, I have to sew more.
First, let's cut out the details.
We take our cup and cut out 2 bottoms from foam rubber - internal and external (do not forget that we have two cups, which means there are two parts for all).
Then 2 strips of foam rubber, one will be used for gluing the inner wall of the cup, the other for the outer wall. I simply measure - apply and cut, if necessary I trim off excess. If you are afraid to miss, take a ruler or a centimeter.
Popular articles Diagnosis and repair of a switching power supply
Now we cut out two bottoms (inner) and two strips of fabric equal to the inner strips of foam rubber, BUT do not forget about allowances on all sides of 1.5 -2 cm.
Next we will need two more details. Cut two squares of fabric. How to measure correctly - take our cup and place it on the fabric; you need to cut off enough so that the fabric fits the cup on all sides, see the photo.
Let's start sewing, if you don't have a machine, it's not scary, you can do it by hand, it will just take a little longer. I know that there are craftsmen who simply glue everything together, I haven’t tried it and I can’t speak for the quality.
We take a circle of foam rubber and fabric and sew them together, as you wish, you can just along the edge, or you can do it like I did.
Then we take a strip of fabric and sew it together.
Next we sew both parts together in a circle. I baste first, then stitch.
This is how it should turn out (two parts).
Now we need to cover our cup on all sides with foam rubber (or other material that you have chosen). First I glue the outer bottom, and then I glue the walls of the cup.
We take our fabric part and glue it to the bottom of the cup.
Then we place our bowl in the center of the square and begin to glue the fabric to the edges of the bowl, draping the fabric.
You can first glue the fabric on the outside, and then on the inside; it will be easier for beginners.
This is what you should get.
Next, glue the inner part around the bowl.
We prepared one part. This will be the bottom of the box.
We take the doll and cut it off just below the waist.
Then we cut strips up to the waist.
We coat these strips with glue and glue our doll to the center of the bowl. Previously, I did it differently, glued the doll to the finished bowl, covered with foam rubber and fabric, but subsequently the doll began to wobble. That's why I do it this way.
We glue foam rubber on top.
We cover the bowl on all sides with foam rubber, as with the first cup.
I make a hole in the center of the square of fabric and dress it as shown in the photo.
Next, I cover everything with fabric, as in the first case.
Our parts are ready, let's connect them. I'm stitching. Some craftsmen glue, some fasten with braid, some with wire, perhaps you will come up with your own way of fastening.
We cover the joints with any braid; you can weave a braid into a bauble and use it instead of braid.
The fun part begins, decorating our doll. Everything is possible! Sew her a dress and put it on top, come up with a costume, etc. I'll show you the easiest way.
Take lace or ribbon and gather it together.
And now we simply glue everything around the doll, creating flounces.
That's it, now we just decorate it up according to your wishes.
My doll will be wearing a hat, here are the details. Take a bottle cap or part of an egg and a circle of cardboard. We cover everything with fabric and connect them together. Then we decorate the resulting hat.
Here is my doll-box from all sides.
I hope you liked my master class.
The material is copyrighted and can only be copied with a link to my website.
If you have something to say, you can leave a review here!
pregnancy 20 weeksSouth Goa beachesJoomla templates by BonusThemes
- < Back
- Forward >
Making a kanzash box
This box will appeal to everyone without exception and can become a real decoration for a lady’s table. To make the box larger, you can use a large bottle, a plastic mayonnaise jar or even a bucket as a base.
The base is covered with fabric, having previously laid padding polyester or foam rubber. If the box is cardboard, you don’t have to use soft cushioning materials on the outside, but immediately cover the surfaces with the main fabric. The lid is prepared in the same way. When the entire structure is ready, check that it covers the box well.
Then proceed to the main decoration of the top and side parts. For this you will need:
- satin ribbon 5 cm wide;
- scissors;
- lighter;
- glue gun
The satin ribbon is cut into 5 centimeter pieces . The resulting squares are folded first diagonally, and then again, without pressing too hard on the fold of the ribbon. The results are small triangles, similar to flower petals. The cut edge is carefully set on fire with a flame from a lighter. This way the cuts will not fall off and the petal will no longer unfold.
Make the required number of blanks. You can use ribbon of different colors: it all depends on the imagination of the artist. All that remains is to glue the satin petals onto the surface of the box. You can do this in even rows, or you can lay them out in accordance with the intended pattern.
Usually, a loop is made on the lid of the box for convenient use, and on the opposite side, a small piece of tape is used to fasten its lower and upper parts. In this case, the cover will never be lost .
In this master class I will introduce you to the process of making a doll box with your own hands .
To make such boxes we will need:
- Doll (any one you like, even the cheapest one will do);
- Plastic bottle (in my case 1.5 liters);
- Lace width 4-5 cm - 2 colors, 4.5 - 5 meters of each color;
- Fabric – crepe-satin – size 80 cm * 20 cm and 3 squares – 12, 9 and 8 cm;
- Batting – 2 squares – 8 and 7 cm;
- Tape width 5 mm – about 50 cm;
- Decorative elements – flowers made of ribbons, beads;
- Glue gun, thread, needle.
Do-it-yourself doll box master class.
Let's get to work. We take a plastic bottle. Cut off the neck. Cut off the top part of the bottle 8 cm high and the bottom 10 cm.
Cut out 2 circles from crepe satin and batting. The first one is made of batting - with a diameter of 7.5 cm, crepe - satin - 8.5 cm. The second one is 7 cm and 8 cm, respectively. From these we will make the bottom of the upper and lower parts of our box.
We take 2 rectangles of crepe-satin measuring 45 cm by 20 cm and 35 cm by 20 cm. We collect circles from batting and crepe-satin and sew the fabric to them, gathering them evenly.
We sew the second set in the same way. As a result, we get 2 unique bags with a bottom.
Using a glue gun, we secure the bottom of the larger product at the bottom of the box and, accordingly, the smaller one at the top. Glue the fabric to the walls and turn it right side out. In the lower part we fasten the ends of the fabric to the outer bottom, in the upper part we tie it temporarily.
Let's start working with the bottom part. We take the lace and start sewing it on, making the gathering.
Having finished the row, we retreat 1 - 1.5 cm and begin sewing the next row of lace of a different color.
There were 4 rows in total.
In a similar way, we sew the 3rd row of lace to the top.
We untie the knot and glue the doll without legs with a glue gun.
We sew on another row of lace. We take 30 cm of lace, gather it and sew it to the ribbon. We tie it at the doll's waist.
Making the top of the dress. Using a glue gun, secure the fabric, cut off the excess, and carefully hem it with a needle. Sew lace on top. We tie a ribbon belt.
Let's make a hat. To do this, take 30 cm of tape, gather it (as we did in step 8), sew it together, leaving a hole in the center. We pass the tail through this hole. We decorate the hairstyle and dress.
We make the outer bottom from an iron lid and fabric. We cover the lid with fabric and attach it to the base of the box.
We sew together both parts of our box and decorate the seam.
The do-it-yourself doll box is ready. Using the basis of this master class, you will be able to make different versions of boxes, and what is most important is that they will be different every time! Good luck to you!
Preparatory work
Before you start working directly on the box, you need to do some preparatory work: cut off the lower part of the doll’s body slightly below the waist line; the height of the bottle or bucket is adjusted so that it matches the length of the legs, and the future product looks proportional. Next, the part is cut into two parts. If you take a plastic bottle for work, it will be most convenient to work with the neck and bottom. Therefore, they measure it from the top and bottom, and throw out the middle. So, when the materials for the base are prepared, assembly and decoration begin, which results in an original doll-box. MK would be very appropriate here.
What do you need to take for work?
The main material for a do-it-yourself box in the kanzashi style is a doll. You can take a Barbie whose legs are broken, but you will still have to remove them during the sewing process. It will be more convenient to work with a plastic toy. This way you can remove the arms and torso to pay attention to detail during production.
The basic element of each box will be a doll.
For the base of the box, take a mayonnaise bucket, bottle or other containers. The size of the future product will depend on them. To tightly fasten the parts together, select high-quality glue. It's better to take glue sticks with a gun. The result is a strong and durable box.
Decoration is a matter of the craftswoman’s imagination.
They also take scissors, a needle and thread, a knife and felt-tip pens for marking sizes. As for decorating the box, everything depends on the master’s ideas. This may be the following materials:
- ribbons;
- lace;
- padding polyester;
- various fabrics, for example, satin;
- organza;
- decorating elements (sequins, beads, buttons, etc.).
As a rule, the boxes are designed in the form of fluffy skirts, decorated with ribbons, lace, braid, beads, and seed beads.
The highest aerobatics would be adding flowers to the decor of the dress using the kanzashi technique.
Making a box doll from a bottle
To avoid throwing away used bottles, you can make a box for your home from a Barbie doll with your own hands. This craft idea is even easier than the bucket work. Take a bottle and cut it into two parts. The bottom one is the base for the container, and the top one is the lid on which the doll will be attached.
The box dolls are so beautiful that sometimes you just can’t take your eyes off some of the photos.
A Barbie without legs is glued into the neck of the bottle, fixing the waist with glue. The bottle itself is covered with a piece of fabric, which will be the beginning of the dress. The inside of the box is decorated with foam rubber or cotton wool to make the inside soft. Externally, everything should also be covered with fabric.
Craftsmen from all over the world made similar boxes for the ladies of the court, and now needlewomen will be able to make similar masterpieces for themselves.
Due to the large and fluffy skirt, the dolls look luxurious and very elegant.
Now they move on to the decorating stage. Here you can use your imagination and apply all kinds of decorative elements. Lace is glued to the bottom of the skirt. To beautifully define the waist, tie a bow with a small ribbon. Separately sew a hat, perhaps adding a small decorative feather.
This could be a wonderful gift idea.
Doll boxes. Basic manufacturing principles
Box dolls are made mainly in the kanzashi style, which involves the use of satin ribbons, lace, chiffon, velvet and many other decorative elements: beads, rhinestones, beautiful buttons.
The principle of making such boxes is that two halves of any containers that can be folded into a box are taken, covered with any material you like, and then connected with a strip of the same fabric. A doll without legs is attached to the top cap, the future skirt, and decorated at your discretion. The lower container is made as a continuation of the upper part, so that the box looks like a solid doll.
The dolls can be in the outfits of ladies from different eras, national costumes or wedding dresses. The latter will be an excellent gift for the bride for her wedding celebration. Each craftsman gives his doll intricate hairstyles or elegant hats, which, by the way, can hide some of the defects of a broken toy. There are many options for decorating doll boxes: it all depends on the imagination of the master.