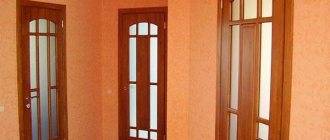
No repair will be considered complete until the windows are in order. The window structures themselves are usually installed by specialists, so there are no special problems with them, which cannot be said about the slopes. In the process of dismantling old windows and installing new ones, the slopes become completely unusable. After all the work on the windows, they will have to be restored to their proper form. With proper skill and a little theoretical training, installing slopes is quite doable with your own hands.
Installation on polyurethane foam
Fastening window slopes with polyurethane foam
You can seal the slope by fixing drywall with polyurethane foam. The sealing is very simple, but it is used if there are few defects on the slopes and the holes are small in size, up to 3 cm. For larger sizes, the defects need to be sealed with foam before installation; the correct method for sealing potholes is using cement mortar or a starting type of plaster. You need to sew it like this:
- Dismantle the old coating, remnants of plaster and foam. Next, large potholes are filled.
- When the holes are dry, polyurethane foam is applied to the drywall from the back side of the material. The foam layer is no more than 1 cm. The material is applied in the form of a snake.
- The plasterboard material is placed on the slope and pressed against it. The pressure on the drywall must be strong so that the foam adheres to the slope.
- After this, the drywall comes off, leaving foam on the slope and finishing material. After 10 minutes the foam will increase in size.
- The drywall is again mounted into the slope and pressed against the wall. If necessary, fix the material with spacers and leave it for up to 24 hours without continuing work.
- The next stage is sealing the drywall seams on the slopes using plaster.
Puttying a window slope
The disadvantages of this design of door and window slopes are quite large. The biggest disadvantage is that the surface will first need to be leveled, otherwise the sheet of drywall will not work. Drywall on slopes may bend during installation. There are voids left on the door/window slope, making the fixation not very reliable. But this is the fastest method for finishing slopes with plasterboard. When a window or doorway is covered with plasterboard, using any described method, the opening is finished with various materials. But before finishing the slopes, you need to do the following:
- The slope is puttyed with a thin layer.
- On the outside of the opening, protection is placed and a corner is formed using a plastic perforated corner, which is covered with putty.
- Another layer of putty is laid down to completely level the surface.
- Finishing material is selected.
Painting is not durable, so for part of the slopes a panel type of material is used, for example, plastic for slopes, instead of plasterboard, PVC panels and other materials, this is a good material, made according to GOST, and is distinguished by its durability. The video shows step-by-step work with drywall; you can use the method for doors and windows:
Advantages and disadvantages
Chipboard has a number of undeniable advantages. It should immediately be said about the excellent interaction with dyes. If necessary, the material can be impregnated with a moisture-resistant composition containing pigments and coated with varnish, thereby giving the appearance of noble wood. High environmental friendliness is also an advantage. In the manufacture of chipboard, only natural components are used, which means that it is safe to use for interior cladding of residential premises.
The disadvantages of plywood include its poor interaction with moisture; we are talking about all types of material, except moisture-resistant. In direct contact with water or steam, the sheets glued together begin to unravel and curl. That is why chipboard is recommended for use in dry rooms, as well as in relative or moderate humidity. Labor-intensive installation of sheets on uneven surfaces, as well as their high cost, can be considered disadvantages.
Installation technology
The main difficulty of the technology is that the frame is built for a specific window with specific wall defects. If you work according to a template, without taking into account the specifics of the situation, the design may end up skewed. Therefore, all work should always begin with careful measurements and drawing.
The creation of the structure should be carried out from the frame to the wall. You should first make sure that the window structure itself is inserted vertically into the opening, without distortion.
The frame design must be rigid enough so that the sheet does not “play” under your fingers after installation. Therefore, it is worth determining the number of jumpers in advance. You will need one in each plane at the corners, and jumpers in the middle part of the plane are placed as needed, depending on the width of the slope.
Read the series of articles on plasterboard: Drywall: types, properties, installation Round plasterboard wall How to level walls with plasterboard Installation of plasterboard partitions indoors
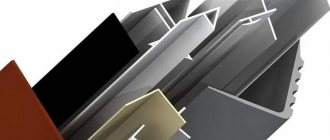
Ready-made reinforced profiles
The maximum load that a profile can withstand depends on two factors: the width of the profile and the thickness of the metal. The greater the width, the stronger the profile will be. Therefore, to strengthen a plasterboard wall, you can purchase a reinforced profile specially designed for this purpose. It is wider and made of thicker metal. There are three types of profiles:
- Width 50 mm. Universal, used everywhere for the construction of frames for drywall
- Width 75 mm. This is the profile most often used to strengthen the frame.
- Width 100 mm. A very durable and massive profile, which is used if you need to seriously strengthen the wall for heavy loads, it is used quite rarely
Another important characteristic is the thickness of the metal from which the profile is made. It can be different, it is better to use one with a thickness of 0.55 mm, ideally if you can find one with a thickness of 0.6 mm. This will provide the necessary strength, even if the frame is sheathed with only one layer of plasterboard sheets.
It is best to use a profile with a width of 75 millimeters. The structure will not look so huge, and the strength will be quite good. The 100 mm profile is used only where the loads are really large, but then the partitions will be very large. But behind them you can hide any engineering communications, not to mention electrical wiring.
General requirements for window slopes
A slope is the outer or inner part of a window opening, which is created due to the difference in the thickness of the wall and the window frame.
Slopes give windows an attractive appearance and also protect the room from cold and dampness
In order to decide how you will finish the slopes (no matter for wooden or plastic windows), you need to consider the following conditions:
- the surface of the slope must have good resistance to weather conditions and mechanical stress, i.e., not peel off over time, not get wet, and not change color under the influence of humidity and sunlight;
- have good thermal insulation, which will prevent the formation of condensation on the surface of the slopes;
- slopes must have good vapor and moisture resistance to ensure high performance properties of the assembly joint, which is achieved by installing windows in compliance with all GOST requirements;
- the surface of the slopes must be resistant to wet cleaning and cleaning, so that the outer surface does not delaminate and stains do not appear on it.
Often after installing windows, apartment owners ask the question: Is it necessary to finish the slopes? There can be only one answer: it is impossible to leave the windows for a long time in the form that was left after the installers’ work. And it's not just a matter of poor aesthetic appearance. There are at least two reasons to make window slopes:
1. Polyurethane foam, which is used when installing windows, gradually breaks down during operation under the influence of sunlight. In addition, when hardening, the foam increases by 5–10% in volume, i.e., it seems to compress itself. This causes a gap to form between the frame and the foam, hence reducing the heat resistance.
Polyurethane foam, which fills the voids between the opening and the window frame, needs protection
2. Foam is not a waterproofing material; it collects moisture, which, when frozen, can damage the integrity of the material. Therefore, the foam must be immediately protected from negative influences.
Gypsum fiber GVL
It differs from the standard conventional plasterboard. Has a homogeneous structure. There are no outer cardboard shells. Consists of 80% gypsum, 20% cellulose. Available in rectangular shape. Production is prescribed in GOST R 51829-2001.
It is highly resistant to physical impact; if necessary, you can hammer a nail. A distinctive feature is a high level of sound insulation. GVL does not crumble. Resistant to frost. Resistant to moisture, does not get wet or swell. Eco-friendly and easy to install. Operation is not limited. Has disadvantages: fragile; weighs more than regular plasterboard; high price.
Stage five. Installing sheets or how to make slopes from plasterboard
When the solution is ready, they proceed to installing the blanks in the window opening. To do this, an adhesive composition is applied to the back side of the sheet being mounted in tubercles up to 100 mm high and 100-150 mm in diameter. Moreover, the spacing of these gaps is taken to be 250-300mm.
Then the panel (first the top one) with the applied solution is installed in the opening and pressed against the base plane until the marks on the side walls correspond to the level of inclination of the sheet. Excess material squeezed out is leveled with a spatula along the end of the slope. The side panels of the structure are mounted in a similar way.
When performing this work, you should follow a number of recommendations:
- Carry out the work together (while one holds the top panel, the second installs the side panels);
- Check the correct installation of the panels by visual inspection, or using a level or plumb line;
- After the glue has pre-hardened (15-20 minutes), fill all the voids between the drywall and the base plane with the same composition.
Painting
Painting slopes is quite a problematic task, especially when the surfaces are not puttied very well
Therefore, I strongly recommend that you pay due attention to the putty.
The slopes are painted with water-based paint. Matte paint is more suitable for painting
. For high-quality painting with glossy paint, you need to putty the surfaces as efficiently as possible and “eat the dog” when painting the slopes.
No types of brushes are appropriate here, because all the stripes will be visible. Just a roller! A roller with a width of 15-20 cm made of foam rubber or fleecy polyamide, or something similar is suitable. I like foam rubber ones better; they are easy to paint inside corners by simply pressing the roller into the corner. Any paint smudges should be avoided; any drops should be rolled out immediately. Typically, 3-5 coats of paint may be required for excellent results.
Installation of drywall elements
From a whole sheet of drywall, which you have already coated with a primer in advance and allowed to dry, you need to cut off the upper part of the slopes. When you cut out a piece of drywall that matches the parameters you calculated and indicated on the diagram, you can begin installing it. Check all length and width measurements carefully before cutting the piece. No need to waste extra drywall.
Immediately transfer all calculated dimensions onto the plasterboard sheet. Use a regular ruler and pencil for this. You cannot start cutting without marking the cutting line in advance.
Use a utility knife to cut out the top piece exactly along the lines you drew. To do this, attach a ruler to the lines and cut the cardboard along it on one side. Then, with a light blow of your fist from the back of the cut, break through the drywall, as if bending it along the line of the cut.
Before installing the cut part, make sure you have all the necessary materials and tools.
Level-bar
It is important that it has a length that matches the length of the panel you are going to install; Putty knife. It is needed to apply and distribute the mixture over the surface; Cut out plasterboard; Glue.
Now let's start applying the glue. It is best to apply it around the perimeter, and also make several separate islands of the mixture in the center of the plate. Thus, the plate will be fixed much better, because the edges will be securely fastened, and the glue located in the center will be evenly distributed throughout the void under the drywall.
Once you have applied the glue, you can secure it. This is not an easy task and not because it requires physical effort. It is necessary to install the plate evenly so that it coincides with the intended drawing.
The slope must be strictly horizontal. In order to achieve this, you need to check its location after installation. This is done using a level in two directions. But this technology is applicable only for the upper part of the slope.
If there is a need to bring a certain area closer to the wall, you can lightly hit the drywall. It's unlikely to hurt him unless you use too much force. However, you should not pull the part back. This is fraught with serious consequences. Drywall can simply crack. Based on this, it is more advisable to apply a little more mixture. The excess substance can then simply be distributed, filling the empty space.
Craftsmen often additionally secure the upper part of the slope with dowels or create various supports to fix the corner in a suitable position, but this is not strictly necessary. The slope can easily be maintained due to the sheer force of surface tension. It will not allow the drywall to move in space.
As soon as the adhesive mixture holding the top slab has hardened, you can begin installing the side slopes. The side panels are mounted in exactly the same way as the top. Cut out the part of the required shape and size from a plasterboard sheet coated with primer. Mix the adhesive mixture and apply it to the joints using the same technology. Install the drywall piece in the desired location so that it matches the intended drawing. Using a level, adjust the panel to the required location indicated by the marking lines. However, this time the level check is different. The difference is that the test is carried out with a level only vertically in one direction.
Next comes a very important moment. Wait until the adhesive mixture has completely hardened. After this, take the same mixture and cover all the cracks in the plasterboard structure. This is a very important and necessary step.
After the slope structure has been completely assembled, you can begin to putty the surface of the drywall. Putty is the final stage of installation of any plasterboard structure. If you are going to make slopes with your own hands, you cannot do without it.
After you have thoroughly puttyed the slopes, the work can be considered complete. However, that's not all. Although the structure is complete and the room is protected from the street cold, the window remains in an extremely unpresentable state. Therefore, it needs finishing. In order to prepare the slope for cosmetic finishing, it is lubricated with finishing putty. Only after this can you begin painting or any other type of finishing.
Finishing
After all the preparatory and main work is done. The structure is assembled and installed. The final finishing is coming. It includes several basic and important steps:
- getting rid of all irregularities;
- forming an outer corner, applying putty;
- alignment of side joints;
- applying a primer;
- applying final putty;
- painting with water-based paint and varnish enamel intended for interior work.
Preparing for work
Before installing plasterboard slopes, it is necessary to prepare the workplace - clear the area near the window. If there is furniture in the room, it should be covered with polyethylene to protect it from dirt, dust and moisture. Working with drywall is a “wet” type of work.
Slopes for plasterboard entrance doors, like window ones, can be mounted in several ways - using glue, foam, putty or a metal frame.
When attaching elements to the wall surface, use an adhesive mixture based on gypsum, followed by coating with finishing putty.
Polyurethane foam
This material is used to securely fix the window structure and to protect the installation seam from moisture from the street. The installation of plasterboard slopes is carried out to protect the mounting foam from moisture and sunlight, as this leads to its destruction and loss of performance characteristics.
Excess construction foam is removed using a utility knife
Due to its ability to expand, the foam can protrude beyond the boundaries of the assembly seam. Before installing slopes on plasterboard windows with your own hands, you need to cut off excess foam using a stationery or construction knife.
Metering
To make high-quality door slopes with your own hands, you need to take exact dimensions and cut out the parts in accordance with them. In this case, it is necessary to take into account the need to create allowances, since adjustments may be required during the work.
When measuring the niche of a window opening, the slope is taken into account, so the height is measured twice - near the window and near the wall.
Surface preparation
To ensure maximum adhesion of the adhesive composition to the surface, it is necessary to thoroughly clean the base from dirt, dust and fragile finishes that crumble with minor mechanical stress.
After cleaning the surface with a brush or brush, it is washed with water to remove as much dust as possible.
It is important to remove the old plaster layer or paint coating. If the integrity of the wall in the window niche is significantly damaged, it must be restored and leveled
Before installing drywall on slopes, it is necessary to clean the surface
Finishing window slopes at the leveling stage can be done with ordinary putty.
If the installation of plasterboard slopes is carried out using a metal frame, then if there are minor surface errors, leveling may not be performed. The main thing is to remove the damaged plaster layer.
Before making slopes, the surface must be treated with a primer with antiseptic additives to avoid the appearance of mold and mildew. It is necessary that the slopes dry out.
Antiseptic primer prevents the appearance of mold on slopes
The plasterboard slope should be attached with glue perpendicular to the plane of the window. The slopes of plastic windows are fixed to the walls in compliance with their exact horizontal and vertical location. Therefore, before installing plasterboard slopes on the windows, it is necessary to mark their locations using a marker and a corner.
The installation location of the future slope is marked with a marker or pencil
Tools
The tools you will need to prepare are drywall, glue, primer, fasteners in the form of self-tapping screws, materials for thermal insulation, a small spatula, a screwdriver, rags and a water container, foam and profile. You will also need metal scissors, a level and a tape measure.
How to cut drywall
If it is necessary to cut off a piece of drywall in a straight line, then use the tip of a sharp utility knife to follow the intended line. Then lightly tap the surface of the sheet, applying a meter ruler to the line. As a result, the drywall breaks off along the cut line, leaving the cardboard to be cut off on the other side.
The panels are cut using a stationery knife.
If it is necessary to cut out a shaped element, then use a hacksaw with small teeth. Using an electric jigsaw can speed up the work, but be prepared for a lot of dust.
To install slopes on windows and interior doors, it is necessary to use GKLV grade plasterboard.
What types are suitable?
There are only two requirements for plasterboard/gypsum fiber sheets for slopes under plastic windows:
- Thickness: GKLV/GKLVO from 12.5 mm, GVLV – from 10 mm.
- Only moisture resistant (wall).
A simple non-moisture resistant material (ceiling; 9.5 mm or any other thickness) will quickly bubble, even if it is plastered. This solution is only acceptable in perfectly dry conditions. In extreme cases , you can reduce the thickness, but the sheet must be moisture resistant .
For window slopes we use GKLV or GKLVO (green). The last letters: “B” - waterproof, “VO” - waterproof-fireproof.
If we talk about gypsum fiber, then, by analogy, it’s GVLV, it doesn’t have color designations (however, it may be found in some manufacturers). There is also no “GVLVO” marking - this material is always produced fireproof. Gypsum fiber is stronger, so you can be satisfied with 10 mm , but the larger the number, the better.
Manufacturers have their own technologies and solutions, so the color of the material may not always correspond to those accepted according to the traditional scheme - you need to clarify and look at the markings, which must be right on the sheet.
Note. Moisture resistance does not mean that the material is not afraid of water - it simply has a reduced ability to absorb moisture and is more resistant to deformation under its influence.
For very humid rooms, GKLV/GVLV is suitable only with a caveat: there is a high probability that after some time the sheet will become deformed, swell, bubble, or crack. In addition, the above may appear when painting such a panel.
It is possible to use simple non-waterproof gypsum fiber board/gypsum plasterboard (ceiling) for slopes, but the reliability of such a finish will not inspire confidence. It is necessary to use material with a thickness of 10 or 12.5 mm of moisture-resistant type (wall).
How is it different from gypsum fiber?
In this article we will summarize plasterboard (GKLV) and gypsum fiber (GVLV), since the methods, process of work and all its features are identical.
If we compare the materials themselves, then the second one does not have the disadvantages of the first one : it is stronger, stiffer, more durable, less capricious in case of temperature changes, more resistant to moisture, can withstand 15 freezing cycles, while GKLV/GKLVO only has 4 (such temperature changes cause cracks).
Disadvantages of gypsum fiber: almost 2 times heavier, fragile, when transporting it must be handled correctly, however, there are reviews that this disadvantage is greatly exaggerated. Advantages: GVL is much stronger, it is also used for floor coverings, and it has better heat, sound, and waterproofing properties
Advice! Experts for slopes advise taking GVLV, which is somewhat more expensive, but the parameters for the interior element in question are much better.
In this article, if we use descriptions for plasterboard, then it should be understood that the same applies to gypsum fiber sheets, unless any remark is specifically indicated, and vice versa.
GVLV is produced polished and simple (rough) - the latter is taken if the finishing on the slopes will be painted or plastered or any other finishing treatment or cladding will be used.
Gypsum fiber breaks when strongly bent, and plasterboard is easier to give the required shapes, it is more plastic, so it is advisable to use it for slopes in the form of arches, for figured, curved structures.
In all other cases , the best material is GVLV; you don’t have to reinforce the corners for it, although it is advisable to do so . You can also use silicon-based paints and whitewashes, which is undesirable for gypsum boards.
Gypsum fiber is better suited for frame fastening: it holds screws much more reliably without dowels, is not prone to cracking, and does not crumble. But if gypsum board can be cut with a knife (it’s easier to work with), then a hacksaw will be required. It is GVLV that is best used in the kitchen and bathrooms where there is high humidity.
Features of drywall
Typically, the design of slopes with plasterboard is chosen by people who want to carry out repairs on their own without the involvement of experienced specialists. The result is an aesthetically pleasing window with slopes. This is due to some advantages of gypsum boards.
- Thermal and sound insulation properties. If you want to further insulate the room, you can install double slopes with special insulating material.
- Light weight, which allows you to make only a frame for installation without additional reinforcement.
- A perfectly flat surface when using gypsum board sheets promotes faster finishing.
- The ability of drywall to “breathe”, that is, when there are temperature changes or changes in humidity levels, there is no need to worry about deformation of the sheets.
- Environmental Safety. Even in combination with other additives, slopes do not emit harmful gases into the environment.
- The result is minimal waste.
However, you should also take into account the disadvantages of the material during installation work:
- it is necessary to handle drywall carefully during repairs and avoid any damage;
- It is necessary to additionally protect the surface from high humidity, since even moisture-resistant material will become vulnerable after some time when exposed to moisture.
Depending on the room where slopes need to be installed, choose a material of a certain type:
- at an average level of humidity in the room (up to 70%), standard drywall is suitable;
- in conditions where humidity is more than 70%, gypsum plasterboards with antifungal and hydrophobic additives are used;
- in conditions of increased fire hazard, gypsum plasterboards with additives such as fiberglass and mineral wool are suitable; this option is used extremely rarely, but its equally important advantage is its high strength to mechanical stress.
Chipboard, its advantages and disadvantages
Chipboard is one of the most popular materials in construction. Because of its strength, it is used in the manufacture of doors, installation of partitions between rooms, or in the manufacture of various furniture.
Advantages of chipboard:
- High strength and rigidity
- Easy to process
- Wide range of applications
- Nails and screws are firmly attached
- Homogeneity of material structure
- Possibility of manufacturing parts of various shapes
Disadvantages of chipboard:
- Twice as expensive as a gypsum board sheet of similar size
- Swells from moisture
- Flammability
- Toxicity (contains formaldehyde resins)
Preparatory activities
First of all, take all your measurements. When preparing sheets of material for decorating slopes, leave slight allowances.
Measurements
Regardless of the chosen method of finishing slopes with plasterboard, perform preliminary preparation of the surface to be decorated. Be sure to remove the existing layer of plaster coating.
Remove old plaster
If the gluing method is used, the surface must be carefully leveled. For this you can use ordinary putty.
Leveling the slope surface
When using the frame method, preliminary alignment can be abandoned in most cases. It is enough just to get rid of the crumbling areas of the plaster coating.
Treat the base with an antifungal agent.
Antifungal primer
After completing all the preliminary steps, you can proceed directly to attaching the plasterboard sheets using the chosen method.
Plastic slopes
Special plastic panels for finishing slopes are available for sale. This method is even simpler than installing plasterboard slopes. Plastic slopes are undemanding in maintenance, moisture-resistant and durable. There are panels in various colors.
There are several types of such slopes:
- made of foamed PVC;
- made of plastic on a plasterboard base;
- sandwich panels.
On the rough surface, mount the guide profile near the window frame. Secure the plastic slope in it. The opposite side is attached to the outer corner or also to the profile.
For decoration, an additional plastic panel is installed on the corner. In this way, conventional plastic slopes and models with a plasterboard base are installed.
Mixed method
I would like to dwell on one more method, which is similar to the previous one with polyurethane foam. In this option, an L-shaped profile is attached along the edge of the window frame. Acrylic sealant is poured into it, and strips of drywall are immediately inserted. So the gypsum board is already glued at one end and is located perpendicular to the window. After this, the drywall is attached to the profile with self-tapping screws. After such fastening, the installation of plasterboard slopes will be much easier.
Due to the L-profile, drywall is placed perpendicular to the window
Two-thirds of the formed cavity is filled with mineral wool. It is installed closer to the window. And the remaining void is filled with glue or putty. That's it, the slopes are ready. All that remains is to putty everything.
Instructions for installing plasterboard slopes
Elements cut from plasterboard can be installed:
- on polyurethane foam;
- for putty;
- on the frame.
On polyurethane foam
Any person can “glue” drywall to foam
It is very easy to fix the cut sheets onto the mounting foam. But this can be done right away if there are no large holes on the slopes. If the depressions are up to 3 cm, you can install the slopes right away, only fill the largest potholes with foam first (do not apply a lot, about 1/3 of the volume of the excavation).
If the unevenness is deeper than 3 cm, it is better to pre-fill them with cement mortar or a composition for starting plaster.
The procedure for installing plasterboard door slopes on polyurethane foam is as follows:
- Having prepared the site (removing dust and falling pieces, filling too large recesses with foam), apply mounting foam to the back side of the plasterboard blank with a thin (no more than 1 cm) snake.
- Place the element in place, press it against the wall, the way this fragment should stand.
- Tear it off and put it aside for 5-8 minutes. The foam remained on the wall and on the sheet of drywall. In a few minutes it increases in volume.
- Place part of the slope in place and press it well. Leave in this state until the foam has completely hardened (12-24 hours).
- Seal the gaps between the plasterboard elements and the wall with plaster.
The plasterboard slope has been completed; finishing work remains.
The disadvantages of this method are quite serious. Firstly, the side and vertical surfaces must first be leveled, otherwise you will not be able to install the elements evenly. Secondly, there is a possibility that the workpiece will bend/bend. Thirdly, voids remain. Well, and the most important thing is that the mount is not the most reliable. But the door slopes are made simply and quickly.
For putty
Instead of polyurethane foam, you can “glue” the cut out fragments onto diluted putty:
- Apply cakes of a composition for working with drywall, diluted to a paste (preferably the finishing one, it is more “sticky”), onto the sheets. They should be located around the perimeter and somewhere in the middle.
- Spray the slope cleaned of dust and cracked old plaster with water from a spray bottle.
- Place the workpiece in place and press well. You can rest your palms on the plane and “sway” the fragment from side to side. Feel that the plaster has begun to blur, and the piece of drywall has “stuck.”
- If the fragment stands tightly and does not move, you can leave it until the putty sets (for a day, sometimes two). If an element is held unsteadily and can move, it needs to be supported with something. Preferably at the edges and in the middle. Leave it like this for at least 10-12 hours. Then the supports can be removed and wait for the putty to dry completely.
Methods for applying putty “patches” can be different. The main thing is that the element holds well
The disadvantages of this method are the same. You just need to say that the slopes on the windows in our apartment are made in exactly this way. This happened 9 years ago, and still no problems.
On the frame
A more labor-intensive, but also more reliable and versatile way to install plasterboard slopes is on an assembled frame. The frame is made of wooden blocks or special profiles.
The guides are placed vertically along the door jamb and at the corner. Between them, at a distance of 50-70 cm, small transverse jumpers are placed.
To install plasterboard slopes with your own hands, first assemble the frame. It can be made from profiles or from wooden blocks
There is one peculiarity with this method: measurements are taken after the frame has been installed. The cut out parts are put in place and secured with self-tapping screws.
If the frame is assembled from profiles, screws are needed for metal, if from bars - for wood
In any case, you need to twist it carefully so as not to tear the cardboard. If you overtighten, the plaster may even burst or crumble.
A large number of defects of this kind will lead to the fact that the plasterboard slope will not hold up well.
At the stage of installation of the frame, no attachments were made for hanging things
If you plan to use drywall in finishing work, then you need to immediately think about hanging heavy things, because to secure them inside the frame you need to make embedded parts from wood or plywood. Embeds are a reliable guarantee that a TV or shelf will not fall off the wall.
An example of using mortgages to install a TV.
Preparatory work
The reliability of fastening and the durability of the entire structure depend on the quality of surface preparation. At this stage, it is necessary to lay communications (mainly wires) under the future structure. You will also need to remove excess mounting foam on which the window is attached, seal cracks with putty and remove traces of mold. After this, you need to clear the opening of debris.
Taking window measurements
To make the structure as level as possible, use a metal square to measure the distance from the window to the wall. It is recommended to carry out the procedure along the entire perimeter, noting the length at each corner and in the center at the top and bottom.
Plasterboard sheets must be adjacent to the window. That is, it is necessary to ensure that the planes of the slopes and the plastic frame coincide. To do this, you need to apply appropriate marks on the window sill and window, along which the plasterboard sheets will be installed.
Preliminary surface preparation
At this stage, it is necessary to remove the mounting foam and debris that interfere with the installation of the slopes. You should also apply a layer of primer, which will prevent mold from appearing in the future. Without the last procedure, after a few years you will have to destroy the structure and re-treat the surface. The primer is also recommended to be applied to the back surface of plasterboard sheets.
Removing the plaster layer
It is recommended to install slopes on “clean” walls. That is, the metal frame on which the plasterboard sheets are fixed should be installed on a surface that has been previously cleared of plaster. This procedure is due to the fact that the cement mixture breaks down over time, which in the future will lead to a violation of the integrity of the slopes. The plaster layer is removed using a hammer and other devices such as a chisel.
Leveling and puttying
Before installing slopes, it is necessary to repair wall defects that can become “bridges” of cold. In winter, frost penetrates into the apartment through such holes in the walls. To seal such defects, ordinary putty is used.
Leveling the surface is necessary in cases where drywall is attached to an adhesive or polyurethane foam. This stage can be neglected if the work is carried out using a metal profile. However, the frame itself also needs to be leveled to the building level.
Wooden beam inside the profile
Another way is to place a wooden beam inside a metal profile. They are also secured with self-tapping screws every 200 mm. But first, make sure that the internal width of the profile and the bar match each other, and you want the bar to be slightly narrower. Watch for changes in the shape of the support - it should not deform or bend - this is necessary for the precise fit of the beam to the horizontal supports.
These two options are the results of improvisation by builders of past years, which have proven themselves well, but they are most often used only for constructing a frame around the doorway. To strengthen walls, proven methods are still recommended.
Material selection criteria: PVC, plaster, drywall
What should the slopes be made of on the inside of the room, what are the options?
Sometimes the choice still depends on the initial data, for example, for a reinforced concrete opening, plastic materials will be the most suitable, since concrete itself easily accumulates and retains moisture. Or very poor quality of brick laying, which is often observed in “Khrushchev” buildings - sometimes there is almost through-blowing of the wall, and freezing is generally constant. Moreover, often all this has already been eliminated by renovation of the premises and there are no obvious signs. This is where danger lurks - drafts in openings that should be eliminated. And for an additional effect, make the slopes from insulated plastic.
Of course, you can turn to the experts. But if you decide to make the slopes of plastic windows with your own hands, then by and large it all depends on your preferences and skills in working with materials. Main conditions: high-quality preparation of the opening - elimination of all cracks, and proper installation of the window with a window sill
After this, it no longer matters how you design the slopes; any material convenient for you will provide a good result. There are few technologies for constructing slopes: plastering and finishing with sheet materials
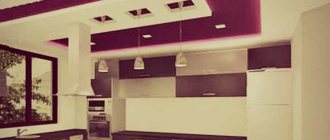
Examples of decorative partitions
An option that will fit perfectly into any design is the formation of windows on the sides of the opening in a plasterboard partition with a door. This option will illuminate the already dark corridor with natural light and give an aesthetic appearance to the room. These windows can be made in the form of semicircles over the entire height of the door or only a part. The classic option is a window on top of the door.
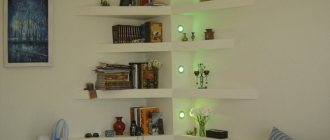
The walls in the hall or living room can be made with many niches in which decorative elements or just books will be located. It is advisable to organize niches with lighting so that they do not appear as dark spots against the light background of a lit room.
If you need to mount a partition that will only nominally divide the space of a room or neighboring rooms, you can make a plasterboard wall with many openings of various shapes and locations. How to make a partition from plasterboard will be discussed below.