If you are a lover of pirate themes, a potential “gentleman of fortune” and you already have a pirate costume for Halloween, but don’t yet have a helm, then it’s time to correct this injustice! I'll tell you how to make a steering wheel out of cardboard!
The material for a DIY cardboard steering wheel will mainly be cardboard.
Cardboard is a fairly common, cheap and environmentally friendly material.
How to make a ship's "rudder" using a template
It’s easier to make a ship’s helm from cardboard with a template yourself, so we’ve selected several different options:
You can choose a slightly simpler option, for example, this one:
You can try drawing your own template. Consider the density of the material and the sharpness of the scissors so that the “rudder” of the ship can be easily cut out and it will turn out neat.
DIY ship's helm as a souvenir
The choice of gift often depends on the preferences of the recipient.
People's hobbies and professions are different, so the number of souvenirs only increases every year. If there is a need to present a surprise within the framework of a nautical theme, then there is nothing better than surprising a person by making a ship’s steering wheel for him with your own hands. This marine attribute looks most impressive if it is made from an unexpected material. In order to please a loved one and improve his mood with your gift, you can use different types of chocolate as the main material for making a steering wheel.
A master class with step-by-step photos demonstrates how to make such a souvenir.
Set of templates in nautical style for cabin boy's birthday
For the little cabin boy's birthday, we suggest making a garland with your own hands.
To do this, print ready-made templates on paper. It is better to use a laser printer for this so that the paint does not bleed if it comes into contact with moisture.
Using a hole punch, make holes along the top edge of each flag and thread the string through the holes. You can also use a ribbon that matches the flags, that is, yellow, blue or turquoise.
Make some cool caps for your guests. To do this, print the finished templates on A3 paper.
Using scissors, cut along the contour and coat the area to be glued with glue or a pencil. Glue to the back of the template. You can already attach a ribbon to the finished cap.
To do this, use a needle to place holes on opposite sides of the cases, thread thin ribbons through them, and secure them. For packaging cupcakes or cupcakes, we suggest making original stands or baskets.
No less interesting are the boxes for packaging sweets.
Set up a candy bar “Yunga”, and use original toners to decorate dishes.
Print our templates and cut out along the outline. Apply a little glue to a skewer or toothpick and attach to the back of the topper.
Anchor as wall decor
People began to conquer the seas from time immemorial, and it is noteworthy that the anchor in the version to which we are accustomed now appeared only in the Middle Ages, while the anchor rod was most often made of wood and had straight “horns” - a transverse solid bar at the top parts of the structure. Over time, by the way, they abandoned it - too often these same “horns” led to accidents.
How to make an anchor as a wall decoration - master class from gina-michele
Features of working with cardboard
Cardboard is a dense and reliable material from which, if desired, you can make various crafts. Working with it will not cause any difficulties if you apply these tips:
- if the cardboard is thick, take sharper scissors or cut it with a stationery knife;
- If you are going to bend the finished parts of the product along the drawn dotted lines, trace their outline with the blunt side of your scissors or with a non-writing pen - the cardboard will bend easily and much smoother;
- A glue gun is effective, but not always suitable - if the material is thin, it is easier to replace strong glue with PVA or regular office glue;
- Make sure that the room where you will work is not too humid, otherwise the finished products will later delaminate or the parts will not stick together properly;
- regularly ventilate your room, adjust the light;
- if the model is complex, watch videos instead of text master classes;
- work in stages when the mood is good.
Beginners usually start simple, gradually making the task more difficult for themselves. Anyone can make a ship out of cardboard, even a child. If you follow all the instructions.
: Making handles
So, it's time for pens. The easiest way to make handles is from sticky tape. Wrap one end of the tape around each steering wheel spoke. You'll have to put on a ton of tape, but the handles will look pretty good.
Now put all the pieces together again to check if everything is going well.
Accent on wood
Wooden bikes are distinguished not only by their unique attractive design, but also by their practicality due to the properties of wood:
- material strength;
- elasticity;
- ease of processing;
- vibration absorption, resulting in smooth running.
Manufacturers often use layering technology to create a flexible molded form that creates a solid frame, which adds strength. And they also often combine wood with carbon fiber to ensure the lightness of the product. The finished frame is treated with impregnations against moisture and decay, which ensures the product’s resistance to environmental influences.
The most common tree species used in production: ash, maple, birch, beech, oak, cedar, walnut, sandalwood and other varieties of mahogany. Another material worthy of attention is bamboo. It is, of course, not a tree, but it is not inferior in strength.
Manufacturing without a template
You can take the simplest route. So, for work we need:
- thick cardboard;
- wooden skewers;
- scissors;
- pencil;
- glue;
- threads;
- paints.
First you need to draw two circles and cut them out. Inside each circle, you need to cut out another circle so that you get cardboard rims, as in the photo:
The size of the headbands should be the size you want the future product to be. Next, you need to cut out several small round pieces that will serve as the center.
Next you need to prepare the beams from wooden skewers. Measure the required length and cut the rays using a knife.
The ends of the beams need to be sharpened so that they resemble the beams of a real steering wheel.
The place where the ray will touch the main rim also needs to be sharpened a little so that the ray fits well. Well, then let’s start assembling the product:
Cover the top with another cardboard circle and secure it well with glue. Next you need to do the same with the outer rim:
To make the edge of the steering wheel as neat as possible, you need to sand it with fine-grained sandpaper.
Next, you need to wind a thread around the ends of the rays to give them volume. Now all that remains is to decorate the product with paints and you can decorate the room or play. Such a steering wheel can also become part of the composition and act as a cart wheel:
Design elements
To start working on the device, it’s worth understanding what this toy consists of.
Wheels
During the assembly process, the question will arise: which wheels are best to use for a children's balance bike? You can use:
- wheels from an unnecessary bicycle;
- wheels of a cart or wheelbarrow.
To reduce resistance, it is better to take care of the presence of bearings. They will extend the life of the bushing. The quality of shock absorption will not be affected by any material. The load on the wheels will be light.
You can use a bolt or a pin for the axle. The optimal material is plywood, 15 ml thick. The frame must be double with a distance between the sidewalls. It is necessary that they match the width of the wheels. It is worth considering the nuts that lock the axle.
Seat
Detailed adherence to the settings undoubtedly affects how quickly and efficiently you can set up your balance bike.
The rotary assembly can be performed using several methods:
- For a stand, you can take a shovel barrel. To reduce friction, it is better to oil it. After this, you should fix it with steel clamps to the frame cross member.
- If you don’t have a shovel handle, a piece of rebar will do. The clamps must be made of plywood.
About floating anchors
A drogue does not hold the ship in place. He holds it with his nose against the wave or current. In fleets, standard floating anchors are rarely used, except on expedition ships. Probably from a sailor's superstition: during a voyage or voyage (if the ship is a military one), the sea anchor is most often thrown out when it is time to give an SOS. Any floating anchor operates on the principle of a parachute.
However, in amateur fishing, floating anchors find quite utilitarian use. Some species of fish swim downstream in a school to feed, and then leave the core and return to their original position. It is clear that by staying in a boat above the school, you can expect a larger catch.
It is very easy to make a fishing anchor for a PVC boat from 4-5 2 liter PET bottles, holding them in a row with tape. Then the ends of a nylon cord are tied to the necks of the outer bottles, a loop of it is tied behind the bottoms and tied with the same tape. The rope from the boat is tied to a loop of the cord. So it is necessary that the bottles meet the flow of the current with the most streamlined surface, and rely on the thrust from the boat to rest against the least streamlined water, as befits a parachute. Setting up such a sea anchor for almost any boat is also easy: to do this, the bottles are partially filled with water or sand.
: Winding the rope
This step is not too difficult, but it will take you a lot of time. Cut six pieces of rope, 6mm thick and about 1 meter long each. Coat each spoke of the steering wheel with glue and wrap pieces of rope around the spokes. It turns out pretty good.
How to draw steam with a pencil step by step
Step one. Draw the body of the ferry and the water line with straight lines. Step two. We add a deck to our ferry, all sorts of antennas and gadgets. We complete the lines of the body so that they stand out more clearly. Step three. Somewhere on the horizon we draw the earth, insert a pipe for the exhaust for our ferry, draw lines for the windows. Step four. All that remains is to complete the windows in the already marked places, make some adjustments to the structure of the ship and its appearance, and, voila, the ferry is afloat. Take the helm, captain, we have a long journey ahead in the world of creativity! Step five. If you're knee-deep in the sea, try these lessons as well. On the pages of the site, you can always download various drawings for free and keep your children busy with them. A ship's helm, like a sea souvenir, is offered on the Internet from 1,900 rubles to 20,000 and above. You can save this amount and get the steering wheel absolutely free. All you need to do is download a ready-made one, cut it out of paper. And then, having chosen a place for it in your apartment or office, walk through it. We have already written about production. Why is the ship's naval helm so fashionable now? Firstly, a marine theme is always romantic. Secondly, the ship's wheel reminds of the sea and the ship, of pirates and adventures. And the ship, long journeys, the dream of all boys and girls. Immediately, I remember books that I remember from childhood: “The Fifteen-Year-Old Captain,” “The Life and Amazing Adventures of Robinson Crusoe,” “The Children of Captain Grant,” “The Two Captains,” “The Odyssey of Captain Blood,” and others. In general, the naval helm is a symbol of great achievements and discoveries. And it can become an original decoration for your interior, be it an apartment or an office, a restaurant or a hotel. What if you cut out a stencil and stick it on a hard surface, and then varnish it. You will receive a real naval steering wheel, a priceless gift for your son or grandson. Are you interested in the topic of stencils? Subscribe to our free newsletter! And you can always follow the updates happening on our website. You will be the first to see new stencils, which will be constantly updated. We will help bring all your creative ideas to life. If you find it difficult to cut out a stencil yourself, then in the near future we are planning to produce and sell stencils on various themes. So, you won't have to cut them yourself. In the meantime, subscribe to the newsletter and follow our news. If you closed your subscription in the pop-up window, simply refresh the page. And don't forget
participation in the mailing list. To do this, click on the ACTIVATION LINK.
You will receive it along with our letter.
Wooden steering wheel for a play complex
Drawing and assembly diagram of a wooden play wheel for a playground
- Catalog
- ☛Promotions and Discounts winter '21
- Playgrounds, Houses, Swings
- Playgrounds Series IZEO - M
- Playgrounds Bormio series: houses and towers
- Playgrounds GARDA Series
- Gymnastic complexes IZEO
- Towers and playhouses
- Playhouses (on stilts and on the ground)
- Wooden swing frames (stands)
- Playgrounds in the shape of a ship
- Home play area
- Winter slides, water slides and playgrounds
- DIY Assembly Kits
- For self-installation of playgrounds and swings
- ►Gymnastic climbing cubes
- ►Gymnastics - additions
- ►Children's climbing walls for home
- Sandboxes with a lid - a bench
- Sandboxes 120 x 120 cm
- Sandboxes 150 x 150 cm
- Large sandboxes (>150 cm)
- Unusual sandboxes
- Covers, awnings, accessories for sandboxes
- Slides - slopes for playgrounds
- Unusual swing: nest, liana, bungee
- Growing swing for babies (3-in-1)
- Swing without backrest (“seats”)
- Swing for two
- Swings for public places
- ►Playground components (hooks, fastenings)
- ►Gymnastics
- ►Plugs, lids, caps, handles
- ►Game elements (binoculars, steering wheels.)
- ►Cable cars / bungees
- Bungee for public places
- Bungee for private use
- Wooden playgrounds for public areas
- Swings for public places
- Cable car for public places
- Spring rockers
- Nets - climbing frames for public places
- MDF fences for playgrounds
- Climbing wall for home
- Garden partitions Series DND
- Sheds, sheds, firewood sheds
- Flower beds/beds/tables/benches
- Wooden Carports for Cars
- Interior items
- Fences for playgrounds
- Dog kennels
- ☃ New Year's home decoration
Featured
- Feedback
- Request a call back
About our company
Our company specializes in the production of wooden goods for organizing children's recreation in the country: playgrounds, swing stands, sandboxes. In addition, our assortment includes products from other areas: wooden beds and flower beds, wooden carports, storage systems for garden equipment.
The main direction (production began in 2013) is the production of children's play complexes for summer cottages. We have truly affordable prices for platforms and accessories for them, thoughtful designs and clear assembly instructions.
- You can read why in our concept here>>.
- Legal information is here >>
If you have any questions, please contact us, we will definitely help with calculations, planning, delivery and installation of your playground!
Captain's helm
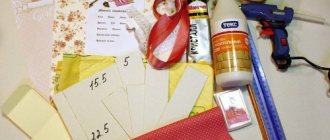
To work you will need:
- Cardboard
- Skewers
- Glue Titan and Moment
- Threads “Iris”
- acrylic paints
The first stage of work is to determine what size steering wheel you will have. It should not be very small like a car steering wheel. But not huge, so that it doesn’t block your character. So. When the size is determined, we make a pattern and cut out two circles. (here also look at the type of cardboard. If it’s very thin, you may need four circles) Now we cut out the inside of the cardboard circles, making like rims. Again, the size is to your taste, not very thick, not very thin. Now we cut out the same number of parts (2 or 4) for the middle of our steering wheel. From here the rays of the handles will come out and there will be a center for fastening. Now you need to cut the rays-spokes from skewers. We determine the size, counting on the fact that a thread handle will also be screwed onto the part that comes out of the steering wheel. and then cut them in half. I got 8, but the number can be set differently - according to your taste. Now we need to grind off the ends of our spokes with a knife or scalpel. It’s a little vague here, but it’s clear that towards the end the skewer has become thinner. After the ends are all done, we proceed to the middles. We apply it and mark where the outer wheel of the steering wheel will go. And now we grind it down in the same way as the tip, making it thinner. When all the spokes are prepared, we glue them to the central circles. Cover the top with the other half and press firmly. Next, we do the same with the outer circle of the steering wheel. Glue and glue everything together. This is what happens. You can see that the edge is a little uneven. We take the skin and sand it. Cardboard sands well, and it also covers cardboard porosity. So it goes smoothly. If it doesn’t turn out smoothly everywhere and some holes remain, there are processing options: 1. stick on pieces of toilet paper 2. cover with Paperglue (if you have one) When everything is ready, sanded and dry, we make handles. Simply wind the required amount of iris thread with glue onto the ends. This is what happens. Now we make the holder. In my case it is 1. a small stand, 2. two wires and 3. a piece of straw inserted into the middle. The steering wheel turns out to be even working. Using the same scheme, you can make wheels with spokes, only in this case the spokes will not extend beyond the wheel.
Alfa Romeo 164 2.0 R4 TB New level › Logbook › Wooden steering wheel. Manufacturing technologies
Hello again! Many have been waiting for this recording and it’s finally happened! In this post I will talk about the technologies for making a wooden steering wheel. But before I begin my story, I would like to immediately clarify a couple of questions that you may have: 1. I WILL NOT make such steering wheels to order! In this post I will talk about the technologies known to me and the materials used, but I do not have enough time to make such things to order. In addition, some of the work was done by my cabinetmaker uncle, but he also refuses to do it to order (he already asked). 2. If you have not previously dealt with “heavy” equipment (jointers, planers, stationary milling cutters and circular saws), be extremely careful and careful. I started using such machines in my distant youth and worked on them for 9 years. Some safety habits still apply today, as the large number of cutting elements rotating at 6000 rpm makes it difficult to relax. So let's get started! I will talk about 3 technologies for making a wooden steering wheel. More precisely, about 3 possible options for preparing the rim. Milling, gluing and subsequent work are the same in all options.
1.
I read the first method a long time ago here and it interested me very much. In principle, it describes almost the entire process. Unfortunately, the author of the entry, voluntarily or not (I don’t know), was removed from the site about 2 years ago and personal correspondence with him regarding the subtleties was lost... Pros:
in my opinion this is the simplest way.
In addition, any type of wood from pine to oak is suitable for this method =) Disadvantages:
lack of a smooth pattern of wood texture, transitions between pieces are visible.
2.
The second method is to make the rim from a “solid” piece of wood. In this case, it is necessary to use wood with a dense texture - ash, oak. Pros:
Quite simple manufacturing, possibility of making an anatomical steering wheel.
Cons:
in the final product we have a straight pattern, and not a radial one, as we would like.
3.
The third method is more labor-intensive, but allows you to get the full effect of the “factory” steering wheel. It consists of using thin strips of wood glued together to form a “rim” to prepare the rim. For this method, it is advisable to use softer and more flexible woods, such as elm. Pros:
“correct” texture pattern.
Cons:
labor-intensive process.
And now about how I did it: At first I followed method 3. My uncle had “expropriated” several elm boards, photos of which I posted a few posts earlier. The boards were cut into strips 5 mm thick in sufficient quantity
After sawing, plan the strips to a thickness of 2-3 mm. This will allow us to “roll” the strips more easily and provide better adhesion. Next, we prepare the matrix, according to which we will actually bend the fingers of the strip
Remember that the height of the matrix must be greater than the width of the strips. And yet, here I made a mistake, because of which I later had to redo everything using the 2nd technology. The matrix should not be half like mine, but 3/4, then you have a better chance of getting an even circle on the rim and making a better product.
When the preparatory work is completed, we begin gluing, using a large number of clamps, KleyBerit glue and mat.
We need 4 such gluings: top/bottom and face/back side. Making a whole circle is not the best option, because... By the time you adjust the edges for joining, all the glue will dry =)
In the meantime, we begin to prepare the steering wheel itself for pasting and subsequent milling, namely, we tear off all the factory “foam plastic”.
Further, as I already said, I took the gluing blanks and the steering wheel itself to my uncle, but he rejected the gluing because... they did not reach the normal radius, and I don’t have time to set new ones... Therefore, I decided to use the second technology and cut it out of a single piece, which, in fact, was already done without my presence, and a week later I took this miracle:
floating ship
Why limit yourself to simple crafts when you can create a real ship that will float? Of course, you need to put in more effort, but the result will certainly please you.
What you will need:
- wide tape;
- a piece of foam plastic (does not sink);
- textile;
- cardboard;
- thin wire;
- cutter;
- wooden boards (small);
- threads;
- scissors.
Manufacturing:
- Frame. The step-by-step creation of a three-dimensional ship begins with its hull. Using a cutter, carefully cut out the hull, first forming the contours for the deck and bow. Then cut the two sides obliquely and make the bottom as flat as possible.
- You may need a stencil or photo of examples to create the poop. When tracing the lines, immediately leave 7 mm, draw again. Once finished, you can cut it out. You will get patterns for the skins of the future vessel.
- Decoration. Color the patterns. For example, you can take a photo of a pirate, military or ancient Viking ship. Separately, on the pattern of the future deck, mark all the places where you will install the masts. Carefully cover each cardboard model with tape. It will provide protection from possible getting wet.
- Now attach the finished patterns one by one to the foam base. To secure, use glue or tape.
- Masts. You make them from thin planks. Try to make the masts sharp at their base and narrowed at the top. Secure it with wire to the finished masts.
- Sail. Remember, if you are planning to make a sailboat out of cardboard, you will have to fit several masts and make larger sails. After all, sailboats moved thanks to the wind. After cutting out the sail, literally sew it to the finished mast. Use a needle to make several identical punctures, pass a thread through them, then tie the ends to the yards. According to the shape, it will be narrower in height. When finished, stick the masts with their sharp ends into the base of the ship.
- Steering wheel. It is needed so that the ship then sails straight. Cut a couple of identical pieces from ordinary cardboard, then symmetrically stick them in the stern area into the base itself, positioning them so that they reach the water.
- Test descent. Look, if the ship suddenly falls or rocks, attach additional weight below or inside - a nut or large bolt. It’s better to hang it by wrapping a wire 5-8 cm down from the bottom of the ship.
INTERESTING: New Year's crafts from scrap materials: TOP-20 ideas
Options for making your own lamp
Wood provides almost unlimited possibilities for making unique lamps. You can use all available materials, even waste that you find in the forest. To work you will need simple tools:
- hammer;
- screwdriver/drill;
- nails and screws;
- glue;
- materials for impregnation;
- dye.
- Finished wood products
One of the most popular base options for lamps made by hand from wood are ready-made products, for example, a cart wheel. In the past, such chandeliers were hung in taverns, and the material could be found at almost every turn. Now such a product is available for purchase only in a specialized store.
To make an original wooden chandelier, take a base wheel, a certain number of lamps, depending on the size of the product, chains for fastening and materials to hide the power wire. Small touches will help create an additional feeling of immersion in antiquity - you can trim the wood with forged parts. This lamp is suitable for a wooden house and will fit perfectly into the overall interior.
If you can't find a cart wheel, you definitely have regular wooden clothespins. You can use them to make a chandelier, sconce or table lamp. Some models will require glue, others just time and enthusiasm. As an example, you can use a metal mesh for the base, roll it into a cylinder of sufficient size to fit the lamp inside. Attach clothespins from the outside, without glue or nails, simply putting them on the base. You can involve your child in the work, and the warm light from the finished lamp will be a pleasant reminder of the time spent together.
You can make a lamp from wood using ordinary hangers. Simply stack them on top of each other so that there is room in the center for the lamp. To make the design look more attractive, rotate each subsequent hanger a little around its axis. For fastening you only need glue. Do not doubt that such a handmade lamp will not leave you indifferent.
In a similar way, you can independently come up with ideas on how to make a lamp from wood. Anything can be used: old barrels, a ship's wheel, popsicle sticks and much more.
Natural materials from the forest
If for previous options you had to buy the basics, then in this section we will look at wooden blanks that can be found in the forest. As an example, use birch bark instead of a lampshade for a lamp. It will dim the light and make the room more romantic and calm. The only thing you need to remember is that this material is highly flammable and it is better to use LED lamps.
Decorating a children's party in a nautical style: ready-made templates for birthdays
Hang a banner in front of the door inviting kids to the party.
And on the walls hang portholes depicting ships and seascapes. Dolphins and seagulls watching the holiday through the portholes will delight the eye. Print the finished portholes on thick paper measuring 300x300 mm and attach them to the walls in the room where the holiday will take place.
If a seaside celebration is being held in honor of a child’s birthday, you can make a congratulatory banner with waves.
DIY floor lamp made of wood
Surprisingly, from terrible and absolutely unremarkable driftwood you can build stunning lamps with a touch of mystery.
- Snag.
- Stones.
- Branches.
- Glue
- Gardening scissors.
- Sandpaper.
- Lampshade, lamps and various decor.
- Bar.
- The first step will be the most pleasant and interesting thing - decorate the lampshade with various branches, cones and stones to create a unified style with driftwood. This must be done in advance so that the glue has time to dry.
- Next, use garden shears to give the driftwood the shape and size you need for your lamp.
- Pull the wire with the lamp through the block.
- Connect all the parts together.
master class with photos and videos
The helm always evokes thoughts of travel and adventure. The most interesting thing is that you can do it yourself. Depending on the chosen material, it can be a toy or interior decoration, if it is made of plywood or wood, mastic or cardboard, or even coffee beans and candies. Today's master class will tell you in detail how to make a ship's steering wheel.
How to make a ship's steering wheel out of wood with your own hands
We will need: – Thin long slats. - Hot water. - Wooden cylinder. – Knitting sticks made of wood. To create a circle, we take thin and long slats, which need to be shaped into a circle. To bend them, we fill a bath of hot water, lower the slats into it, then fix them in the desired position using a press and leave until completely dry. The slats located closer to the central part must be twisted into rings more tightly. When creating a circle, you need to coat all tiers with glue. The twisting method is convenient because the circle will ultimately be stronger, and simply making a circle from a board will not give the desired effect. For the central part, take a low cylinder and make 6-8 holes in it for stick-knitting needles. After preparing all the parts, you need to combine them. To do this, we stick the knitting sticks into the circle in the center, simultaneously passing them through the hoop, and only then fasten them together. We attach the handles to the knitting sticks to make the steering wheel look more natural.
Ship's steering wheel made of chocolate mastic
Such products can be made to decorate, for example, a cake. The steering wheel is made from mastic, the handles can be made from pieces of spaghetti. The steering wheel itself is made of mastic ribbons. Recently, handmade crafts have become very popular. These also include candy bouquets. These are not just bouquets made from sweets, but very interesting crafts that look like beautiful compositions. For example, you can make a candy bouquet in the shape of a ship's steering wheel. The basis for such crafts is most often made of thick cardboard so that the structure is durable. Then this base is masked with corrugated paper and only then candies and other details are attached on top of it.
Steering wheel-topiary made of coffee beans
This is a beautiful product for interior decoration; it also emits a pleasant coffee aroma. We will need: – Thick paper. - Paper tape. – Stick for the stem. - Napkins. - PVA. – Brown paint. - Tape. - Coffee beans. To begin, take cardboard and cut out a couple of identical templates. Now we glue a stick to one of the templates. Next, taking masking tape, we begin to roll an oval out of it, this is necessary to give volume to the product. Glue these rollers onto the first template. Next, glue the second part of the workpiece on top of the pasted tape. Now we cover the resulting part evenly with napkins, as in the papier-mâché technique. The glue can be diluted with water. Now we leave our craft until completely dry. When the base of the future steering wheel has dried, paint it with dark brown paint. As a topiary decoration, you can glue a string to create a nautical style and hang a small lifebuoy on it. Now you can paste over the topiary with coffee beans. And we cover the stick-stem with tape. At this stage, the topiary steering wheel is ready!
How to make a ship's steering wheel from cardboard with your own hands
You can make a steering wheel in another way - using cardboard. This craft is perfect for children's games. It is done very simply. We will need: – Bulk corrugated cardboard. – PVA glue – Scissors – Compass or other round object for drawing a circle. - Regular ruler.
Using a compass, draw two large circles - this will be the rim. Now we cut out a couple more circles, but without holes in the center. As additional details, you can cut out a couple more small circles of different sizes to give the product volume. Let's make another element with knitting needles. Now, using PVA glue, we combine the parts into a single product and we get an excellent toy in a marine style. To avoid deformation of the circles due to the distance between them, you need to glue additional cardboard inserts between the parts around the perimeter. Now the cardboard steering wheel is ready! Happy creativity!
Steering wheel for those with a sweet tooth
Making a candy steering wheel does not require special skills or the use of complex materials.
In this work you will need:
- Cardboard;
- Scissors;
- Glue;
- Stapler;
- Corrugated paper;
- Double sided tape;
- Candies.
Two circles are marked on the cardboard, one of which should be 5-6 times larger than the other. The size of the larger circle depends on what diameter of the steering wheel is ultimately preferred.
In a large circle, a circle with a radius of 5-7 cm smaller is laid out. Circles are cut out of cardboard, in duplicate each. A hole is cut in a large circle along the lines of the previously laid out circle. The result should be two rings and two small circles.
Four strips of cardboard are cut out separately, the length of which should exceed the diameter of the ring.
All parts are covered with colored corrugated paper.
The four strips are placed crosswise on top of each other and secured in the center with a stapler. The finished “fan” is placed between two large rings. The parts are fastened together.
Small circles are fixed in the center on both sides with a stapler. Pieces of double-sided tape are glued to the back of the prepared candies.
If candy wrappers require the presence of “tails,” then the latter are folded back and hidden under the tape.
Using the second adhesive side of the tape, the candies are secured along the diameter of the ring and in the center of the steering wheel. A delicious gift is ready!
It is not necessary to use only small round candies in your work.
If you increase the diameter of the steering wheel, then long oblong sweets and massive chocolate bars, which can be placed along the cross lines - the handles of the steering wheel, are suitable for decoration.
Craftswomen who know how to create culinary masterpieces in the form of different types of cakes can go further and create a miniature sweet ship.
In this case, the ship itself will be directly a biscuit with the desired filling, and it is quite possible to form all the small parts of the boat from mastic of different colors. The only thing you need to consider when making a sweet souvenir is its short storage. Therefore, it is advisable to start creating a masterpiece the day before the celebration.
Cardboard steering wheel for a photo shoot
If you are preparing for a thematic photo shoot and the theme is the sea and everything connected with it, then you can prepare a helm for this event. Use thick 3-ply white material and one of our templates. It is better to cut out such a wheel using a sharp stationery knife so that the product turns out neat. In theory it should look something like this:
DIY wooden ship models: drawings, instructions, tools
So, well, let's start creating such a ship. Carving prefabricated wooden ship models is not the easiest task. You will need many tools for this. Among them are: a knife, a chisel, a hammer, a block (and, if necessary, a saw), thin cloth, superglue, a long wooden spike, a rope, a drill. In addition to this, you will need two more very important parameters. Firstly, this is time, and secondly, an important quality of those people who create prefabricated models of ships from wood is patience.
Tags
with your own hands from your own hands. with your own hands a steering wheel at hand there are no future handles sticky Paint the handles brown with your own hands will be with your own hands from with your own hands from with your own hands what to make from How to make a paper one Make a steering wheel How to make a paper one how to make a steering wheel You can make a rotating one, you need to make a steering wheel How to make a steering wheel You can make several ships with your own hands, cardboard with your own hands. We make cardboard with our own hands with our own hands. do-it-yourself ship draw your own template. do-it-yourself cardboard do-it-yourself cardboard Come up with your own pirate
articleuse ring diameter circles at home