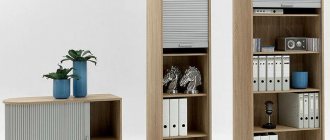
The back of the cabinet is designed not only to protect things from dust. It adds stability to the furniture, creates completeness, and also performs a decorative function, complementing the design of the room. It will be useful for home craftsmen to learn about the types of fasteners, materials and secrets of installing the back wall of a cabinet. Experts will express their opinions and answer readers' questions.
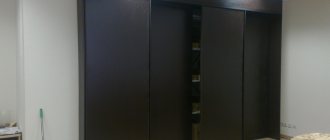
Example of fastening the rear wall of an OSB cabinet
Do you need a back wall in your closet?
This part rigidly connects the wardrobe structure, giving it the correct shape and additional stability. But this is not always required for a number of reasons:
- Built-in furniture may not have a back. Such a cabinet is mounted to the wall of the room or inside a niche, and does not require additional support.
- The absence of a back part in cabinet furniture will lead to loss of the original shape and distortions. The front end will also suffer. Swing doors will warp along with the body, and sliding doors will fall out of the guides and slide to one side. This happens because the things inside put an uneven load on the body. In addition, the niches in the walls and the shelves of the wardrobe have different shapes and sizes, which creates additional difficulties for the stability of the entire structure.
- If you buy a partition cabinet that will be used on both sides or as a shelving unit, it will not need an additional wall.
- For a kitchen cabinet, not only stability is important, but also adherence to the wall, so the back is attached using grooves.
How to repair a shoe section for a hallway set?
The photo shows that the facade was skewed to one side due to a breakdown.
The most common breakdown of this section is the failure of the plastic bushings of the opening mechanism of the section with doors (facade). They are usually divided in half - external and internal. You can, of course, turn new bushings on a lathe, but not everyone can do this. A more accessible and simpler way is to attach the outer part of the mechanism bushings using self-tapping screws (4x25 mm). From this “set” we use only self-tapping screws with a press washer and a larger plastic ring, and throw away the rest. After the work has been done, everything will be as it was originally.
What material is it made from?
To dwell on a specific option, let's consider the positive and negative sides of each.
| What is the name of the material | Its advantages | Main disadvantages |
| Chipboard (chipboard) |
|
|
| Fiberboard (Fibreboard) |
|
|
| HDF (High Density Fiberboard) |
| high price |
| Plywood |
| cannot be processed with all types of materials |
| LDSP (Laminated chipboard) |
| high price |
| OSB or OSB (Oriented Strand Board) |
| some manufacturers add glue to the material that contains resins that are harmful to health |
How to repair a hinge with epoxy resin
To repair larger damage, epoxy resin can be used. This is a plastic material that, after hardening, turns into a hard surface.
Epoxy resin consists of two components that must be mixed thoroughly before use. The resin must be tightly filled into the damaged hole and the surface leveled with the main one.
While the resin has not hardened, you need to screw the confirmat into it and leave it until it hardens completely. The fastener will then easily unscrew from the wall and be installed again along the thread through the loop. Instead of a confirmat, you can use a regular bolt: cut off its head and make a slotted thread at the end. Glue the bolt with the thread outward using epoxy glue or drown it in resin, as in the previous version. Then install loop and secure it with a suitable size nut
If the inner surface of the wall is white, you can mask the repair area with a regular corrector, and for colored surfaces, select a suitable paint or cover the area with self-adhesive film
You can also use filling the hole with cotton wool soaked in PVA glue. When the glue hardens, you can screw a self-tapping screw into this place
How to secure?
Let's look at the details of self-assembly of the rear part. There are several ways to do this, each of which is suitable in a specific case.
Overlap fastening
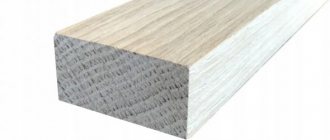
The most practical and inexpensive option for this method would be fibreboard (in common parlance “hardboard”). The thickness of the fiberboard should be 3-5 mm. This material is especially suitable for sliding wardrobes. You can also use plywood, OSB and other materials with a flexible structure. You should not use nails for fiberboard or chipboard - fastening with their help is unreliable, and the panel may fall off over time at the slightest impact.
Step-by-step installation instructions:
- Assemble the cabinet and open the back according to its size, but 2 mm less on each side. For example, for a structure measuring 1800x700, the fiberboard should be 1798x698 (the base is not taken into account).
- Secure the corners of the sheet to the body. Use screws measuring 3x16, 3.5x16 or 4x16 for this.
- Screw in the screws along the edges of the sheet. Their exact number depends on the size of the cabinet. For greater strength, the distance between the screws should not be more than 10-15 cm. At this stage, to save money, you can nail a small number of nails measuring 1.2×25 or 1.2×20.
Groove mount
Most often this method is used for kitchen wall units. In this case, the recessed wall does not prevent the cabinet from fitting tightly to the wall and is easily adjustable. This method is also suitable for furniture that is in plain sight. The back part inserted into the groove becomes invisible and the cabinet looks beautiful.
Installation in grooves with additional fixation with corners
Step-by-step instruction:
- Pre-make grooves 10 mm deep. in the walls, bottom and roof of the module.
- Now secure the back into the grooves. Assembly starts from the bottom and ends with the roof.
- If the width of the grooves is too small, you can slightly grind the edges of the back wall.
In the form of an internal insert
This method allows you to secure the back part from the inside without moving the cabinet. Most often used for large and heavy furniture. But a fiberboard sheet is not suitable for this. “Orgalite” demonstrates good strength during tensile deformation, but in this case the entire structure will compress the back wall, so it is better to choose laminated chipboard with a thickness of 6-10 mm, which will withstand such a load.
Step-by-step installation instructions:
- Cut the blanks a couple of millimeters smaller than the dimensions of the niches. The remaining clearance will be used for the seal. Do not forget to process the edges of the finished sheets so as not to scratch the inner sides of the walls and shelves;
- Before installing the panel, secure 4-8 metal corners in each niche so that the back side of the corner is flush with the end. This way you will place the wall evenly, and it will not fall out on the back side - the corners will hold it inside.
- After installing each sheet of chipboard, attach it from the inside. You can use rastex, canonical screed, plastic or metal corners. Read more about fastening methods.
The video below shows the homemade production of an inset back wall without the use of professional tools.
Butt-to-butt connection
This option is suitable when you need to install a back wall of several sheets on a two- or three-section cabinet or if the fiberboard sheets are narrow. In this case, the remaining edges of the sheets are screwed overlapping with self-tapping screws (see the first method).
How to install correctly:
- Attach the fiberboard sheets overlapping the edges of the cabinet.
- Use self-tapping screws at the joints. They are screwed between the fiberboard sheets on top of special plates that come with the cabinet, which will firmly press both sheets to the partition.
The plates can be replaced with ordinary metal washers or made independently. Stores also sell plastic connectors specifically for these purposes.
Connecting profile 2 meters long for the rear wall of the cabinet.
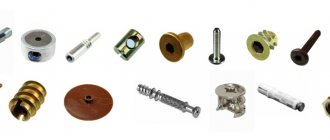
Branded fasteners
Furniture hardware companies often offer their own proprietary cabinet designs. They are easy to install, used in finished projects, and sold individually and in packages in hardware stores.
After installing the back wall of the cabinet, if it is placed in the center of the room, think about decor options.
How to choose quality fittings
There are a great variety of alloys from which furniture fittings are made, so there is no need for a non-specialist to understand all these intricacies. In addition, manufacturing companies are constantly improving the quality of their products and patenting new compositions.
The main things you should pay attention to when choosing accessories:
- The manufacturer's logo must be in the most visible place and clearly legible.
- The color of the metal must be uniform, without stains, burrs, roughness, or streaks.
- Open fittings are a thing of the past; it is better to give preference to hidden mechanisms.
- When opening and closing doors, they should not creak, knock, wobble or generally cause any suspicion.
- Drawers should not rattle, jam, or slide to the side.
- The finishing mechanism, if present, must work without any complaints.
By following these recommendations, you can not only choose high-quality furniture that is suitable in price and functionality, but also purchase a product that will last for many years, maintaining its presentation.
Experts' answers to readers' questions
In the “question-answer” section they often write about the back wall of the cabinet. Experts in the field of furniture production have selected the most popular ones and we publish them here.
There is an unpleasant smell from the back of the cabinet, what should I do?
In this situation, you can try 2 options:
- Treat the entire structure with Smelloff universal odor neutralizer. This product is safe for people and pets.
- If the first option does not help, you should replace the back panel with a new one.
Read about methods to get rid of unpleasant smell in the closet.
How to make a hole in a cabinet wall
Sometimes it becomes necessary to make a hole for an outlet or switch right inside the cabinet. In this case, the advice is:
- Depending on the shape and size of the cutout, you can make a hole using a jigsaw or a fine-toothed wood saw.
- The edges must be covered with a U-shaped edge made of plastic or PVC.
How to make a wall with your own hands?
Choose a material suitable for your design and cut a sheet of the desired shape (if the dimensions exceed the dimensions of the cabinet), or assemble a wall from several small sheets.
How to remove nails from the back wall?
- If the head of the nail sticks out on the surface, you can pull it out using side cutters or a small nail puller.
- If it is deep in the wall, first access the head using a wood punch, and then remove the nail with pliers. This method involves damage to the material and will have to be replaced in the future.
- When the hardboard back wall is overlapped, the best way to remove the nails is to carefully drive a flathead screwdriver between the fiberboard and the cabinet body, using light pressure to push the wall away. The nail heads will be visible and can be pulled out using the first method.
How to strengthen the back wall?
To strengthen the structure, it is enough to attach two narrow planks at the back crosswise, which will cross the entire surface of the cabinet.
There is mold in the closet, what should I do?
If the material is moisture resistant, you have 2 options:
- Use chemicals from the store: ALPA FONGIFLUID, Cillit Bang for black mold, DALI;
- Treat the surface with a folk remedy: brown soda or soda.
Antiseptics
If the material does not have moisture-resistant properties, it is better to replace it.
Manufacturing technology
We will divide the cabinet manufacturing process into several stages:
Stages of manufacturing a cabinet from laminated chipboard
Project preparation
At the design stage, it is necessary to understand all the nuances of the design, such as:
- Dimensions;
- Number of departments and configuration;
- Number of shelves.
Therefore, before you start designing, you should decide in which room and where exactly the new furniture will be placed. Having allocated a place, measure the area several times - its length, width and height. In fact, these will be the dimensions of the structure.
Measure your closet space before designing
The only thing is that if the cabinet is not built-in, its dimensions should be somewhat smaller than the size of the space allocated for it so that the design “fits in” easily.
Sample Project
Having decided on all the above aspects of the furniture, draw it on paper or on a computer. In principle, it is not necessary to make an exact drawing to scale. You can even draw up a diagram by hand. The main thing is that it is clear to you, and all the dimensions of the furniture in millimeters are indicated on it.
Preparation of materials
For work you need to prepare the following materials:
- laminated chipboard;
- Fiberboard;
- Self-tapping screws;
- Plugs for screw heads (selected according to the diameter of the screw heads. You can purchase plugs at a furniture store);
- Accessories - door awnings, handles, legs, guides for drawers and removable shelves, clothes rail with flanges;
- Self-adhesive film according to the color of the chipboard coating;
Cabinet fittings can be purchased at a furniture store
Having the project in front of your eyes, you can independently calculate the amount of all materials.
In addition, prepare the following set of tools:
- Jigsaw;
- Electric drill and drill set;
- Construction corner;
- Tape measure and pencil;
- Screwdriver;
- Construction stapler;
- Rule.
Manufacturing of parts
We begin work with the manufacture of parts:
| Illustrations | Actions |
Manufacturing of parts:
| |
Making holes for fastening shelves:
|
After preparing the parts, stick strips made of self-adhesive film on all their ends.
Choosing fasteners for kitchen cabinets: types, advantages, installation process
Modern kitchen sets include not only cabinets, but also wall cabinets, which are mounted on the wall using special fittings. They are used to store dishes, food and other kitchen utensils. Since the mounted modules with the contents inside are quite heavy, their fastening must be reliable. When choosing canopies for kitchen cabinets, you should be guided not only by personal preferences, but also by the features of the wall, as well as its material and other nuances.
Kitchen wall cabinets are usually installed at a certain height. If the set is made to order, then the installation is subsequently carried out by workers, but if desired, the furniture can be installed independently. There are certain standards for the location of lockers so that they can be conveniently used by a person of average height. People who are too tall or, conversely, short will have to adjust the furniture placement parameters and adjust them to suit themselves.
Despite the generally accepted meanings, the main thing is the comfortable use of furniture, which is directly related to the growth of its owner. The hostess or owner should easily reach the middle shelves of wall cabinets without the help of a chair or stool.
You should know that the minimum distance from the tabletop to the bottom edge of the cabinet is 450 mm. This will allow you to comfortably use the work surface and place the necessary small household appliances there, such as a coffee maker, microwave, electric kettle, etc. But most kitchen furniture stores consider the optimal distance to be 600 mm.
To make it easier to determine the most convenient level for hanging cabinets, you should familiarize yourself with the calculations of the ratio of human height and the distance to the top shelf of the module:
- height from 1.55 to 1.6 meters – height to the top shelf 1.75 meters;
- from 1.6 to 1.7 m – distance to shelf 1.9 m;
- from 1.75 to 1.9 m – height 2 meters.
Taking into account your height, you can easily determine the optimal distance for yourself to the top shelf of the headset.
Types of fastenings and their features
After choosing the height for mounting the cabinets, you should decide on the type of fastening. It can be different: corners, pendants and tires.
Corners or pendants
Previously, special metal hangers were used when installing cabinets. They were attached to the rear ends of the module walls. Today, such devices are no longer used, as they have quite a few disadvantages. For example, the inability to adjust the position of cabinets after installation on the wall. And how evenly they will hang depends only on the accuracy of the markings on the wall.
Corners are almost the same as pendants, only they are attached to the roof of the cabinet
When using them, it is important to determine the upper limit at which they will be set. One horizontal line must be strictly adhered to, otherwise the wall cabinets will not be installed level.
Installation on corners or pendants is a rather labor-intensive process compared to a tire, requiring perfect precision. If there is a mistake, you may need to make new holes in the wall.
If the walls were not leveled during the kitchen renovation, then fixing them to the corners will be the best option. An outdated method does not mean it is bad, you just have to spend a little more time on installation than when using other types of fasteners.
A mounting rail or strip for hanging cabinets is much more convenient and saves time. This kind of work can be done even alone, which cannot be said about installing it on corners.
The fastening consists of two elements - adjustable canopies and a special strip. The canopy is installed inside the cabinet, in the back wall of which you need to make a hole. A rail is attached to the wall, onto which the module is subsequently hung.
This type of fastening has its advantages:
- Self-installation. You can handle the installation of wall cabinets yourself by first fixing a plank to the wall, and then installing modules on it.
- Possibility of adjusting the position of the cabinet. In this case, there is no need to remove furniture from the wall; all the work can be done under the canopy.
- Reliability. Unlike mounting on corners, the option with a bar is considered more reliable and capable of withstanding high loads. Even if a couple of screws in the structure become loose, the rest will hold the modules well.
Tools and preparatory work
In order to install wall cabinets with your own hands using canopies and a mounting strip, you should prepare the necessary tools in advance:
Hammer or drill (depending on the wall material). Screwdriver and screwdriver. Construction level, tape measure.