The walls in the kitchen are finished with clapboard, how to now attach the wall cabinets to the clapboard.
If preliminary calculations have been made, then there should be no problems.
The lining is attached vertically, which means the frame bars are fixed like this
If you have calculated everything correctly (installation height of wall cabinets), then we attach a mounting strip (rail) to a horizontal bar under the cabinets.
Or option 2, each cabinet is attached individually.
That is, you need an even horizontal line, we work with a level and a marker.
Next, straight through the paneling (we pre-drill holes) into the frame block, we tighten the screws and hang the cabinets on them.
The tire is attached in exactly the same way (with self-tapping screws and along the line).
If the lining is already installed and there is no mortgage for cabinets under it, in my opinion, it is more correct to disassemble the lining (tongue-and-groove locking connection + clamps and screws, or nails) on this wall.
And then secure the mortgage.
We knocked out a line, drilled a block, made markings for the cabinets through the block along the line, drilled holes, hammered in dowels, and screwed on the mortgage.
And then install the lining in the reverse order.
If you do not disassemble the lining, then everything is at your discretion, you can use Molly dowels, fasteners for hollow structures, but the entire load will be on the lining on the clamps, they may not withstand.
I definitely recommend disassembling the paneling.
If this is PVC lining mounted using the adhesive method, then the cabinets are hung as on a regular wall.
Markings, holes through the paneling, driving in dowels, installing a tire, or immediately tightening the screws and hanging the cabinet.
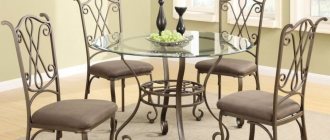
Kitchen design today is striking in its diversity. There are many ideas for kitchen decoration. Every woman strives to create a cozy atmosphere in the home, and especially in the kitchen. For the housewife, this is like a study where she spends most of her time.
Here we have breakfast, lunch, dinner, drink tea, coffee, and the decoration of the kitchen completely affects the feeling at the dining table.
Any woman knows how difficult it can be to create coziness in the kitchen, to put everything in its place, if there are no various hanging shelves and cabinets. That's why they came up with kitchen walls, the set of which includes multifunctional pencil cases, various kinds of stands, bedside tables, and wall cabinets.
Let's look at how to properly hang kitchen cabinets.
Required materials and tools
These pieces of furniture are of great importance. They save space in the kitchen and have sufficient capacity. They keep a lot of things there. Therefore, it is necessary to make high-quality and thorough fastenings to the wall. Before you start work, you need to prepare materials and tools:
- A base to secure objects.
- Hinges for the facade.
- Elements required for the construction of cabinets.
- Self-tapping screws, nails.
- Intersectional couplers.
- Tires.
- Hinges and screws to install them.
- Drill. If the wall is concrete, you need a drill with a hammer drill function.
- Tape measure, pencil, ruler.
- The level is preferably long.
- Screwdriver, screwdrivers.
- Drill attachments, screwdriver attachments.
- Hammer.
- Clamps, hacksaw.
- Open-end wrenches.
After you have purchased all the required materials, you need to prepare the walls for installation and make markings.
Marking places for fastening
Lining is a finishing material that looks decent and solid. There is a feeling of comfort among such walls. Decorative elements will add coziness. Before installing the shelves, find out where the lining fastenings are located. Having projected the frame structure onto the built-in finishing material, make marks on the outside of the boards. If you have a laser level, this task is easier to cope with. After installing the finishing, you can see along the highlighted contours in which places holes will be made for installing anchors.
Don't forget to prepare the walls!
Before hanging cabinets, you need to prepare the walls by doing some work:
- It is good to level the base, since unevenness will negatively affect the entire installation;
Use plaster or plasterboard sheets.
These points will be the basis for the work ahead.
After hanging the cabinets, painting the walls will be very problematic.
Initial stage of work: how to determine the height of the suspension?
Before you start attaching cabinets to the wall, you need to correctly determine the height of their hanging. Approximately the gap between the countertop and the bottom of the cabinets is 50-60 cm, and according to GOST - 45 cm. If you mount the cabinets above the refrigerator or high oven, then their height will indicate the required hanging point.
Size is influenced by several factors, but the primary one is human height.
You should also take into account the quality of the wall partition. In modern houses it is most often made of plasterboard. In this case, do not hang the cabinet too high - the wall may become deformed. In older houses, the floors may also be dilapidated. The walls will not bear such weight and will crumble. In this case, the furniture may fall, and you will be forced to repair it or purchase a new one.
To prevent heavy loads on the floors, you must install auxiliary supports and metal frames.
In most cases, the height of the suspension can be influenced by design innovations. We are talking about facade kits, where everything you need is included in the kit, and this is very economical.
The instructions indicate what height the suspension should be.
How to hang a cabinet on a concrete or brick wall
First of all, you need to correctly mark the drilling locations. The wiring diagram is preliminarily specified and the markings are adjusted according to it. You need to be prepared for the fact that the drill will get very hot during operation - it needs to be cooled with water from time to time, dipping it into a container of a suitable size.
A brick wall is drilled at low speeds (about 400), in impact mode. It is important to hold the tool strictly perpendicular.
Concrete is highly durable; for it, use a pobedite drill with an extra-hard tip. Drilling is carried out at medium speeds, in shock-rotational mode. You need to be prepared for the fact that there is a risk of getting into the reinforcement and you will need a new drill (the tip of the current one may break off). In this case, the drill is replaced with a regular one to bypass the obstacle. If possible, it is better to move to the left or right.
To hang cabinets on a tiled wall, you must remove the glaze from the intended locations before drilling. Then drill with a thin drill to eliminate the possibility of cracks during further work.
Hanging on a mounting plate (rail)
Before you start hanging kitchen cabinets, you must keep in mind that there will be a gap between the furniture and the wall. It is necessary that the gap be the same both above and below. It is necessary to install an additional rail at the bottom of the cabinet.
You can attach it at a height where the lower part of the furniture “enters” the kitchen apron.
This type of canopy has a number of positive aspects if you hang it on loops and hooks. Firstly, it is very easy to make markings for the mounting rail; the installation of cabinets can be done with high precision. Secondly, the hangers can be adjusted, and dismantling and installation will be quick and easy. Thirdly, the cabinets form an even row, without any gaps. Fourthly, the ability to withstand any loads, here they are distributed evenly.
You can handle this job yourself.
But there are several disadvantages of this type of canopy:
- Such a kit - attachments and rail - is not cheap. But this is, rather, not such a serious obstacle, because the time savings are significant;
- Gaps form between the wall and the furniture.
Despite this, this method is considered the most acceptable, within the capabilities of any master.
Parallel layout
In some cases, home owners have to give preference to this option for arranging furniture. This has to be done if you plan to create a special design. If the door is located opposite the window, then household appliances and furniture should be placed on both sides.
Parallel layout is convenient when all the necessary things should always be at hand. You can always find what is hidden in the functional drawers of the kitchen unit.
Parallel placement of kitchen furniture in a narrow room
Useful drilling tools
A jack of all trades always needs certain tools to work in a private house, on a summer cottage, in an apartment, or when building his own house. Many of them are not even worth purchasing if they do not require constant use. For example, for drilling, there are many different attachments that will greatly increase the functions of your drill and significantly expand them.
Let's look at some devices for auxiliary potential.
To obtain precise holes of significant diameter in different workpieces, a device such as a drilling and milling attachment will help to carry out individual milling work.
Make a milling machine out of a drill.
The next device worth mentioning is very expensive, but has the highest versatility. You will sharpen all the tools that you have on the farm, be it knives, shovels, axes, hoes, various drills, effortlessly with a universal sharpening device.
When purchasing drill attachments, be sure to check their compatibility.
Holder with clamp. With its help, you can fix the drill anywhere, use it with various kinds of devices, use it as a mini-lathe, sharpening, milling or grinding and polishing machine.
The drill holder allows you to quickly secure the drill.
All kinds of attachments are also designed for drills. These can be stops that limit the depth of drilling, platforms with which you can drill at a certain angle or perpendicularly. There are nozzles that are adapters and extensions of different designs: offset, angled, flexible.
The angle drill adapter is designed for hand and electric drills.
Metal cutting attachments turn your drill into a one-of-a-kind tool. Some resemble sheet metal shears, while others have a different feature, such as roller shears. The nozzle, called the “Cricket,” seems to cut through the metal.
The main advantage is that they do not damage the polymer coating of the metal.
There are also other attachments designed for monotype work.
- For installing aluminum rivets. There are types for both the same size and those with interchangeable bushings for different calibers.
- Tape-shaped attachment for self-tapping screws. With its help, you will significantly save time when working with plasterboard partitions or when you need to secure other materials with self-tapping screws.
Maximum time savings for serial screwdriving.