A chest of drawers is a small closet with drawers in which you can store various things and objects. For its manufacture, different materials can be used, for example, plywood, chipboard, plastic or metal, but more often in homes there are chests of drawers made of wood . This is a high-quality and environmentally friendly material that is easy to work with. But how to make a chest of drawers out of wood with your own hands, without experience and special skills? This will be discussed in more detail in this article.
DIY wooden chest of drawers
Advantages of wooden structures
When choosing products made of wood, the owner has several advantages at once. These include:
- the harmlessness of the wooden structure for others, since it is made of environmentally friendly material;
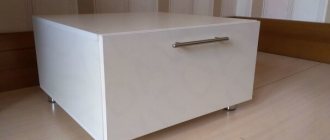
Dressers with legs made of wood
- unique appearance. The relief and texture of each tree is different, so it is impossible to find two absolutely identical chests of drawers;
- wood is much more elegant and beautiful than other, cheaper materials (chipboard or MDF);
- the finished product has a long service life if the material was properly processed during manufacturing.
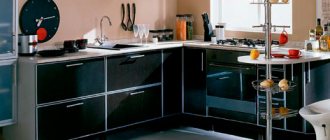
A metal chest of drawers is somewhat inferior to a wooden one
Note! Despite the large number of advantages, chests of drawers made of wood have one drawback - the cost of the finished product. Wood prices are much higher than chipboard or plywood. But if you make such a chest of drawers with your own hands, then the difference in the cost of materials is not that big.
Advantages of wooden furniture
Prices for finished products
You won’t be able to buy a wardrobe made of real wood for little money, since the material for it is not cheap, plus the work of craftsmen.
Thus, a chest of drawers made of acacia 110 cm high, 148 cm wide, 45 cm deep will cost 109 thousand rubles. An antique-style teak structure with shell-shaped metal handles 79 cm wide, 45 cm high, 47 cm deep costs 17 thousand rubles. The price of a pine chest of drawers 92 cm high, 40 cm deep, 45 cm wide is 5 thousand rubles.
Regardless of whether it is factory-made, custom-made or home-made furniture, wood will bring a natural, natural motif to the interior of the house and will become an excellent design element of many styles.
Material selection
Experts recommend using hard wood, although other, softer ones can be used. Let's look at the most popular species used in carpentry.
Pine
A relatively soft wood that is easy to work with. But pine has several disadvantages, for example, the surface of pine products is easily scratched and quickly loses its appearance, and the structure itself is unable to withstand heavy loads. As a rule, pine is used to make decorative elements or small pieces of furniture (stools, sideboards, bedside tables and chests of drawers).
Processing pine is easy
Birch
A harder type of wood with a beautiful texture. Birch is not able to withstand high humidity and sudden temperature changes, so it is not used to create outdoor furniture. Birch makes good bedside tables, tables and other oversized furniture not intended for heavy loads.
Birch is not used to create outdoor furniture
Beech
An excellent, high-strength material that is equally suitable for both outdoor furniture and structures intended for indoor use. Among all the disadvantages of beech, it is worth highlighting the most important one - the tree quickly absorbs moisture. Therefore, to prevent finished furniture from quickly deteriorating, at the stage of its manufacture, all material must be treated with special solutions. It is not recommended to make garden furniture from beech . The same can be said about products installed in places with high humidity.
Beech joinery board
Oak
One of the most popular wood species in the furniture industry. Oak is highly durable, so products made from it can last for several decades. The wood does not deform when there is high humidity in the room, does not rot and is not attacked by insects. In addition, the appearance of oak products does not deteriorate over the years, which cannot be said about other types of wood.
Oak planks
Oak is actively used to create kitchen units, cabinets or beds. The wood is also suitable for making a chest of drawers. The disadvantages include the large weight of finished products and the high cost of the material.
Wicker chests of drawers
Types of chests of drawers
After choosing the material for work, you also need to decide on the type of chest of drawers, because there are many different models, and they all differ from each other in design features, functional purpose and appearance. Below are the main models of chests of drawers that you can make yourself.
Table. Popular models of chests of drawers.
| Model name, photo | Description |
| Changing chest | A unique product that combines the functions of a chest of drawers and a changing table for babies. For convenience, such designs are equipped with small wheels to make them easier to move around the house. |
| Children's chest of drawers | These chests of drawers are designed for use in a children's room. The upper part of the structure is a pull-out shelf on which you can store items or carry out various activities. |
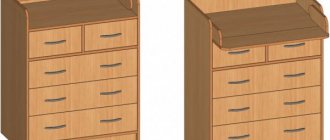
| Chest of drawers | Another type of chest of drawers that looks more like a wardrobe. These models are tall and have many drawers for storage. As a rule, a chest of drawers is made for a hallway where usable space is limited. |
| Chest of drawers | The design consists of fittings, legs or wheels, drawers and a small table top. This product simultaneously serves as a table and functions as a small cabinet in which you can store your things. |
| Classic version | A popular type of chest of drawers, it looks like a small cabinet with drawers that slide out. A classic chest of drawers can be used to store bed linen, clothing or small items. |
Regardless of the chosen model, the manufacturing technology of the product is practically no different. Therefore, if you are finished with the choice of material and type of product, all that remains is to choose the method of fastening the wooden elements. Only after this can you start working.
Assembly steps
After the initial inspection for defects, as well as equipping the workplace with light and tools, you must:
- mentally draw up an action plan guided by the principle “from big to small”;
- we start with the formation of the main body - the frame of the entire structure;
- Next you need to assemble the boxes;
- the next stage will be marking the installation of retractable mechanisms for drawers;
- after which you will need to correctly position all the fasteners;
- now - fronts for drawers and installation of handles;
- The final stage will be the top of the chest of drawers.
Important! The sequence of actions and the number of points in the plan may vary from model to model. Furniture is varied, which means the situation is individual.
Assembling the chest of drawers
Pay attention to how placement on the floor is provided. Sometimes wheels can be used, which must be secured with separate screws. In other cases, legs are installed, or the chest of drawers stands on solid base strips. Inspect the details of the chest of drawers. It is with this element that the process should begin in order to immediately give the mechanism stability.
Assembling the chest of drawers
In order for the case to be strong and reliable, it is necessary to fix all the walls with tightening screws. The back of the chest of drawers is usually turned towards the wall of the room, and therefore is often made of thin materials; nails will be enough to fasten it. First, assemble the chest of drawers.
If your specific design includes cross bars, they should also be installed at this stage. To ensure a flat surface and maximum compliance of the sides with each other, it is recommended to check the installation result with a level. Before assembling the chest of drawers, it is advisable to read the instructions.
Assembling drawers
The correct assembly of the chest of drawers is determined by both the accuracy of the measurements and the accuracy of the installation of the entire structure. For greater convenience, you should immediately divide all the components into separate piles so as not to get confused. Assembling the chest of drawers will not take much time.
First, we take short self-tapping screws (25-35mm) and connect the body with them. Then use slightly longer screws (40-50mm) to attach the bottom. It is advisable to complete the installation of the boxes by fastening the facades using self-tapping screws. Standard assembly of a chest of drawers is a fairly simple matter.
But it is better to carry out this procedure after installing the roller guides along which the box will move. This way you will protect yourself from inaccuracies and errors.
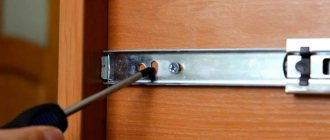
Installation of guides
The key to quiet and smooth movement of all elements of the chest of drawers is the correct installation of the guide elements (ball or roller). Accurate measurements using a tape measure are necessary so that the drawers can be pulled out without touching anything or creating additional noise. Secure drawers carefully.
Initially, you need to attach the runners to the inside of the chest of drawers, then the guides to the outside of the drawers. For successful fixation, you will need short-length self-tapping screws (no more than 30mm).
If you have drawers, the first thing you need to do is screw the guides to the inner surface of the chest of drawers (cabinet).
If the work done was successful and all the drawers are positioned correctly, all that remains is to attach the fronts and handles to them. You can use nails, screws, or even strong double-sided tape.
Types of fastenings
If you decide to create a wooden chest of drawers with your own hands, you need to familiarize yourself with the basic methods of fastening wooden elements used in assembling various pieces of furniture. We are talking about rafix, minifix, confirmat and corner fastening. Let's consider each of the listed methods separately.
Furniture fastenings
Rafix
Used when assembling shelves or built-in furniture. Rafix differs in that all fastenings from the outside of the product are not visible. This mount makes it possible to repeatedly disassemble and reassemble furniture. The connection is reliable and quite strong, but has one drawback - high cost.
Rafix usage scheme
Minifix
Used for quick installation of furniture structures. This type of fastening is popular due to the possibility of repeated assembly and disassembly of elements. The surface of the furniture remains unharmed. Minifix is not suitable for making furniture yourself.
Minifix
Confirmat
This type of fastening is used in the manufacture of metal products, so confirmat is not suitable for furniture made of wood or plywood. Otherwise, the surface of the part at the fastening points may deteriorate.
Screw confirmat
Corner
One of the simplest and most popular ways to fasten wooden products is using a corner made of plastic or metal. Such products are attached to the joints of parts using ordinary self-tapping screws. If desired, you can choose a plastic corner painted in the same color as the structure itself.
You can use furniture corners
On a note! When making furniture at home, it is recommended to use metal corners or special tenon fasteners. Installation of such elements is very simple and does not require much effort.
Decoration
For chests of drawers made of wood, traditional finishing methods are best suited: painting, varnishing. The work is performed at the cutting stage or after final assembly. Models made from non-laminated boards or old surfaces are covered with self-adhesive films and veneer. Paint and varnish materials are applied to dry, cleaned surfaces with a roller, spray cans or brushes, in at least 2 layers. After covering the base, the facade is lightly sanded.
Among the original design finishing techniques are:
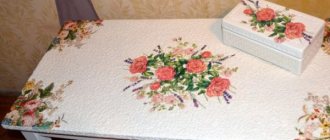
- pasting surfaces with posters with floral prints, fabric, lace, old maps, newspapers, notes or wallpaper;
- emphasis on the outer sides of pull-out elements (pasting drawers with bright textiles, painting them in contrasting colors);
- applying paint to varnished or laminated surfaces (alternating glossy and matte stripes);
- coating the chest of drawers with metallic paints, installing mirrors;
- artificial aging of surfaces using craquelure glazes;
- creating an “ombre” effect (a uniform or blurred transition from light to dark using paints or varnishes of different colors);
- use of stencils;
- lining the outside of the chest of drawers with wooden planks, bamboo wallpaper, coffee beans, colored pencils, old wooden rulers, beads;
- gluing moldings or other volumetric decorative elements;
- painting surfaces with magnetic or slate paints (relevant when making chests of drawers for children's rooms).
The above methods can be used when decorating both hand-made chests of drawers and when restoring old items. When choosing the final option, it is important to take into account the general style of the room and interior items (color, texture, compatibility of materials). Special attention is paid to the handles. For example, an interesting effect is achieved by replacing the usual accessories with ropes, pieces of leather, three-dimensional numbers or letters (house numbers, children's alphabet). Creativity and creative approach are welcome in this case.
What do you need for work?
Before any type of carpentry work, you must first prepare all the tools and materials. These include:
- nails;
Preparing tools
- double-sided tape;
- handles for dresser drawers;
- set of self-tapping screws;
- boards or sheets of plywood;
- screwdriver and set of drills;
- construction hair dryer;
- a simple pencil;
- meter, ruler, tape measure or other measuring instrument;
- mounting brackets made of metal or plastic;
- stationery knife;
- electric drill.
You should also take care of safety glasses and gloves. Once everything you need is at hand, you can get to work.
Making a chest of drawers
Step 1 . Prepare boards for work. They don't have to be new. For example, this project uses boards from an old dismantled structure.
Preparing the boards
Step 2 . Using a jigsaw or a regular hacksaw, cut the boards into the required pieces, the number and dimensions of which must correspond to the project drawing.
The details of the future chest of drawers have been cut
Step 3 . Sand the surface of the boards to eliminate even the most minor defects and irregularities. As a result, the boards should be as even and smooth as possible.
Sanding boards
Step 4 . Assemble two side frames from the cut boards.
Assembled side frames
Step 5 . Start assembling the panels. To do this, install planks in previously made frames. It is advisable to use self-tapping screws as fasteners.
Boards are installed in the frames
Step 6 . Select the boards in width so that they can completely cover the wall without forming any gaps.
There should be no gaps
Step 7 . Attach the boards to the back of the finished frame, thereby creating the back wall. Here the boards should be used much wider than for the side parts.
The back wall is created
Step 8 . This is what the half-finished chest of drawers will look like from the front.
Finished chest of drawers without drawers
Step 9 . Start assembling drawers for your future chest of drawers. First, prepare the boards.
Boards for boxes
Step 10 . To assemble the boxes, you must use wood glue, such as PVA. It will be enough.
Drawer assembly
Step 11 . After installing the bottom, the surfaces of the boxes must be treated with a special waterproof material that will protect the wood from negative factors.
Processing the finished box
Step 12 . Repeat all procedures with the remaining boxes. Once all the boxes are ready, sand them down using sandpaper.
Ready-made chest drawers
Step 13 . All elements of the wooden chest of drawers are ready. Now you can start assembling.
You can begin the final assembly of the chest of drawers
Step 14 . This is what the almost finished design will look like. All that remains is to add drawer opening mechanisms and handles.
The chest of drawers is ready
Step 15 . As a final step, coat the chest of drawers with tung oil. It will make the product attractive.
Product after treatment with tung oil
Step 16 . Even though the work was done using old wood, the chest of drawers turned out to be truly beautiful and original. You can now enjoy the fruits of your work every day.
It turned out to be a really attractive chest of drawers
Scheme and drawing
Before you start making a chest of drawers, you need to make a drawing of it. The drawing must indicate:
- height;
- width;
- depth;
- number of boxes.
Attention: calculating the size of the chest of drawers depends on what things will be in it.
How to make a drawing is a personal matter for each individual master. For some, it is enough to sketch sketches on a piece of paper to understand how to quickly and efficiently manufacture and assemble parts, others use special computer programs with accurate calculations, and there are also craftsmen who find ready-made versions of circuits on the Internet.
Important : in the drawing, in addition to the type of construction and dimensions of individual elements, the mechanism for opening the drawers must also be indicated.
Decor
It is not enough to make a wooden chest of drawers; you also need to decorate it so that the finished product is immediately noticed by guests. This can be done using some painting techniques. First of all, for decoration you need to prepare brushes and acrylic paints, the color of which everyone can choose to their taste. The product can be completely repainted in one color or decorated with several patterns that add charm.
Retro chest of drawers, stylized at the beginning of the twentieth century
The process of decorating a chest of drawers is not as complicated as it might seem at first glance. First you need to apply a base layer of acrylic paint, and after it dries, decorate the surface of the product with special patterns. It is not necessary to draw the patterns yourself, because for this you can use ready-made stencils that are sold in stores . As soon as the patterns are dry, the entire chest of drawers needs to be varnished. That's it, the wooden chest of drawers is ready!
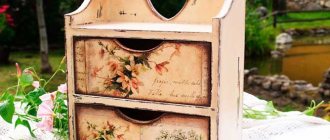
Decoupage of a chest of drawers with fabric with delicate pastoral motifs
Results
The cost of a handmade chest of drawers is much lower than the cost of a finished product from a furniture store. But this requires some skills. In addition, if you compare handmade furniture and purchased products, the first one is much superior in quality. Thus, if you buy a chest of drawers in a store, there is a risk of not only overpaying, but also getting a low-quality product.
Original solid wood chests of drawers will look luxurious in a bedroom with a suitable interior
A durable chest of drawers made of oak or other types of wood can last for many years without losing its attractiveness. Therefore, all the money spent and efforts made will not be in vain. You just need to follow the instructions exactly and anyone can do the job.
Wooden chest of drawers
Preparing for painting
Before painting, sanding must be done. The better it is done, the less likely it is that the tinted coating will be applied well. Since oils and glazes are transparent, putty cannot be used. The surface should already be of high quality and without unacceptable flaws.
The flat surfaces were sanded using an orbital sander, while the pilasters and milled ends were sanded by hand. For soft breeds, 180 grit is sufficient, but it is better to go up to 250.