Most people bring a lot of shells from their seaside vacation, which eventually gather dust on a shelf and are forgotten about. Not everyone realizes that they can be used to make an excellent and original panel
It should be understood that the sketch should not have many small details, since the shells themselves are a very original and interesting material that looks impressive in various compositions. But if you really want to, you can use shell crumbs for small details.
Beginners to create in this direction should take simple drawings, with a small amount of detail.
Print the image in accordance with the dimensions of the panel being performed, the next step.
Then you need to apply the drawing to the board using carbon paper.
However, this is not a mandatory step; beginners usually do this. Or when the drawing is incredibly complex. You can simply create a composition directly on the panel.
How to make paintings from natural materials
Using shells, you can create unusual paintings or decorations. Doing this is not as difficult as you might think at first glance. You just need to approach the work from a creative side, using your imagination. The main material is shells, which can be bought or collected on the coast. Then they need to be sorted depending on type and size. To create a masterpiece, you will also need the following materials at hand:
- base, you can use plywood, board or thick cardboard;
- frame;
- glue;
- paints;
- beads, twigs, blades of grass, sand, beads and other decorative elements.
The process of creating a picture from shells consists of the following steps:
- Sketch design. If you are not very skilled with a pencil, find a picture on the Internet, scan it and make an image along the outline.
- Preparing the base. Thick plywood or a cutting board, such as a cutting board, is best. It is recommended to sand the base and then repaint it. The background can be made with a stain of a suitable color or potassium permanganate.
- Drawing. If you are working with a sketch, it is better to use a carbon copy to transfer the picture onto the base, or simply create the future picture directly on the board, like a mosaic. You need to paint the material before you start gluing it. It is advisable to use bright acrylic paints. If you are making a flower, it is better to take white or multi-colored paints, but for a panel with a seascape, green and blue shades are suitable, which convey the color of the waves well.
- Gluing the material. Shells and other decorative elements are well fixed with PVA glue.
- Framing the painting. Homemade baguettes can transform paintings, but making them will require a lot of patience and skill.
Seashell panel with seascape
This type of needlework will awaken everyone’s creative abilities. A panel with a seascape will look great in the bathroom. It’s not too difficult to make it using a master class:
- Paint the frame with stain or potassium permanganate and set it aside to dry completely. For a panel with a seascape, use white, blue and green paints.
- Insert the prepared base into the frame.
- The background can be made of mesh, sand, fabric or burlap. Cut the material according to the size of the baguette, attach with glue or a special glue gun.
- Proceed to the next stage - creating the picture itself from shells. Remember that you need to carefully attach each part with glue.
- Cover the finished panel with acrylic varnish. This will give it a complete look, and the sea will shimmer, as if you were really standing on the shore.
Portrait applique made of seashells
A painting made by yourself will be an excellent gift or decoration in the home. To create a shell applique, you need to have a lot of base material in different sizes and colors. If you are good with a pencil, then making a portrait from shells will not be difficult. The process itself is as follows:
- Prepare the foundation on which the creation will be located.
- Draw a sketch using a photo of a person as a reference.
- Apply glue to the image and immediately lay the shells, not allowing the glue to dry. Elements must be suitable in color and size.
- If the portrait applique is ready, do not forget to spray it with varnish. This will give it shine and completeness.
Making a flower arrangement from shells
Using natural materials, you can create original interior items. The decor of the room will be decorated with a hand-made flower arrangement made from shells. For production you will need:
- main material – shells (any size);
- frame;
- varnish and paints in cans;
- universal glue;
- piece of film.
A step-by-step picture of flowers is made like this:
- Use paint to create a background for your future work. Using a spray can for this purpose, you will do everything neatly and without streaks.
- Start making flowers: wipe off the shells, place them in a row (this makes it easier to take).
- Place a little glue in the center of the film.
- Glue the shells one by one in the shape of a bud.
- Make the core of the flower: glue a small shell of a different color into the middle of the half-opened bud.
- Make the rest of the flowers in the same way, the quantity depends on your desire. It is worth noting that the flower arrangement will be more interesting if shells of different shades alternate in one flower.
- Think about where each flower will be located on the base; you can make marks.
- Glue the flowers and spray with varnish.
This is interesting: Affirmations for Happiness and Love
Abstract seashell mosaic
Such paintings will make any interior exclusive. Making a mosaic from sea shells takes a long time, but you will have fun doing it. When creating a masterpiece, an important step is preparing the base. The “weeping” shell is often used. Get started:
- Draw an even circle on the sink and cut it out with scissors.
- Glue the shells in a certain order onto a prepared base (photo frame, flowerpot or any other object). Start from the top outline, moving down, from the right side to the left. It is better to attach it with a hot glue gun, applying the composition to the base and to the sink. Please note that the glue strips should be no more than 2-3 cm.
- When most of the mosaic picture is ready, apply glue only to the shells and carefully insert each one into place, pressing it firmly into the base.
- Decorate the background with backfill - plastic or glass chips. Apply glue to the required area with a brush, then cover the material in a dense layer and press with your fingers to compact it. Afterwards, turn the picture of shells over so that the excess falls off.
From simple to complex
Working with sinks is not difficult, but requires careful handling. Let's go from the simplest to the more complex options for crafts. Bracelets and beads can do it all! Let's look at more interesting ideas.
Frames
The usual photo frames and mirror frames will sparkle with other colors if you decorate them with sea shells.
Basic instructions for preparing shells
Cleansing
Before you start making crafts from shells, you need to prepare them well.
- If the shells are “dead” and there are no shellfish remains left in them, then you just need to soak them in a solution of water and any chlorine-containing product (for example, bleach, “Duckling”, etc.) in a 1:1 ratio for 30 minutes. If the shells are very dirty or you want to remove the dark outer layer (periostracum), soak them longer. After soaking, brush the shells and rinse in clean water.
- If the shells are “live”, that is, they have the remains of mollusks (even if they died long ago) and have an unpleasant odor, then they need to be thoroughly cleaned. To do this, put the shells in boiling water for 5 minutes, and then remove the remains of the shellfish using tongs, nail scissors, etc. There is a second way: heat the shells in the microwave for 30 seconds, then try to remove the remains with tongs. If unsuccessful, continue heating the shells in the microwave, checking the result every 10 seconds. When all remains have been removed, treat the sinks with a bleach solution according to the first instructions.
After processing, inspect the sinks for chips and, if any, sand them with a sanding block, disc or sandpaper. If desired, you can add shine to them using clear nail polish or furniture polish, as well as using oil or rich cream. True, in this case, before treating the shells with glue, the gluing areas will have to be additionally degreased with alcohol.
Drilling holes
To make some types of crafts from shells (for example, wind chimes, garlands, beads, bracelets and other jewelry), you need to drill a hole in them. This task is quite simple, the only difficulty is that the shells can crack or delaminate at the drilling site.
- Therefore, remember the main rule: the thinner the shell, the smaller the hole should be in it and, accordingly, the thread/accessories of the decoration.
Photo frames
Pasting photo frames can be considered a simple and interesting decoration. You can use them to display a photo from a seaside holiday or a family portrait. For the base you will need to buy or make a wooden photo frame. It will be the easiest to arrange. Cardboard analogues can become deformed and will last much less. The manufacturer will also need a glue gun. The work is carried out according to the following instructions:
- The glass and back wall of the frame are removed. The largest sashes are selected. They are glued to the base in the center of the wooden planks.
- Small scallops and cones are glued onto the remaining open base. They can also be glued to large sashes.
- To give the most non-standard look, gluing beads is allowed. It is advisable to choose bright glass fittings and opaque mother-of-pearl balls. Upon completion of the design, the glass and the rear wall of the frame are installed.
DIY shell panel - happy memories of summer
Of course, many of us have a variety of shells at home as warm and bright memories of the gentle sea, yellow sand and sun. But shells are also an excellent material for creativity. Creating panels in a marine style is a very exciting and quite popular hobby. Today we will tell you how to create a panel of shells quickly and easily with your own hands.
This is interesting: Stones for Capricorn women
To make a panel from shells, you do not need any special skills or knowledge. Anyone can create something unique that matches the interior of their apartment. All you need is imagination and patience. We are all different and everyone will create their own work of art. But to make any panel we will need some materials.
Beautiful storage
You don't have to hide the items you need in locked cabinets. Many of them are quite decorative in themselves, especially if placed in a glass vase. Creative materials such as buttons, colored threads, pencils and so on look bright and fun. But cotton pads and sticks in transparent vases in the bathroom will look very nice. Experiment!
Learn how to make a panel of shells with your own hands step by step in a master class
Now that everything you need is at hand, you can get to work. A fairly detailed master class will help you make your first unique panel from shells. So, let's begin.
- First, you need to carefully select the background for the future panel. Attach the shells to the selected background, try several options. The background should not be too bright so as not to drown out the natural beauty of the shells.
- Then glue the selected background onto the prepared base (plywood or board). Burlap, fabric, mesh or sisal must be cut to the size of the base (with a slight allowance), stretched and glued to the back of the base using glue.
- Now - the most interesting part. Directly a process that requires creative inspiration. Each element needs to find its place on the panel. You can glue shells randomly, intuitively creating a harmonious composition. You can make a specific picture: flowers, a tree, a ship, birds. You can draw the image yourself or print the finished one. For beginners, it is better to take simple drawings and transfer them to the base using carbon paper. But this is optional. The finished template or stencil can be secured to the base using masking tape and then outlined with a pencil.
- We cover the finished panel with acrylic varnish and let it dry.
- To make the painting look more interesting, you can insert it into a frame matched by color or painted with acrylic paints. Don't limit yourself to the box! Glue the individual elements onto the frame itself.
Here are some more photos for inspiration:
A panel of shells and sand is created in a similar way. Only as a
The background uses sand collected on the beach or purchased. The sand must be washed and dried, painted if necessary. A thick layer of PVA is applied to the board or plywood and a layer of sand on top. The sand mass is lightly pressed so that it sticks better. Now you have to wait a few hours until everything is completely dry. After this, a composition of shells is made and glued to the sand.
Original ideas for crafts
In general, shells can hardly be called a material: they are independent objects with their own unchangeable shape and size, from which a product is assembled, or they themselves serve as a finished decor item, painted and trimmed with rhinestones and sparkles.
As you can see in the photos presented, any craft made from shells is structurally understandable and it is not difficult to figure out how it works - the most valuable thing is the design of the craft, the idea, the direction for creative thought.
Applications and surface decoration
The easiest way is to make various kinds of applications from shells. Even a child can cope with this task; all you need is a piece of colored cardboard with a drawn outline of the future picture, which is pasted over with shells of suitable shape and size, pre-painted in the desired colors.
The most successful applique paintings should be placed in a frame under glass!
A more complex and practical type of decoration is the decoration of photo frames (ready-made or pre-made independently), mirrors, and picture frames with all kinds of shells and other starfish.
It’s a good idea to use photographic examples to learn a creative approach to solving such a problem. You can try to repeat the design you like, but to do this you should especially carefully select the shells in shape and size, having previously finished their surface accordingly.
In the same way, you can create valentines, original Christmas wreaths on the door or fireplace, even Christmas tree decorations!
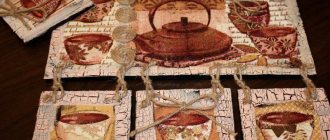
You can breathe new life into your favorite cup by covering its outer surface (preferably the lower half or third) with a composition of small shells. An option is a stand for pens and pencils instead of a cup, as well as a flower vase.
Among the many famous crafts made from shells, an important place is occupied by all kinds of boxes, boxes and chests decorated by these inhabitants of the seabed. Moreover, surfaces can be covered with shells either completely or fragmentarily, creating all kinds of ornaments, floral patterns, etc.
Candlesticks for regular and decorative candles are also popular as “shell” decor. There are two possible solutions here: either paste over the lower half or third of the candle itself, assembling a symmetrical structure from different shells, expanding downwards to give the candle a stable position,
or cover a cardboard cylinder the thickness of a candle with shells, and it will be a real candlestick.
The first option is more decorative, so make sure that the candles are high-quality and expensive-looking.
There are also many solutions related to using the shell itself as a candlestick.
To do this, paraffin melted in a hot water bath is poured into the internal volume of a more or less large shell,
Using tweezers, hold the wick pre-glued to the bottom of the shell in a vertical position. As a rule, after 15 minutes the paraffin completely hardens and such romantic candles are ready for use.
Volumetric crafts made from shells
Creating three-dimensional crafts from shells can be even more fun than “flat-surface” decor. Children especially agree with this, from under whose skillful fingers come funny little animals, birds and people.
As a rule, once you have some experience in “shell” modeling, you want to start creating flowers, three-dimensional Christmas tree decorations and other New Year’s decor, various kinds of sailboats, lamps and three-dimensional panels.
Often, many very complex and quite simple, but created with taste and imagination, crafts made from shells amaze the imagination. The following photo shows a lot of such crafts, each of which can be repeated if you have the appropriate experience in working with the material and a trained eye for needlework.
In principle, the same super-or hot-melt adhesive, double-sided tape and plasticine are used everywhere, and the surface is painted with acrylic paints, gouache, and varnished. Any beautiful and simply curious little thing that experienced craftsmen thriftily collect in their creative “bins” will come in handy; You can have a good time searching for suitable jewelry and decor in art and craft stores.
Just start making crafts from shells, and you will very soon see that it is not very difficult, but so much fun!
Trying to make a sea panel from shells and sand in plaster
An interesting version of a panel of shells and sand can be made if you use ordinary plaster (alabaster). Make a composition in advance of shells and additional elements (starfish, pebbles, bark, corals) on paper. It is better to use natural material of large and unusual shapes. Take a ready-made frame with a back wall or make it yourself - this will be the shape for our panel, like for a cake. Dilute the plaster with water, stirring constantly, until you obtain liquid sour cream. Pour plaster into the mold. Now quickly transfer each element of the composition from paper to plaster, slightly recessing it until the plaster hardens. Sprinkle the surface with sand, also pressing down lightly. Wait until the plaster dries completely. Cover with acrylic varnish. Your painting is ready!
Glossy effect
Water-dried shells look less vibrant than the items on store shelves. To achieve a beautiful glossy shine, the parts are treated with acrylic varnish with a transparent or pearlescent tint.
After processing, mother-of-pearl models acquire a lasting shine. It seems that the shell was just taken out of the water.
Where to look for materials for shell panels: tips for beginners
Every year, citizens go to coastal regions to take a break from the constant bustle of everyday life. You need to take the time to collect the necessary shells. The shape of the latter is chosen taking into account aesthetic preferences. The unusual shape of the shells will add uniqueness to the composition. At the same time, it is worth remembering one aspect: if we are talking about vacation in another country, it is necessary to clarify the legal nuance, is it allowed to export a large number of shells from the country? It is necessary to ask a similar question when entering the state.
In addition, it would be a good idea to do the following:
- Take a dense container for transporting shells;
- Find large and small pebbles deformed under the influence of waves;
- Collect several branches of exotic trees.
It’s easy to find materials to complete the composition in a craft store or at the market. The main thing is to first sketch on paper what you plan to bring to life.
Seasonal decorations
With the arrival of a new season, there is often a desire to make your home blend in with it. A glass vase will be an excellent container for various seasonal decorations: in the fall it can be leaves and acorns, in the winter pine cones and Christmas balls, in the spring bright pebbles, and in the summer wildflowers.
How to make a panel from shells with your own hands: secrets and recommendations
To begin with, a rough sketch of what should happen in the end is made. Designers recommend not limiting yourself solely to shells. The panel will be complemented by seeds of cereals and legumes.
This is interesting: Peking duck classic recipe
In order to make the composition you will need a large piece of thick cardboard, which is cut into two equal parts. The outline of the future creation is drawn with a pencil on one of the parts. At the next stage, you will need Moment glue or hot melt glue, a brush and decorative materials, depending on your preferences.
The procedure for working with them is as follows:
- Small pebbles are laid out on a sheet of cardboard, according to the previously drawn contours;
- The resulting layer of pebbles is filled with a thin layer of glue;
- After drying, the glue will become transparent, thereby giving a special charm to the composition;
- The glue gains maximum strength within 24 hours, only then can shells be attached;
- When choosing a method for applying seashells, it is not necessary to adhere to the rules of symmetry;
- Moderate creative chaos will give the composition lightness and attractiveness.
After traces of touching the canvas with a glue gun have dried, the resulting voids must be filled with stones with a very fine fraction. Designers do not recommend abusing this element. The shells should not be completely hidden under the layer of filler. The manufacturing process of surface varnish treatment is completed. It will add durability and special charm.
Fairy lights
Not only candles can illuminate a room through the glass walls of vases. Electric garlands placed inside will turn the vase into a night light and simply an interesting decorative object. And in general, garlands are a magical material for interior decoration: “Glowing garlands: interesting ways to decorate”
Making a panel ship from shells with your own hands
The composition, unusual in its form, will appeal to those whose hearts have long been filled with love for the endless sea. Making the panel will take no more than 2 days, taking into account the time required for the glue to dry. You will need to find one large shell, which will become the base. Decorative elements are selected taking into account the color scheme of the room where the composition will be installed.
For beginners, there is one good piece of advice - decide in advance on the shape of the vessel. The selection of necessary materials depends on this. If you plan to make the ship multi-level, you will need several small shells.
Step by step instructions
- Glue together the base of the structure from 2-3 rapans; the gluing process takes place on the front part, followed by a revolution;
- Cut 2-3 sticks, the length of which is the same;
- Glue the sticks strictly vertically onto the sink, maintaining an equal distance between them;
- The glue will dry within 4-5 hours;
- Attach a shell to a piece of dense material, the inner side of which faces upward;
- It is allowed to use twine to decorate and strengthen the structure;
- Attach shell-sails to installed vertical sticks;
- It is recommended to place a large shell-sail in the middle, and use smaller shells for the other 2 sails;
- The mast of the resulting ship is decorated with a flag.
If you want to add a little luxury to the interior of your room, we recommend reading the following article: https://homeli.ru/dekor/panno/dekorativnoe-panno
Thematic mirror
We suggest doing a little work for beginners. It will look like a mirror with shells around the edges. It won’t take much of your time, and will also delight you and those around you!
Related article: Modeling an angel from polymer clay
We will need:
- shells of different sizes;
- glue gun;
- mirror of any size;
- unnecessary newspapers;
- scotch;
- additional decorations (beads, seed beads) at your request.
If you don't like the look of the mirror frame, you should paint it the color you want. In order not to stain the mirror, it is worth securing the paper on it with tape.
We begin to glue the shells onto the frame. At your discretion, arrange the parts according to size so that the picture looks neater in the future.
We fill all the gaps with small parts or shell remains.
Well, that's it! Look how easy and simple everything is, but at the same time beautiful and pleasing to the eye.
Do-it-yourself paintings-panels made of shells: advice from designers
Those who want to make an original panel with their own hands must remember the need to maintain balance. An eye-catching painting does not contain a large number of elements. That is why it is important to think everything through in advance. For example, a composition of pastel colors looks great in a living room, and warm colors for a nursery. If you don’t have any ideas in your head yet, you can look at a variety of photos of finished works.
When making a composition, it is necessary to take into account the degree of illumination of the room and the colors prevailing in the interior.
Other recommendations include the following:
- Do not overuse glue, otherwise the composition will turn out unaesthetic;
- The elements used must be harmoniously combined;
- To create a visually attractive picture, you will need a frame that differs by 2-3 tones from the main color of the work;
- Thick cardboard or chipboard is used as a reliable base;
- You cannot place the finished composition in direct sunlight;
- There is always the opportunity to attend master classes, where experienced masters will answer all questions.
Candles
Glass containers, especially low and wide ones, act as beautiful candlesticks. There is no need to be afraid that the wax will drip on the table or something will catch fire - glass is reliable and heat-resistant protection. And, of course, it looks beautiful! Especially if you put several stump candles in a vase and additionally decorate around it. More decor ideas using candles: “Hand flame: candles in the interior”
Painting with paints
What kids will definitely love, both children and adults can do, is painting shells. Patterns, ornaments.
You can apply acrylic paints with a regular painting brush on a dry surface. The finished painted craft is varnished. They look organically in any interior, standing out as a bright spot.
Create with your children, create a colorful mood, give shell gifts to your family and friends.
Let's create the mood. "Breeze"
You can create a summer mood and decorate the interior with the help of a “breeze”. It is a small pendant made of various shells of the same size. You will also need a wooden stick, a piece of twine, fishing line:
- All materials are cleaned, processed, if necessary, varnished.
- In a stick 30 cm long, holes are made every 5 cm.
- A string about 40 cm long is pulled through the outer holes and secured to a knot. This will be a mount for which you can hang it on a nail in a convenient place.
- Shells, starfish, and beads are strung on a fishing line 50 cm long, combining them in any order. They fix it on a stick, leaving the lower end free, fluttering from the slightest breath.
When air moves, the “breeze” makes barely audible sounds, reminiscent of sea surf.