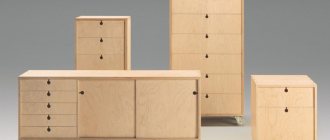
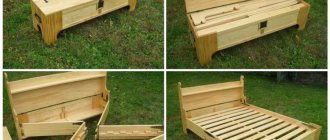
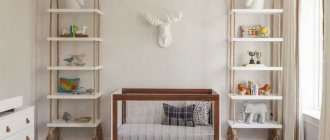
The pantry in a house or apartment should be rationally arranged. This is a separate room that is used to store various things and non-perishable food products. In most cases, the pantry contains a huge number of items that clutter the entire room.
A storage room is a separate room in an apartment or house, and its arrangement should be rational.
To avoid this, use racks and shelves in the pantry. They help to properly organize your storage system and avoid clutter. Next we will talk about how to make simple shelves for your pantry with your own hands.
To avoid clutter, you can put shelving in this room.
Features of shelving in the pantry
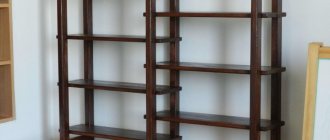
The rack is represented by a structure that consists of open shelves. A reliable and strong case is used to frame them. The main feature of this type of furniture is its large capacity with small size and shape. The pantry shelving option showcases a simple design. In most cases, they are entrusted with only the function of correctly placing all things.
Racks are a structure consisting primarily of open shelves framed by a strong and reliable frame.
Shelves in the pantry can have glass and pull-out components. This solution helps to properly organize the storage of different types of things. There are also models with or without a back wall. Very often they are similar to kitchen units, but have a simpler appearance. In this case, the color of the material may be different, since this parameter completely depends on the preferences of the property owners.
With a small space occupied, the rack allows you to accommodate a lot of things, freeing up the visible space of the apartment from them.
Features of planning storage systems
The most important thing when arranging a storage room in an apartment or private house is to decide what things it will be intended for and correlate the load with the dimensions of the room.
- For a small pantry, several rows of shelves located one above the other are suitable. It is better to leave space at the bottom for boxes and drawers: this way the area will be used optimally.
- The dimensions of the compartments must be made in accordance with the dimensions of the items that will be stored in the pantry.
- If the room has a high ceiling, it is worth providing space for a stool or stepladder: it will be more convenient to get things from the upper shelves.
- Some pantries have enough free space to create deep shelves. This is not always convenient; moreover, you should leave a distance for passing and bringing in objects.
Types of shelf designs
The main classification of furniture is based on design features. In the store you can find three varieties - linear, U-shaped and corner racks. Proper arrangement of space depends on the dimensions of the pantry.
INTERESTING! Most often, when choosing a shelf, the guidelines are the features of the room. Shelving should fit into the room and create proper organization of the storage system.
At the same time, you can separate types of products according to the dimensions of the shelf and the rack itself. Various manufacturers provide their products to suit customer needs, for example, equipped with closed drawers and doors. They are performed similarly with display cabinets.
A distinctive feature of such furniture is its spaciousness with relatively compact forms.
Modern designs can also be equipped with compartments for jars, a glass facade, shelves with baskets, compartments with metal fasteners for bottles, and drawers for vegetables.
Such options are selected on a case-by-case basis to suit the needs of property owners.
Final decor of the rack
The finished structure must be painted. Of the various options, the simplest are coating with water-based acrylic paint or varnishing the product.
The advantage of acrylic paint is that it dries quickly and has virtually no odor. It can even be used indoors, although the room will still need to be ventilated. Varnishing is preferable if you want to preserve the structure or slightly tint the surface of the wood. Clear or tinted varnish to resemble oak, walnut, ash and other wood species should be applied two to three times. Each new layer is applied after the previous one has dried.
Before painting the rack, it is necessary to prime the surfaces to be painted, unless two-in-one paint is used. Priming the surface will ensure a good result and will ensure that the paint does not peel or crack over time. If you intend to paint with oil paints, it is recommended to do this in advance outside the living space. We bring all painted parts into the house for subsequent assembly only after complete drying.
So, once the shelving unit is assembled and painted, you can stand back and admire your work. However, your furniture will look more presentable when books, figurines, framed photographs and other household items for which it was made appear on the shelves.
Important points when designing utility shelves
You can also make shelving and shelves for your pantry yourself. To do this, there is no need to have specialized knowledge and skills. First of all, a sketch of the furniture set is created, which takes into account all the important parameters.
The pantry rack is a convenient storage for food, dishes, and homemade preserves.
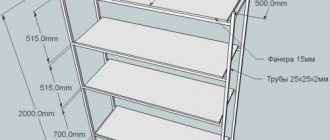
The diagram must reflect:
- room size;
- shelf dimensions (height, width, material thickness);
- design features.
Each shelf of such a rack is used to the maximum and allows you to easily find the desired item, saving time on searching.
All these parameters affect the final appearance and correct installation. In order not to miss a single detail, we recommend that you familiarize yourself with the information on how shelves for the utility room are made by hand.
Tools for work
To understand what tool is needed for the job, you need to clarify what exactly needs to be done. If the material for the shelves is not prepared and needs to be trimmed and sharpened to the required dimensions, then it is imperative to have a jigsaw or a hacksaw for wood and a plane. They will help you make shelves of the right size. You will also need sandpaper to sand the edges of the cuts and give the shelves a finished look.
Tools needed for work.
You need a hammer drill to create holes in the wall for dowel-nails to attach brackets, and a screwdriver to connect parts to each other, if necessary.
This is enough to ensure that the pantry has good and reliable shelves on which you can store anything.
You will definitely need:
- Tape measure, for creating markings and measuring distances;
- Construction level so that the rack with shelves is level;
- Pencil or colored chalk for marking the wall. When you have prepared all the materials, you can begin the process of installing them in place.
How to make shelves in your pantry with your own hands
Before proceeding with the main actions, it is necessary to determine the design of the structure, shape, and method of attaching the shelves to the wall. All these manipulations relate to preparatory actions.
Preparatory activities
First of all, the rack is depicted on paper. In this way, future furniture will be visualized taking into account the size and wishes for the storage system for household items.
The box can be open on both sides or have a back wall.
What to make shelves from
The main materials for making shelving are steel and wood. These components are characterized by the reliability and durability of the frame. But the only drawback is the lack of resistance to moisture and steam.
Metal or wooden frames withstand mechanical stress and heavy loads.
Rack shelves can also be made from various raw materials. For example, they use wood, metal, including galvanized metal, MDF, glass, and chipboard profiles. All the options mentioned have their advantages and disadvantages. They must be taken into account when choosing material for making your own storage system for the pantry.
Despite the wide range of materials used in the production of pantry racks, only the most reliable ones remain a priority.
Required materials and tools
To properly make shelves in the pantry, you need to prepare the following tools:
- electric jigsaw or regular hand saw;
- hammer;
- a measuring device, such as a tape measure;
- screwdriver. Two types of profile may be required - linear and cruciform;
- fasteners (screws or nails);
- screwdriver
Other tools may be required during production.
The set depends entirely on the master’s preferences in working materials, method of fastening the shelves and frame.
Manufacturing options
The principle of manufacturing a storage system is entirely based on the mass of materials that have been selected for the process. The location is also selected based on this factor.
Wall shelves
Lighter structures can be installed with fixation to the wall. In most cases, wood and metal are used, which are connected to the wall using special fasteners, for example, hidden shelf supports, decorative brackets, hangers or hanging ears.
Such structures are considered hinged.
Wall shelves do not require labor-intensive manufacturing; it is necessary to properly prepare and process the material. After sanding and painting, you can begin installation.
Installation is carried out according to a pre-planned scheme to avoid errors and inaccuracies.
Rack
Massive frames that are designed for heavy loads are preferably placed on the floor. Such structures can be fixed to the wall surface or in the form of stationary furniture. It all depends on the intensity of use of the rack and shelves. Such storage systems can be represented by a simple structure made of chipboard and wood.
If necessary, the rack can be painted: this helps extend the service life of the material and allows the product to look most harmonious in a small space.
The production of a rack most often begins with the arrangement of the frame. Subsequently, the craftsmen fill it with the necessary components in the form of shelves, drawers with or without doors. In the process of performing actions, it is important to choose the right fasteners, as this solution will help minimize the risk of damage to the structure and its integrity. This approach is important, because very often racks are used to store fragile household items (cans, bottles, dishes).
All models are united by the fact that they are selected based on the specific footage of the pantry.
Pantry materials
After all the above steps have been completed, you need to start selecting materials. There is one economical option that can save you a good amount. If you have an old chest of drawers, bedside tables or a small shelving unit at home, you can disassemble them and make good, free shelves from the parts.
The second option involves purchasing boards made of wood or other material , having previously decided on their width, thickness and quantity. After all, depending on the weight of the stored items, the shelves should be wider or narrower.
Some people use ready-made sheets of plywood, but this option is only applicable if you do not intend to place heavy objects on this shelf. In the best case, under heavy load, it can crack and gradually sag; in the worst case, it will break sharply and drag down everything that it holds. Therefore, it is still recommended to use denser materials for the pantry to be sure of their strength and quality.
In principle, the material can be not only wooden; it is possible to use metal structures if they are strong enough to withstand the expected load. You should also think about the fasteners that will hold the boards and other consumables.
Simple tips for creating shelves in your pantry
Equipping a pantry is not difficult. But this process requires compliance with some rules and recommendations:
- correct measurement of the room and drawing a dimensional grid on the walls;
- correct selection of material for shelves and frames, taking into account the intensity of use;
- The choice of fasteners depends entirely on the level of load on the rack.
These three basic tips allow you to take an optimal and responsible approach to creating a storage system from scratch with your own hands.
Shelves and racks in the pantry are a simple, but practical and multifunctional design. It allows you to properly organize the storage of household items and various food products. Today, everyone can buy finished products or make them themselves. In the latter option, the information offered above will help.
The convenience of such structures is the ability to use the usable area with maximum benefit.
Load calculation
Before production begins, the load from objects and things to be stored is calculated. This indicator depends on the following factors:
- The thickness of the wooden shelf is from 30 to 55 mm. The greater the load expected, the thicker the board should be;
- fastening method - wooden blocks of several cm, metal brackets. Plastic holders will not cope with the weight of the shelf;
- fastening points – the longer the built-in rack is, the more fastenings are used.
Photo ideas for homemade shelving
Sources
- https://FurniLux.ru/dizajn/kak-sdelat-polki-v-kladovke.html
- https://berkem.ru/polki-i-stellazhi/kak-sdelat-polki-v-kladovke-svoimi-rukami/
- https://bezkovrov.com/prihozhaja/stellazhi-v-kladovku.html
- https://vdome.club/materialy/svoimi-rukami/kak-sdelat-stellazhi-v-kladovku-svoimi-rukami-iz-dereva-profilya.html
- https://www.ivd.ru/dizajn-i-dekor/sistemy-hranenia/kak-sdelat-polki-v-kladovke-svoimi-rukami-sovety-foto-i-poshagovyj-plan-35931
- https://ProPodval.ru/stroitelstvo/kladovka/kak-sdelat-stellazhi-v-kladovke-svoimi-rukami.html
- https://wexy.ru/obustrojstvo/dizajn/stellazhi-dlya-kladovki-305
- https://gidrukodeliya.ru/stellazh-svoimi-rukami
Expert advice
Experts give a number of tips to avoid mistakes in manufacturing and installation. A rack for a pantry or dressing room can be made by hand no worse than in production, if the rules are followed:
- the purpose of the structure is determined. The diagram reflects all large items that require shelves with sufficient width and depth;
- treatment of all wooden elements with varnish and stain. On the Internet you can find many photos with examples of such work;
- optimal placement of the structure along three walls or in a U-shape;
- natural materials, solid wood are preferred. The manufacture of partitions allows the use of veneer, plywood, chipboard or MDF.
