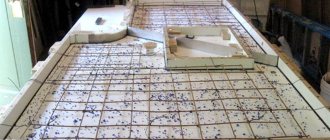
There are quite a few options for making countertops for the kitchen, mainly plastic or acrylic products. But what can you say if the countertop for the kitchen unit is made of tiles? It is quite possible to do this yourself; to do this, you just need to follow all the recommendations indicated in this article.
Obviously, this countertop option wins in many respects: appearance, practicality and durability.
Features of tile countertops
Finishing the countertop with tiles is a newfangled design solution. Such a surface will last for many years if you choose responsibly the material with which you will decorate the countertop. Stone or ceramic tiles are used to finish the work surface.
Kitchen countertop made of stone.
Stone countertops are usually made of marble or granite. This surface looks presentable and practical. But most often the work surface in the kitchen is made of ceramic tiles or tiles; these materials are much cheaper. It is better to use tiles when making countertops; they have a more convenient porous structure. To cover the kitchen surface, use squares with a diameter of 30×30 or 46×46.
IMPORTANT! The tiles need to be laid as close to each other as possible so that the seams can be masked (high-quality grout).
The most practical material for kitchen countertops is tile.
See also: Decorating a hall for a wedding with your own hands: photo ideas
Installation nuances
Any construction process requires skill. If this is your first experience working with tiles, then it is better to choose a small countertop for renovation. The principle of covering walls and countertops is the same. The edges and ends of the tabletop are decorated with special ceramic corners or elements made of wood or aluminum. During repairs, several subtleties should be taken into account:
- To finish the countertop, you can specifically buy materials or use leftovers. When laying it yourself, it can be difficult to accurately calculate the amount of material. Therefore, it is necessary to buy tiles slightly larger than the table area required (about 10-15%). If several types of remains have been preserved, the surface is decorated in the form of a mosaic. Moreover, the elements are selected to be of the same thickness. And to cut mosaics they use a tile cutter;
- The table surface must be absolutely flat and clean. If the base of the tabletop is wooden, then it is treated with moisture-proof impregnation. For reliability, the base can be attached to the wall. The plywood base is made from two multi-layer sheets and attached to the furniture with self-tapping screws;
Stylish kitchen in a modern style
Advantages of tiling
There are several reasons why tile is the best choice for countertops. Firstly, it is practical; there are no scratches on the tiles. Secondly, the price is affordable; tiling a kitchen surface with ceramics will cost less than with natural stone or solid wood. Don't skimp on tiles. The quality of the tile determines how strong and durable the surface of your table will be. The tiled kitchen countertop is easy to clean and moisture resistant. She calmly tolerates any exposure to acidic or alkaline agents. Also, the tile countertops do not fade. The only drawback is cleaning the seams between the tiles. When grouting joints, you can cover the tiles with masking tape to protect them from contamination.
Tiling your kitchen countertops has a number of advantages.
IMPORTANT! For tiling the kitchen backsplash, you can choose the same tiles as for the countertop. This will create the effect of harmony and unity, and will also visually increase the space in the kitchen.
See alsoAll about ventilation in the bathroom and toilet
Tools and materials
The countertop can be made from tiles left over after the renovation of the room or you can buy new material.
To work you will need:
- Tile;
- Level;
- Putty knife;
- Tile adhesive;
- Carpenter's glue;
- Silicone or sealant;
- Primer for tiles;
- Tile cutting tool;
- Screwdriver, self-tapping screws.
Types of tiles
To cover a kitchen surface, you need to choose glazed tiles with protection class 5. Kitchen tiles should not be afraid of grease, hot and cold objects, should not absorb moisture and should be easy to clean. There are a great variety of kitchen tiles, let's look at the most interesting options:
- Tiles imitating brickwork. These tiles are in the Italian and Provence style; they will fill the kitchen with warmth and comfort.
- Stone effect tiles. It will decorate the kitchen in Country and Classic styles, giving the kitchen individuality and novelty.
- I imitate leather on tiles. It will fill the kitchen with an atmosphere of chic and glamor. The imitation of snake and crocodile skin looks impressive.
- Tiles with crystals, painting or hand-decorated. These luxurious products are created for the rich decoration of the kitchen. They will give the interior uniqueness.
- Tiles with ornaments. They embody the most colorful and unusual design ideas. The kitchen will be decorated with patterns, prints, ornaments, drawings, and abstraction.
- Mosaic tiles. Gives off notes of oriental and Arabic interiors. It is very practical, but you need to take it with a reserve in order to select a design.
- Tile with photo printing. You can take any picture or photograph as an image. Thanks to special technology, the image on the tile does not erase, fade or drip.
- 3D tiles. It will add dynamics to the calm interior of the kitchen and make the design as interesting as possible.
- Tile with texture. Trend of the season: a glossy pattern is applied to a matte surface, it looks cool and tasteful.
- Figured tiles. The tiles are produced in the form of polygons, trapezoids, and round shapes. These tiles will turn your walls into a beautiful decoration.
Decorating a kitchen countertop with figured tiles.
IMPORTANT! You can cover the window sill with kitchen tiles, thereby increasing the working area. And if you cover the dining table with tiles, you will get an original design solution, original and bright.
See also: Do-it-yourself wood cuts for the interior
Ceramic variety
To cover a countertop with ceramic tiles, you must choose glazed tiles. Preference should be given to small sizes of 10 × 10 cm - such a surface will look neat and elegant. For the edges and ends of the kitchen surface, plastic or metal baseboards, corners and borders are purchased. A variety of colors makes it possible to realize the most daring design solutions.
Covering the kitchen countertop with ceramic tiles.
IMPORTANT! Buy ceramic tiles with a reserve, they may come in handy if over time some of the tiles break or need to be replaced.
See also: Do we buy or do we sew with our own hands? 50 decorative pillow ideas.
Mosaic wealth
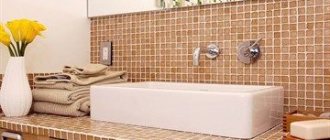
Mosaic is a very small tile up to 2.5 cm. Made from porcelain stoneware or marble, malachite or onyx, and other natural stones. Mosaic fragments can be of very different shapes. Tabletops decorated with mosaics look perfect and impressive at the same time. Mediterranean or Moorish styles will look very harmonious.
Surface tiling with mosaic tiles.
Mosaic for cladding is divided into the following types:
- Glass is the most common type of mosaic; it can be matte, transparent, glass, with various shades and additions;
- Metal mosaic;
- Smalt is the most expensive, but also the most reliable;
- Stone made of travertine, marble, lapis lazuli.
There are 3 types of mosaics for countertop cladding.
Reliability and a unique appearance are the qualities of mosaic. Small tiles can be used to create pictures and patterns.
IMPORTANT! A mosaic tabletop has considerable weight, so when choosing a base, do not forget to take this fact into account.
See alsoThe main stages of decorating and setting up a wedding table
Eternal Granite
Granite countertops are very popular, but they are quite expensive. Granite has a great advantage over tiles and ceramic tiles. A kitchen surface made of polished granite has excellent water-repellent properties - this will not allow bacteria to accumulate on such a surface. It is distinguished by increased mechanical strength - only diamond is stronger than granite. This table top will serve you for a really long time. Granite is a beautiful stone with many unique patterns and colors.
Kitchen surface made of polished granite.
IMPORTANT! If suddenly scratches appear on the granite countertop. They are easy to disguise using a special wax pencil. Apply a pencil to the scratch and buff it with wool or flannel material.
See also: Making Easter decor with your own hands
Porcelain tiles
Porcelain stoneware is a mixture of quartz sand, clay, kaolin, and feldspar. This mixture undergoes heat treatment and high pressure treatment. In appearance it is difficult to distinguish it from granite. Tiles made from porcelain stoneware are extremely durable. And it has a number of advantages:
- Porcelain tiles are much cheaper than stone;
- Increased strength, it is not afraid of sharp objects, there are no scratches or chips on it, it withstands all detergents;
- Wear resistance, long-term use of the surface;
- Heat resistance, porcelain stoneware does not deform due to temperature changes;
- Increased hygiene, dirt is not absorbed into the tabletop; to remove it, just wipe it with a cloth;
- Lack of pores, protection of porcelain stoneware countertops from mold;
- Similarity to natural granite;
- Unlimited length of the product, allows you to make a tabletop without joints;
- Variety of color palettes.
The porcelain stoneware countertop has sound insulation properties.
IMPORTANT! Porcelain stoneware countertops reduce noise levels in the kitchen.
See alsoHow to make an interior collage
Where to start
The first thing you will ask yourself is where to start the whole workflow. And this is correct, because everything must be divided into several stages and performed in the specified sequence. And the first section we will introduce you to will be the choice of finishing material.
It’s possible to do this, but the cost of curved tiles may scare you
Choosing tiles for countertops
To limit (save time) the widest range of materials, you should immediately say that a kitchen countertop made of tiles should only be made of porcelain stoneware.
Here's what it has to do with:
- Porcelain tiles for the kitchen are not inferior in strength to natural stones. That is, by laying such tiles on the countertop, you will avoid the appearance of cracks and chips even when in contact with heavy pots and pans. It can only be broken with a hammer, but this is far from a kitchen tool.
- High wear resistance. No matter how much you rub it, the surface will remain in its original form. Manufacturers provide a 10-15 year warranty. Tell me, what other material can be used so much?
- Very low water absorption compared to tiles and ceramic tiles. The indicator fluctuates around 0.05%, which allows the use of porcelain stoneware even in rooms with a humidity of 95%.
- Resistant to fats, oils, various acidic and alkaline reagents. Therefore, you can safely use household detergents without harming the surface.
Types of surfaces
However, you still have to choose, not the composition of the material, but its surface, since there are several options:
- The relief (textured) surface - its disadvantage is that dirt accumulates in the pores very quickly, which is not so easy to clean. On the other hand, the kitchen creates a unique design that is difficult to recreate with smooth materials.
- Polished (semi-polished) – easy to clean, pleasant to the touch. But, as we said earlier, the charm is lost.
There is porcelain tile in the form of a mosaic, but we do not recommend it for those who are laying tiles for the first time. A harmonious combination of apron and countertop will benefit the kitchen. This option will decorate the room.
For lovers of large sizes, there are tiles with dimensions of 60x60 cm, so if you want to simplify the installation workflow, this option is for you. Look at the photo to see what it looks like.
Tiles are very bulky and therefore rarely used as finishing materials for countertops
How to make it yourself
You can make a tabletop with your own hands step by step:
- We select materials;
- Preparation of the base;
- Laying tiles;
- We rub the seams.
Laying a tile kitchen countertop.
Now let's look at each point in detail.
See alsoDesigner things for decorating your home interior with your own hands
Selecting the material
A kitchen countertop can be made of tiles with a smooth or textured surface; experts are more inclined towards the first type. A mosaic tabletop will also look original.
IMPORTANT! When choosing tiles, you need to take into account the size of the kitchen. The smaller the size of the kitchen, the smaller the diameter of the tiles.
When choosing the size of the tiles, the size of the room plays an important role.
See alsoHow to decorate your desktop with your own hands
Preparing the base
The most suitable material for the base of the tabletop is FSF or FB softwood plywood. We measure the required dimensions of plywood. To prevent the tabletop from delaminating due to moisture during use, the plywood is treated with impregnation and waterproofing. So it is necessary to saturate all the wooden parts involved in the formation of the tabletop.
Plywood is often used for the base of a kitchen countertop.
Then we install the tabletop frame; we fasten the frame to the cabinets using side ties. Then we secure it with self-tapping screws. We also attach the side walls to the plywood, connecting them with metal corners and screws.
Waterproof PVA or wood glue is applied to the thoroughly reinforced frame. And we lay the second layer of plywood on top and fix it with self-tapping screws. We place the screws at a distance of 10-15 cm around the entire perimeter. We attach plywood with a diameter of 4 cm to the edges.
Waterproof adhesive is used to lay the tiles.
With the second layer we make notches 6 cm long. A painting mesh is applied on top of the notches, we stretch it well over the edges of the plywood and secure it with a stapler.
The final stage will be applying liquid glass and covering the structure with waterproofing. You can start laying tiles.
See also: Do-it-yourself refilling of the refrigerator with freon: step-by-step instructions, tips and tricks
Laying tiles
To avoid distortions, you need to make markings and apply a cement layer that will connect the tiles to the base. We mark two points in the middle along the edges and connect them with a line. We get the center line of the tabletop. In the same way we mark the center in width. As a result, we get two perpendicular lines, which will serve as our guide for facing the countertop.
We spread the glue. For reliability, you can add a little primer to the glue (approximately 1/3 ratio).
Laying adhesive for laying tiles.
We begin laying the tiles from the side that will be visible. You can start from the outside of the tabletop. Using a notched trowel, apply a layer of glue to the cement base. We lay the first tile on the corner of the countertop, lay out the first row, being sure to maintain an angle of 90 °, checking the outer and horizontal lines using a level. The tiles should converge with the markings made earlier.
When adjusting the tiles to the sink, you can allow an error of half a centimeter. The main thing is that the sink rests completely on the tiled surface.
IMPORTANT! The tiles are easily cut with a lever tile cutter, so to make the work easier when cutting tiles under a sink or refrigerator, you can make blanks from cardboard and then mark them.
To make the work easier when laying the first row, we will also lay out the end cladding.
Laying the tiles begins from the middle of the countertop.
Next, lay the tiles in rows, do not forget to insert crosses into the seams and remove excess glue. Be sure to check the plane using a level.
When the finishing of the countertop with tiles is finished, you can begin to cover the end of the countertop.
IMPORTANT! Lay the tiles as close to each other as possible.
Laying begins from the center of the tabletop.
See alsoCoffee machine cleaning products, rating of the most popular companies
How to cover the end of a countertop
We attach slats to the bottom of the tabletop; they will serve as a support for covering the tabletop. We fix the corner outer profile on the end side. Carefully prime with a layer of cement and wait for it to dry.
When tiling, the first layer of tile must be laid with a protrusion equal to the thickness of the tile. After which the tiles are cut and glued to the end of the countertop. Trimmed tiles or decorative borders are glued at right angles. And the underside of the trim is masked in the profile.
The end of the tabletop can be covered with tiles or a decorative border.
When the finishing work on the end is completed, the tiles have dried a little, you can start grouting the joints.
There are three types of closing the end of the tabletop:
- so that the edge of the tile overhangs;
- so that the edge of the tile protrudes;
- the most difficult option (usually trusted to a master) is closing the end at an angle of 45 degrees.
There are several types of covering the end of the countertop with tiles.
Grouting joints
When the countertop is covered with tiles, it is important to grout the seams correctly. For work we will need: grout, foam sponge, wooden sticks, rubber spatula, mixer. When choosing a grout mixture, you need to pay attention to the recommended joint width. This work takes place in several stages:
- We remove the remaining tile adhesive; you need to use a foam sponge or wooden sticks so as not to damage the tabletop.
- We clean the slab from cement residues.
- Prepare the grout according to the instructions on the package. Remember to prepare the grout in small portions. It dries quickly.
- With the prepared solution (it should look like very thick sour cream by eye), using a rubber spatula, fill all the cracks without gaps
- After drying, wipe the tiles with a sponge, often moistening it with water.
Grouting joints using a special spatula.
The tile countertop is ready to use.
IMPORTANT! For kitchen countertops, you need to choose epoxy resin-based grout. They are resistant to chemicals and acids, as well as temperature changes.
Required tools and materials
For the base of the tabletop we take three cabinets (sink cabinet, cabinet with drawers, two-door cabinet) measuring 1600 × 560 cm.
For the base of the tabletop we take two sheets of FSF or FB plywood made of coniferous species.
FSF is plywood glued with phenolic resin. FB is bakelized plywood, it is impregnated with bakelite varnish (this plywood can be used in hot and humid rooms).
We will also need:
- carbon grinder with tile disc for dry cutting;
- spatula - for grinding cut tiles;
- spatula – 60 cm and 12 cm;
- high-hold adhesive for tiles;
- level;
- crosses for tiles 3 cm;
- silicone sealant;
- protective composition for wood;
- latex or primer;
- wood glue;
- electric drill;
- oilcloth, old rags for cleaning;
- felt-tip pen, pencil;
- liquid glass and waterproofing composition;
- stainless steel self-tapping screws – 3.5 -3.8 cm – 400 pcs.;
- jigsaw;
- mixer;
- wood drill;
- bucket for solution.
Tools for laying tiles.
Laconic minimalism
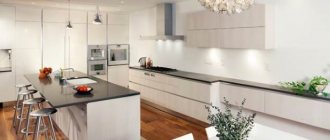
Simple and practical style will appeal to dynamic people. The kitchen is not forced with many decorative elements. Therefore, the room always looks spacious and clean. Distinctive features of the interior:
- the color scheme can be any. But most often the style is associated with monochrome. Surfaces made of modern materials are welcome: glass, plastic, metal;
- the surface of the furniture should be smooth. Any textured items will violate the design style;
- gloss is the most popular option for kitchen facades. The contours of the furniture are always strict, with clear lines.
The main thing is that everything suits your taste
This style is ideal for small spaces. Since glossy surfaces reflect light well, the room visually looks more spacious and free.
Glazed ceramic tiles or smooth porcelain stoneware are suitable for finishing the table. As a rule, no more than three shades are combined in the interior. And the tabletop is usually made white or black.
Most often, materials of the same color range are chosen for the apron and table surface.
Tiles with a glossy surface will add sophistication to the interior. Products with inscriptions have become a new trend. This type of countertop will give the kitchen a stylish, creative look. The original inscriptions look unusual. This decor will unobtrusively decorate the room.
As an option, for a small kitchen in a studio apartment: a kitchen with white plastic glossy facades, a matte dark blue wall. The surface of the table is decorated with shiny porcelain tiles in a rich dark gray color.
Advice: To make the work surface and the wall look almost like a single whole, a composition for grouting joints is selected that matches the color of the finish.
Combined with wood
If you want to “hide” the kitchen in a small apartment, then choose furniture fronts to match the walls. A white kitchen with a shiny white porcelain stoneware countertop literally “dissolves” into the surroundings. To soften the sterile look of the environment, the room has a dark purple sofa. A small rug made from elements of simple geometric shapes in different colors (black, gray, white, dirty yellow) will give the room a stylish look.
DIY templates for crafts from cereals and pasta for children (185+ Photos) - Original solution Home decoration and more
Choosing tiles for countertops
When choosing tiles for a countertop, you need to consider three criteria.
- The appearance of the top layer. For the kitchen, it is necessary to select tiles with the most even face. Porous types of tiles will constantly get dirty, and mirror surfaces require frequent cleaning.
- The material must be as durable as possible, because the countertop is a work surface with intensive use. The best option is porcelain stoneware tiles; they can withstand temperature fluctuations, mechanical damage, and do not allow moisture to pass through.
- The parameters depend directly on the size of the working surface. For cladding, you can take tiles of various sizes, ranging from mosaic to your imagination. It is important to remember that the tiles should be chosen so that there is less waste during the work.
For the countertop, you need to choose a tile with the maximum smooth surface.
All that remains is the grout
See also
: Corner shelf in the bathroom: choice of material and design
To make the finished tabletop look like in the photo and video, then you need to sand the seams.
Even during the installation process, carefully remove excess glue from the seams. A plastic spatula and a damp sponge will help you.
When working, do not use an excessively wet sponge, and do not allow water to get into the tile seams.
Only after 1-3 days, depending on the drying speed of the tile adhesive, a grout layer is applied. Apply the material, and then after 20 minutes go over with a slightly damp sponge. This way you will get rid of excess.
When dry, wipe the seam with a damp sponge at intervals of 3-4 hours. This way they will dry evenly.
Examples of interesting solutions
An excellent option is finishing the kitchen with tiles. The tiles are very easy to care for, they are easy to clean, resistant to external factors and look presentable. Let's look at the most interesting design solutions.
For small kitchens, mosaic or small tiles are suitable.
A bright kitchen is a housewife's dream. The tiles can be matched to the walls, in the same tone as the furniture. The walls, countertops, and kitchen facades can all be the same tone.
To cover the walls above the work area, you can use more interesting shades, then the color of the countertop will echo the tone of the apron and you will get a gentle play of color.
When choosing the size and tone of the tiles, do not forget to take into account the size of the kitchen. Light colors will make the kitchen larger, and bright colors will look stylish.
An excellent design solution is to add glass tiles to the interior.
The glass surface will fit perfectly with any design.
There are a great variety of stone and stone imitation tiles on the market; you can also find imitation wood and metal tiles.
Tiles can be not only of different sizes and colors, but also textured or smooth, glossy or mirrored.
When choosing the color of the tiles, do not forget to take into account the level of lighting in the kitchen.
The tile fits perfectly into the Loft style; the tile can be used in any design direction.
For a Loft-style kitchen, a tiled countertop would be an excellent solution.
Romantic interior in Provencal style
The mild and sunny climate of the southern regions of France is associated with calm, pastel colors. Several characteristic features will emphasize the originality of the interior in a rustic style:
- the color scheme is formed by light pastel shades (sand, cream, white, beige, lilac, light green);
- you can lay out an interesting pattern on the work surface, but any combination of shades should not look provocative;
- Provence style assumes the presence of a variety of textile decor (curtains, tablecloths, pillows, upholstery). The shades of textile patterns should be reflected in the palette of the tabletop.
As an option mosaic tiles
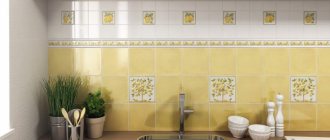
Ceramics with plant motifs will be an excellent decoration for the kitchen countertop. Motifs depicting fruits and vegetables look interesting as decor.
To prevent such surfaces from looking too patterned, you can use this material to decorate a small area of the countertop near the sink.
Advice To create a homely atmosphere, it is better to choose products of small sizes - 10x10 cm or 15x15 cm. Discreet and cozy interior: white and blue kitchen.
The work surface is laid out with blue tiles. A kitchen apron, decorated with pale blue squares with small plant patterns, will harmoniously complement the work surface. The role of the plinth will be played by a strip lined with the same blue tiles as the table.
The blue frieze will elegantly border the ceramic plinth. A milky kitchen set will visually soften the coolness of the blue tones. White grout will give the countertop an elegant look and make it visually lighter.
Porcelain tiles are a more budget option
An easy option for creating a cozy interior is to lay out identical squares on the kitchen apron and work table. Choose contrasting shades or to match the color scheme of the interior.
An original option for finishing a desktop is rectangular products that imitate a wooden surface . In the manufacture of ceramic elements, clay, special additives to improve the structure, and quartz sand are used. Which material to choose, glazed (with single/double firing) or matte, is up to the residents to decide individually.
The wooden surface is easily imitated by tiles of different shades. For a soft, calm Provencal style, light-colored material (oak, maple, birch) would be a win-win option. Patterned textiles with floral designs will bring a play of colors to the interior.
In calm beige color
A fashion trend is to use it with a worn effect. The material imitating aged wood looks elegant and noble.
Some care tips
An artificial stone countertop does not require special care, but some recommendations should still be followed. It is enough to treat the surface of a countertop made of natural or artificial stone once a year with a special impregnation. This impregnation prevents the penetration of moisture, extending its service life. Tile joints must be periodically coated with sealant.
Stone countertops must be sealed once a year. Use special coasters for cold and hot dishes. You should not cut food on the countertop; for this you need to use cutting boards. Natural stone surfaces need to be polished occasionally. The tiled countertop does not require special care; simply wash with warm water and soap.
The working process
We make the base for the tiles
If you already have a kitchen set, you should make some changes to its design:
- The first step is to add a few legs to each cabinet. Distribute them around the perimeter; they are of no use in the center of the product. Still, the porcelain stoneware countertop is quite heavy.
- Fix the cabinets securely together so that they form a single unit. This is necessary to maintain a single horizontal level.
The next step is to prepare the tools and materials for the base:
Buy FSF or FB plywood. The standard size of sheets of material is 1500x1500x20 mm. Accordingly, if your kitchen is three meters tall, then you will need two sheets.
- Also stock up on moisture-proof wood impregnations. Consult with the store clerks; manufacturers may differ in each city.
- The tools you will need are a jigsaw, a hacksaw, a hammer and a screwdriver.
- Initially, the plywood is cut so that it hangs over the kitchen unit. The standard size of a plastic tabletop is 60 cm. Do not forget about the overlap of 1 cm on the front side and 2 cm on the edges.
- Then we treat the material with moisture-proofing agents. At first glance, this is only a kitchen countertop made of tiles; its base is made of wood. Therefore, in order to prevent the appearance of unevenness and deformation, everything should be thoroughly lubricated.
Attaching the base
- We set the kitchen set by level. Some craftsmen attach it to the wall through the back walls of the cabinet, but we consider this an unnecessary procedure.
- The first layer of plywood is attached to the cabinets using stainless steel screws. Hats should be recessed. The optimal length of the self-tapping screw is 38 mm.
- Then wood glue is applied to the surface. Moisture-resistant PVA or wood glue will do.
The most important thing is to tighten the screws around the perimeter, the middle is not so important, there the material will be securely fixed with glue
Tile mortar
- Tile adhesive, which is sold in stores.
- A solution of cement and dry fractionated sand is also sold in stores.
- Cement-sand mortar that can be made at home. For higher adhesion, we recommend adding glue to the solution (PVA is suitable).
Apply the solution to plywood
- The finished solution is laid out on the base using a trowel. It should be applied evenly over the entire area of the plywood.
- To level the solution and at the same time maintain the level, beacons should be installed. It is better to use a large spatula, from 30 cm.
Movements must be strictly “left-right”, no circular or diagonal
- After the solution has completely dried, it is necessary to remove the beacons and treat the end-cement-sand cushion. Pour the solution into the places where the beacons were installed.
- We level everything into a single plane and leave it for 2-3 days.
Laying tiles
If you are holding porcelain tiles in your hands for the first time, then, of course, there can be no question of any professional types of installation; let’s consider the simplest one: seam to seam. We will take a product measuring 10x10 cm as the basis for the tile.
In this case, the tiles were laid using mixed methods: diagonally and traditionally.
Initially, you need to mark the surface. We draw the middle in width (you should get 30.5 cm) and in length (based on 3 meters and tolerance, you get 151 cm). We draw a line and get perpendicular lines. Prepare the adhesive solution according to the instructions on the package
On your own, for a better effect, you can add a primer in a ratio of 1 to 3 parts water. We begin laying the tiles from the corner that is considered the most visible: with a notched trowel, the glue is spread over the surface of the cement-sand pad. Since we are laying without a visible seam, pay attention to the horizontal lines that are located along and across. The cutout for the sink is laid out with a discrepancy of 2-3 mm from the actual size. The main thing is that the sink then lies only on the tiles, without any unevenness.
With this device you can cut tiles to size without dust or dirt.
After the countertop is completely tiled, you should take care of the end, which for now consists of two layers of plywood, cement mortar and tiles.
Design finishing ideas
The choice of tiles and design for the countertop depends only on the preferences of the individual. There are many different options:
- brickwork;
- under stone or leather;
- the presence of various decorative elements, sometimes even crystals;
- mosaic options;
- various ornaments;
- photo printing;
- 3-D options;
- textured and figured tiles.
The kitchen countertop made of tiles can be anything. It is even possible to make such a design yourself. There are many tutorials on the Internet that can help you do similar work. However, complex designs are best left to experienced craftsmen. With proper and high-quality installation, such material will last for quite a long time.
