0
(0)
There is no such thing as too much kitchenware and accessories - any housewife will tell you this. In addition, all sorts of blades, holders, and other items are always lost, broken, or out of order. Homemade wooden spatulas for the kitchen are the best gift. And if these spatulas are properly polished and covered with oil or wax, they will serve for a long time and flawlessly. The manufacturing process may seem complicated and will require a lot of time and effort. But all the costs will be more than compensated by the joy of the loved one who will be presented with such a gorgeous gift.
Workshop – Making a wooden carved kitchen spatula “Primrose”
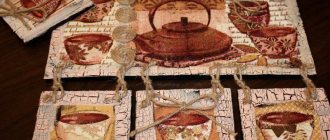
Since ancient times, people have been decorating their home, household items, and kitchen utensils! Spinning wheels, dishes, spoons were decorated not only with paintings, but also with carvings! handmade
carved wooden . To make a carved kitchen spatula, take a linden board 70 mm wide, 20 mm thick, 300 mm long, plan the ends to a cone, bring one end of the workpiece (the handle of the spatula) to 30 mm, and leave the other wide. We plane the flat part of the workpiece, trim the wide part (blade) to 6 mm. leaving the narrow part of the workpiece (handle) - 20 mm. We have a linden blank (baklusha) for making a carved kitchen spatula!
We make markings: mark the center along the length of the blade and mark the border of the handle and blade.
Using any suitable circle, we mark a smooth transition from the blade to the handle and mark the handle of the blade.
To make such a simple product, I do not consider it advisable to use a power tool (jigsaw, drill). Armed with a sharp semicircular chisel of a suitable size, with a comfortable handle, let's start carving wood! First, we select, marked in pencil, a smooth transition from the blade to the handle, then we turn the workpiece over onto its end, fix it, and cut off the excess with a flat chisel. On the other side of the workpiece we do the same.
If you want to hang a spatula, make a through hole using a semicircular chisel of a suitable size.
Using a semicircular chisel, at an angle, from the center marked with a pencil, we begin to cut.
Carefully remove the chamfer from the shoulder of the blade to the first notch.
Using a corner, trimming the edge of the handle, we separate the design and make the handle curly.
Using a straight chisel and an oblique knife, we trim the edge, making the design more prominent.
From the center of the handle, we cut the leaf with a corner, separating it from each other.
Use a semicircular chisel to round the end of the handle.
Using a semicircular chisel, cut out four petals. We separate them from each other with a corner.
Use a semicircular chisel to chamfer the tip of the handle. From the outside we separate the petals with a corner.
Using a straight, wide chisel, sharpen the end of the blade and grind it.
We made a wonderful carved kitchen spatula. To the delight of the beloved and to the surprise of the guests.
Cooking utensils
Kitchen utensils are the main attribute of the kitchen, which were used by our ancient ancestors. Utensils for cooking, for serving the table and eating dishes, utensils for drinks, cutlery - absolutely any piece of utensils allows you to turn an ordinary meal into a pleasant and comfortable time spent at the table with the whole family.
Once upon a time, it was enough to have one or two items in the kitchen that were used for any culinary task. Now you can buy dishes for different purposes: pots, frying pans, stewpans, frying pans for cooking, tureens, gravy boats, plates, bowls, salad bowls, for serving, glasses and glasses for various drinks.
Source: www.olx.ua
Lesson 3. Kitchen spatula
The spatula (Fig. 36) is your first practical product.
Every housewife needs it. And of course, she will be pleased to hold in her hands, while preparing food, a product decorated with carvings. The beautiful things that surround us lift our spirits, and you will be happy that you are creating this beauty.
To make a kitchen spatula you will need a piece of wood with an area of 250 x 60 mm and a thickness of 8 mm. There should be no cracks, knots or other defects on it. If it is well planed, then sanding it is not recommended, since when sanding, small abrasive pebbles are separated from the sandpaper and rubbed into the surface of the wood. When cutting, they contribute to the rapid dulling of the knife.
To transfer the image of a shoulder blade onto a board, you will need a piece of tracing paper with dimensions equal to this board. Place it on the shoulder blade template and trace along the outline. (The template for this product is shown in Fig. 50.) After this, glue the tracing paper onto a sheet of thick paper and cut along the contour with scissors. You will receive your template.
Now place it on the board and trace the outline of the shoulder blade (Figure 37). Save the template. It will serve you more than once.
Now you have to cut out this product. Three methods are offered:
- hand jigsaw;
- jigsaw;
- manual hacksaw followed by processing along the contour.
The most preferable of them is cutting with a jigsaw - quickly, cleanly and without much physical effort.
In the absence of jigsaws, both electric and manual, you are left with only the third processing method. We will consider it in detail. The first thing you need to do is, stepping back 2 mm from the contour line of the blade, draw cut lines (Fig. 38). Then press the workpiece with a clamp, placing it on the edge of the table (Fig. 39).
Using a hand saw, make cuts as shown in Fig. 40, a (arrows indicate sawing directions). After this, wring out the clamp, place a backing board on the table (so as not to damage it), place the spatula on it, pressing it with your left hand. Use a semicircular chisel to process the blade around the perimeter (Fig. 40, b). Then, marking the angle of the blade on the edges and the length of the blade on the sides (Fig. 41), use a flat chisel to cut the corners on the working part of the kitchen spatula, as shown in Fig. 42.
After this, use sandpaper to sand all treated surfaces. If the unevenness is large, then before grinding it is necessary to work with a file: semicircular on radii and flat on straight lines.
This completes the production of the blade. You can start marking patterns. Start by drawing a vertical center line. Let me remind you that the center line divides the image of the object in half. It can also be called the axis of symmetry. If you fold an object along this axis, then the weight of the points on one side should coincide with the points on the other. Nature tries to make everything symmetrical.
To draw the center line, place a ruler on the product and measure the width of the blade at the top. Divide the resulting size in half and place a dot on the shoulder blade (Fig. 43, a). Do the same at the bottom of the object. Connect the resulting points with a line. It will be axial.
Then, using the template, measure the distance from the top edge of the blade to the hole. It will be 12 mm. Transfer this measurement to the product and mark it with a small line. There will be a hole here. We will mark the holes with a cross, and not with a circle of a certain diameter, since you will choose the diameter of the holes yourself, depending on the location of the product.
Now, in the same way, take the measurement from the center of the hole to the beginning of the square and transfer it. It will be 11 mm. Place a check mark. Next, the dimensions are transferred in the following sequence (Fig. 43, b):
- from the beginning of the square to the end of it - 24 mm;
- from the end of the square to the beginning of the rectangle - 5 mm;
- from the beginning of the rectangle to its end - 50 mm;
- from the end of the rectangle to the beginning of the small square - 4 mm;
- from the beginning of the small square to the end of it - 19 mm.
After this, from the marks on the vertical axis, sequentially, from left to right, set aside the dimensions that you take from the template (Figure 43, c):
- large square - 11 and 11 mm (I and II);
- a rectangle that tapers slightly towards the bottom - 11 and 11 mm at the top (III), 9.5 and 9.5 mm at the bottom (IV);
- small square - 9.5 and 9.5 mm (V and VI).
After these steps, connect the ends of the resulting segments (Fig. 43, d). In the squares, mark the “stars” that you already know from the first lesson. Only here they are enclosed in a rhombus inscribed in a square (Fig. 44).
Start marking, as usual, with the center lines. You already have a vertical axis, draw a horizontal one (Fig. 45, a), connect points A and B, B and C, C and D, D and A with segments (Fig. 45, b). You now have eight triangles. Write a “pyramid” into each of them (see “ABC”), and you will get a new interesting figure, although the novelty here lies only in the reversal of the “asterisk” (Fig. 45, c).
In a rectangle, the pattern is formed by a combination of “viteyki” and “diamonds” (Fig. 46). To mark it, divide each half of the rectangle, divided by the center line into two parts, in half and place points ABCD (Fig. 47, a). Connect them with straight lines (Fig. 47, b). Then mark the entire height of the rectangle, which is 50 mm, in 5 mm increments and draw horizontal lines, as in Fig. 47, v. The result is squares in which you can easily enter the “viteyka”. “Diamonds” form on their own (Fig. 47, d).
Now you can start carving. Don't forget that you first need to mentally determine the tattooing points. If in doubt, contact ABC.
With regard to this pattern, only one explanation is necessary. This applies to the small triangles located in the corners of the rectangle in Fig. 47, g. It must be cut out the same way you cut the “pegs”. The point of tattooing is, naturally, the top of the triangle.
When you have completed the pattern, drill a hole whose center you marked earlier. To do this, you first need to prick the center of the hole with an awl.
When drilling, use a backing board to avoid damaging the table. Feed the drill slowly, without jerking, trying to keep the drill, or rather the drill, perpendicular to the drilling plane (that is, at an angle of 90°) (Fig. 48).
Solid fabric of different shapes
Rectangular and trapezoidal products are needed for working with large pieces of food. Round-shaped options are suitable for moving ingredients or pieces of a finished dish: laying out, arranging portions. When choosing, it is important to pay attention to the length and width of the tool’s working area.
The more compact the product, the more convenient it is to work with small ingredients. The width of the product determines its suitability for dishes of a certain format: in extremely limited space it is easier to manipulate a compact accessory.
Kitchen utensils made of wood
With the advent of the era of Teflon pans and pots, wooden cutlery has become firmly established in our kitchens. Although it must be said that wooden utensils were even more popular in the old days, due to their cheapness and ease of manufacture.
Indeed, anyone can plan a wooden spatula for a frying pan. And you don’t need any special tools for this. But if you need to make a large set of products for the kitchen, for example, for sale, then there is a need to somehow optimize and speed up the process. In this case, it is advisable to use a power tool for work.
Beech is the best material; walnut, maple, pear, or birch are less commonly used. In any case, conifers are not suitable for contact with food. First, you need to prepare a thick block of wood; gluing the workpiece is not recommended.
1. Draw the shape of the edge of the blade on the face of the block. If the thickness allows, then it is more convenient to immediately outline several parts one after another, with a gap for sawing. Using a band saw, we cut along the markings without going beyond the lines. In extreme cases, parts can be cut out with a hand-held electric jigsaw, but this will take noticeably longer. For the master, homemade grinding machines and devices.
2. We adjust the dimensions and sand the cut lines using a grinding machine, or manually with emery cloths.
3. We continue to saw the workpiece along all the marking lines.
4. We collect several parts into one bag and secure the sandwich with adhesive tape on all sides. On the upper side of one part we draw the outline of the blade of the shape you need. To make it easier, it is better to first draw the part on paper, cut out the template with scissors, then apply it to the surface and outline it.
5. We cut out the parts in a different projection on a band saw, or using a jigsaw. When working with a jigsaw, it is more convenient to fix the workpiece with a clamp to the edge of the table, finish it to the middle, unfold it and clamp it again with a clamp.
6. We also process the edges of the parts in a bag secured with tape.
7. Next, on each individual blade we round off the sharp ribs on the handle. It is clear that such work is best done using a sanding drum and a sanding disc.
8. For amateurs, there are soft sanding discs for drills in stores, but no one has canceled sanding bars yet. On the topic of the article: sanding wooden products by hand.
Advantages and disadvantages
We practically don’t think about the advantages of wood products for the kitchen - we just use them with pleasure. But every housewife will be pleased to know that her tools are safe and will never spoil the signature dish. Here are a few reasons for using natural utensils:
- When using a wooden spatula while cooking, there is no chance of getting burned because wood has low heat conductivity and, unlike metal, it does not heat up.
- Such utensils do not scratch dishes, because wood is, in a sense, a malleable and soft material. This makes it possible to use it for cooking in pots and pans with non-stick and Teflon coating.
- Environmentally friendly - unlike plastic and other newfangled materials, natural solids do not emit toxins and do not affect the taste of dishes. True, for this you will need to purchase a spatula, which was definitely not treated with any impregnations in production.
- Large selection of shapes, sizes and designs. You can buy carved or painted spatulas, decorated with burnt-out designs, with or without slots.
- Low cost, not to mention the fact that such a thing can be made with your own hands from a small plank - it will be almost free.
Wood products are considered hypoallergenic and safe for human health.
However, products made from natural materials also have their drawbacks. For example, such blades absorb odors, are stained by some products, and can warp and even crack from prolonged exposure to water. And over time they darken. Although these disadvantages are easy to eliminate. To prevent the spatula from absorbing moisture, it must be wiped dry after washing; to protect it from smoldering or fire, it must be stored away from open fire. And simple rules of care will help you preserve the attractive appearance of your favorite instrument longer.
Making a wooden carved kitchen spatula “Primrose”
Since ancient times, people have been decorating their home, household items, and kitchen utensils! Spinning wheels, dishes, spoons were decorated not only with paintings, but also with carvings! handmade carved wooden
To make a carved kitchen spatula, take a linden board 70 mm wide, 20 mm thick, 300 mm long, plan the ends to a cone, bring one end of the workpiece (the handle of the spatula) to 30 mm, and leave the other wide. We plane the flat part of the workpiece, trim the wide part (blade) to 6 mm. leaving the narrow part of the workpiece (handle) - 20 mm. We have a linden blank (baklusha) for making a carved kitchen spatula!
We make markings: mark the center along the length of the blade and mark the border of the handle and blade.
Using any suitable circle, we mark a smooth transition from the blade to the handle and mark the handle of the blade.
To make such a simple product, I do not consider it advisable to use a power tool (jigsaw, drill). Armed with a sharp semicircular chisel of a suitable size, with a comfortable handle, let's start carving wood! First, we select, marked in pencil, a smooth transition from the blade to the handle, then we turn the workpiece over onto its end, fix it, and cut off the excess with a flat chisel. On the other side of the workpiece we do the same.
If you want to hang a spatula, make a through hole using a semicircular chisel of a suitable size.
Using a semicircular chisel, at an angle, from the center marked with a pencil, we begin to cut.
Carefully remove the chamfer from the shoulder of the blade to the first notch.
Using a corner, trimming the edge of the handle, we separate the design and make the handle curly.
Using a straight chisel and an oblique knife, we trim the edge, making the design more prominent.
From the center of the handle, we cut the leaf with a corner, separating it from each other.
Use a semicircular chisel to round the end of the handle.
Using a semicircular chisel, cut out four petals. We separate them from each other with a corner.
Use a semicircular chisel to chamfer the tip of the handle. From the outside we separate the petals with a corner.
Using a straight, wide chisel, sharpen the end of the blade and grind it.
We made a wonderful carved kitchen spatula. To the delight of the beloved and to the surprise of the guests.
Ceramics
Ceramic accessories are rarely used for active work. The products look elegant, but the functionality is questionable. They are safe, easy to clean, and not susceptible to moisture or odors.
Ceramic spatulas quickly leave scratches on dishes and become damaged themselves. Temperature changes are contraindicated for the accessory: there is a risk of cracks.
The option is often preferred for aesthetics or serving dishes. For example, such a spatula is convenient for serving food. Most often, ceramic tools are used for serving cakes.
Kitchen spatulas will become like new: 6 ways to update wooden appliances
I rarely listen to my mother-in-law's advice. I usually listen to her with half an ear and nod. But this time everything did not go according to script. Her exclamation: “What have you done with wooden kitchen spatulas,” outraged me to the core. “It’s none of your business, Mom. The blades have served their purpose. I was just about to throw them in the trash.”
What the mother-in-law heard inflamed her even more. From the long monologue, I understood that she was going to put them in order. I was shocked. Both blades, covered with stains, became as good as new. Since then I have been recommending her life hacks to everyone.
"Salt-water"
It turns out that a children's spell against bees and wasps also works against plaque on a wooden spatula. You need coarse rock salt. Take a handful of salt and a regular kitchen sponge. Rub the device and leave for 5 minutes. The tree brightens before our eyes. Wash off the salt with water.
Heavy artillery
Even if the shoulder blade has already seen a lot in its lifetime, it still has every chance of salvation. I was convinced of this personally. My set of spatulas were completely stained and blackened. In general, it just asked to be thrown into the trash. After cleaning with salt, it became lighter, but the stains did not completely disappear. In such situations, heavy artillery saves:
- Soda. 5 tbsp. spoons of baking soda should be dissolved in a glass of boiling water. Then lower the spatula into the solution for 10 minutes. Rub it with a sponge. Rinse with water.
- Hydrogen peroxide. You need to soak a cotton pad with pharmaceutical peroxide and wipe all darkened areas. Leave the spatula for 10 minutes and rinse under the tap.
- Sandpaper. Any fine grain paper will do. You need to rub the stains with it (not too much). After this treatment, even soot will disappear, not to mention traces of fat.
My mother-in-law said that wood with stains can still be painted in a decoction of onion peels. You need to strain the broth, add a tablespoon of vinegar, put a spatula inside and press down with something. Dry after 10 minutes. For me, painting such a small thing is too much. But suddenly her advice will be useful to someone.
Vinegar and lemon for odor
Any tree absorbs odors very quickly. If the spatula looks decent overall, there is no need to clean it. You can simply get rid of the aromas. Pour some table vinegar into the saucepan. You can dilute it with water 1 to 2. Heat it until it is hot. Lower the spatula for 5 minutes.
Rinse with water. It is better to hold the event with open windows. Vinegar stinks, but quickly dissipates, taking with it foreign odors. You can do without vinegar. If you have recently mixed something aromatic with a spatula, just wipe it with a slice of lemon.
The finishing touch
To make wooden dishes less dirty, you need to grease them with vegetable oil and put them in an oven preheated to 180 degrees for 3-5 minutes.
The mother-in-law says that these are common truths. The procedure should be carried out immediately after purchasing any wooden utensils: rolling pin, spatula, spoon, cutting board. Heated oil creates a film on the wood that prevents water and dirt from entering. New blades must be treated in this way. If the devices have been thoroughly cleaned, the procedure is repeated.
Important! The spatula must be completely dry. Otherwise it may crack in the oven.
3 Secrets to Clean and Tidy Appliances
A wooden spatula is a very useful tool. It’s easy and pleasant for her to stir different fried dishes, turn pancakes and cutlets. The trouble is that the tree absorbs everything it comes into contact with: fats, juices, accidentally spilled coffee. Even water.
But there are 3 secrets that will help your wooden utensils stay clean longer:
- Always wash it first. The faster the wood is cleaned, the less likely it is that any marks or stains will remain on it.
- Use natural detergents - baking soda, dry mustard, coarse salt or vinegar. They both clean the tree well and renew it at the same time. And ordinary detergents are absorbed. As a result, the device deteriorates faster and can harm your health.
- Keep the spatulas in a ventilated place, but not near the stove. The wood should dry well from moisture. Therefore, it has no place in a desk drawer. Near the stove, on the contrary, it is too hot and dry. Wood cracks prematurely.
Silicone
Choosing silicone spatulas for the kitchen is a good decision. They are safe for humans and do not damage dishes. The products are easy to care for and do not absorb odors.
Over time, aesthetics are not lost. Design possibilities are unlimited. You will be able to buy both items with a neutral design and bright, interestingly decorated items.
The disadvantage of this option is that it is too soft. The structure is often reinforced with metal and plastic inserts.
Do-it-yourself wooden spatulas for the kitchen - quickly and cheaper than store-bought ones!
There is no such thing as too much kitchenware and accessories - any housewife will tell you this. In addition, all sorts of blades, holders, and other items are always lost, broken, or out of order. Homemade wooden spatulas for the kitchen are the best gift. And if these spatulas are properly polished and covered with oil or wax, they will serve for a long time and flawlessly. The manufacturing process may seem complicated and will require a lot of time and effort. But all the costs will be more than compensated by the joy of the loved one who will be presented with such a gorgeous gift.
How to cut wooden kitchen spoons with a stand
To make 4 spoons, different wood was taken:
- for blades with straight edges ash, this dense wood is just suitable for wide, narrow straight blades;
- for an oval spoon - beech, another particularly dense wood that does not absorb moisture;
- for a spoon with round edges - birch.
Four spoons made from four types of wood
Tools for working at home
The main tool for turning is a jigsaw. It is designed for cutting out small parts and works like a sewing machine needle. Also useful:
- grinder with grinding disc;
- plane;
- drill with grinding drum;
- drill;
- diamond disc;
- a piece of sandpaper no. 200 or higher.
The process of carving spoons from wood with your own hands
The first thing is to attach a stencil to pieces of wood. Using it, cut out the design on the handles of the spoons and the shape of the products themselves.
Cutting out the design and shape of future spoons
The second thing is to make the handles rounded. A grinder with a grinding disc will be useful for this.
Curves for handles are made with a sanding disc
Third, use a plane to shape the narrowing of the blades in their working part. Give the shape very carefully so as not to narrow one of the sides.
Narrowing of the blade shape near the working part
Fourth, remove the top layer of wood along the entire plane with a plane. This should be done very carefully! You have to remove a very thin layer of wood
.
Fifth, make a notch on the spoon. The outer part should be done first with a drill with a sanding drum, then with a grinder with a sanding disc.
Processing the outer notch on the spoon
Shape the inside of the spoon using a drill.
Decorating the inside of the spoon
Sixth, sand the products with a diamond disc. You can lay sandpaper on top of the diamond disc to make the surface perfectly smooth.
Making a stand for homemade wooden spoons
The blanks for the stand are already equipped with a stencil. Cut out a shape using a jigsaw.
Cutting out the spoon rest shape
The stand is made of birch and consists of 3 parts:
- wide bottom base;
- holder with bushings (upper);
- kernel.
Four-sided blade holder. Each side is equipped with a hole for gluing a dowel. The dowels will hold the spatulas and spoons.
Cutting holes for dowels on the holder
The rod is made on a milling cutter. The machine is expensive, buying it “at a time” is not profitable, you can contact the carpentry experts and ask them to cut out the rod
.
The elements for the stand are ready.
The final touch is to cover the spoons and stand with wax, assemble and present!
Four spoons from four types of wood on a stand ready
Rules for choosing oils and impregnations for wooden products
There is no single correct answer to the question of impregnating a wooden spoon. Craftsmen defend their positions and test various mixtures and compositions with practice. But there is one rule - food accessories are coated only with food impregnations.
. The most convenient option is edible (vegetable) oil.
There are many advantages of using oil:
- Oil does not harm the body. From a large range of products you can always choose the perfect option.
- The oil has good waterproofing properties. Impregnation will close all cracks and microcracks in the wood and make it resistant to moisture.
- The oil film gives the product an attractive appearance.
The best oil for impregnating wooden products is bleached linseed oil. It is sold in art stores. The oil is hypoallergenic, does not cause any negative consequences, is well absorbed and lasts a long time on wood. Sea buckthorn and pumpkin oils are also good. They give the wood a pleasant golden hue.
Process of impregnation and waxing of wooden spoons
Impregnation is done with oil or a composition of oil and beeswax. The second composition is called mastic. It is extremely important to choose a mastic for coating food utensils
.
The oil impregnation process itself looks like this:
- Fill a spoon with oil and place it in a water bath to heat. The oil temperature is maintained within 80 degrees. The oil should not boil!
- Turn the spoon in the oil periodically so that there are no unoiled areas left and the process proceeds evenly.
- As soon as air bubbles stop escaping from the wood, the spoon is oiled. The heating is turned off and the product is allowed to cool in the oil.
- After cooling, take out the spoon and wrap it in several layers of paper. The paper absorbs excess oil well, and the spoon will dry quickly.
Once the excess oil has been skimmed off, the spoon is left to dry in the sun for about 4 days. After this, it is ready for use. If necessary, oiling is done 2-3 times. Impregnation with a wax composition is carried out strictly according to the instructions.
.
But you shouldn’t varnish a food spoon. Sooner or later, the varnish will crack due to temperature changes, and the wood will begin to get wet. Moisture getting into the wood will cause rotting and the spoon will deteriorate. They mainly varnish decorative utensils that are not intended to be used for cooking.
.
Please rate the article ☺
Click on the star ↓
Average rating: 0 / 5. Number of votes: 0
Be the first to vote!
Criteria for selecting a device
It’s good if the tool is capable of performing several functions at once. Blades with high versatility are rare. Usually a separate copy is selected for each type of work.
Sometimes you can make kitchen shovels with your own hands, but more often you have to choose from ready-made proposals. Product evaluation must be carried out comprehensively. This approach will ensure a perfect match to the requirements and needs.
Lesson on technology (carpentry) "Making a kitchen spatula"
SUBJECT:
Practical review:
The topic of the lesson is “Making a kitchen spatula.”
Educational:
Strengthening the skills of marking according to a template and processing wood with hand tools when making a kitchen spatula.
Correctional and developmental:
— development of mental activity through the implementation of various tasks;
-develop coherent speech;
-develop spatial orientation and fine motor skills.
Educational:
— nurturing motivation to learn;
- to cultivate precision and accuracy in work, the desire and ability to complete the work started.
Equipment:
Templates for marking blades, technological maps, rulers, pencils, art. squares, hacksaws, jigsaws, sandpaper.
Lesson type:
combined (generalization and systematization of what has been studied).
Object of work:
1. Organizational moment.
Construction and verification of students' appearance.
— Hello guys and those present, I’m very glad to see you
today in class!
— What date is today, day of the week? Are there any missing ones?
— Starting our lesson, I would like to not let bad mood, as well as extraneous thoughts, distract us from work. So, let's begin our lesson.
2
. Repetition of covered material.
Teacher: Let's remember what you covered in the last lesson?
— What is wood and where is it obtained from?
- Tell me the main parts of a growing tree?
—Which part of the tree is the most valuable?
— What do you get when you cut a trunk along its length? One by one, pronounce the names of lumber out loud.
— What is lumber used for?
The teacher shows the children several wood products, including one made of metal (key):
— Guys, what item is missing here and why? Look at the products, remember their names
— What are called kitchen utensils? Give examples of kitchen utensils
3. Updating knowledge.
-Now, we will do a graphic dictation that will help you find out the topic of the lesson
(correctional and developmental exercise (development of auditory and visual analyzers, small muscles of the hand, spatial, development of thought processes; formation of the ability to act according to the rule, organization and independence.)
-Look carefully at what this drawing looks like.
— Can a spatula be classified as a kitchen utensil?
-Kitchenware can be made from different materials: metal, plastic, ceramics and wood.
Nylon
You can also find nylon options on sale. The quality of the material is similar to silicone. At the same time, nylon blades are more elastic. The cost of such a solution will please you with its democratic nature. The disadvantage will be a short service life.
Note!
- How to descale a kettle: vinegar, citric acid, soda, brine, soda. TOP most effective cleaning methods!
- Blinds for the kitchen: how to choose, what they are, photos of new designs
- DIY kitchen mitts: diagrams, patterns, tips, original designs and new items (200 photos)
How to paint wooden spatulas
Folk art classes are very inspiring, develop imagination, aesthetics in taste, calm, attract the right and positive energy. You can start with something simple, for example, with modeling or knitting, embroidery, appliqué, and if you know how to draw at least a little, then you can immerse yourself in the wonderful world of wood painting. You can start by painting wooden blades. This simple kitchen item can be turned into a real work of art. This activity is suitable for both children and adults; the painting process itself is very captivating and immerses you in some amazing, carefree world.
What materials are needed for painting
Before you start painting a wooden shovel, you need to prepare a place for yourself: it should be spacious, it is important that the room is bright and ventilated. We will also prepare materials:
- wooden spatula without a pattern or any logos;
- wood varnish;
- acrylic paints;
- brushes of various thicknesses;
- a simple pencil;
- PVA glue.
Wooden spatulas are sold in any hardware store, as well as in markets. It is better to choose a glossy varnish for wood; it can be found in any hardware store; take a jar; in any case, it will be useful around the house.
You can find acrylic paints in tubes in any craft store; they sell entire sets for every taste and color. Buy brushes there: choose one thicker, the other thinner - for drawing fine details.
PVA glue will be needed for the primer.
We create a masterpiece of decorative art from a spatula
So, a small master class on creating a beautiful painted kitchen spatula. First, we need to prime it so that the paint will adhere better later. To do this, dilute PVA glue in a small amount of water so that the water becomes like milk. Carefully coat the “working” surface of the blade and then leave it to dry.
After the spatula has dried, we can begin drawing. This technique will allow you to leave the original appearance of the blade, i.e., leave the texture of wood. At first, it is better to draw the drawing with a simple pencil; choose something simple: ornaments, patterns, flowers, even if it is just one flower, but bright and beautiful.
Once you get the hang of drawing something simple, then you can move on to animals and birds and paint some scenes. So, when you have drawn the outline of the drawing, you can start applying paints.
To draw thin lines, choose a thinner brush; if you need to paint a larger area, it is better to do this with a thicker brush. In order not to wash the brush every time, first paint all the details of the same color, then wash the brush and dip it in paint of a different color.
After the design is applied, leave a spatula so that the paint can dry thoroughly. In principle, this happens quite quickly. After the paint has completely dried, you can apply varnish.
After drying, the finished product will shine very beautifully and have a finished look.
What other painting options can there be?
For example, before applying the main design to a wooden spatula, its base can be painted over with some neutral color, although it can be quite bright, but the main thing is that the subsequent design is “readable”.
Dot technique of painting a kitchen spatula
The so-called dot painting technique looks very beautiful and bright. We do all the preparatory work the same, only we paint it with paints, applying small dots with a brush. You can use a colored outline for this, it is sold in a craft store, and it is much more convenient to apply dots. This blade looks very elegant and “jewelry”.
To make it easier to understand how the process of painting a kitchen wooden spatula occurs, we suggest taking a look at the video master class. This blade is painted in the Gorodets style. This painting is characterized by an abundance of flowers, various animals, birds, and genre scenes.
Types of products
A single format tool is inconvenient in everyday life. Housewives often strive to purchase a whole set of ladles and spatulas for the kitchen at once.
The set usually includes the most popular models. This greatly simplifies the task of choosing. If you assemble your kit yourself, it will not be superfluous to evaluate the purpose of specific types.
Let's choose!
First, you should ask what type of wood the blade is made from. Not only its appearance, but also its service life in your kitchen will depend on this.
Juniper is a favorite here. It has a very dense structure and practically does not absorb water. In addition, juniper wood has disinfecting properties and a wonderful smell. These particular blades are the strongest. Next comes the reed - it usually comes with factory impregnation, so it does not require oil treatment and frying in the oven. The outermost space is occupied by deciduous species (birch, beech, alder, walnut, etc.) - they turn out to be the least durable.
Now all that remains is to choose the shape and size of the spatula, depending on how you will use it. There are plenty of options here. On the market you can find rectangular, oval and cone-shaped instruments, products with holes, as well as models in the form of a shallow spoon or fork with a long handle.
- A narrow spatula is convenient for laying out pieces of cake or other desserts.
- Wide - roll fish or cutlets in a frying pan, cook roast.
- Products with holes are comfortable for deep-frying - excess fat drains through the cracks in the spatula.
- Wooden spoons are suitable for making sauces, jams, porridges and watery dishes that need to be tasted during the cooking process.
Individual care
To protect the wood spatula from cracks, before using it for the first time, you need to lubricate it with Vaseline oil and throw it in the oven for 5-10 minutes at +180 °C. Be careful: this advice is not suitable for beech or varnished products. From time to time, give your natural utensils “oil rubdowns” - this will protect them from the action of water and prevent the occurrence of cracks.
Wood utensils should also be kept clean during use. After preparing or serving dishes, immediately rinse the spatula with running water. If food dries on its rough surface, it can only be removed without damage after a long soak, which is also not good for such a tool.
Also, modern household chemicals should not be used to wash wood blades. Replace these products with laundry soap, soda or lemon. This will not only clean and disinfect the surface, but also give the wood a pleasant smell.
Hydrogen peroxide will help lighten a wood blade that has darkened over time. You just need to apply it to a cotton pad and wipe the surface of the product, and after 2-5 minutes, wash it in warm water and dry it.
Useful little things - what to pay attention to
High competition forces tableware manufacturers to come up with a variety of features to attract buyers. This is only beneficial for the end user.
When choosing a spatula for the kitchen, pay attention to the following points:
- Anti-slip coating of the handle - convenience during long-term cooking.
- Hanging hole or loop – important for stand-less storage.
- The footrest, which holds the working part suspended, eliminates contact with the table, preventing contamination.
- The presence of an individual stand protects the kitchen table from grease drops.
Buying spatulas in sets that include models for different tasks and types of pans is not always practical. The kitchen must have different options - durable metal, flexible silicone, lightweight nylon. You can buy a set, but then still pick up a couple more devices to easily solve any culinary tasks.
Canvas with holes or recesses
The surface configuration helps to perform certain culinary functions. The accessory in the form of a spoon with high sides is aimed at preserving the liquid components of the dish. The canvas with slots of various formats is designed to remove moisture. The tool operates on the principle of a sieve.
With storage organizer
The presence of a stand for spatulas in the kitchen will help organize storage and ergonomics. Every thing will be in its place. You don’t have to look for the necessary tool in the kitchen bins.
A convenient example would be a spatula with an individual stand. This design will prevent dirt from spreading while using the tool.
Where is the best place to buy
You can buy them at culinary supply stores, grocery stores, and department stores. Gourmet and specialty stores are likely to offer the highest quality and most innovative options. Kitchen spatula sets are also available for sale. However, it is better to choose your favorite options yourself.
Before purchasing, you should definitely make sure that the utensils you are purchasing have the necessary characteristics (heat resistance, ease of cleaning, required sizes, etc.).
Edge decoration
To work in dishes with rounded outlines, it is better to buy a tool with a special edge design. The beveled format of one or a couple of corners at once will help to avoid problems.
The option with a thinned edge is convenient for working in the area of the bottom of dishes. In this case, the width is reduced only along the edge or up to the middle of the accessory.