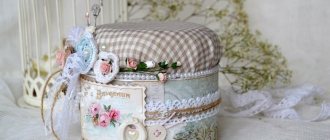
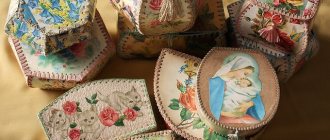
The crochet technique allows you to make various things and crafts, including complex configurations. You can tie a jar, a square box, or a fancy-shaped bottle with colored threads, making an original box for storing various small items. Buttons, jewelry, candy, needles and thimbles, beads, hairpins - a hand-made crochet box can become a reliable, and most importantly, beautiful storage for any small items.
A pleasant creative activity for needlewomen is crocheting boxes.
This original storage for jewelry can be made from an unnecessary jar with a lid.
Crochet boxes: patterns and manufacturing steps
For needlework you need to prepare the following materials and tools:
- a hook, scissors, a measuring tape for measuring the size of the future craft;
- a jar or box that will become the basis of the product;
- threads for knitting (multi-colored yarn scraps are perfect, best with synthetic fibers - such threads will last longer);
- buttons, beads, ribbons that will be used for decoration and original decor.
Instead of a knitted part, you can sew a small button on a leg or skip a ring on the lid, and such simple devices will add ease of opening.
A knitted product will hold its shape if you use a wooden or wire frame.
By the way! For knitted boxes, you can take any jars of suitable shape: from cosmetic cream, baby food, coffee, tea. Even an ordinary glass jar can be radically changed with the help of knitting, so no one will suspect a standard container in an elegant knitted product.
Necessary materials
- Knitting yarn Biskvit Apple for the box approximately 1 skein
- Brown knitting yarn Biskvit Chocolate for tail approximately 5 m
- Yarn Biskvit green Green for a leaf of approximately 3 m
- Hook No. 8, 10
- Needle with a wide eye.
Round knitted boxes: detailed instructions
For beginner knitters, it is best to try your hand at crocheting round crocheted boxes. Any plastic jar, such as a cream jar, is suitable for this. Depending on the size, you will need 30-50 g of thread, hook No. 2.5 or 3.
Flowers and berries are knitted according to a small pattern and sewn onto the fillet mesh of the lid.
Handicraftsmen often use ordinary plastic containers for the frame.
Detailed description of how to crochet a round box
- First the bottom is knitted. It should be tight, so it is best to knit single crochets or single crochets. Knit according to the pattern, gradually increasing the number of loops until the circle becomes the required diameter.
- The side walls are knitted in the round with double crochets without increasing. At this stage, experienced knitters can knit various decorative elements of the pattern: make capes, tubercles, insert openwork elements.
- The side walls can be knitted in different colors, changing the thread a lot.
The finished openwork covers are starched and stretched over the prepared bases. - In the process of knitting a round box with a hook, do not forget to try your craft on a jar, checking the size and determining the subsequent amount of work.
- If a plastic jar is inserted inside, then it is necessary to knit the inner knitted side. It is created similarly to the front side.
- The lid is knitted in this way: two circles of the required diameter are made. A plastic cap is inserted between them and tied with single crochets. You can decorate the edge with a contrasting thread and the “crawfish step” technique.
- The final stage is the creation of decorative elements. These can be flowers, leaves, you can sew on buttons, beads, beads, decorate with ribbons, inserting them into openwork holes.
Round knitted boxes for needlewomen are an opportunity to show imagination and make a beautiful, original thing.
Baskets of different shapes
A crocheted basket made of knitted yarn can be not only round, but also square, oval, and complex in shape. The option is selected individually. You must understand that the more original the model, the more difficult it is to implement.
The diagram of a suitable geometric figure is always taken as a basis. A round basket is considered the simplest; a square or oval product is no less easy to knit. It will be more difficult with the option in the form of a heart or an asterisk.
Knitted openwork items with patterns of floral motifs
Extraordinarily beautiful openwork crochet boxes with diagrams and descriptions. Their peculiarity is the absence of a frame. They are starched or soaked in sugar syrup, after which they become strong and keep their shape.
You can knit an openwork box with your own hands only with crochet, although there are knitting options.
The box should be knitted from the bottom.
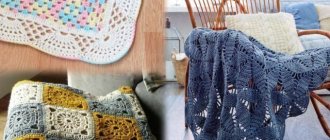
Openwork boxes for needlework are knitted according to the pattern. Square products look very nice. It is necessary to knit 6 openwork squares, connect them together with single crochets in the shape of a cube.
The product should be starched and, if possible, pulled onto a mold to dry completely.
Fairy fungus
An extremely interesting and original handicraft box, knitted with knitting needles in the shape of a mushroom. If you know how to knit in the round, then it will not be difficult for you to knit the stem and cap of a mushroom. But the easiest way to do this is with crochet.
A mushroom-shaped craft will serve as a repository for important little things.
Important! The mushroom shape is held in place by thick threads and single crochets, which will create a dense pattern.
The mushroom stem is knitted from a light beige thread according to the pattern. For the hat, you should take brown yarn, from which, according to the pattern, a circle is knitted with decreases in the last rows for a beautiful rounding. You can decorate the hat with a pompom made from the same yarn or show your imagination by knitting leaves and berries.
To give the mood, various decorative elements are sewn on.
Unusual house
You can make an original and unusual gift with your own hands - a crocheted box in the shape of a house with diagrams and descriptions.
The craft resembles a gazebo or house with a carved roof.
To make it, you should take a round jar or cardboard box. It is tied in a circle with double crochets according to the usual pattern. Windows and doors can be knitted along the way with threads of a different color, or appliqués can be made and sewn on. The roof of the house is knitted in the shape of a cone. For rigidity, you can insert cardboard inside. Use your imagination to decorate the roof. You can decorate it with flowers, leaves, sew ribbons and beads.
This box will decorate a lady's dressing table or is suitable as a gift for mom on March 8th.
Square box
If you don’t know how to crochet a beautiful box for beginners, then try crocheting a square one.
You can put small hair ornaments or jewelry in such a bright and colorful box.
Take any cardboard box of a suitable size, 100 g of main yarn and several colored balls to create a flower arrangement. Tie the squares that correspond to the size of one side of the box using a checkerboard pattern according to the pattern. Using a regular granny square, tie the wrong side of the future product. The front and back squares are connected to each other (the sides of the box are inserted between the layers) using single crochets. The lid is knitted in the same way. To add volume, cotton wool is stuffed inside between the layers and the cardboard layer.
Decorate the lid of the finished craft with a scattering of knitted multi-colored flowers and leaves and attach them.
Heart box
An unusual type of handicraft is a crocheted box made from decorative cord. It is knitted strictly according to the pattern. After the work is completed, the product must be starched and left until completely dry.
Crocheted boxes will decorate the needlewoman's corner and become an interesting highlight of the interior.
This box can serve as a pleasant gift for your friends and family.
To make the heart shape perfect, try making an improvised frame from wooden spacers (you can use toothpicks) and stretch the finished product between them.
In such a box you can store various small items, jewelry and even sweets.
Pincushion cakes and knitted cake
If you have a lot of colorful leftover yarn, make a cute pincushion in the form of small cakes and pastries. Such boxes are crocheted according to the pattern. For rigidity, make a frame of felt. This is a soft but dense material that does not wrinkle easily.
The boxes can be decorated with a ribbon, or with knitted flowers or beads - it all depends on your imagination.
The lace frills decorating the box look harmonious.
The sides, bottom and lid are cut out of felt. Crochet with regular double crochets. All parts are sewn together or connected with single crochets.
The top is decorated with knitted details in the form of cream, berries, and flowers.
An original craft in the form of a cake can be made from an ordinary candy box.
It is tied in standard ways and decorated with flowers and berries.
Creating original yarn boxes is an unusual type of needlework that will bring a lot of pleasure. You will not only feel joy while working, but also receive an original, useful item that will decorate the interior or become a useful storage place for various small items.
You can knit from any yarn and any color. The box knits up very quickly.
Candy bowl with gold ornament
Make a candy bowl as a gift for a close friend on March 8th or a colleague for her birthday. To work, you will need 400 g of red yarn and a crochet hook No. 5, and to create a gold ornament - 1 ball of iridescent rope and a hook No. 2.5.
According to scheme No. 1, 4 parts are made - 2 for the lower part and 2 for the lid. Lay a reinforcing base between the two finished hearts and connect the parts with one row of non-woven columns.
Advice from the author of the box! It is undesirable to make a cardboard base, otherwise the item will not be washable. Use thick plastic folders, cut out a heart from them according to the template and place it between the parts of the box.
The finished lid and bottom are tied around the perimeter with golden thread ("Lace" pattern). If desired, the needlewoman can fill the inside of the box with padding poly for volume.
According to scheme No. 2, a golden heart is made and carefully sewn onto the lid of the box.
A secret from a needlewoman! And the sweets in the box are also not simple; using the proposed patterns, you can surprise your friends and knit such surprise sweets.
From popsicle sticks
It’s easy to make a wooden box with your own hands from rods or planks. You can make a box with your own hands from cardboard or plywood. But it's much easier to use popsicle sticks. This box will look great. You won’t have to search for materials for long.
How to connect and fix “logs”
Ice cream sticks can be glued together, glued to each other or to another material, and secured with threads. They are made from soft wood or pressed shavings and are quite fragile.
When drilling holes, tenoning, nailing, you need to be careful. Instead of nails, you can use a furniture nail or even pushpins.
Drawing for making a box
First, you need to draw a sketch, a drawing, so as not to get confused during work, make a box with perfectly straight sides and exact dimensions.
If you need to shorten the sticks, it is better to use a fine-toothed hacksaw or a utility knife. The box should consist of four sides, a bottom and a lid.
Top part
The lid can be put on, resemble a master's graduate's hat, and have internal grooves for fixation made from the same sticks or a rubber band. In this case, its area should be larger than the upper part. It can recline while being supported by the tape.
Additional decor
The box itself looks beautiful, but if you decorate the lid with acorns, shells, paint it in a beautiful color, draw an ornament, it will not be superfluous.
Since it will stand on a coffee table, dressing table, shelf, and will be in plain sight, it can be decorated in the style in which the interior of the room as a whole is designed.
Crochet Rectangular Yarn Storage Boxes
Such products must be large. They will contain skeins of thread and various ropes, buttons, beads, and elastic bands. All the craftsman's tools are at hand.
Prepare a cardboard box of the required size. In addition to the base for the future container: PVA glue, brush, thick hook, measuring tape, roll of twine, scissors, coffee beans.
Technique for making the product:
- Measure the perimeter of the cardboard box with a measuring tape.
- Tie a chain chain (length equal to the perimeter of the base).
- Close the chain into a ring.
- Continue knitting the product in a circle st. b/n.
- Proceed to form the lid.
- Mark its future location with pins.
- Then continue knitting in this place using reverse rows.
- When the lid is ready, cut the twine and hide the remaining tip.
- Tie the edges with a crawfish step.
- If desired, make an additional rectangular bottom.
- Place the resulting blank onto a cardboard box.
- Alternately glue all sides of the workpiece to the base.
- After drying, decorate the yarn box with coffee beans or knitted items.
Work order:
- We choose a pattern at random and begin tying the container. You need to start from the middle of the bottom of the container, gradually adding the required number of loops. Because In this case, the container is round, then the pattern on the bottom is knitted in a circle.
- When the bottom is completely connected and, when tensioned, corresponds to the specified dimensions, you can proceed to the side walls. The number of loops must be reduced. The canvas should fit snugly against the walls and be sufficiently stretched (the canvas should not spontaneously “slip” off the walls of the container).
- When the container is completely tied, it is necessary to secure the knitted fabric to the container itself. Using hot water, carefully remove the remaining label, but make sure that the glue remains in place. This will make gluing easier later. We put a stocking on the knitted fabric on the box and distribute it evenly over the surface. There should be a gap of about 0.5-1 cm at the top in order for the lid to close.
- The glue remaining on the box will partially secure the threads; in other places it is necessary to apply a thin layer of glue. The glue should be evenly distributed so that it does not have time to saturate the threads to the top layer. Press the edge and hold until dry.
- Now you need to knit the fabric that will be located on the lid of the future box. It is better to choose a more intricate design for the lid. Firstly, it will always be visible, and secondly, the fabric on the lid does not need to be pulled as tightly as on the box itself, so the knitting will look more prominent. If desired, you can attach a “tail” to the lid, which will act as a loop and the lid will always be securely connected to the box. You can fix the canvas with glue.
- If the threads are thin enough and their layer will not prevent the lid from closing tightly, then you can use a nail to make holes along the edge of the lid, and, passing a thread through them, attach the knitted fabric to the outer surface of the lid. To do this, just heat the tip of the nail over a candle and melt small holes in the plastic. For convenience and to avoid burns, it is better to hold the nail with pliers.
The box is ready.
Practical gifts for the man who has everything
Practical gifts can be called one of the most pleasant, since such gifts significantly facilitate some everyday tasks and remind you of the person who gave the gift every time they are used. We have provided a list of pleasant, practical gifts for men.
- Magnetic book holder.
- A GPS pet collar is the best gift for a dog or cat owner who is afraid of losing their pet.
- Bath set.
- Minibar in the globe.
- Rocking chair.
- Cushions for the sofa.
- Bonsai (garden in a bottle) is a wonderful decoration for any interior.
- Coffee lover's set (Turkish, brewed coffee).
- A heated sheet is the best gift for a person who cannot tolerate frost.
- A set of warm indoor socks.
- Barbecue set in a suitcase.
- Personalized cup.
- Device for air ionization.
- Heated cup stand.
- Soft bath mat.
- Original bath curtain.
- Telescope.
- 3-D pen.
Such gifts can make any person happy. They are both original and useful.
Simple box for beginners
It is difficult for novice craftswomen to knit a single piece. Therefore, when creating boxes, containers and covers for organizers, they often use granny squares.
Each craftswoman can independently choose a suitable scheme.
The description is simple. Crocheting boxes from granny squares begins by creating 5 or 6 squares. The parts are then joined together using connecting posts.
If the box has a lid, then the square replacing it is attached to the workpiece on one side. Most often, the top of such a part is decorated with a convex decorative element. It will replace the "handle".
Basket made of knitted yarn with a wooden bottom
It is popular to use ready-made bottoms instead of hand-made creations according to patterns. They are made of wood and other suitable materials. It can be plywood, MDF, plexiglass, plastic. To use the blanks in knitting baskets, they have holes along the edge.
When making the product, the hook is alternately inserted into each hole, knitting sc. If it is difficult to pull out the stitches with a crochet hook, then simply pass the thread through the hole and form an air loop.
In this way, a chain is obtained around the entire perimeter of the finished form. This will be followed by knitting the walls in the usual way.
Gnome: holiday bottle case
A charming gnome, knitted in the shape of a bottle, will be an unusual packaging for festive champagne. It’s easy and simple to knit such festive characters as in the photo, the main thing is to show imagination and a good creative spirit.
First, according to the principle of a basket, a round bottom is made, and then high sides, which will become the body of the gnome and packaging for the bottle. The gnome's face and nose are knitted from light yarn, and then a beard and fluffy hairstyle are added from fluffy yarn. All you have to do is knit a tall triangular cap to the height of the bottle, decorate it with small shiny accessories and that’s it, the cheerful “Gnome” bottle case is ready!
Interesting ideas for creativity
The hobby of crocheting helps to transform standard boxes into exclusive items that become a real decoration of the interior.
Products with lace and ribbons look stylish and feminine. They are used to store cosmetics, jewelry, yarn, and also as original gift “packaging”.
Lunch containers tied with yarn look cute. Children and adults enjoy carrying lunches in them.
To make the lids of such boxes easy to open, they are decorated with three-dimensional elements. Knitted pineapples, apples, pears, pumpkins and even radishes are used to decorate food containers.
