When installing interior walls, questions often arise: how to strengthen a plasterboard partition, and what fasteners to use to assemble it? Solutions to these problems may vary, depending on the complexity of the job and your capabilities. As a rule, rack profiles with a width of 100 millimeters are used to strengthen partitions, but in this case the structure turns out to be too massive. Is it possible to achieve an acceptable thickness with optimal strength? Yes, this is feasible, and if such a goal is set, you can use many tricks and techniques.
Kitchen cabinet installation methods
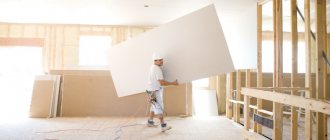
Gypsum plasterboard (GKL) is a fairly fragile material that cannot withstand significant weight loads.
Therefore, hanging and fastening shelves on gypsum boards requires correct calculation of fastening points and selection of fasteners.
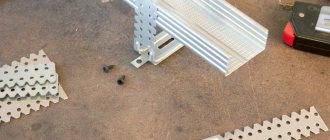
Attach to expansion anchor
Each fastener can withstand a pullout load of 35 kg; it turns out that furniture with a total weight of 70 kg can be hung on two anchors.
The expansion anchor is installed inside the gypsum board and increases in diameter at the back of the sheet
- Place the furniture against the wall and mark the attachment points with a pencil.
- At the marks, holes are drilled equal to the diameter of the fastener.
- The anchor is inserted into the hole until it stops, and the threaded screw is tightened. There should be a clicking sound as the part's legs unclench from the back of the gypsum board.
- The anchor fastening screws are tightened with a screwdriver to tightly fix the part in the hole.
- Afterwards the screws are unscrewed. The furniture is placed against the wall, screws are inserted into the mounting loops and screwed back into the mounting hole of the anchor sleeve.
Main wall mounting
This method is used for hanging massive and heavy furniture weighing over 100 kg. Such fastening is possible only if the distance between the gypsum board and the main wall is no more than 5 cm.
Installation is carried out in the main wall, the permissible load depends on its characteristics
First, they calculate and mark the places where the furniture needs to be attached. Then drill holes in the drywall according to the diameter of the selected anchor. Next, they begin to work with the main wall.
- Using an impact drill or hammer drill, drill holes at least 5 cm deep.
- The hole is cleared of concrete chips and dust using a tube.
- The anchor spacer is inserted into the mounting hole.
- A threaded pin is inserted into the bushing; two nuts are screwed onto the outer end for security and locked together.
- Afterwards, the top nut is tightened with a suitable wrench. There should be a slight creaking sound from the opening of the anchor petals.
- Once the nuts are securely fastened, the cabinet mounting loop is threaded onto the outer end of the anchor.
Hang on a mortgage beam
When the location of wall-mounted storage systems is known before covering the walls with plasterboard, a wooden beam can be laid under it. In this case, the weight load falls on the beam, which is securely fastened to the main wall. Laying timber is one of the most reliable options for hanging furniture - it can withstand a load of 100 kg.
Scheme of fastening to the embedded beam
For work, select a beam with a width of at least 80-100 mm. The thickness of the mortgage must correspond to the height of the profiles so that the sheet of drywall lies on them without interference, but there is no large opening.
- Measure the distance between the vertical profile posts. To this size, the required number of segments are cut from the timber.
- On the wall, mark the height of the cabinets and the location of the timber between each vertical profile.
This is what the embedded beam between the profiles looks like
- The timber sections are secured between the profiles to the main wall with anchor bolts at 2-3 points.
- After installation is completed, measure the distance from the center line of the bars to the floor. The value is recorded (it will be useful after covering the walls to determine the exact location of the beam).
- Before hanging the cabinet, measure the required distance from the floor to the center line of the beam and draw a horizontal line.
- The cabinet is lifted to the mounting location, leveled and secured to the mounting hinges with wood screws.
Mounting on horizontal bars
When the walls are already covered with plasterboard and it is necessary to hang pieces of furniture at the same level, metal rails are used.
These are narrow and long steel profiles with holes for fasteners, which are sold in the form of long rods.
Adjustable brackets are installed on the side walls of each cabinet using self-tapping screws.
Installation diagram of a wall-hung cabinet on a horizontal rail
In this case, the total load is distributed over a large number of dowels, so this mount can withstand the weight of cabinets from 50 kg.
- The height of the cabinets is measured, and marks are placed on both sides of the wall at this level. Next, measure the distance from the top plane of the furniture to the hook bracket. This distance is laid down from the marks and a horizontal line is drawn along this level.
- Measure the overall width of the hanging cabinets and cut the profile to this size using a hacksaw for metal.
- A tire is mounted along the drawn line using dowels along the gypsum board. First, it is fixed with 2-3 dowels. They are leveled and finally mounted with additional dowels in increments of 50-80 mm.
- For greater stability, it is recommended to screw 2-3 screws for metal into a metal profile under the drywall; its location can be detected using a magnet.
- After checking the reliability of the fixation, the furniture is hung.
Dowel mounting
This fastening option is used for hanging individual cabinets at different levels. To do this, use wrap-around plastic or metal dowels. Regardless of the material, the dowels have the same diameter, but come in different lengths: 25 mm and 32 mm. Each fastener can withstand a pull-out weight of 10 kg.
The dowel is suitable for cabinets weighing up to 20 kg
- Calculate and mark the places where the furniture will be attached, and use a drill to drill mounting holes.
- A dowel is inserted into the hole and, using a curved screwdriver, screwed until it stops.
- The cabinet is placed against the wall, and self-tapping screws with a wide head are screwed into each dowel through the mounting loops.
When hanging furniture, it is important to consider not only the pullout load of the fasteners, but also the permissible load on the drywall. If possible, it is better to use more reliable methods - installing a mortgage or mounting it on a main wall.
In this case, problems with the stability of the cabinets will not arise even with significant weight and active use.
Fastening techniques
Let's start with the fact that fastening methods entirely depend on the parameters of the object being hung (dimensions, weight), and based on the data obtained, you can get an answer to the question - is it possible to hang kitchen cabinets on drywall.
Professional techniques
- The most popular and accessible method even for beginners is to attach kitchen cabinets to plasterboard using butterfly dowels and special plasterboard dowels.
When attaching cabinets to the so-called “butterflies”, you need to make holes in the wall and then install the fasteners. When screwing a self-tapping screw into a “butterfly”, the tendrils of this type of dowel spread in different directions and tightly press the installed fastener to the surface of the gypsum board.
Operating principle of the butterfly dowel
If the cabinet is mounted on special dowels, use a screwdriver to screw the dowel into the cavity of the material and only then screw in the fastening bolt (screw). This method allows you to fasten only lightweight structures whose weight with all contents does not exceed 5 kg.
dowel nail; 2. snail dowel; 3. butterfly dowel;
- The second method is to attach kitchen cabinets to drywall using mounting strips . The main feature of this fastening technology is that the mounting strips are attached to a sheet of drywall, and not to the suspended structure. The strips are fixed in several places (both to the gypsum board and to the metal profile located under the drywall). Fixation is done with self-tapping screws.
Mounting rails for wall cabinets
After completing the installation work, you can hang a cabinet on such slats, the weight of which when fully equipped will not exceed 15 kg. But this method has one significant drawback - the use of unaesthetic fasteners that are unlikely to decorate your kitchen.
If you need to hang bulkier and heavier cabinets on the wall, there are other secure mounting options that will help you do the job yourself:
- Extended anchor bolts can be used as fasteners - such fasteners will allow you to attach bulky kitchen cabinets and even household appliances to the wall.
In order to secure them, you should drill deep holes with a hammer drill through the drywall at the very base. We insert anchor bolts into the resulting holes and clamp them there using ordinary wrenches.
Which is better: heated floors or radiators?
Warm floorBatteries
This method of fastening is relevant only if there are base walls (this fastening option is not applicable for a plasterboard partition);
Anchor Bolt Installation
Note! If you choose the method of fastening with anchor bolts, then during the process of hanging the cabinet you need to monitor the tension level - overtighten the bolt, and the sheet of drywall may simply burst.
- There is another proven method - even at the stage of designing and installing a plasterboard wall (partition), it is necessary to make special embedded parts into the frame, made of timber, reinforced metal profiles, brackets, etc. They are made in those places where the intended attachment points of kitchen cabinets will be located . After the mortgages are covered with plasterboard, special marks are placed on its surface indicating their location.
The price of mortgages is zero - they can easily be made from leftover building materials.
Advice! In terms of the choice of fastenings, nothing should limit you - you can try to create your own “mix of several methods, using the same mortgages and anchor bolts at the same time.
Unconventional fastening methods
Often, in order to more securely fasten massive and dimensional elements to surfaces, additional fastening systems are used:
- Thus, a heavy kitchen cabinet suspended on a plasterboard wall can be additionally secured to the ceiling using decorative cables;
Hole in the shelf for the cable
- As additional elements for fastening kitchen cabinets, experts often use decorative chrome-plated tubes - they are screwed to the floor and installed in the form of a frame, which bears the weight of the suspended structure;
In order for the hanging cabinets to be mounted as efficiently and productively as possible, several recommendations must be followed:
- Use only those fasteners that have a quality certificate and meet aesthetic standards;
- When marking fastening points, you must use a building level, and not do the work by eye - correct marking will allow you to evenly distribute the load on all fastening points.
If you follow all the instructions and recommendations described above, then you will probably end up with a reliable fastening system that will quietly serve until the next repair.
In addition to cabinets, the presented techniques allow you to attach any other hanging accessories and attributes to the walls (hoods, air conditioners, cornices, curtains and paintings). All of the above work can be carried out without problems by beginners, without the involvement of expensive specialists.
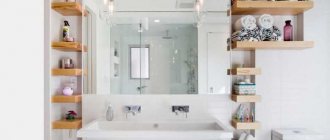
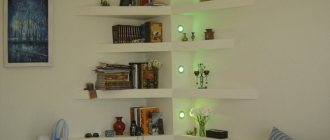
Shelf on plasterboard for various accessories
Strengthening plasterboard partitions: effective techniques, nuances, recommendations from specialists
When carrying out construction and repair work, there is often a need to strengthen the plasterboard partition. This problem can be solved in several effective ways.
The option of using wide (100.0 mm) profiles is logical, however, the plasterboard structure turns out to be very massive. Let's consider this and alternative methods of strengthening that maintain an acceptable thickness of the partitions.
Impromptu techniques
A reinforced, rather thin plasterboard wall will result if all the vertical posts are made from a pair of profiles folded together. The resulting structure can withstand considerable weight without destruction.
The elements are connected using self-tapping screws, screwed in at intervals of 150.0–200.0 mm. In principle, the profiles are not adapted to such uncharacteristic use, so the installation of prefabricated supports is not practical.
A good technique would be to insert a wooden beam inside the profile parts. Both parts are fastened with self-tapping screws with an intermediate pitch of approximately 200.0 millimeters. Before reinforcing the profiles, you need to make sure that the dimensions match - the width of the wooden beam should be slightly less than the profile width.
In addition, it is necessary to ensure the evenness of the support during the joining process, otherwise you may end up with a deformed part for the plasterboard wall. The reinforced profile should fit very tightly to the surface of the horizontal planks.
These options are improvised and are used more often for the production of doorways.
The methods are certainly effective, however, it is better to use ready-made, more durable products created by the manufacturer at the enterprise.
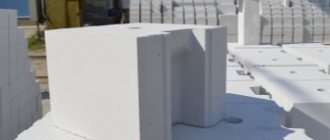
Wooden beam inside the profile
Another way is to place a wooden beam inside a metal profile. They are also secured with self-tapping screws every 200 mm. But first, make sure that the internal width of the profile and the bar match each other, and you want the bar to be slightly narrower. Watch for changes in the shape of the support - it should not deform or bend - this is necessary for the precise fit of the beam to the horizontal supports.
These two options are the results of improvisation by builders of past years, which have proven themselves well, but they are most often used only for constructing a frame around the doorway. To strengthen walls, proven methods are still recommended.
Ready-made reinforced profiles
The values of permissible load indicators for a metal profile depend on factors: the thickness of the metal and the width of the structural elements. The thicker and wider the profile, the stronger it naturally becomes.
Therefore, when there is a need to strengthen a plasterboard structure, you can buy factory-produced, certified parts that are specially designed to withstand increased loads.
There are several varieties of particularly strong partition profiles. It is worth noting that the height parameter is the same for everyone. Products are classified into categories by width:
— 50.0 mm – multifunctional standard;
— 75.0 mm – the most popular profile;
— 100.0 mm – especially durable elements for partitions with high requirements.
Regardless of the profile width, it is better to use a profile made of sheet metal with a thickness of half a millimeter or more. The ideal option is 0.6 mm, which allows you to install very strong partitions even with sheathing in one sheet of plasterboard.
Very often, it is enough to install a 75 mm profile, with which the reinforced plasterboard partition will not be overly bulky. 100 mm rack profiles are an option for walls that can be loaded to the maximum. Such partitions are the thickest, with good soundproofing characteristics and the ability to accommodate various utilities.
Profile thickness and drywall type
Attention!
Choose the correct profile thickness. It depends on the thickness of the metal used as the material.
For light partitions, a profile with a thickness of 0.4 mm is suitable. But its use to create a partition that is attached to the floor is considered irrational. Any serious loads will ruin the resulting structure. Profiles with a thickness of 0.45 mm are stronger, but for the described option it is better to choose a thickness of 0.55 mm. It guarantees excellent resistance to stress and wear. If desired, even shelves can be mounted in such a partition.
Additionally, take care of the selection of the drywall sheets themselves. Many people prefer the universal option. It comes in gray with blue markings. If the partition is installed in the kitchen or bathroom, choose a moisture-resistant or fire-resistant option. A plasterboard sheet that is resistant to both moisture and elevated temperatures is optimal. Its price is high, but its characteristics fully justify it.
Double skin technology
In addition to those listed, there is another effective way to strengthen the frame. It is used if you are not satisfied with the strength of a 75mm product. In this case, double cladding is usually performed when installing a profile with a width of 50 mm. Of course, the thickness will be greater (100.0 mm), but the strength will also be significantly enhanced.
The technique of double skinning with intersecting seams strengthens a plasterboard partition quite well. Also, this technology contributes to good sound insulation of rooms.
To guarantee a barrier to noise, it is recommended to lay a layer of mineral wool. The wall is already a good obstacle to sounds, but the internal cavity still contributes to resonance and their propagation. Filling with insulating material will additionally perform a thermal insulation function.
Recommendation! It is more convenient to place mineral wool after finishing covering one side of the partition!
Plasterboard slabs are fixed to the profile with self-tapping screws, which must be tightened with a small recess to prevent defects in subsequent finishing. Screw heads that are not tightened enough will interfere with quality puttying. When performing installation, it is important not to overdo it, since screws that are too deep into the drywall will not provide a proper connection.
Hanging kitchen cabinets on drywall - 5 reliable options
Features of attaching wall-mounted furniture to plasterboard are related to the design of the walls and the characteristics of the material itself:
- The gypsum plasterboard wall is hollow - the thickness of the lining is only 1-2 cm;
- Drywall does not tolerate point loads well - around a self-tapping screw simply screwed into the plasterboard, the material quickly begins to crumble and crack.
If you make a mistake with the fasteners or choose the wrong fastening method, something like this may happen.
Taking these factors into account, several types of fasteners and professional techniques are used to securely hang a cabinet on a plasterboard wall. For starters, here is a useful video about fastening methods and methods:
How to strengthen a wall, Partition between the kitchen and toilet.
Hi all! I encountered a problem while installing the kitchen. Well, of course it was assumed that the wall between the kitchen and the toilet was thin, but not that much! It turned out to be a 1.5 cm sheet of something. It was either chalk felt or plasterboard, but with thin metal rods inside. You can even dig through it with a screwdriver. The task is to hang kitchen cabinets on this wall (dish drying, terminal and corner cabinets.)
Question. How to strengthen this wall so that the cabinets do not fall. I THINK it’s better not to hang anything on such a wall without additional shamanism. Neither anchors nor drywall fasteners will help. The drying cabinet will be heavy.
The house is new. This year's delivery. P44T
Thank you in advance for your cooperation.
Izmaylovo5 wrote: It turned out to be a 1.5 cm sheet of something there. It was either chalk felt or plasterboard, but with thin metal rods inside. You can even dig through it with a screwdriver.
And yet, to answer your question, you need to know exactly the design of the wall and the materials used
You can make hangers from strips and attach them to the ceiling with anchor bolts. Is the flooring a reinforced concrete slab?
Overlapping reinforced concrete slab. Wall - 1.5 cm slab. I don't know what from. Toli plaster or chalk. But there are iron bars inside this slab. It looks like a mesh. I don't really like the solution to attach it to the ceiling. because it is difficult to regulate the location of the cabinets. I would like to retain the ability to hang them on a standard bar.
The materials we will use have not yet been purchased. So you can get creative here. What comes to mind is to spandite a beam of 50x50 or even larger cross-section on the toilet side. And attach the cabinets through the wall to this beam.
Izmaylovo5 wrote: Reinforced concrete slab floors. Wall - 1.5 cm slab. I don't know what from. Toli plaster or chalk.
Most likely plaster - I also have a fresh P44T. The box for the Euro socket went right through from the kitchen to the toilet. The wall is really about 1.5-2 cm. I also want to join the question.
Mistress2009 wrote: The box for the Euro socket went right through from the kitchen to the toilet. The wall is really about 1.5-2 cm.
Then the simplest solution would be to put a tongue-and-groove wall 8 centimeters thick next to it (butt-to-end), and the problem will disappear into oblivion
Paletsky wrote: Then the simplest solution would be to put a tongue-and-groove wall 8 centimeters thick next to it (end-to-end), and the problem will disappear into oblivion
What if the idea came after finishing the finishing and laying the tiles on the kitchen backsplash?
What to do then? True, this wall is plastered, but not with a thick layer.
Mistress2009 wrote: What to do then?
Then place the tongue-and-groove ridge on the other side of the wall
Paletsky wrote: Then install the tongue-and-groove ridge on the other side of the wall
I’m telling you, the thought came after
Therefore, on the other side (in the toilet) there are tiles.
Method 1. Installation of embedded beam
The embedded elements are pre-installed into a wall or partition made of plasterboard at the required height during the installation of the frame.
A huge advantage of this method is the ability to securely screw the cabinet fastenings anywhere along the entire length of the embedded elements.
Mortgages do not require any additional costs. Essentially, these are additional horizontal jumpers of the frame made from scraps of a rack profile with wooden blocks embedded in them.
The combination of profile and timber has a number of advantages compared to purely wooden mortgages:
The method with embedded elements is often used if it is necessary to hang kitchen cabinets (especially on a plasterboard partition), when there is simply no possibility of attaching to a solid wall.
Installing mortgages is the most reliable way to hang a cabinet on a plasterboard wall.
The disadvantage of this fastening method is the need to know in advance the dimensions and location of the wall cabinets, which is not always known at the installation stage.
Correct marking of the space for the partition
The frame is the basis of the partition. He admits that there will be about 25 cm between the partition and the ceiling. A larger distance is not recommended, since in this case reliability will be lost, and it is unlikely to add aesthetics to the room.
Marking
Frame installation begins with markings. A chop cord and level will help with this. Initially, the required height of the partition is selected from sheets of material. It is preferable to do this along the bottom corner of the room, measuring from the ceiling. This will eliminate visual unevenness, even if there is a gap between the ceiling and the structure.
After this, marks are left on the wall to which the frame is attached. They are performed using a chokeline - the chop cord is pulled back and abruptly released. The result is a reference line on the wall. It is recommended to verify its correctness using a building level.
If you wish, you can start marking from the floor, this will eliminate the need for measurements. The resulting line is then accurately transferred to the surface of the selected wall or walls. Additionally, you can use a plumb line. It is this line that becomes the control line for placing the guide profile.
It is not difficult to determine the boundaries of the resulting structure. To do this, the thickness of the selected sheets of drywall, putty and the planned finish is added to the marked parameters. If you are planning an arch or doorway, take this into account during the marking process.
Method 2. Mounting a horizontal bus
Sets of modern kitchen sets and wall furniture often include metal rails - a rigid shaped strip with holes and bends for hanging kitchen cabinets on special hooks.
The horizontal rail is mounted along the entire length of the wall where the cabinets are planned to be hung. Accordingly, all attention is focused on the reliability of its fastening, since the furniture hangs on them and does not have contact with the wall.
For tires, the universal rule for attaching hanging elements to a plasterboard wall is applied - distribute the load as much as possible along the plane of the sheet and, if possible, transfer it from the plasterboard to the frame.
Installation is carried out in a combined way:
- The tire is screwed to the rack profiles of the frame through the plasterboard;
- In places where there are no profiles, special dowels are used.
You can find frame elements under drywall using a magnet. To do this, it is held a few millimeters from the surface of the plasterboard - at the location of the metal element, the magnet will be attracted to the metal.
Another way is test drilling. Using a screwdriver with a very thin drill, the plasterboard is drilled without pressure in the places where the profile is supposed to be located. The drilling height is chosen such that the “unsuccessful” holes are subsequently hidden under the tire. The drill easily passes through the gypsum board and “falls” into the void. The drill will rest against the profile and will not drill through the metal without noticeable pressure.
Wooden blocks or planks can be used as tires. In this case, it should be taken into account that the wooden block is noticeably thicker than the metal strip, which is why the wall cabinets will move somewhat away from the wall. To fix this, you will need to install a stop of similar thickness under the bottom edge of the furniture so that the kitchen furniture elements do not hang forward on the wall.
Features of drywall
Drywall is a material now known to everyone. It is made from compressed gypsum, and the word “cardboard” in the name is due to the presence of ordinary thin cardboard on one and the other side of the gypsum sheet. This is an absolutely safe and environmentally friendly material that helps maintain an optimal microclimate in any room, does not emit toxic substances into the air, is easy to use and is not flammable. It also has a good level of sound insulation, can bend if necessary (just moisten it with water), and can be painted and pasted over. Drywall is usually used during major renovations of premises to create arches, suspended ceilings, level walls and build partitions.
The history of the appearance of plasterboard boards
Physical and technical characteristics of plasterboard sheets
Drywall also has its disadvantages, which limit the possibility of using the material in repairs and construction. So, it does not like high humidity and is picky about storage conditions . It should not be used for finishing ceilings if there is a risk of flooding of the apartment from above. This material is quite fragile and cannot be used as horizontal shelves.
There are different types of drywall
There are several types of drywall; you need to choose the most suitable one depending on the work being carried out, as well as operating conditions.
Table. Types and types of drywall.
| Type | Description |
| Wall or standard | This is ordinary drywall, the sheets of which are usually blue or gray in color. It does not contain any additives - it is pure gypsum. This is a universal material with a certain level of sound insulation, which is usually used for leveling walls and creating partitions. The humidity in the room where it is used should be no more than 70%, otherwise the material will begin to deteriorate and deform. |
| Moisture resistant | This drywall is green in color and, as the name implies, is highly resistant to moisture, namely, it contains special antiseptic additives that will prevent mold and mildew from developing. It can be used in rooms such as a bathroom, toilet, basement - that is, where air humidity is high. |
| Ceiling | This material is used to create suspended ceilings, which were very popular in Russia in the 90s and 2000s. This drywall is highly flexible and can be used to create a range of decorative designs. This property is due to its thickness being smaller than that of a standard sheet. The difference is about 3 mm. |
| Refractory | This type of drywall is gray in color and has certain markings. Typically used for creating and finishing fireplaces, stoves and chimneys, as well as in rooms that have special fire safety requirements. Gypsum contains certain fire-resistant additives. |
| Acoustic | This type of drywall has small holes on the surface, and on the reverse side there is a special fabric. This material is used to improve the acoustic properties of premises such as recording or concert halls, etc., that is, where increased sound insulation is required. |
| Arched | The best material option for creating complex and arched structures. These are very thin sheets that are easy to bend to the desired position. However, craftsmen advise buying it only if it is impossible to use the usual standard material, since such drywall contains fiberglass, which makes it difficult to cut and fix. Yes, and it costs more. |
Sheets of moisture-resistant plasterboard
On a note! Despite the fact that plasterboard is easy and pleasant to work with, hanging something on walls finished with it is not easy due to the fragility of the material. All methods of fixing objects on the surface of this material should be carefully studied in order to prevent the collapse of structures in the future.
How to cut drywall
Method 3. Plastic and metal wrap-around dowels
This is the fastest option for hanging a cabinet from a plasterboard wall. The downside is a significant limitation on the maximum load. The video below demonstrates what load different types of dowels can withstand:
For fastening, special roll-up dowels for DRIVA plasterboards are used. They come in metal and plastic, with or without a drilling tip, and have large external threads and a cross slot for screwing into drywall with a screwdriver. In contrast to previous methods, these fasteners should not get into the metal frame profiles.
DRIVA is simply screwed into the plasterboard sheet in the right place, its end is flush with the plane of the wall. The force when screwing should be controlled so that the dowel does not “fall” through the gypsum board. To fasten hanging furniture, self-tapping screws or self-tapping screws are screwed into DRIVA.
Advice! To avoid distortions when screwing in dowels, you can pre-drill the gypsum board with a regular drill of a smaller diameter.
The declared maximum load on DRIVA fasteners is 25 kg. At the same time, we should not forget about the additional dynamic loads that arise during operation. Craftsmen recommend using DRIVA for attaching small cabinets, shelves, plasma panels and paintings to drywall.
Another innovative solution is the use of the Fischer DuoTec self-aligning dowel. The principle of its operation and installation technique can be seen in the video:
Mounting rail
If you don’t want to spoil the appearance of the wall, then the mounting issue can be solved using a mounting rail. Of course, such a wall will not withstand a heavy load, but it will be possible to attach small cabinets or shelves.
This method is mainly suitable for walls with plasterboard frame fastening. You need to take the butterfly dowels and secure the mounting rail with them. In places where the profile is located, it is necessary to use self-tapping screws. The distance between fastening elements should not exceed 10–15 cm.
Method 4. Expandable anchor fastener
Expandable fasteners are more difficult to install, but are much more reliable. When tightened, the part of the dowel located behind the drywall is compressed along its length, spreading widely to the sides. Even a strong accidental tug will not pull the tightened expansion fastener out of the wall.
This approach allows you not only to hang cabinets on gypsum boards, but also to attach pendant elements and lamps to a plasterboard ceiling - one dowel will support a weight of up to 35 kg.
Attention! With multi-point fastening, the load per square meter of drywall should not exceed 50 kg. Therefore, you should not load single dowels to values close to critical.
Expandable anchor fasteners for hollow-core walls consist of two elements:
- A metal or plastic dowel with “petals” that diverge widely when tightened;
- A screw or self-tapping screw of suitable length and diameter.
Two types of expansion fasteners are most often used:
- "Molly" with metal dowel and screw;
- “Butterfly” with a plastic core and a self-tapping screw (lightweight version of “Molly”).
To attach cabinets to drywall, a hole with a diameter corresponding to the diameter of the fastener is drilled in the places marked for fasteners using a conventional drill. It is inserted into the holes in a straight, loose state, and a small side at the end of the dowel will not allow the fastener to fall inside the wall.
After this, a screw or self-tapping screw is screwed into the dowel all the way through the furniture's mounting lugs. There is no need to apply excessive tightening force - overtightening the “butterfly” can lead to the screw turning in the plastic, and the fastening element will have to be changed. It is difficult, but possible, to break the thread on a metal Molly dowel.
How to hang a heavy cabinet in the kitchen
To hang heavy furniture in the kitchen, you need to use fasteners that can support the appropriate weight. One of these is Harmut Knauf. It holds up to 55 kg weight. To fix it you need:
- make a hole in the plasterboard surface measuring 13 mm;
- take the “Harmut” by the blue antennae and insert the metal bar at the end into the hole;
- By pulling the antennae towards you and aligning them, the bar will become horizontal on the back side. Will rest against the surface;
- on the front side, the antennae are fixed with plastic fasteners and cut off;
- A screw is inserted into the hole created from a plastic sleeve and tightened.
Method 5. Anchoring into a solid wall
This solution is used for main walls covered with plasterboard; it is not suitable for partitions made of gypsum plasterboard. Anchoring into the wall allows you to hang large structures, household appliances and cabinets on a plasterboard sheet.
To do this, hatch holes are cut into the gypsum board so that you can drill into the main wall with a hammer drill and install anchors. The anchor consists of a metal or plastic dowel and a long threaded screw or hook. I don’t take into account chemical dowels, because... they are used quite rarely and have some difficulties in installation.
It should be noted that the fasteners must be completely located in the main wall. Therefore, screws and hooks are selected to be longer so that the threaded part of the screw reliably wedges the anchor, and the head of the screw protrudes beyond the plasterboard wall.
You can hang heavy furniture on anchors if the distance from the main wall to the gypsum board does not exceed 5 cm. At a greater distance, even a thick screw that can withstand significant loads will bend over time. In this case, you can use a combined method, for example, by securing the tire to anchors and adding several attachment points to the gypsum board.
After installing the anchors, the cut sections of drywall are mounted in place. The joints and the hole around the anchor head are sealed with putty.
Advice! To cut out sections of plasterboard, it is very convenient to use a toothed bit clamped in a drill chuck. The crown will quickly and accurately cut round holes in the drywall, the discs from which will snap into place with a minimum gap. The diameter of the hatch hole of 100 mm is quite enough for installing the anchor.
Anchoring is effective if the main wall is made of concrete or brick without voids. In cinder block or foam concrete, the anchor holds much worse.
You can increase reliability by passing the anchor through the rack profile of the plasterboard lining. Unfortunately, the places where furniture is attached do not always coincide with the location of the metal frame parts.
The disadvantage of mounting on anchors is the need for very precise markings. Possible distortions and deviations will become noticeable only when the furniture is already secured to the anchors, and it will not be possible to hang the cabinet “a little higher” or move it to the side.
How to fix a cabinet on a plasterboard wall
Drywall is a universal building material used in all types of repairs.
It has many advantages and a minimum of disadvantages. Due to the fragility of the material, difficulties may arise in the question of how to attach a cabinet to a plasterboard wall. To solve this problem, wizards use some options, familiarization with which will not lead to an error. The plasterboard surface will remain intact and not deformed.
Options to strengthen the frame of a plasterboard partition
When installing interior walls, questions often arise: how to strengthen a plasterboard partition, and what fasteners to use to assemble it? Solutions to these problems may vary, depending on the complexity of the job and your capabilities. As a rule, rack profiles with a width of 100 millimeters are used to strengthen partitions, but in this case the structure turns out to be too massive. Is it possible to achieve an acceptable thickness with optimal strength? Yes, this is feasible, and if such a goal is set, you can use many tricks and techniques.
Selecting profiles and thickness of plasterboard sheets
Drywall is used in conjunction with profiles. They are represented in an impressive number. Each type has its own functional purpose. In accordance with this, the desired option is chosen in order to achieve the reliability and durability of the partition.
The design will require a guide profile. It is distinguished by a sheller-shaped cross-section. It is used as a base for fixing the rack profile. The standard width of the shelves is 40 mm, and the width of the backrest can vary from 50 to 100 mm.
You will also need a rack profile. Its distinctive features are the presence of bends on the shelves and a width of 50 mm. There is also a ceiling option, but it is not needed, since there is no attachment to the ceiling.
If you plan to create corners that require aesthetic design, purchase a special corner profile. With its help, it will be possible to protect soft corners that are created using sheets of drywall.
Arched profiles will help you create elegant curved structures. They are represented by shelves and a back, which are integrally connected to each other. However, there are divisions that help to bend them and achieve sophisticated rounded shapes. The last possible profile option, which is distinguished by functional purpose, is a beacon profile. It is used to level the wall as a stop.
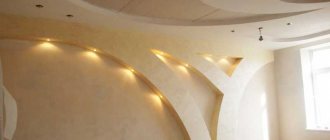
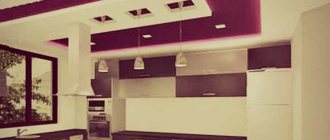
Plasterboard partition with internal lighting
Improvised techniques
A fairly thin reinforced plasterboard wall will be obtained if each vertical post is made from two folded profiles. This design can withstand more weight than one profile. The parts are connected using self-tapping screws, which are usually screwed in increments of 150-200 millimeters. On the other hand, profiles are not designed to be used in such a non-standard manner, and a prefabricated support may not be very practical.
Another way to strengthen the structure is to insert a wooden beam inside the profile. Both parts are connected with self-tapping screws in increments of up to 200 millimeters. Before reinforcing the drywall profile with timber, it is recommended to make sure that their dimensions are suitable. It is necessary that the width of the beam be slightly less than the width of the profile. It is also necessary to ensure that the support does not deform during the process of connecting the fasteners. Then the reinforced profile for drywall will adhere to the horizontal planks with millimeter accuracy.
Both options are improvised and are most often used to create doorways. But you can install more durable profiles directly from the manufacturer.
Stand made of two profiles
The simplest method of strengthening a plasterboard partition is to make a frame from reinforced rack profiles, but very often this cannot be used due to the fact that the structure will be too bulky and massive, and the apartment may not be very large in any case. The use of a reinforced profile, the width of which is 100 mm, will increase the gap between the real wall and the false wall or, if it is a partition, significantly increase its thickness. This will affect the area of the room. Therefore, in small rooms and apartments it would be advisable to use another method - creating a rack from two profiles. Two profiles will withstand a greater load than one. They are connected to each other with self-tapping screws, the distance between the screws is 150-200 mm.
This method is not very common, since the profile is not intended for such work, and the design is not so practical, but it is quite suitable as one of the options.
Ready-made reinforced profiles
The maximum load that a profile can withstand depends on two indicators - the width of the product and the thickness of the metal used. The wider and thicker the profile, the stronger it is, accordingly. Therefore, if the question arises of how to strengthen a plasterboard wall, you can purchase ready-made certified products designed for increased loads.
Three main types of profiles for partitions. Please note that the height is the same for all
Rack profiles are divided into three categories depending on their width:
• 50 millimeters – universal standard; • 75 millimeters – in most situations this profile is used to strengthen the frame; • 100 millimeters – for cases where high demands are placed on the strength of the partition.
Regardless of the width of the profile, it is best to use those made of sheet metal with a thickness of 0.55 millimeters or more; the ideal option is if this figure is 0.6 millimeters. Then the partition will turn out to be quite strong, even if it is sheathed with only one layer of drywall.
In most cases, installing a profile with a width of 75 millimeters is sufficient. With it, a reinforced plasterboard partition will not be too bulky. Rack profiles with a width of 100 millimeters are an option for situations where the maximum load is planned to be placed on the wall. Partitions on such supports are the thickest possible, but they acquire excellent soundproofing properties. You can also hide almost any engineering communications inside them.
Creating a wireframe
The next stage is installation of the frame. It involves attaching a guide profile to the floor. choose the one that has the greatest load-bearing capacity to eliminate possible difficulties in subsequent operation. Dowels are used to secure the profile. They are placed at a distance of 50-80 cm from each other. The specific distance depends on the dimensions of the structure.
Frame base for partition
Next, fix the rack profile, starting from the edges of the guide and in the place where the doorway will be located, if it is planned. The fixation should be of the highest quality, so do not skimp on fittings. This will prevent movement or deformation of the finished structure. The rack profile is mounted along the length of the entire frame. The distance is fixed - 60 cm. Metal screws are used for fastening.
At this point, the installation of the frame is considered complete. It is recommended to ensure its strength and, if there are minor flaws, provide additional reinforcement. Rigidity is enhanced by installing cross bars made of profiles. The frame itself must be double-sided. This will ensure the rigidity of the partition itself. If you wish, pay attention to the video, which will allow you to understand the principle of operation. In the video you will get acquainted with the features of installing profiles and their fastening.
Application of double skin technology
There is another way to strengthen the drywall frame if the strength of the 75 mm wide profile does not suit you. Typically, in such a situation, double cladding is made using profiles 50 millimeters wide. Then the thickness of the partition will be 100 millimeters, but its strength will increase significantly.
It helps to strengthen a plasterboard partition well, double sheathing with intersecting seams. This method also improves the sound insulation of the room.
It is recommended to lay a layer of mineral wool between the profiles. This will contribute to better sound insulation. Although the wall will practically not allow noise to pass through, it is better to play it safe and get rid of cavities in which sound travels and resonates well. The reinforced frame for plasterboard with double skin also retains heat indoors quite well. It is better to lay mineral wool after one side of the partition has already been covered with sheets: this will make it much easier to fix the filler.
Drywall is attached to the profiles with self-tapping screws, and it is recommended to screw their caps all the way in to avoid protrusions above the wall surface. After all, you need to not only take care of how to strengthen the partition for drywall, but also ensure that all further finishing work is carried out without a hitch. The fact is that the protruding heads of the screws will interfere with the application of putty. If you drown them too much, the strength of the connection will be compromised.
To assemble partitions, it is best to use a reinforced Knauf plasterboard profile, which is quite durable and practical. This brand produces products of different thicknesses and widths, so finding a suitable option is not difficult.
Which mounts to choose: tips
To hang a cabinet on a plasterboard wall, choose the following fasteners:
- Plastic dowels - “butterfly”. Withstands a load of 24 kg. Light objects such as shelves, small paintings, small cabinets are hung on it.
- Metal adjustable dowel “Molly”. The principle of operation of the fastener is the same as that of the “butterfly”. It can withstand a load of 35 kg.
- Metal anchor. This fastener is used for hanging heavy chandeliers and heavy objects. It can withstand loads of up to 50 kg. Therefore, hanging a cabinet on it will not be difficult.
- Dowel Driva. Made from plastic (hanging 25 kg) and metal (holding 30 kg).
- "Harmut Knauf" - this mount can withstand 55 kg. At the same time, the plasterboard surface will remain the same flat.
Choosing fasteners for hanging a cabinet is a responsible matter. Not only the weight of the furniture is important here, you need to consider what will be put in it, and what the weight will be if the cabinet is full.
Before hanging the cabinet on the gypsum plasterboard surface, it is necessary to make precise horizontal markings. The weight of the filled furniture should be taken into account. The use of mortgages is the best option. If rearranging or updating furniture is done after repairs, then you need to select fasteners taking into account their withstand load.