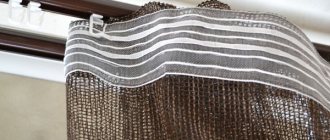
A simple thin white profile aluminum cornice allows you to achieve a similar (like a niche) aesthetic result, and the folds formed by high-quality curtain tape will only strengthen it for the better and there is no need to hide anything, and attaching the cornice to a flat ceiling is much easier, in the end everything works out cheaper.
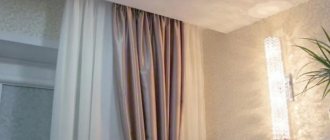
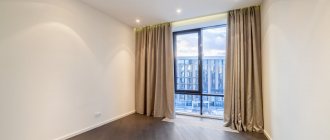
True, there are customers who really don’t like the regular folds of curtain tape. Then they need to be hidden in a niche or covered with a ceiling plinth. In addition, you can hide an electric curtain rod for a Roman blind there. Spectacular LED curtain lighting is also placed in the niche. In my practice, there was a case when in one living room room, both alternative ceiling options were implemented for two adjacent windows. Here is a photo:
You can use the mouse button to enlarge the image and compare both options. Which one will be completed for you is up to you to decide.
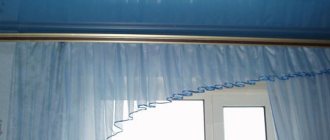
Next, we believe that you have decided to make a niche and we, accordingly, move on to the subject of our article: “ How to properly make a niche in the ceiling for curtains .” Or more precisely, how to correctly set its dimensions and its location . The entire RuNet is filled with articles from “ceiling experts” on the topic “how to do it,” but the issue of correct preliminary measurements is covered extremely poorly there. As a result, I constantly, year after year, come across the wrong niches... Like this one, which I found on the topic using the top ten from Yandex at the time of writing this article:
So let’s be patient and eliminate this information gap, highlighting the problem from the point of view of a designer-decorator, a specialist in curtains...
Niche for curtains made of plasterboard and in suspended ceilings
A niche for curtains made of plasterboard is an excellent design move.
This element looks modern and harmonious in any style. You get the opportunity to create a beautiful design with curtains covering the entire wall, visually raising the height of the room. There are different ways to make such niches, but the principle is the same - creating a box from gypsum plasterboard. Its size depends on the design idea. A niche for curtains in a suspended ceiling looks especially impressive.
Tools required for work
When installing a niche for curtains in the ceiling you will need:
Materials and tools
- hammer drill and screwdriver;
- tape measure, pencil, level;
- plumb line
In addition, you will need the following materials:
- plasterboard sheets;
- metal profiles;
- dowels and screws;
- reinforcing tape;
- putty.
To create a high-quality design, experts recommend purchasing all materials for the work produced by Knauf.
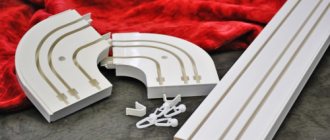
Types of hidden niches for curtains
The type of niches depends on the design of the curtains themselves and the method of attaching them. They can be:
- Window-mounted - designed to hide cornices only at the window, used quite often.
- A shallow niche is useful for non-bulky curtains or light tulle with a pattern.
- A deep gypsum plasterboard structure is needed for heavy curtains in combination with tulle, lambrequin or without them. The mounting strips are assumed to be massive and reliable.
- A niche for a curtain in a suspended ceiling has its own design features.
- A plasterboard element for zoning space. Not only curtains, but also lightweight partitions can be moved under such structures. For example, for an oriental style design.
When designing niches, it is necessary to take into account whether there will be lighting, backlighting or other electrical mechanisms.
LumFer niche with reflective lighting for lamps made from profiles Ba01 and M01
The Lumfer niche with reflective lighting for lamps is made of two parallel running profiles Lumfer Ba01 and profile M02, and is fully integrated into the suspended ceiling (without gaps, cracks, plugs, seals). The niche profile is made in black and white.
Any type of static lamps can be installed in the niche for lamps - linear, spots, etc.
It is possible to mount a niche of any length and shape with a joining angle of 90 degrees or more. Structures with sharp joining angles are not manufactured. The niche does not fit into a two-level structure (with or without lighting). The minimum length of the niche structure is 1 meter. The minimum distance from the walls both to the end of the structure and to its side is 30 centimeters. The distance between niches is at least 30 cm.
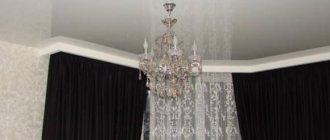
Features of a niche in a suspended ceiling
The height of the ceiling will visually increase even more if the tension fabric is glossy. The curtains will flow from the reflection. When ordering work from craftsmen, the presence of such niches is usually discussed, and the installation work is carried out by professionals.
But you can do the design yourself, here you will need the following sequence:
- First of all, it is necessary to carry out all the work with wiring, lighting and illumination, if they are suggested by the design.
- The cornice is fixed to the ceiling using dowel nails with a plastic sleeve. So, it will be easy to determine the size of the future niche. Afterwards, the structure must be covered with polyethylene to prevent damage during installation of the box.
- The construction of a niche begins with the assembly and fastening of the base. It is necessary to indent a few centimeters from the cornice and nail a wooden beam. In this case, it is necessary to take into account: the level of the lower edge of the beam must coincide with the indentation on the other walls so that the tensioned surface is without slopes. Wedges are used for leveling.
- Fastenings for the future stretch ceiling are mounted on the inside of the tree. As a result, you should end up with a niche for the cornice; you can only notice it at close range.
A distance of −50-100 cm from the window opening is absolutely not noticeable, especially when finishing the niche with curtains.
Required materials and tools
To build a box with your own hands you will need:
- Drywall. The structure will not bear a significant load, so it is quite sufficient to use a 9 mm thick ceiling gypsum board.
- Guides and ceiling galvanized profiles. An exact calculation of the required number is made after drawing up a detailed drawing of the future niche.
- It is recommended to fasten the frame to the wall using dowel nails.
- Metal screws for fastening frame fragments together.
- If necessary, additional fastening elements, for example direct hangers.
- Reinforcing tape or serpyanka, putty and primer for finishing the resulting plasterboard surface.
Standard set of tools for the construction of gypsum plasterboard structures:
- A hammer drill with a drill of the required diameter.
- Screwdriver. It is useful to equip him with a special bat for working with drywall.
- Metal scissors for cutting profiles.
- Tape measure, plumb line, building level.
- Painting knife and hacksaw for cutting sheets.
- A spatula, brush and roller used to seal joints and apply primer to the finished frame.
The assembly processes for wide and narrow boxes have differences, so it makes sense to consider them separately.
Construction of a plasterboard niche
If the room is supposed to have a suspended structure made of plasterboard and there is a design concept - curtains falling from the ceiling, then you need to start by installing a niche made of gypsum plasterboard.
First you need to determine the size of the indentation from the wall. Here it is necessary to take into account the most protruding parts of the window opening and the heating radiator. The width of the niche for curtains will depend on this. If, for example, the most protruding part is a window sill, then take it as a starting point and use a plumb line to measure another two centimeters towards the opposite wall.
As a result, you need to make sure that even if the curtains have folds, they will not rub against the protruding parts of the window opening. If a lambrequin is intended, then it is worth considering its thickness. It is better to attach the ceiling cornice in the niche before installing the box itself.
How to hang curtains correctly
Having determined which curtains are best for curtain rods for suspended ceilings in a given room, you need to choose the right method for forming a niche. For heavy curtains and multi-layer installations, lambrequins, it is better to use a steel frame.
Note! When fastening curtains, you should avoid exposing the ceiling to avoid damaging it.
If the width and depth of the niche are calculated optimally, there will be no problems with attaching curtains and tulle to the cornices. Curtains can be hung on rollers, loops or hooks; plugs are installed on the sides to prevent them from slipping.
To secure complex installations, it is better to seek help from curtain specialists.
Keep in mind! The best curtains for a niche are made of plain thick fabric or satin. Not the best solution is lambrequins and additional decoration that is not intended for a hidden niche - it will look like scraps of fabric carelessly sticking out from the ceiling.
Creating a floating curtain effect
A constructive solution for installing a cornice in a niche allows you to achieve the effect of a floating curtain in a room. A greater “airiness” effect is given by the use of a special metal profile - with a curtain or like a mortgage.
If the canvas for the stretch ceiling is chosen to be of a glossy type, the effect will be greatly enhanced, the curtains will float in the air. In addition, glossy ceilings visually increase the height of the room.
Installing a stretch ceiling with the formation of a niche for curtains and tulle will undoubtedly complicate the work and will take more time. But such installations look more interesting than wall cornices under the ceiling and allow you to solve various design problems in the room, which makes the choice in their favor reasonable and correct. A room with floating curtains looks neat, stylish and beautiful.
Step-by-step instructions for installing a niche made of gypsum plasterboard
- Once the required dimensions have been determined, you need to make markings on the ceiling (two stripes on the ceiling and one on the wall) using a pencil and a long ruler or coated thread.
- Using screws with plastic elements, you need to secure the guide profile according to the markings.
- Insert the wide metal frame sideways into the guide. Fix it with pendants that are attached to the ceiling.
- Next, another profile is attached along another line.
- You can begin covering the frame with plasterboard sheets. First you need to make the necessary measurements and cuts in the sheet, where this is required by the design on the ceiling.
- The gypsum board is screwed to the metal frame using screws in increments of 15-25 cm.
Arrangement of vertical elements: there can be a maximum of 3, a minimum of 1. It is necessary to assemble the base - connect the ceiling profile with sides to the guides. It is better to assemble the vertical base on the floor - it is difficult to use a screwdriver at the top, due to the small distance between the wall and the edge of the niche.
According to the markings, the already assembled vertical structure is installed and secured. We also fix the sides of the structure, but the guides are not needed.
After the niche is installed, all that remains is to complete the finishing. Fill the joints and fasteners with self-tapping screws. Now the frame is being installed under a single-level or two-level ceiling. In both cases, the floating curtain will look organic.
Preparatory stage
Before installing the structure, the following preparatory work should be carried out:
- determine a place for a niche;
- clean the ceiling of all irregularities that could interfere with the fastening of the frame;
- apply markings to the ceiling. We make it as close to the ceiling as possible;
- the lines should be parallel to the floor and outline the work surface. We check all lines with a level.
When all the preparatory work is completed, you can begin installing the box.
Interior design options
Hidden curtain rods are an excellent solution and almost the only one for rooms with angled ceilings (monsard). The traditional method of fastening the cornice in such cases does not look very nice. Hiding it from view is the only correct solution.
Which is better: heated floors or radiators?
Warm floorBatteries
If the budget allocated for repairs allows, then you can make original lighting as in the photo. Lighting can be installed both inside and outside the curtains. This solution puts emphasis on the window area and allows you to use this space separately. For example, use for a desk or relaxing with a book.
A hidden curtain can also be used to create a canopy over a sleeping area. The room takes on a more aesthetic appearance, because the fastening design does not stand out from the overall interior. A cozy and romantic atmosphere is created if dim lighting is used in this niche.
Niche design: creating lighting
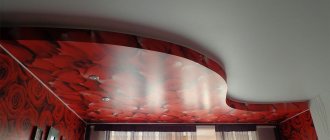
It was noted that in addition to the main function, the box allows you to integrate lighting. The organization of additional lighting will look unusual and attractive. The lighting will create the effect that the curtains are airy. To achieve this goal, a strip with LEDs is inserted into a special groove. It can be any color; you don’t have to choose a classic one. This also helps to visually increase the height of the space. Relevant for low rooms.
@remontoffanapa.ru
The box for the curtain rod allows you to hide the auxiliary elements and leave only beautiful curtains for the eyes. There are several methods to implement such a project. One of them can only be performed by professionals. Therefore, if you plan to carry out the work yourself, it is worth taking into account the peculiarities of the methods for creating a recess.
The construction of the box should be planned at the ceiling design stage. Otherwise, it will be impossible to implement such an idea later. A strip of lighting will create an airy effect and add light to the room.
Constructing a niche from plasterboard - step-by-step instructions for decorating a living room
A high-quality renovation is a unified concept of style design, in which there is no place for unnecessary elements that do not fit into the interior of the room. This is especially true for the living room, which is the face of the entire house. For example, curtains have been selected, but there is no cornice of the required shape and style. What to do? There are two options: continue to look or make a niche for the cornice. To do this, you can use different materials, but the simplest and most common method is to build a niche from plasterboard in the living room.
Adviсe
When creating a niche, you can make it more attractive by following some tips.
- Curtains illuminated with LED strip look unique. Using a special remote control, the lighting changes color, creating an emotional mood for each individual moment.
- A niche looks more impressive if it is assembled along the entire wall. But if you select only the window, you can save on building materials.
- The opening for curtains does not have to be an invisible gap in the ceiling; it itself can be a decorative element of the interior. It is highlighted with color, lined with mirrors, decorated with moldings and a wide ceiling molding.
- You cannot make mistakes when calculating a niche; a niche that is too narrow can squeeze and deform the line of curtains, and a wide one can create a hole in the ceiling space.
- Rooms separated by ceiling openings for curtains can be zoned not only with soft curtains; The best division of space is Japanese curtains.
Types of plasterboard niches
The shape and size of plasterboard niches for curtains can be different; even a two-level ceiling built around the perimeter of the room creates a niche for curtains near the window. This is a more complex option. There are simpler ones:
- On the ceiling, a box is constructed along the wall where the window is located and along the side walls.
- A box is constructed along one wall with a window.
- This structure can be wide up to half a meter, or narrow 15-20 cm. By the way, spotlights will look good in a wide box.
- The height of the box can vary from 15 to 50 cm.
- It can have rectilinear shapes, or it can have curved ones.
That is, the variety is quite large, the choice is only yours. But if the task is to build a niche for curtains from plasterboard in your own living room with your own hands, then you should not look for complicated ways. After all, a simple design (niche) will look decent. Therefore, we will consider the option of constructing a ceiling box, with which you can hide the ceiling cornice.
And remember that any niche for curtains is built only for ceiling cornices. There is no point in hiding the wall option; it itself is already an element of the living room decor.
Like any repair and installation process, assembling a plasterboard niche in the living room is divided into several stages.
A box is not a niche - definition of concepts
When they talk about creating a cornice using drywall, they often mean the box. If in the case of creating a niche the top of the curtains is hidden in a recess, then in the case of a box it is hidden behind the newly designed design. At first glance, it may seem that creating a box will ruin the look of the room, especially if the ceiling is single-level. But this is not true, although everyone has different tastes.
A plasterboard cornice does not have to be attached to a suspended ceiling
A gypsum plasterboard cornice can be attached either to a finished suspended ceiling or to a bare ceiling. The second solution can only be applied if the ceiling is flat, and this is not often the case. Sometimes, when creating a suspended ceiling, they prepare in advance to create a box. Therefore, a profile is added to the design, to which a plasterboard cornice for curtains will later be attached.
A niche must be provided at the time of creating the frame for the suspended ceiling. In the case of a box, this is not necessary. Although it doesn’t hurt to think about its use in advance.
We will consider the process of creating a box that plays the role of a cornice.
Preparation
You need to start by purchasing materials. For this you will need:
- plasterboard sheets;
- two types of profiles: ceiling PP 27x60 and guide PN 28x27;
- self-tapping screws;
- tape for sealing joints;
- putty.
- perforator;
- screwdriver;
- knife;
- putty knife;
- tape measure and pencil;
- strong thread.
Applying markings is a very important moment. It is based on the correct location of the cornice (and, accordingly, the niche) relative to the window sill or heating radiator. The first relative to the others should be located inside the living room by 15-16 cm. Therefore, knowing the dimensions of the protruding part of the window sill or radiator and adding 15 cm to it, we obtain the distance of the place where the cornice is attached from the wall in the living room.
We transfer this size along the ceiling along the two side walls. Now, by attaching the ends of the paint cord to the two resulting points, we get an even line on the ceiling, parallel to the wall. This is the end of the niche for plasterboard curtains and the beginning of the decorative box.
From this line we set aside the width of the box you have accepted inside the living room, and draw another line. So, the installation dimensions of the box for the niche under the cornice are there. You can proceed to assembling the frame.
Marking
At the initial stage, markings are made:
- The distance from the box to the most prominent element of the window opening should be at least 16 cm. It is laid on both walls and connected by a line on the ceiling. This line will be the boundary of the niche. It is convenient to use painting thread for drawing.
- Parallel to the line, draw another one, which is the inner boundary of the box. The width between them corresponds to the width of the structure.
- Verticals are lowered on the walls, limiting the height of the frame.
USEFUL INFORMATION: Assembling a frame from a metal profile for plasterboard
The following diagram shows a variant of a niche, which is provided in the design of a suspended ceiling.
Assembling the frame for a niche
You need to start assembling the frame on the floor. To do this, prepare two letters “P” from the guide profile. The letter will be unusual: the top shelf is the width of the room (let it be 3.2 m for example), the racks are 8 cm each. The standard profile length is 3 m, so one will not be enough from wall to wall, so you will have to increase it.
This is not difficult to do.
- To do this, we make the missing size (20 cm) from a piece of profile, having previously bent it at a right angle so that a stand is immediately formed. The same must be done with the main profile. It turns out that what will be missing is not 20 cm, but 28. This means that you will have to add a piece of 28 cm, plus a bent part of 8 cm.
- The profile extension must be placed inside the docked parts and attached to the two parts with self-tapping screws (fleas), two for each section.
- Now we lift the entire structure to the ceiling in the living room, attach it to the marked line and use a puncher to make holes in the ceiling every 60 cm. You need to start from the wall at a distance of 5 cm. Special metal dowels are driven into the holes, which craftsmen call among themselves “quick installation” " They are driven into the ceiling like nails with a hammer. Don’t forget to secure the pillars of the letter “P”.
- Now, along one wall surface along the lower edges of the racks, two small pieces of the PN profile need to be installed and secured. They are sized from rack to rack. Fastening is carried out with two dowels. These two cross members are necessary to create the rigidity of the frame.
- Next, we prepare (increase) two profiles. Their length is the width of the living room, where a niche for plasterboard curtains is made.
- A thread is stretched connecting the opposite walls on which the racks of the ceiling structures are fixed. This is the horizon along which the lower element will be aligned.
- The extended profile is installed along the lower edges of the racks and secured to them. It will bend under its own weight. This will be clearly visible in comparison with the stretched thread.
- Pieces of the ceiling profile 8 cm long are cut. They must be inserted into the profile, which is fixed to the ceiling, and attached to it with self-tapping screws. The distance between the intermediate posts is 40 cm.
- Now you need to align the lower PN profile along the thread, attaching it to the lower edges of the PP profile.
So, there are two rectangular structures installed on the ceiling, from which you can already determine the niche for the cornice in the living room. In order for both structures to merge into one box, it is necessary to connect them at the lower edges with crossbars made of PP profiles. The crossbars are installed at a distance of 40 cm from each other.
Rules for constructing a plasterboard box for curtains
Like all construction processes, the assembly of a plasterboard niche for a cornice is carried out in several stages:
- Preparation,
- ceiling markings,
- assembly of frame structure,
- plasterboard covering,
- finishing.
Preparatory stage
Before you make a niche for curtains from plasterboard, you need to prepare all the required materials and tools. The materials you will need are gypsum board sheets with a thickness of 9-12 mm, perforated paper tape or serpyanka tape, putty, self-tapping screws, two types of profiles: guide (PN) and ceiling (PP).
As for the tools, to carry out the work you will need: a hammer drill, a sharp knife, a construction level, 2 spatulas (wide and narrow), a tape measure and a pencil, a screwdriver.
Marking
If you are constructing a plasterboard niche for curtains near one wall (second option), then from the surface you need to set aside a distance along the ceiling in the corners of the room equal to the width of the protrusion, plus 10-15 cm. After which both points are connected to each other by a line that will be parallel to the wall . It needs to be drawn on the ceiling with a pencil, using either a prepared metal profile or a strong thread as a ruler. Then, from the drawn line, you need to set aside the width of the box and also draw a line.
We attach the starting profile
The main task of marking a niche for plasterboard curtains is to accurately mark the dimensions of the structure.
Frame assembly
- PN profiles are laid along the lines marked on the ceiling.
- Through them, holes are drilled in the ceiling surface using a hammer drill every 50-60 cm, starting from any wall.
- Dowels are inserted into the holes.
- The profile is re-attached to the ceiling and secured to it with self-tapping screws using a screwdriver.
- Then, from the same profile, you need to make four L-shaped structures with a side length of 7-10 cm. The size of one of the sides depends on the height of the box; it is this side that the device will be attached to the wall.
- The manufactured L-shaped parts are installed along the edges of the profiles attached to the ceiling, so that one side fits into the profile and becomes its continuation, and the second rests against the wall, positioned perpendicular to the ceiling element. That is, ultimately two U-shaped structures should be formed. The installed elements are attached to both the ceiling and the walls.
- There is another option that uses two L-shaped parts. To do this, one end of the profile itself must be bent at 90°, creating a vertical strip that will have to be attached to the wall. When making an L-shaped element, it is necessary to take into account the distance of the second end of the profile to the opposite wall, taking into account the entry of the first into the second at a distance of 5-10 cm. Plus, of course, a vertical bar.
The ceiling should look like the one in the photo below. There should simply be two such elements with a distance between them equal to the width of the box.
Now you need to cut several pieces from the ceiling profile, with a length equal to the length of the vertical strip. The quantity is determined by the length of the horizontal part and the installation pitch. For example, if the profile length is 3 m (300 cm), and the installation step is 60 cm, then 300/60 = 5 pieces. But this is the norm and more is allowed
Their ends are inserted vertically into the horizontal part of the assembled structure, to which they are attached on both sides with self-tapping screws. Next, the lower free ends of the segments are connected to each other by a profile (PN). There are two metal structures on the ceiling, which must be connected to each other for rigidity. For this purpose, sections of the PP profile are used, the length of which is equal to the distance between the two elements of the box assembled on the ceiling.
Design drawings for a plasterboard niche
Let's consider other options for making plasterboard niches using LED lighting.
Niche with milled plasterboard
Narrow frame
There is another design for a plasterboard box for curtains, which is much simpler in terms of assembly. It is assembled from an in-line PP profile, the width of which is 60 mm. Taking into account that the box will be covered with 9 mm thick plasterboard, the width of the entire structure will be 78 mm. This is a fairly wide structure, although in the category of plasterboard boxes for curtains this is the narrowest option.
In practice, the niche is assembled in exactly the same way as in the previous version. Only instead of PN profiles it uses PP. In this case, the vertical segments connecting two horizontal elements are installed across, and not along, as in the first case. Additionally, it should be added that the niche for plasterboard curtains of this type is a frame made of one structure. The photo below shows a narrow plasterboard curtain box.
You can also assemble a frame for a hidden cornice made of plasterboard for curtains from a PN profile, the width of which is 27 mm, which greatly reduces the width of the box itself. But this design is very thin, it cannot always fit into the interior of the room. It’s better then to use a 50/40 profile. Below is a video of such a montage.
Sheathing
The frame for a hidden curtain rod made of plasterboard is ready. All that remains is to cover it with the gypsum board sheets themselves. To do this, sections are cut out of the sheet with dimensions equal to the dimensions of the frame assembled on the ceiling, which are attached to the finished structure.
There are certain requirements for fastening plasterboard sheets:
- the distance between the screws is 10-15 cm;
- the distance from the edge of the segment to the place where the fastener is screwed in is 1-2 cm;
- The depth of screwing in the screw head is 0.5 cm.
Finishing
Typically, any plasterboard structure is puttied, leveling the planes. A plasterboard niche for curtains is no exception. Therefore, it is first coated with a primer, and after drying it is leveled with a putty mixture.
An important point is the sealing of the joints of the gypsum board sheets with each other, for which serpyanka tape is used. First, a layer of putty is applied to the joint, then tape is immediately applied, which is covered with another layer of putty on top. The joints of plasterboard sections located in different planes are closed with special perforated corners made of galvanized metal, plastic, or aluminum. The installation process is exactly the same as with tape.
After the putty has dried, the planes of the box are sanded with fine-grained sandpaper, thereby removing spatula marks and minor defects. The primer is applied again. As for the design, usually the box and the plasterboard niche for the cornice itself are painted in the same direction to avoid glare on the ceiling.
Sheathing with plasterboard
It is necessary to sheathe the box with plasterboard only from the bottom and front sides. Therefore, several strips are cut from the sheet. Some will be as wide as the width of the box for the plasterboard niche for the cornice, while others will be as wide as the height of this box. Fastening is done with self-tapping screws using a screwdriver.
There is no point in sheathing the back part of the structure; it will not be visible anyway. Now you can install a hidden cornice in a niche made of plasterboard, and finish the box itself with putty and carry out sanding and further finishing.
So, in the question of how to make a niche from plasterboard in the living room, all the i’s are dotted. This is the simplest option. If any of our readers have any questions or ideas, we are ready to discuss them with you on this page in the comments.
Preparing the ceiling for a hidden cornice
The surface must be cleaned of any remaining paint or plaster. To do this, take a spatula. You can lightly moisten the ceiling, so the whitewash will come off faster. If cracks are found, they are sealed.
Advice! In cases where it is not planned to stretch the canvas in a niche, it is better to putty the concrete and cover it with white paint. The pocket will look more aesthetically pleasing.
Niche for curtains made of plasterboard and in suspended ceilings
A niche for curtains made of plasterboard is an excellent design move. This element looks modern and harmonious in any style. You get the opportunity to create a beautiful design with curtains covering the entire wall, visually raising the height of the room. There are different ways to make such niches, but the principle is the same - creating a box from gypsum plasterboard. Its size depends on the design idea. A niche for curtains in a stretch ceiling looks especially impressive. The height of the ceiling will visually increase even more if the stretch fabric is glossy. The curtains will flow from the reflection.
When ordering work from craftsmen, the presence of such niches is usually discussed, and the installation work is carried out by professionals. If the room is supposed to have a suspended structure made of plasterboard and there is a design concept - curtains falling from the ceiling, then you need to start by installing a niche made of gypsum plasterboard. As a result, you need to make sure that even if the curtains have folds, they will not rub against the protruding parts of the window opening.
If a lambrequin is intended, then it is worth considering its thickness. It is better to attach the ceiling cornice in the niche before installing the box itself. The structure should be mounted on a flat ceiling. If you are going to install suspended ceilings, hiding an uneven base, you will first have to plaster a strip along the window to the width of the niche and the plasterboard structure (with a small margin). The base of the ceiling made of a solid concrete slab does not require special preparation, but when installing the guide profile, check that it is horizontal.
If dry ones are used, they must be mixed with water according to the instructions indicated on the package. The finished putty dries out quite quickly in the open air, so the mixture should not be kept open all the time; you need to take a small amount, close the bucket and apply. It is not advisable to dilute dry mixtures in large quantities, especially if you have little experience in performing such work. A niche on the entire wall looks most impressive, but if such long curtains are not planned for reasons of economy, it is better to make the structure slightly larger than the window opening.
It is more convenient to screw a strip of drywall to a previously assembled base on the floor. This is due to the lack of space between the wall and the location of the bulkhead being mounted, which makes it difficult to use a screwdriver. We saw off the strip a little wider than the required size, taking into account the fact that the ceiling plinth will be glued to it.
The guide is positioned so that after installation of the wall it is below the profile: in the future it will become part of the frame of the suspended ceiling.
Installation of drywall and preparation for finishing
When cutting gypsum board fragments, it should be taken into account that one edge of the box, usually the bottom, should be slightly wider in order to cover the ends of the two side edges.
It is recommended to drill holes for spotlights in advance, before installing drywall. It is also better to make chamfers at the joints of the elements. They will be useful for subsequent processing of seams.
The sheathing process looks like this:
- The prepared pieces of drywall are fixed to the frame with self-tapping screws in increments of 25–30 cm. A special bit installed on a screwdriver will greatly facilitate the process: due to its shape, it will not allow the screw to be driven too far and crush the plasterboard.
- As mentioned earlier, it is more convenient to mount the wall of the box facing the window at the bottom. The small dimensions of the niche will not allow you to “crawl” with a screwdriver to the fastening points.
- After the installation of the gypsum board is completed, the seams are glued with reinforcing tape or serpyanka mesh and sealed with a special putty for drywall. It also processes the recesses formed by the heads of the self-tapping screws.
- After drying, the seams are rubbed with sandpaper, and then the entire surface of the box is primed. The primer is applied in two layers. After it has completely dried, you can proceed to finishing.
Thus, it is not at all difficult to assemble a niche for curtains by mounting a box made of plasterboard. This design will definitely contribute to creating a unique design for your room. The process is shown in more detail in the video. Ask questions in the comments!
Do-it-yourself installation of a plasterboard cornice
To create a cornice, you will need precise actions, accuracy in working with drywall, and a sequence of actions.
- In the case of installing a cornice on a plasterboard ceiling, fastenings are carried out in places where the profiles pass. This can be easily checked with a magnet.
- The cornice is attached to the ceiling with plastic butterfly dowels. You should make a hole for them in advance. Scheme of fastening the cornice with dowels
- Heavy curtains are hung on a curtain rod attached to an anchor.
- Profiles, preferably galvanized. They serve well and for a long time, making the structure more rigid.
- Self-tapping screws, screws and dowels.
- Putty “Finish”.
- Reinforced tape.
- Drywall up to 12mm. thick.
- Primer.
- You will need a knife for cutting drywall. You can have a regular one, but with a sharp edge.
- A set of screwdrivers or a screwdriver.
- Planer for chamfering.
- Set of spatulas.
- Regular roller.
- Scissors for cutting metal.
- Meter, pencil and ruler.
- The level is normal, but it is more difficult to work with than a laser machine.
To create coziness in a room or hall, curtains or drapes, curtains, and tulle are required to protect from sunlight. This not only decorates the window, but also creates a unique interior and modern design. For curtains, the market offers a huge number of curtain rods, strips and strings. However, modern fashion dictates its own rules, and for this the cornice or string needs to be hidden.
It’s even better to create a plasterboard cornice with your own hands. An example of how to design a cornice for curtains made of plasterboard with your own hands
Advantages and disadvantages of a narrow box for 1 profile
There are no rules about the size of a plasterboard cornice.
This method is suitable for people who decide to make a box on a bare ceiling. It can also be used to attach the box to a ceiling assembled from plasterboard. Sometimes there are cases when the ceiling was done, and they started thinking about the cornices only later. This method is suitable for these two cases. It has the following advantages:
- for work, one type of profile is required - a ceiling guide (ud profile will be enough to create the entire frame);
- you will need a small amount of drywall, which will save the cost of creating a cornice;
- The small structure is light in weight, which means it can easily be attached directly to the gypsum board.
A small cornice on a plasterboard ceiling does not always go well with the simultaneous use of tulle and curtains. Also, a baguette must be used for it, which is glued along the entire perimeter of the room at the junction of the walls and ceiling.
Niche for plasterboard cornice
So, there are two rectangular structures installed on the ceiling, from which you can already determine the niche for the cornice in the living room. In order for both structures to merge into one box, it is necessary to connect them at the lower edges with crossbars made of PP profiles. The crossbars are installed at a distance of 40 cm from each other.
You need to start assembling the frame on the floor. To do this, prepare two letters “P” from the guide profile. The letter will be unusual: the top shelf is the width of the room (let it be 3.2 m for example), the racks are 8 cm each. The standard profile length is 3 m, so from wall to wall one will not be enough, so you will have to increase it. 10 charming stars children who look completely different today Time flies, and one day little celebrities become adults who are no longer recognizable.
Pretty boys and girls turn into... Our ancestors slept differently than we do. What are we doing wrong? It’s hard to believe, but scientists and many historians are inclined to believe that modern man sleeps completely differently than his ancient ancestors.
Initially. It is necessary to sheathe the box with plasterboard only from the bottom and front sides. Therefore, several strips are cut from the sheet. Some will be as wide as the width of the box for the plasterboard niche for the cornice, while others will be as wide as the height of this box.
Fastening is done with self-tapping screws using a screwdriver.
Curtain studio Decor-Expert
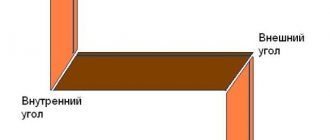
Let us assume, for definiteness, that the far vertical wall of the niche lies in the plane of the main wall on which our window is located. wall of the niche closest to us will be its width W. Well, of course, we look at all this from inside the room. First, you should turn your attention to the heating radiator.
Yes, yes - we dance from it, since ignoring its presence is the source of 90% of errors when designing ceiling niches. Check to see if the radiator will protrude beyond the edge of the window sill. If it protrudes, then we determine the first parameter p - the extension of the battery beyond the plane of the wall; otherwise, in an extremely rare case, this parameter will be the extension of the window sill. Extending the niche to one of the walls (or to both), thereby increasing the length L , makes sense in that case , if you want to hide something on the wall with curtains that could not be hidden structurally during the renovation. Well, or maybe you like a beautiful curtain fabric flowing from the ceiling across the entire wall... This size L between the left and right edges of the niche depends on its location - near the window, across the entire wall (the length of the niche is determined by the size of the wall), from one edge of the window to the opposite wall and vice versa.
To be specific, let’s take the “near the window” option. In this case, the niche should extend beyond the window opening on the left and right. The question is - by how much? In my practice, there was a case when in one living room room both alternative ceiling options were implemented for two adjacent windows. Here is the photo: You can use the mouse button to enlarge the image and compare both options.
Which one will be completed for you is up to you to decide. It is often difficult to harmoniously fit the cornices on which the curtains are attached into the interior of the room. The problem becomes more complicated if you plan to make suspended ceilings: you need to think in advance and arrange the fastening of heavy curtains or curtains. In addition, all these elements will be reflected on the glossy surface of the ceiling, which does not look very nice. The solution may be to install a special niche for plasterboard curtains, which will not only hide unwanted elements, but also add elegance to the room.
The ceiling box can have any configuration and size, the main thing is that it fits organically into the interior of the room and fulfills its main task: to hide the suspension elements. Curtains or curtains that fall directly from the surface of the ceiling look very impressive. The plasterboard box for the niche is assembled in the traditional way. Assembly begins with the frame. Markings are made on the ceiling and walls, and the overall dimensions of the box are indicated.
According to the markings, a metal profile is fixed to the ceiling and walls. Then, stepping back 7-10 cm from the ceiling, install two horizontal jumpers and fasten them to the ceiling profile with hangers. Suspensions are made from ceiling profiles. Any profile can be used to create a frame.
But most often a guide profile (PN) is used. On the outside, the shelf is fixed to the frame with self-tapping screws, and on the inside, it is pressed with a second additional vertical sheet of plaster. If you plan to use one layer of drywall, then install the shelf first, and only then install the vertical sheet of plasterboard.
Depth of the ceiling niche.
With depth, everything is simple... Its minimum value G should be such as to hide, as we agreed above, the folds of the curtain tape. We calculate: the thickness of the cornice h (~ 1.5 cm) plus the height of the tape s (from 5 to 15 cm, depending on the type of tape) plus the correction u (~ 8 cm) to compensate for the angle of the ray of view of the gaze cast by you from the bottom up to the niche from your sofa.
Formula for calculating the depth of a ceiling niche.
From my point of view, the optimal depth of a niche should be 15-20 cm; if the niche turns out to be shallower, then it is not worth making. Well, the maximum depth of the niche depends on the design of the entire ceiling and its design features. It should not exceed 40 cm, otherwise it will be difficult to install the cornice and hang the curtains. There is one more nuance, a little related to depth, which makes sense to discuss here:
- It may turn out that the upper horizontal plane of the niche will coincide with the treated and painted concrete surface of the original ceiling, in which case in the future the curtain rod will be attached without problems in the place we need.
- If when forming a niche, plasterboard , then it is useful to provide a standard mounting metal profile running in the middle along the entire length of the niche above its upper edge. For fastening drywall, this profile may not have much meaning, but for reliable fastening of our plastic double-row cornice it will be very useful...
- For the option of making a niche using stretch ceiling (this option is becoming more and more common), special embedded elements are placed above the future upper horizontal plane of the niche at the right points, to which our cornice will then be attached. The position of the mortgages is determined by the attachment points of the cornice.
Here, in fact, is all the basic information about the preliminary determination of the dimensions of a niche in the ceiling: width W, length L and depth G ... Of course, there are also complex cases and unforeseen nuances that only high-level professionals can figure out... But if you at least check process, by correctly drawing the attention of your interior designer or builders to the procedure for taking the correct measurements, then the niche in the ceiling most likely be made correctly ! I hope this text will reduce the number of my encounters with incorrect niches)))… Read a separate article on this blog about how to attach curtain rods to a plasterboard ceiling.
Niche for plasterboard curtains
Here it is necessary to clarify this point: the niche is being built exclusively for curtains attached to the ceiling. Wall curtain rods are not hidden in this way, since they are considered an independent element of interior decor. Often, when creating a niche for curtains, both of these methods are combined. The height of the partition can be 15–50 cm. Moreover, the design can have either simple straight shapes or curved ones.
This size is transferred to the ceiling along each of the side walls. Then, connecting the ends of the thread attached to two points, mark a straight line. It is the beginning of attaching the decorative partition. So, there is a choice here.
To work with your own hands, you should choose basic options for constructing a niche for a cornice in the living room. Since even a simplified version will look no worse here. The following is a step-by-step guide to constructing a camouflage fence for a cornice. Spotlights are often placed in a wide device. In addition, an LED strip is fixed in it.
Such an ensemble of lighting devices forms the backlight of the curtain.
Making a hidden curtain rod from plasterboard sheets
Before starting installation work on constructing a box for a cornice, you must first draw a drawing. To create a drawing you need to do the following:
- near the window. This hidden type is the most common. Designed to hide the cornice, as well as the curtain above the window;
- box under the cornice. It assumes the presence of lungs and partitions moving around the perimeter of the niche. Used when decorating a room in an Asian style. In addition, it can be used as a zoning option.
In addition to the above options, there are also more exotic designs. But they are extremely rare, since they do not carry a functional load, but serve only as additional decoration of the room. You can make absolutely any design yourself. The choice of installation of a plasterboard ceiling box to hide curtains should be made based on the design of the curtains, type of fastening, etc.
- shallow box For such a design, you should use a string cornice, without a decorative strip. In addition, only light tulle or curtains are allowed here;
- deep box It will be able to withstand heavy curtains, as well as combinations of curtains and tulle. Here you can use massive strips for fastenings.
There are different ways to hide curtains aesthetically using a plasterboard box, since its structure itself can have the following variations:
Additional information on the topic:
- How to make an interior arch from plasterboard video
- How to glue drywall to a clay wall video
- Technology for installing a plasterboard ceiling with a suspended ceiling
- How to make a bar counter from a tabletop and fix it to a plasterboard wall
- How to make door slopes from plasterboard on foam
How to treat the surface → Room decoration → How to choose the right paint → Surface treatment technologies → Leveling and finishing the walls → Selecting and applying a primer → Removal from the surface → Stretch ceilings and technologies → Reviews and testimonials
Recommendations for choosing a cornice
Before purchasing, it is advisable to decide on the approximate design of the curtains. For light curtains, a plastic crossbar is sufficient, but for heavy curtains you will need a durable aluminum or metal curtain rod.
Let’s immediately say that both ceiling and wall models can be installed in a niche, but it is better to give preference to the first option. Such cornices are much more compact and easier to hide behind the tension fabric. Otherwise, you will need to lower the ceiling lower, which will reduce the height of the room.
Curtains are hung in several rows: just tulle, with curtains, or additionally decorated with lambrequins. Depending on the number of curtains, you need to purchase one, two, three or four-row curtain rods. It’s also better to think through this point in advance.
Read more: How to choose the right ceiling curtain rod
Advice! If you hang a ceiling rail across the entire width of the room, the curtains can be pulled apart on both sides of the window. This will allow more light to enter the room.