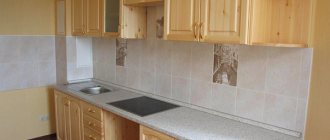
Some people simply love to make furniture, various “conveniences,” and innovations for their home with their own hands. This is the only way to turn all your ideas into reality and make really high-quality furniture with your own hands. Wardrobes are no exception.
Thus, a cabinet made from furniture panels is not just an economical, but also an environmentally friendly solution that has many advantages over standard options. Let's figure out how to assemble a cabinet from furniture panels with your own hands, and what you need for this.
Advantages of a hand-assembled cabinet
A homemade “thing keeper” has the following positive aspects:
- you don't need to spend a lot of money on materials;
- you can create exactly the furniture you dreamed of;
- such a cabinet may have a non-standard shape and design features;
- only a cabinet assembled by yourself can fit perfectly into any interior;
- For this furniture, you can choose the necessary fittings yourself and organize as many shelves as you need.
Now let’s take a step-by-step look at the main question in detail - “How to make a cabinet from furniture panels?”
Types of tables for sewing machines
The range of functional sewing and craft furniture is truly impressive. You can choose from the following popular types:
- specially designed sewing table-book;
- cabinet table;
- side table;
- table for industrial sewing machine.
The last option is suitable for those who decided to open their own tailoring and clothing repair shop (albeit in a mini format). For household use, you can purchase a simpler option.
Advantages of special furniture for a sewing machine
Without exaggeration, a table for a sewing machine and overlocker is the right choice for starting your sewing journey. The design is already so well thought out that everything can be placed in such furniture (from numerous spools of thread to an overlock machine). The width and height of all devices that should stand in such a place have already been verified in calculations. After work, the machines are removed together with the platform, and the table itself can be folded.
In this regard, “books” are very popular, which consist of three sections - the central one turns out to be stationary, and two “wings” resting on legs will open on both sides.
It is better to purchase models with an existing compartment for the machine - in this case, the body of the device will be at the level of the working surface. This solution will significantly simplify the problem of storing the device. Here are the options:
- Simple, when the sewing equipment is inserted manually and then pushed in with special bars.
- A table with a special lift. Such a lifting mechanism will raise and lower the machine itself. There are both mechanical and electrical models.
Sewing machine cabinet: even more space saving
In cases where the square footage of the room leaves much to be desired, you should look for even more compact options. Here it is worth taking a closer look at the table-cabinet for the sewing machine. Its difference is that in this case the sections will rest on opening swing doors. Such furniture has a number of the following advantages:
- There are shelves on which you can place all the little things.
- Very often there are pockets on the doors (again for various accessories).
- There is also room for an overlocker, which can be placed on one of the shelves.
- It is not necessary to unfold the entire cabinet; you can use only one wing.
Industrial sewing machine table
If you plan to open your own business, then this option will be the most suitable. At home, this option may not be very suitable - after all, designs of this type are most often bulky, and they are not at all intended for home devices (because they are designed for professional equipment).
Most often, such a professional sewing machine with a table is already built into it and, accordingly, is a bulky structure. Although if you remember the old type of devices, most of them came with a cast metal structure.
For domestic use, simpler options with adjustable table top height are sold. Everything here is provided so that there is plenty of space under the table and it is convenient to use the pedal. In this case, the machine platform will be flush with the tabletop.
Side table for a sewing machine: maximum benefit at minimum cost
But what to do when the square meters of living space do not allow the purchase of excess furniture? An attached option will come to the rescue. This device is a small platform with supports on which you can perform various sewing operations.
It is best to purchase an extension table for your sewing machine from the same manufacturer as the device itself. This guarantees an accurate fit in all respects, and, therefore, will provide the greatest comfort in work.
Table for a sewing machine from improvised options
And finally, when there is space, but no money to purchase specific sewing furniture, such a device can be made from improvised materials. For example, define a regular computer desk as it. The drawers are perfect for storing accessories, and the shelves above the tabletop can simply be removed.
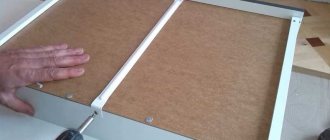
Stage 1: preparation of materials
Shields
The most important stage of assembling a cabinet with your own hands from furniture panels. What is a “furniture panel?” This is a material based on natural wood, which is pressed. As a result, all the bars are glued together almost perfectly.
You can purchase furniture panels in a wide variety of variations. They differ in size, thickness, wood type, etc. The most popular and practical are pine, spruce, birch or oak panels. They are easy to process, strong, and durable.
Advantages of furniture panels when creating a homemade cabinet:
- The materials contain absolutely no impurities that could pose a danger to human health.
- Furniture panels are easy to work with, which allows you to create a very bright, non-standard design.
- The price of the shields is extremely low, along with durability and naturalness.
- From such material you can really create an attractive and unique piece of furniture.
To implement the planned cabinet project, it is necessary to prepare the following consumables:
- furniture board. It is better to take options with a thickness of 20 mm, since it can be used not only to create a base, but also as a body;
- plywood. Various shelves and internal partitions are made from it. The optimal material thickness is 12 mm. The remaining sheets of plywood should be 6 mm. thickness. They will be used to form boxes (if there are any in the plan);
- furniture rod and accessory holders. They will allow you to distribute the space in the furniture as freely as possible. Clothes will be hung on them, any accessories will be attached, etc.;
- accessories. This includes all kinds of hinges, handles, guides, and other parts for convenient operation of the cabinet.
To make the lid and bottom, you can also use furniture panels. If necessary, cutouts for lighting are pre-designed in them.
Now let's move on to the tools that we will need to create a cabinet from a furniture panel with our own hands.
How to choose a shield? Varieties and prices
What does category mean? Reflects manufacturing technology. Knowing the characteristics of each grade allows you to make the right choice in favor of the highest quality material.
Furniture panels of the following categories are sold in hypermarkets:
Variety "Extra"
This means that there are no knots, nicks, or stains of resin on the product. The surface of this sheet is perfectly flat, smooth, uniform and smooth. The risk of breakage is minimal. The option is more resistant to moisture and heat than other analogues. It is easier to work with such shields, because no additional processing or elimination of defects is required. Not surprisingly, they come with a lifetime warranty.
It is more expensive in quality than other varieties. For boards in the “Extra” category, the price starts from 212 rubles per sheet 80x20 cm, a sheet 240x60 cm wide will cost 1910 rubles.
A surface that is ideally uniform in color and texture also allows the use of transparent varnish or stain when finishing facades to preserve the natural tone of the wood.
Grade "A/B"
In this category of boards, the presence of “live” knots no larger than 5 mm in size (no more than three pieces per square meter) is allowed. Those. Only the top layer of the product (layer “B”) has minor defects. Lamels or strips, as in the “Extra” category, are ideally combined in color and texture, which makes the surface uniform and allows the use of transparent paints that highlight the natural tone of the product.
This option is most popular among buyers, since it costs a little less than “Extra”, but the quality is much higher than grade “B”.
Grade "B"
Of all the shields presented, this is the cheapest option. Solid strips are not used in production (as in the “A / B” or “Extra” brand), but are connected by hinges. As a result, such a sheet is less resistant to damage, less durable and less prone to cracking. The material has a uniform shade over the entire surface, but the wood grain may not match.
Sources
- https://12-stuliev.ru/shkafy/shkaf-iz-shchitov.html
- https://sdelay-mebel.ru/uglovoj-shkaf-svoimi-rukami/
- https://mebel-expert.info/shkaf-iz-mebelnyh-shhitov-svoimi-rukami/
- https://interior-experts.ru/shkafy/kak-sdelat-shkaf-svoimi-rukami-51-foto-iz-mebel-nyh-schitov-shemy-i-materialy.html
- https://infomebli.ru/gostinaya/shkafi/iz-mebelnyh-shchitov-sozdat.html
- https://shkaf-info.ru/kak-rasschitat-i-sdelat-shkaf-iz-mebelnogo-schita-svoimi-rukami/
Stage 2: choosing a tool
Having special tools makes the job much easier
When you decide to assemble a cabinet, you need to be equally attentive to the selection of tools. So, first of all, we need:
- varnish for wood coating;
- wood screws for securing various elements;
- screwdriver with various bits;
- drill with drills;
- chisel, tape measure, pencil, and hacksaw;
- grinder for processing materials.
These tools are easy to use, and in most cases they can be found in the drawer of every home handyman - a man who does housework.
Let's move on.
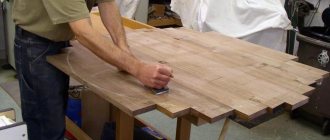
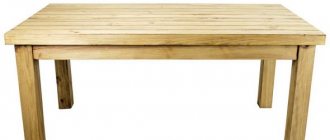
Solid wood furniture is the best natural material for making furniture
Currently, the following species are used to make furniture from solid wood with your own hands: oak, beech, pine, maple, walnut and others.
The cheapest option is pine, but it is quite soft, so it is not suitable for furniture that will be subject to physical impact (for example, in a child's room). The most durable species: oak and walnut.
Advantages of solid wood furniture:
- Environmentally friendly (only natural materials are used in production).
- Durability (the main thing is that the production technology is followed).
- Visual appeal.
Next, look at the annual rings; they should fit snugly against each other.
Stage 3: finding or preparing a drawing
To assemble a cabinet (and indeed any structure made of wood), we need to find drawings on the website or develop them ourselves. But first you need to understand the main features of the furniture, that is:
- height, width and depth;
- number of doors, drawers, compartments, etc.;
- the height of the mezzanine, if provided;
- filling the closet. Here it is important to take into account exactly how many shelves, partitions, rods, holders, etc. there will be inside the structure.
As soon as you understand this point, you can start sketching a sketch of the interior element - that is, creating its drawing. The easiest way to do this is on paper (if you have experience), or seek help from special programs that are freely available.
1
2
The second option has a lot of advantages, since all you have to do is enter the required numbers, then correct and print the resulting drawings. It is on them that we will rely when assembling the cabinet.
Why is drawing so important? Here are just a few arguments in its favor:
- All elements are as detailed as possible.
- You will clearly see how much material is required.
- There will be an understanding of how thick it is worth buying furniture panels.
- You will see a simple cutting of all materials.
Often new cabinets are made to “replace” old designs. If this is your case, implement a similar cabinet by taking measurements of the old one. As soon as the diagram is ready, study it again, and as carefully as possible, and then think about what you can add/remove.
Let's look at examples of drawings of cabinets made from furniture panels, and move on to furniture assembly technology.
1
2
These photo drawings are approximate. That is, if you, for example, decide to assemble a wardrobe or a chic wardrobe, then you should go either to our website or to professionals for drawings.
Computer table for a small room
This option is designed for a small room; for example, this computer table is generally located in a built-in wardrobe. The step-by-step photos show the dimensions, but you can change them so that the system unit fits into the “leg” of the table. In general, they can be made quite spacious so that nothing unnecessary is stored on the table. In this case, the tabletop for the keyboard is not retractable, but this is also a matter of taste; if you slightly reduce the working area of the lower tabletop and install a retractable shelf on runners, it will be retractable.
Photo source www.ana-white.com
Large computer desk with bureau
This table is well suited for a work office, especially if you store documents at home. Of course, there are no bells and whistles here, not even a retractable table top for the keyboard, but it is simple and reliable. The design is simple, step-by-step photos show how to make a tabletop; in this case, the bureau drawers were purchased separately, although you can do it yourself.
Photo source overthebigmoon.com/diy-file-cabinet-desk-blendtec-giveaway/
Large, beautiful and inexpensive computer desk
It’s hard to buy a computer desk at a reasonable price and one that satisfies all your needs, the author of this photo offers an excellent alternative - to make a beautiful and inexpensive computer desk with your own hands. The design consists of four parts.
- table top
- 3 cabinet drawers (for miscellaneous accessories, computer cables, etc.)
- filing cabinet for 2 drawers (boxes the size of folder files)
- printer cabinet.
The idea is to do just that, because the table can be transported and can easily be installed in a new place; repairs and rearrangements are unpredictable. The author chose a fairly simple design, the manufacture of which does not require any special tools or expensive materials, except that you will have to turn to a neighbor or a workshop to cut the wood. Here below are the tools that the author used.
Materials:
- 3 sheets of MDF (you can use maple veneer plywood, but it is 3 times more expensive)
- 2 sheets of 1/8 MDF or fiberboard - wood glue
- hole filler
- 5 pairs of drawer roller slides
- 7 drawer handles – 1 pair of cabinet door hinges
- 4 liters of primer
- 4 liters of paint
- brushes and rollers.
For the assembly procedure, see the step-by-step photos; if you are interested in the nuances, you can read in detail on the source website, link under the gallery.
Photo source www.instructables.com/id/great-looking-inexpensive-computer-desk
Working computer desk studio
The desk is a little bulky, but if your work involves a computer, almost everything is provided here. It is unlikely that you will be able to buy such a model in a store, and making a computer desk with your own hands will cost five times less. In addition to boards and plywood, you will need tie screws, nails and wood glue. Special tools include a circular saw and a grinder.
Photo source: jackdanielsrecordings.com/my-diy-studio-desk-build/
Adjustable computer desk
An interesting idea for a computer desk; in a store you are unlikely to find a model with an adjustable tabletop height. There are some, but basically you have to disassemble the structure in order to adjust the desired height, but here the whole trick is in the chain drive. That is, they simply used bicycle sprockets with a chain. Well, of course, it’s not easy, you need welding and other serious tools, but you’ll get a very comfortable table in an industrial style. How to make it, look at the step-by-step photos.
Photo source kevinjantzer.com/diy-adjustable-standing-desk/
Simple DIY computer desk
You can make such a simple computer desk with your own hands, say, for a summer house. Of course, it’s not exactly computer-based, but rather universal. You can call it a written one, even a kitchen one; in my opinion, it’s quite a suitable option for a dacha. There is a drawer under the tabletop that can be used as a regular drawer or converted into a keyboard. It’s quite simple to make; all the steps are indicated in the diagrams with step-by-step photos.
Photo source www.thedesignconfidential.com/2012/08/free-diy-furniture-plans-build-pottery-barn-inspired-hendrix-large-desk
Technology for assembling a cabinet from furniture panels
The stages described above are preparatory. After this, you can begin directly assembling the cabinet. To assemble the structure as quickly and easily as possible, follow the simple instructions. Let's get started!
Assembly
When assembling a closet for the first time, it is better to start by creating a simple structure - a double-leaf piece of furniture that does not have a large number of internal elements.
Jigsaw
To create such a “home friend” you will still have to cut out some elements. To do this, it is best to take a jigsaw, which allows you to make perfectly even cuts.
What can be cut with a jigsaw:
- A pair of side-mounted walls.
- Bottom (it’s important to remember here - when the closet is intended to store a large number of things, the bottom material must be durable).
- Cover. It “Must” be light, and a little larger in width than the base of the cabinet, which will add attractiveness to the interior element.
- A plinth covering the free space between the bottom and floor of a building.
- A couple of doors.
- The back wall (made from both furniture boards and plywood).
- Shelves. Their number is determined at the design stage.
It is best to make grooves for the baseboards at the bottom of the sidewalls. They can be made either round or rectangular, depending on the type of room. This will allow the cabinet to be pushed as close to the wall as possible.
Shields must be varnished
Before starting assembly, it is better to varnish each piece of furniture. Optimally - in two layers, so that the coating is as beautiful and durable as possible. As soon as the first layer is applied, all elements need to be sanded, and it is better to apply the second layer after all the elements have been installed.
The assembly itself is a painstaking process, and it is implemented in the following sequence:
- The holes for fittings and fasteners are marked.
- Holes are made in pre-marked places.
- It is important to remember that all hinges at the top and bottom must be fixed at a distance of 100 mm. If the doors are heavy, you need at least three hinges.
- The side walls and bottom are fixed with self-tapping screws.
- The base is fixed.
- The cover is mounted (using a building level).
- The back wall is fixed (furniture nails are used).
- Doors are installed in pre-made hinge bowls, the hinges are fixed with self-tapping screws.
- The handles are attached to the screws.
- The doors are hung and adjusted using a specific tool, depending on the type of fittings.
Assembling the cabinet is a fairly simple procedure that you can do yourself. The main thing here is to carefully carry out a clear sequence of actions and constantly check the work.
If everything is done correctly, you can move on to filling the cabinet.
Entrails
The placement of the shelves is a very important decision.
It doesn’t matter what exactly you want to make: a do-it-yourself wardrobe or an ordinary chest of drawers. In any case, such a design should have drawers, compartments and rods for maximum ease of use of the furniture.
Boxes must be implemented in the following sequence:
- Markings are applied to the plywood sheet.
- All necessary holes are drilled. (Important! There is no need to make slits at a distance of less than 100 mm.).
- The drawer fronts are made from an attractive material.
- All elements are firmly connected to each other.
- Special guides with “closers” are mounted on the drawers for more comfortable use of the furniture.
In addition to drawers, each furniture closet should have a clothes rail on which jackets, jackets, dresses, etc. can be hung. It is fixed using special elements to match the diameter of the rod pipe.
Facade
The cabinet facade should please the eye
Once assembled, the cabinet should not only be durable, but also beautiful. Moreover, it must fit perfectly into all the design solutions of the room. To implement this idea, you can use several methods.
First, all elements must be varnished so that the coating is as protected and durable as possible and does not lose its attractive appearance. Then, the following technologies are used to decorate the facade:
- painting in various colors using special paints;
- carving creation;
- gluing films;
- artistic painting;
- installation of special fittings.
Types of decoration
Mirror coating is considered the most popular way to decorate a wardrobe. It allows:
- emphasize the beauty of the interior;
- visually expand the room;
- add originality to the design.
Mirror decor is the most popular option for a dressing room
To make the door design as attractive as possible, you can use several additional improvements.
- To give the mirror a more interesting look, it can be covered with a special tint film. It will not affect the functions of the mirror in any way, but will add style to it. The reflection will be black, gray or even red. You can choose any shade.
- Using patterns you can create attractive compositions on the doors. Part of the coating will remain glossy, while the other will be matte.
- Photo printing is considered the most popular decor today. It allows you to apply absolutely any design to the mirror.
Example of photo printing on glass doors
Design time
From the moment the filling is determined, the cabinet is divided into separate zones using partitions. The classic filling approach gives the main role to the wardrobe part. There are shelves, a bar and hangers here. Next, the space is designed for household items: mop, broom, vacuum cleaner, ironing board and other means for putting the house in order.
Placing household household items in the hallway closet.
You can design the cabinet either yourself or use the services of Basis-Closet. Of course, the second option costs money, but the work will be done by qualified specialists. If you really want to, you can write everything out on paper yourself.
One of the options for arranging a closet in the hallway with the dimensions of the proposed shelves.
A built-in wardrobe has a great advantage: the main wall of the room serves as the back wall. Accordingly, there is no need to use too many parts.
It is easier and more profitable to make a built-in wardrobe in the hallway with your own hands, since it does not require many parts.
- The largest wall will be the side one, the height of the cabinet itself.
- 2 horizontal partitions (taking into account the number of doors there may be more).
- Other additional details (mezzanine for unnecessary things). Other shelves are made upon request.
Approximate drawing of a proposed hallway cabinet.
If in the future you plan to dismantle the built-in wardrobe, but not replace its ceiling, it is better to leave a small gap between the doors and the ceiling. It is better to cover the free area on top with a lid to prevent dust from flying into these cracks.
When doing drawing work, you should immediately record all the places where the edge is applied and determine its thickness. By the way, it is better to order the edge from the same place where you sawed the wooden profiles. Here a standard PVC edge will be glued to the entire visible area. Additional parts for joining with others do not need to be glued with an edge.
The choice of edge depends on the purpose of using the shelf.
Check the evenness of the walls in advance. Because if at the time of installation it turns out that the back wall is uneven, it will not be possible to level it with a jigsaw. And adding an additional PVC profile will only complicate the assembly process itself.
Do not forget to check the evenness of the wall with a level before installing the cabinet.
The place where the next laminated chipboard is cut definitely needs to be covered, as moisture can get into it. Melamine edge and U-profile are applicable here.
Covering the cut area with a U-profile is not only the main protection against moisture, but also provides a visual improvement to the element.
In order not to process the inside, it is better to worry about high-quality painting of wooden profiles in advance.
Detailing of drawers
Based on the example of the facades indicated above, it is not necessary to purchase a whole sheet of chipboard to assemble the cabinet. On sale you can find small furniture panels suitable for blanks for small drawers. In such specialized stores you can order cutting of parts. The above calculations were performed for chipboard with a thickness of 1.6 cm and an edge with an adhesive base thickness of 0.5 mm.
Fasteners and fittings necessary for assembling a drawer.
So, you will need:
- 5 facades 140x397 mm;
- 10 sidewalls of drawers 110x450 mm (30 mm are subtracted from the facade in height, their length is equal to the length of the guides);
- 5 front and 5 back walls of drawers 110x310 mm.
The width of the front and rear walls is calculated in this way. If the thickness of the chipboard for the cabinet is 16 mm, then its internal space will be 400 - (16 x 2) = 368 mm wide. Double check this value, it may vary.
The front and back elements of the box will be fixed between its sides, so you need to subtract 16 mm from the length twice. The guides will take another 2.5 cm. It turns out: 368 – (16 x 2) – 25 = 311. Subtract 1 mm of tolerance and get 310 mm. This formula allows you to calculate the dimensions of parts for a cabinet of any configuration.
Next, you need to secure the bottom to the box with self-tapping screws. For this you can use fiberboard. Bottom size – 340x450 mm.
Fasteners and accessories:
- self-tapping screws 4x16 – 0.5 kg;
- 4x30 self-tapping screws for attaching facades to drawers – 15 pcs.;
- confirmations 5x70 – 40 pcs.;
- full extension guides 450 mm – 10 pcs.;
- furniture handles – 5 pcs.
Peculiarities
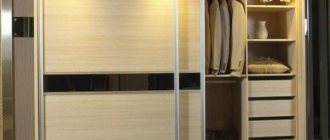
First of all, you need to decide which cabinet is suitable for your room. Modern buyers prefer sliding wardrobes because they are more functional.
Among their main advantages:
- Increased capacity and compact design. The furniture does not look bulky, but at the same time it can fit a fairly large number of things.
- A sliding wardrobe can be placed in a room of any size and shape. This piece of furniture can be skillfully transformed and adjusted to the characteristics of your room.
- Possibility of zoning the premises. Using this item you can visually divide a room into different zones. Most often, the room is divided into a work area and a relaxation area.
- Door mechanism. You do not need additional space to open the wardrobe.
- Convenient assembly. This can be done independently and without special skills.
In a house or apartment, any type of wardrobe, be it a compartment or a hinged one, occupies an important place. Thanks to this piece of furniture, it was possible to find a worthy solution to the issue of maximum functionality in a limited space
The main advantage of cabinets is the economic use of usable space in the room. They are multifunctional, durable and easy to use.
They are also an integral part of the apartment’s interior. As a rule, it occupies the entire space from floor to ceiling, eliminating the presence of hard-to-reach places where dust and dirt can accumulate. This allows you not only to extend the life of the cabinet, but also to preserve your health.
When designing this type of furniture, all architectural features of the room are taken into account. This allows you to use all corners, niches and other “dead zones”. The design of the cabinet allows you to store almost everything in it, even things of non-standard dimensions.
The greatest effect of using the usable space of the cabinet is achieved through the use of sliding door systems. This system is designed for durable and quiet operation.
The closet should be as spacious and functional as possible. When choosing a design, you can order the number of outdoor shelves, drawers, hangers, and baskets you need. At the same time, do not forget about free access to the contents of the cabinet.
The modern market for furniture materials allows the use of almost any type of material.