An innumerable amount of research has been carried out on the design of handles; many hygienists and designers have worked on their shape and size; theoretically, handles have long been brought into complete unity with all the requirements of anthropometry and ergonomics. Another thing - furniture handles and, in particular, kitchen handles
. For pens, very specific and quite stringent requirements have also been developed, the fulfillment of which provides some guarantee that the user, for example, will not break his finger. In all other respects, the design of the handles determines the design.
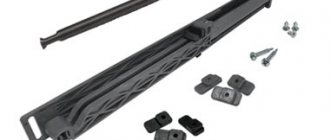
Installation of handles on kitchen facades dimensions
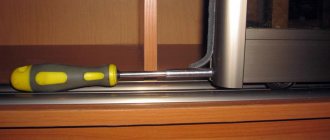
If you order a kitchen set, you can immediately make additives for handles on kitchen facades in production. This is convenient if, for example, you plan to install button handles, which are small in size and attached to the facade with one screw. But with handles-rails or handles-brackets it is a little more complicated; the fact is that on a sketch of a kitchen set it is not always possible to determine the best position of the handles, vertical or horizontal. If the handles in the kitchen are placed incorrectly, blocking of neighboring cabinets or cabinets may occur, this especially often happens on corner kitchen units. In such cases, apply a furniture handle to the facade and try to open it, but no obstacles should arise. Depending on the situation, handles on kitchen fronts can be arranged: all vertically, all horizontally, or combined. If you decide to install handles on the facades yourself, you will need the following tools to install handles : a square, a pencil or a marker with a thin rod, a screwdriver, a 4 mm or 5 mm drill and a screwdriver.
For more accurate and quick installation of handles on kitchen facades, you can use a furniture handle template. The template is a rectangular piece of thick paper or plywood with holes for fasteners. Thanks to the furniture handle template, you can quickly mark holes for fastening handles on all facades. Regardless of how you are going to make markings, with or without a template, the first thing you need to do is measure the center distance on the handle, although the manufacturer usually indicates it. Based on existing standards, the center-to-center distance of handles, this is the distance from one fastening to another, is always a multiple of 32. The most common center-to-center dimensions of furniture handles are 96 mm, 128 mm.
kitchen with handles and railings
When furniture handles are placed horizontally in the kitchen, it is necessary to measure the width of the facade itself, subtract the center-to-center distance of the handle from this width, and divide the remaining value by two. For example, a front with a width of 600 mm and a handle with a center distance of 128 mm. We get: 600-128 = 472/2 = 236 mm. It is necessary to leave 236 mm on both sides to the center distances of the handle. At the bottom you can leave a distance equal to the width of the ruler, this is approximately 20 mm - 30 mm, depending on the type of square. To do this, you need to align the outer edge of the ruler flush with the horizontal edge of the facade.
When placing furniture handles vertically in the kitchen, you can also use the width of the ruler. Place the outer edge of the ruler flush with the vertical edge of the façade. In this case, you can immediately use a ruler to measure the distance from the horizontal edge of the facade, for example, 20 mm. If you install handle rails vertically on kitchen facades, consider the distance from the horizontal edge of the facade to the edge of the handle, and not to the first mounting hole, as with the handle bracket.
horizontal and vertical installation of handles
Handle Installation Tool
For a wooden kitchen facade or MDF facade, use sharp step or core drills with a diameter of 4 mm or 5 mm. A drill with a diameter of 5 mm is used in the case when the shape of the handle during installation can block the hole, this gives more accurate positioning of the handle, the bolt can be slightly shifted in the hole. But there are forms of handles that do not cover the hole; in this case, it is better to use a 4 mm or 3.5 mm diameter.
Latch hole
The second stage involves drilling a hole for the latch. To do this, insert a pen drill with a diameter of 23 mm into the drill chuck and carefully make a recess perpendicular to the blade. There is nothing complicated here, you just need to make sure that the recess is even and then everything will be fine.
Kitchen Cabinet Handle Sizes
No registered user is viewing this page.
10 storage ideas for a tiny kitchen that are very easy to implement
10 small kitchens with a window sill-countertop
How to make your kitchen more comfortable without renovating or changing furniture: 11 smart solutions
- Construction and repair
- Foundation
- Roof
- Walls
- Window
- Doors and partitions
- Ceiling
- Balconies and loggias
- Internal structures
- Floor
- Water supply and sewerage
- Heating
- Ventilation and air conditioning
- Gas and energy supply
- Lighting
- Plumbing equipment
- Security and home automation
- Baths, saunas, swimming pools
- Construction Materials
- Decoration Materials
- Tools
- Technique
- Laws and finance
- TechnoNIKOL
- Design and decor
- Apartment
- Bedroom
- Kitchen
- Dining room
- Living room
- Bathroom, toilet
- Hallway
- Children's
- Attic
- Small rooms
- Workplace
- Wardrobe
- Library
- Decoration
- Furniture
- Accessories
- Vacation home
- Landscape
- Redevelopment
- Catalog of houses
- Magazine
- News
- Events
- about the project
- Advertising on the website
- Advertising in a magazine
- Terms of use
- Contacts
- about the project
- Advertising on the website
- Advertising in a magazine
- Terms of use
- Advertising on the website
- Advertising in a magazine
- Terms of use
- Contacts
Are you a professional architect or designer?
IVD. Repair and finishing
Are you a professional architect or designer?
The IVD.ru website is a leading Internet project dedicated to the issues of reconstruction and interior design of residential premises. The main content of the site is the archive of the magazine “Ideas for Your Home” - exclusive author’s articles, high-quality illustrations, practical tips and lessons. A team of professionals is working on the project in close collaboration with famous designers, architects and leading publishing experts.
On our website you can choose comprehensive design solutions; view detailed reviews of the market for construction and finishing materials, furniture, machinery and equipment; compare your own ideas with design projects of leading architects; communicate directly with other readers and editors on the forum.
Facades with push-to-open mechanism
The third option to make a kitchen with facades without handles is to use PUSH-TO-OPEN opening mechanisms (also called “pushers”). The best quality mechanisms, in our opinion, are produced by Blum (Austria). We use them in the production of our kitchens.
To make it easier for you to understand how it looks and works, watch our short video demonstrating a facade with push-to-open opening:
There are two types of opening mechanisms:
- invoices
- mortise
There is no difference in price and quality, it’s more a question of aesthetics (as you like) and the complexity of installation: the invoice just needs to be screwed to the inner wall of the box with self-tapping screws, and for a mortise one you need to make a hole in the end of the box with a diameter of 10mm.
| Push-to-open overlay mechanism | Push-to-open mortise mechanism |
Thus, we take the fronts, put a push-to-open mechanism on the cabinet body and get furniture with fronts without handles! It is advisable to use facades with a soft-touch coating to reduce fingerprint marks.
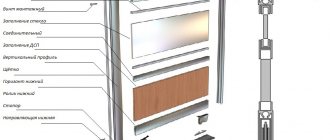
Material
Materials for making furniture handles:
- Zamak is a lightweight, corrosion-resistant material consisting of an alloy of zinc, aluminum, and copper. It's inexpensive, it's all about manufacturing technology. Mainly used in the production of pens in China.
- Plastic is a type of polymer that provides products with reliability, variety of shapes, and lightness. Such handles for cabinets in a nursery look impressive.
- Ceramic is a reliable accessory to use, since it is based on metal, and the ceramic coating itself is used to give it an interesting shape. It is used to decorate cabinet fronts not only in classic, but also in modern design. Manufacturers: Türkiye, Italy, China.
- Wood - such a handle is not only functional, but also beautiful; it looks especially stylish if it is artificially aged. Wooden fittings are relevant for classic, rustic style.
- Metal with galvanic coating is resistant to corrosion; the higher the quality of the galvanic coating, the more durable the product. In the production of accessories, galvanization is carried out after the threads for fasteners have already been cut. This is a guarantee that over time the fastening points will not rust.
Types of furniture pipes, nuances and tips for their use
Tsamak
Plastic
Ceramics
Tree
Metal
Furniture templates and jigs for fittings
To install lifting and sliding mechanisms, as well as four-hinged furniture hinges, handles and other fittings, the principles of system 32 are also used, which implies an initial distance from the front edge of the edge of 37 mm, followed by fastening with screws in increments of 32 mm.
Markings for installing handles
Any handle is installed either in one hole (handle-button) or in two holes, which are located relative to each other at a distance that is a multiple of 32mm. Furniture jigs for handles allow you to quickly mark the holes for handles, with a selected distance from one or two edges of the facade (if the handle is installed in a corner).
Here it is necessary to take into account the decorative design of the handle. It often happens that a handle is installed in a standard 96, 128 mm base, but at the same time it takes up much more space due to protruding decorative elements.
Marking for fastening furniture hinges
Regardless of what type of furniture hinge, the scheme for attaching its arm to the side of the cabinet and installing the bowl on the facade will be carried out absolutely the same way. The only exception, perhaps, is special hinges for thick facades, which is understandable. For all other overhead, semi-overlay, inset, corner and other furniture hinges, you can use a standard furniture template. As a rule, it has additional markings for internal hinges, which are installed deeper along the body, taking into account the thickness of the facade.
The furniture hinge jig should be applied to mark the fasteners taking into account the thickness of the edge. However, the standard hinge adjustment play of 2 mm, if necessary, allows you to press the facade against the body or move it away if necessary.
There is one important nuance when implementing a push-pull opening system: when installing pushers on the facade, it is necessary to take into account the technological gap of 3-5 mm between the body and the facade. It is due to this that the push to open push mechanism is activated. This means that when marking fasteners on a furniture jig, the loops should not be “planted” so deeply.
I advise you to always take into account the peculiarities of installing mechanisms on all facades in the general range of furniture. For example, when combining swing and pull-out elements, the push-pull opening on drawers is most often set with a gap of 4 mm according to the manufacturer’s recommendation.
This means that furniture hinges on hinged facades must also be installed taking into account a gap of 4 mm, to make it easier to align all doors in one plane.
Marking for drawer guides
Taking into account the above-mentioned nuance of installing retractable mechanisms that are activated by pressing, the standard markings according to system 32 are the same for almost all guides. Furniture guides for drawer guides can be reversible, but most often they are offered as a set of two rulers for the left and right sides or one double-sided ruler.
How to determine height?
In the first option, they consider the possibility of focusing on family members, that is, on the height of the household member, who is considered the average of all those living in the house. Having decided who in the family is of average height, you need to place this family member close to the door with his arms down. Directly at wrist level plus an additional 200 mm up and there should be a point of acceptable height at which the handle on the interior door will be installed.
The second option, which allows you to solve the issue of mounting a door handle, will be the following: you need to do the same steps as described above for the first option (you need to select one of average height from all household members and attach it to the door leaf). However, this time the mark must be made not at a distance from the floor to his wrist, but to the level of the elbow joint. In this case, there is no need to make any additional shift from the resulting marking.
Measurements can be made using the first and second methods - in the end you will get almost the same result, but with a slight difference.
DIY façade installation instructions
Having chosen the right time and prepared the tools, you can begin installation. However, during the installation process they often encounter unpleasant nuances that can delay the installation of the facade indefinitely.
Let's consider installation features that are best taken into account before starting work.
Stage #1 - determine the dimensions of the decorative panel
To find out the exact dimensions of the facade panel, you do not need to make calculations or draw diagrams - the manufacturer did everything for us. The instructions indicate all the indicators of interest - length, width, thickness, allowances.
The width of the panel often matches the width of the dishwasher, since the door on the sides follows the parameters of the body. For example, for standard 60-centimeter models it is usually 598 mm, for 45-centimeter models – 448 mm (there are exceptions).
However, the height may vary. This depends on how the front of the adjacent kitchen cabinets is positioned.
It is allowed to use a panel a few mm longer than the recommended length if the interior requires it. The main thing is that the extra millimeters do not interfere with opening the door at a right angle.
If the overlay touches the base, then it is left unchanged, and the edge of the base is cut out along the contour of the facade.
Stage #2 - choose the right fixation method
It is prohibited to ignore the manufacturer’s recommendations and experiment with methods of attaching the lining. If you fix the facade in your own way, it may fall off or “move” to the side over time.
If you use nails instead of self-tapping screws, you will definitely have problems with dismantling. Expensive appliances last for decades and can “outlive” your kitchen set.
To replace the trim with a panel from new furniture, you will have to rip out the nails with the risk of deforming the surface of the door.
It is a mistake to fix the facade with glue . Two extremes can occur: either the glue will quickly lose its properties due to temperature changes, or it will “tightly” fix the pad to the machine. Both options are impractical.
Marking and fastening to swing doors - stages
1. The door is placed on a table or any flat surface. 2. Count 5 cm from the corners (edges) and place a dot in the places where the handle should be located. 3. Two mutually perpendicular lines are drawn through the points. The location of the first fastening is considered to be the point of first intersection. Be sure to use a square when drawing, applying it to the edges of the door. 4. The distance between the mounting holes is measured on the handle. 5. The distance between the holes is transferred from the intersection point. When installed horizontally, the displacement is carried out to the side, when installed vertically - downwards. The second attachment point is indicated. 6. Drill 2 mounting holes on the front side of the door. This operation should be performed as carefully as possible. 7. Mounting screws are inserted from the rear side. A handle is mounted on the front side. Screwing is done with a screwdriver.
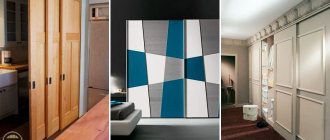
Kitchen without handles: pros and cons
A kitchen with smooth fronts without handles is one of the trends in modern interiors. Furniture of this type is easy to fit into a design project in eco, minimalism, loft, and modern styles.
Other advantages of handleless fronts:
- They are convenient even in narrow passages and in the kitchen work area, where protruding handles make it difficult to move freely.
- The kitchen visually seems more spacious and lighter.
- They make it easy to maintain cleanliness: it is enough to occasionally wipe the smooth surface with special cleaning compounds. The presence of handles slows down cleaning because dirt usually accumulates around them.
- Ideal for corner modular kitchens where cabinet doors may touch each other when opened. If there are no metal handles, then the risk of damaging the facades is eliminated for any arrangement of cabinets.
There are also disadvantages, but they are few. Firstly, kitchen elements with closers or a push-open mechanism may periodically require repairs, because they are technically more complex than simple cabinets with handles. And secondly, the cost of furniture with smooth facades is usually higher than that of classic options. Before choosing a kitchen, it is important to weigh the pros and cons, but overall, this is a convenient option.
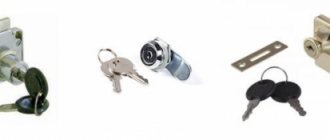
Mortise
Curly duralumin slats are built into the horizontal end cutouts at the top of the floor and bottom of the wall-mounted front panels of the cabinets. Insert the drawer handles into the slots in the center of the facades. In some cases, the handle needs to be moved a little closer to the top edge of the drawer panel. Make cutouts in the fronts of doors and drawers for slatted handles using a hand or machine router.
If the mortise handle has a round shape, cut out the cavity for it with a special toothed crown.
Guys, we put our hearts into Bright Side. Thank you for revealing this beauty. Thanks for the inspiration and goosebumps. Join us on Facebook and VKontakte
The kitchen is a place where we spend quite a lot of time every day. That is why it should be comfortable and beautiful at the same time.
Bright Side offers a look at the main design mistakes that spoil the appearance and functionality of the kitchen.