In order for the finishing layer of paint or plaster to last on the wall as long as possible, it is recommended to cover the wall with a layer of primer before starting finishing work. In construction supermarkets today there are a large number of different types of primers from different manufacturers on sale. However, not everyone knows how to make a primer with their own hands, the cost of which will be an order of magnitude lower than that of a ready-made one.
Return to content
Making your own primer at home
Before further finishing, the surface is treated with a layer of primer to create a reliable fastening. The construction market offers a large number of available ready-mix options. Do-it-yourself primer is in no way inferior in quality to store-bought counterparts if used correctly.
Is it possible to make your own primer at home?
The soil not only improves the adhesion index, but also extends the service life of the product as a whole. This is a liquid mixture that is distributed evenly over the surface. As it dries, a protective film is supposed to be created, on which other materials are then laid.
The answer to the question of whether it is possible to do primer at home at all will be positive. It is enough to study the composition of store options, and then get the components for free sale.
The only exception may be wood processing; in this case, it is better to refuse homemade options. Next, we’ll tell you how to make a primer from PVA glue.
Homemade primer versus store-bought primer, which is better?
Materials include simple substances in the composition. They are freely available and much cheaper than buying a ready-made mixture. All you have to do is follow the recipe and make sure the proportions are correct.
Materials include simple substances in the composition.
Classification and methods of cooking at home, what components are needed
Coatings without proper treatment do not retain any materials. Such compositions are especially important for bases where several materials are present at once. Each variety has its own purpose, but there are some differences when making your own primer for walls.
Coatings without proper treatment do not retain any materials.
For painting
Here you can also use PVA glue. If everything is done correctly, a film is formed that is almost invisible from the outside. The main thing is to make sure that there is not too much glue when adding to the water. Otherwise, over time, such a surface deteriorates, parts separate from each other. Even if it's drywall.
Quick priming is a must even for those who have no experience in such work. It is recommended to follow these tips for better results:
- Before treatment, remove all dirt and old paint and varnish materials from the surface, if any.
- The mixture is poured into a special container; application involves the use of brushes or rollers. Then the convenience will be maximum. The first step is to process corners and hard-to-reach surfaces. The craft gives results immediately.
- Movements go from top to bottom.
- The second layer is applied only when the first one is completely dry. Then the clutch will become more reliable, and it will be easier to move on to other decorative work. The paint spreads without problems.
If there is not enough solution, prepare a new one. Only the container needs to be thoroughly cleaned, otherwise lumps will appear. Priming will not work effectively. When applying primer, it is recommended to avoid using sprayers; this will increase the risk of damage to the primer.
The second layer is applied only when the first one is completely dry.
Any solutions prepared independently are stored for one day, no more. Otherwise, the original qualities are lost and painting is impossible.
The walls are covered with compounds after completion of all primary work. When repairing and restoring elevations, soils will be needed to increase the strength of the foundation. For preparation, you can use any of the recipes described above.
Such materials are suitable for bricks that have begun to crumble. Copper sulfate can be easily purchased by visiting gardening and gardening stores.
Hardware stores will help with the rest of the components; they can also be applied to the floor.
The walls are covered with compounds after completion of all primary work.
The need to visit stores does not always arise if the required type of primers is not available. It’s easier to gather available ingredients on hand to prepare the mixtures yourself.
Their quality is no worse than other analogues. The only drawback is the shelf life, which is only a day. Without its observance, one may not think about the long-term preservation of the original qualities.
Only the liquid form of the primer qualitatively fills all the pores on the surface, this should also be remembered.
Application Features
Priming walls can be done quickly even if there is no relevant experience. To ensure quality work, it is recommended to follow the following rules:
- Before priming, it is necessary to prepare the working surface, namely, clean it of old coating, paint, dirt and dust.
- For convenience, pour the mixture into a special container and treat the walls with a brush or roller. First of all, corners and hard-to-reach areas should be treated.
- Movements should be from top to bottom.
- After the first layer has dried, apply the second. This will ensure reliable grip and allow you to move on to decorative work.
If there is not enough primer, then before preparing a new one, you must thoroughly wash the container to clean it of the old mixture. If this is not done, lumps will appear.
Do not use spray when applying primer, otherwise all furniture and other interior items will be damaged.
If during the repair process you don’t have a primer on hand, then you shouldn’t immediately run to the store. Make the mixture at home. If you strictly follow the recipe, you will get a quality product. Easy to prepare – deep penetration primer based on PVA. The main condition in the process of its creation is compliance with the proportions specified in the recipe.
What materials to use after PVA primer
After applying a primer made from PVA glue, different types of finishing can be produced. A thin protective film seriously reduces paint consumption and makes it easier to apply. This primer is ideal for acrylic and latex paints, as well as alkyd enamels.
After priming the walls, you can paste them with wallpaper: paper, vinyl, non-woven, using any wallpaper glue. To increase the strength of the connection, PVA is also often added to the glue. The primer composition is suitable for ceilings that are planned to be finished with polystyrene foam tiles: the degree of adhesion will increase.
Choosing a base for priming
When performing construction work, the importance of priming cannot be underestimated. How to prepare a primer from PVA glue? A special composition penetrates into small cracks and crevices, makes the surface smoother and more even, and improves adhesion. After applying the primer, you can use any paint and varnish materials and glue wallpaper to the walls.
Thanks to the use of the base, it is possible to achieve savings in expensive paints and enamels.
Why use a primer
Before you start preparing this mixture, you need to figure out what exactly it is for and what it is. Yes, such a solution can be different - each type can be used to improve the properties of a specific surface. The main purpose of using a primer mixture is to enhance the adhesion of the finishing material and the base. If you carry out repair work without using a primer, the finish will last a significantly shorter period.
Moreover, some types of paints simply cannot adhere to an unprepared substrate, especially if it is smooth. This is why you need to use a primer - to give the base the necessary properties.
Priming is a mandatory stage of preparatory work, which affects the quality of the entire finish.
Regardless of their composition, all primers perform the following tasks:
- improve adhesion between the base and the material;
- prevent cracking of the bottom layer;
- reduce glue consumption during wallpapering;
- protect walls from excess moisture;
- allow you to level out deformed areas.
General information
First of all, let's look at what a primer actually is and why it is needed. So, this is a special liquid that is applied to the base before applying the finishing material - plaster, putty, paint, etc.
What is it used for?
There are several reasons:
The composition improves adhesion, which is especially important for smooth surfaces.
Strengthens the base, which may be necessary for a loose, crumbling surface. The primer can reliably glue even dust.
It closes pores and thereby reduces the consumption of finishing material, and also ensures its uniform absorption, thereby eliminating the possibility of stains on the painted surface. In addition, primers may have additional properties, for example, anti-corrosion or antiseptic
In addition, primers may have additional properties, for example, anti-corrosion or antiseptic.
What destroys a tree?
Wood is an extremely unstable material that is destroyed due to exposure to external factors. We are talking not only about cases where houses are built entirely from wood, but even about furniture. The main reasons that contribute to the destruction of wood are:
- clay bacteria;
- fungi;
- grinder beetles;
- moisture.
Clay bacteria can weaken the structure of wood in a short period of time, and fungi, even after they are removed, leave dark spots. A humid environment produces mold spores that destroy wood products. In addition, mold can cause deterioration in human health.
Fortunately, you can increase resistance to such external factors with the help of special antiseptics. They must be used at every stage of house construction, as well as:
- during the production of lumber;
- during the production of furniture, building materials from wood;
- at high humidity.
Useful tips
Recommendations from experts on the use of homemade soil composition.
- It is best to treat the wall surfaces with the solution using a roller, dipping it into a special plastic tray, which, due to the presence of a large number of ribs, will not allow the roller to absorb a large volume of the liquid composition.
- When wallpapering walls, you can use a composition made from wallpaper glue to prime the surfaces. The properties of PVA and wallpaper glue are almost identical. They can provide good strength and sufficient penetration. Moreover, when using wallpaper glue as part of the primer, you do not have to wait for the composition to dry out. The wallpaper is glued directly onto the primer.
- Professional builders advise applying the primer layer in one wide motion from bottom to top. It is necessary to try to apply the primer so that the roller does not pass over one area several times, otherwise the layer will turn out to be uneven. To make the overall layer as dense as possible, you need to let the first layer dry completely, and only then apply the next layers on top of it.
Taking into account all the advantages and disadvantages, all that remains is to determine whether a self-prepared primer is suitable in each specific case or not. Professional solutions can provide protection against the effects of fungi; they do not separate, but the cost of purchasing them is much higher, in contrast to similar mixtures made at home.
Primer for walls. Kinds
The primer can be made on different bases and from different components. Based on this, there are several types of this building material: acrylic, mineral, quartz, alkyd, phenolic primer.
Let's take a closer look at each type of primer:
- Acrylic. The main component is acrylic polymer. This mixture is suitable for bases made of brick, cement, concrete and wood. Acrylic primer can be water-based for treating walls with water-soluble emulsion paints and enamels. The undoubted advantage of this material is the complete absence of odor and good drying speed. In just 2 hours the surface will be completely dry and you can begin the next stage of repair work.
- Mineral primer is made with the addition of lime, gypsum or cement. It is used for processing brick, concrete, gas silicate brick and plastered surfaces. The packaging should indicate for what type of substrate the mineral primer can be used. After treatment, the coating will dry in 2 hours.
- Quartz primer. The main component is sand. An ideal product for improving adhesion, since after treating the wall a rough layer remains on the surface. An ideal material for working with decorative plaster and paint.
- Alkyd primer - it contains phosphate and zinc chromate, which prevent the formation of rust on the surface. This primer is suitable for treating wooden surfaces, glass, metal and ceramics. Alkyd primer should not be used on plasterboard or concrete walls. It takes a long time to dry, so you will have to immediately be patient and take a break of 12-15 hours after applying the primer.
We have listed the main types of primer. In the construction supermarket you can see a large selection of different primer mixtures. Remember that they are all divided into 2 groups:
- Adhesive.
- Strengthening.
Therefore, in order to make the right choice, you need to decide on the type of finishing material.
Drying time
Many people are interested in the question of how long it takes to glue wallpaper after priming.
This directly depends on the percentage of water in the mixture. Other indicators are also important: the optimal temperature in the room is 20 degrees Celsius, atmospheric humidity is 70%. It is best to follow the drying times indicated on the label, since with a similar name from different manufacturers, the solution may contain special substances that affect the drying speed. Approximate drying times for different materials are presented in the table.
| View | Surface | Time |
| Concrete contact | All | 6 hours |
| Latex | All | 40 min |
| Universal acrylic | concrete | from 1 to 3 hours |
| drywall | 12 h | |
| brick | from 6 to 8 hours | |
| plaster | from 2 to 4 hours | |
| Deep penetration primer | All | 24 hours |
| Mineral | concrete | from 2 to 6 hours |
| Alkyd | tree | 10-12 h |
| metal | 10-15 h | |
| Glyphthalic | metal | 24 hours |
The main mistakes made when drying:
- drafts - open windows and doors will cause uneven drying;
- using a hairdryer or heat gun - the outer layer of the mixture will dry faster than the inner one;
- temperature changes - the lower the temperature drops, the slower the material dries.
What soil is needed for seedlings: soil composition
The soil for seedlings often includes sand. It is best if it is clean river sand that does not contain clay. It is enough to sift it to clear it of stones. Soil containing sand never forms a surface crust, which is a big plus.
When preparing soil for seedlings, refrain from using quarry sand, since it always contains clay and may contain toxic impurities such as iron or manganese salts (the brightness of the color of the raw material indicates their presence), which negatively affect plants.
In recipes for mixtures you can find manure or mullein. If you grow seedlings in an equipped greenhouse, there are no contraindications to their use. In the event that we are talking about residential premises, this issue must be approached with knowledge of the matter.
Manure happens:
- fresh, in which the straw is clearly visible;
- half-rotted, the straw is still visible in it, but it has already darkened and is easily torn;
- rotted, representing an almost homogeneous (homogeneous) mass;
- in the form of manure humus. This is the best option, since in such manure the nutrients are in the form that is most accessible to plants.
What kind of manure for soil is better when growing seedlings in a residential area? At home, only manure humus can be used as a component of the soil mixture, which is good not only from the point of view of hygiene and aesthetics, but is also beneficial to plants.
When preparing soil for seedlings, compost is also used, which still needs to be properly prepared, since the pile in the corner of the plot, consisting of food waste and weeds, has absolutely nothing in common with a real compost pile. If heating is not provided during its preparation, then plant debris and everything else that is usually put into compost will simply slowly decompose, losing nutrients and accumulating harmful microorganisms.
Coconut substrate for seedlings
Gardeners have recently been willing to use home-made coconut substrate as seedling soil, which is environmentally friendly, consisting of 70% coconut fiber and 30% recycled coconut palm husk. For seedling soil, coconut substrate can be mixed with peat in a 1:1 ratio. If you do not include peat, you will have to periodically fertilize with a weak solution of fertilizers.
Using a coconut substrate, a favorable breathable environment is created for the formation of a powerful root system of seedlings. The coconut mixture gives clay soil looseness and increases the moisture capacity of sandy soil. This substrate can also be used as mulch, protecting the soil from overheating and drying out.
Seedling soil from coconut substrate is prepared according to the instructions on the package: 1 kilogram of substrate is designed for 15 liters of water.
To obtain, for example, 4 liters of soil, you need one and a half liters of warm water, where you should put a briquette of the substrate and give it 10-15 minutes to swell. After this time, the briquette will increase many times in volume and become loose and porous. It can be used as soil or included in seedling potting mix.
How to make a primer with your own hands?
Surface priming is a very important process in construction and repair. Don't forget about him. Sometimes you can make your own primer. This way you can save your money.
Peculiarities
Primer mixtures are auxiliary finishing materials. Their purpose is to modify the properties of the surface on which they are applied. In this case, various goals can be pursued, such as improving the protective properties of the material, for example, moisture resistance, protection against corrosion, or enhancing adhesion between the surface and the finishing material subsequently applied to it.
Thus, the use of a primer significantly affects the quality of finishing work, their strength and durability. Moreover, the various properties of primer mixtures depend on their composition.
Primer requirements:
Strengthening adhesion. Different types of surfaces - wood, brick, metal, concrete - have different properties, as a result of which the strength of the connection with different finishing materials varies greatly. To ensure strong adhesion of the decorative finish to the base, a primer is used. It strengthens the bond between materials at the molecular level, creating an “alloy” of contacting surfaces and the primer mixture in the boundary layer.
Increased moisture resistance. Some materials are porous in structure, such as wood or concrete. Moisture can accumulate in their pores and eventually lead to the destruction of the material. To prevent such phenomena, the working surface is treated with a primer solution, which fills these micropores and saves the material from damage.
As a result, two positive effects are achieved at once:
- waterproofing increases, since water can no longer penetrate the surface,
- the consumption of glue, paint, varnish or other finishing material applied to the treated surface is reduced due to the clogging of micropores with a primer.
- Strengthening. The primer mixture creates a protective layer on the surface that absorbs the effects of an aggressive environment. The nature of the protective properties is determined by the specific composition of the primer and can vary depending on needs.
- Antiseptic protection. To prevent fungus and mold from multiplying in places with high humidity, the primer mixture includes an antiseptic that prevents the activity of harmful organisms.
Homemade primer mixtures are divided into several types according to their main purpose. Unlike factory primers, homemade ones do not contain additional synthetic additives that expand their functions in several directions, but perform one main task. Thus, all homemade primer mixtures can be divided into the following types:
Strengthening. This type of mixture is designed to increase the strength of the surface being treated, such as a plasterboard wall or ceiling. Such primers are widely used in old houses, especially with wooden supporting structures, where it is not possible to replace beams or wooden floors that have begun to deteriorate over time.
How to make a primer with your own hands?
The primer can be made at home with your own hands. How to make a primer for walls using PVA glue? What are the requirements for a primer? What types of primers exist on the construction market?
Primer to increase strength
This mixture is used when it is necessary to insulate walls and ceilings in an old room. Often, in old houses, bricks can crumble, but there is no point in dismantling and building new walls, since they are still quite strong.
It is in this situation that a primer is used, which can strengthen the base. In addition, according to this recipe, the material can be used for a concrete base.
Use the container to which vitriol will be added only for household purposes.
To prepare you will need:
- wood glue – 500 ml;
- copper sulfate – 100 g;
- laundry soap – 1 pc.
It should be noted that copper sulfate is sold in gardening stores. During cooking, only enamel utensils are used, which will not be used in the future for cooking. Other species may react when cooked.
Do-it-yourself primer for walls is prepared as follows:
- 7 liters of water are poured into the pan, after which it is brought to a boil.
- While the water is warming up, you should grate the soap, and while boiling, add it to the water. The fire should be kept to a minimum and while pouring out the soap, constantly stir the water with a wooden object.
Stir the solution with a wooden spatula - After dissolution, wood glue and vitriol are added.
- After stirring the liquid, leave the pan on low heat for another half hour. It is important to stir the contents every 5 minutes to prevent lumps from appearing.
- After half an hour, the liquid is filtered using gauze, and then left to cool.
Once the mixture has cooled, it can be applied to concrete and brick walls. It will prevent the appearance of fungus and mold, which means it is ideal for cellars, roofs, and bathrooms.
If, while preparing the mixture, lumps have formed, they should be broken up using a mixer, and only then can the composition be strained.
Advantages and disadvantages
Construction stores offer a huge selection of high-quality primers, but they have a considerable price. How to prepare a primer from red lead? It will be much cheaper to prepare the primer yourself.
A homemade primer solution is based on the use of PVA construction adhesive.
PVA glue provides the following functions of a regular commercial primer, such as:
- increased adhesion;
- sufficient water resistance;
- If antiseptics are added to the solution, antibacterial properties will also be present.
But, despite these advantages, such a primer solution may peel off from the surface over time due to improper mixing of the glue with water. Also, the glue turns yellow after a while, and these spots appear on the front side of the decorative coating. This can be avoided by applying a thick layer of finishing coat (such as paint).
Thus, if external beauty is not very important, or if expensive wallpaper or paints will not be used, then a self-prepared primer based on PVA glue will be very useful.
Deep penetration soil
PVA mixes well with other substances, forming a reliable, high-quality solution.
The deep penetration mixture is the most popular among other types. To save money, you should know how to make a primer for walls with your own hands. It will contain PVA glue, which is widely used in construction and we are talking not only about wood, but also about adding glue to other mixtures, for example, adding it to cement allows you to achieve high ductility and hydrophobicity.
For the primer, only PVA construction adhesive should be used. It should be used only as an additive to the solution, and not as a base. A very large amount of glue leads to the fact that after drying it will create a film on the wall that will begin to peel off along with the finishing materials.
The primer should lie evenly on the walls
To prepare a high-quality primer you need to use:
- PVA glue – 1 l;
- water – 8 l;
- cement - 1 trowel.
Cooking technology:
- The glue must be mixed with water and, stirring, until the consistency is smooth.
- Next, cement is poured in and mixed thoroughly.
- At the end, the primer is filtered using gauze, and then the mixture can be applied to the walls.
Cement can be replaced with chalk in powder form. After applying the solution to the wall, the material should lie evenly and leave barely noticeable white marks. For more information on preparing a deep penetration mixture, watch this video:
Initially, glue should be poured into the container, and then water should be added to it, actively mixing everything.
Before applying homemade primer to walls, it is recommended to test it in an inconspicuous area. After it dries, no film should appear; only in this case can the solution be used for further work. If a film forms, the primer is diluted with plain water.
Why do you need a primer for walls?
When getting involved in renovations for the first time, people do not pay enough attention to the primer, because they do not know the characteristics and do not suspect how big its role is in finishing. Therefore, the building mixture is often ignored, but in vain. If the base prepared for wallpapering is left without a primer layer, it will be rough; this flaw can only be noticed upon close examination. Such defects are the reason for the violation of the smoothness of the wallpaper and the unpresentability of the premises.
But the purpose of the building mixture is not only to achieve a flat surface. It is successfully used for other purposes, depending on the type and composition of the material used. The advantages of primer are that it:
- gives a smooth and high-quality base;
- makes the surface strong and durable;
- facilitates easy application of coloring and other substances;
- masks wall defects;
- Makes glossy finishes shine.
A well-executed wall primer eliminates the smell of paint and prevents the appearance of mold in the future.
Priming different surfaces, answers to questions
Different surfaces are primed using the same technology, or with a brush or roller, depending on the curvature of the surface. For example, a brick wall is quite difficult to prime with a roller, so the entry point is a large brush.
Do I need to prime the walls before plastering? Necessarily! To improve adhesion to the surface. And if the wall is made of smooth concrete, then we must prime it with concrete contact (adhesive composition).
Do I need to prime the walls before applying putty? Before any type of finishing, you need to prime the surface and wait until it dries completely.
Does drywall need to be primed? Drywall also needs to be impregnated with soil. Its technical characteristics are improved, the surface becomes an order of magnitude stronger. According to the technology for finishing gypsum boards, a mandatory procedure is the priming of non-factory seams; only after complete drying can you begin to putty them.
Here's the most basic information you need to know about properly priming walls. We will talk about other types of surface priming in other articles.
Making a primer
Components for homemade primers are available on any construction market. This composition is made quickly, it is immediately ready for use
The most important thing in the manufacturing process is the correct proportions. Each recipe written below will help you understand how to make your own primer.
Deep penetration composition
You can make a deep penetration primer as follows:
- Pour glue into the container, add water to the glue and mix until smooth.
- Add cement or chalk powder to the suspension.
- Strain the resulting mixture through a gauze bandage.
In the video: primer made from PVA glue.
Strengthening
The primer composition is made as follows:
- Bring water to a boil and add grated soap into it.
- Reduce heat and pour glue and copper sulfate into the pan.
- Keep the mixture on the fire for 30 minutes and stir.
- Strain the mixture through a gauze bandage.
Wood mixture
Preparation method:
- Pour alum into 3 liters of boiling water.
- Dilute the glue with the remaining water.
- Put the water with glue on the fire and add soap, drying oil and water with alum to it.
- Mix thoroughly, add chalk and mix again.
What is a primer?
Before you start painting the walls, it is necessary to properly prepare it for further processing. A primer is a special composition that is used to strengthen the surface being treated and helps improve the characteristics of the wall. By using a primer, the paint will apply more evenly and adhere better to the surface, which will generally have a positive effect on all work done. The material may have a different composition, which will affect the final characteristics and properties of the product. Therefore, before purchasing, you should carefully familiarize yourself with the different compositions in order to choose the most suitable option.
Composition and why it is necessary to prime walls
Manufacturers also add pigments and drying accelerators, various additives that improve the characteristics of the finished product. Primers do not have any decorative properties and can be used under finishing materials. In some cases, in order to make the cladding process simpler, the mixture can be additionally tinted.
On sale, the primer can be in the form of a ready-to-use composition or powder, which you will need to prepare yourself according to special instructions offered by the manufacturer. Depending on the surface for which the mixture was made, it may have a different composition. Moreover, this material has the same characteristics and performs the same functions in each case. The main ones include the following:
- Help strengthen the surface. That is why primer is especially often used to treat loose, porous or uneven substrates. If the wall is not strong enough, then preference should be given to a deep penetration primer, which can penetrate into the material and strengthen it. It is worth noting that conventional compounds can penetrate only 2-3 cm into the wall. In turn, deep penetration products impregnate the base to a depth of 10 cm.
- Improves the adhesion rate with finishing materials several times. This function is the main one. The material also allows you to remove various types of unevenness, defects and roughness, and reduce the absorbent properties of the wall. This reduces the consumption of finishing materials. Of course, at first glance it may seem that some surfaces do not need to be primed, but this will cause additional costs. Those walls that have been pre-primed require the use of a minimum amount of finishing materials. At the same time, they will be applied better and last longer without the formation of cracks and other defects.
- Protects walls from moisture. Primers are also used to protect against the formation of mold and mildew, rust and other similar damage.
Manufacturers today can offer a huge selection of compositions to perform a variety of tasks and for different surfaces. When choosing a suitable mixture, it is worth considering the exact conditions in which the work will be carried out, what walls are being processed and what functions the primer used should perform.
Technology
I have good news here. Priming walls for painting, unlike other stages of repair, does not require special skills and is the least labor-intensive process. Primers are sold in cans of various sizes in liquid form. Usually these are 1L, 3L, 5 and 10L.
Their consumption is small, and the remains can always be applied with an additional layer. How many coats of primer should be applied to the walls before painting? Nothing bad will come of this. The tools you will need are a convenient container (usually a paint tray or bucket), a roller (preferably with long pile), a brush and a brush.
For high walls, prepare a comfortable handle. This could be a long branch, a mop, a fishing rod or any other handy item.
A small amount of primer for walls for painting is poured into the selected container. Then, dip a brush or roller into the liquid and carefully apply it to the wall. Don't forget about safety rules.
The primer splashes a lot, so take care of your face and wear work clothes and a hat. Washing primer from your hair is not the most pleasant thing. It is much easier to wash it off from areas of the skin with a small amount of water or by wiping it with a wet cloth.
When applying primer to a wall, you will most likely experience drips. This is not very scary, but still try to avoid them so that the work looks neater. A brush can be used to treat corners and other narrow areas.
For priming high walls, place the roller or brush on the holder and continue working.
It is important that the roller sits firmly on the holder, otherwise you risk getting injured from it falling. After the primer for walls for painting has completely dried, you can apply a second coat.
Before carrying out further work, make sure that the wall is completely dry.
If painting begins with a wet primer, it will begin to fall off along with pieces of plaster and mix with the paint right on the roller. Then it will stretch along the entire wall. Then you will have to start all over again, completely cleaning the wall.
Enjoy your renovation, easy preparation and excellent results!
Tips and tricks
Self-prepared primer retains its technical characteristics and provides high-quality coverage only within 24 hours from the moment of preparation. Therefore, you should not make a large amount of primer solution at once. In general, it is advisable not to delay treating the surface with a homemade mixture.
If you don’t have PVA construction glue, you can purchase carpentry or office glue. But it is still recommended not to experiment and use construction adhesive suitable for these purposes.
To stir the primer solution during the manufacturing process, it is better to use a special construction mixer. If you have to work with a regular mixer, then after stirring it must be washed immediately, as it may become unusable. In addition, a construction mixer will help achieve the desired homogeneity of the composition without using much effort.
Before treating the entire surface, it is advisable to make sure that the solution is made correctly and will not peel off. To do this, you need to apply the primer to a small and inconspicuous area. If the applied solution becomes bright white, then you need to add more water to the primer. A high-quality primer should leave a not very noticeable mark.
After the solution has acquired the desired shade, you need to wait for it to dry completely and check for peeling.
If wallpaper will be used as a decorative covering, then instead of PVA glue it is advisable to use special wallpaper glue. It does not leave yellow stains and is better absorbed into the surface.
If the surface is to be painted with acrylic paint, then it is not necessary to prime the surface before doing so , since this type of paint itself acts as a primer. You can immediately do pigmented painting.
Before application, it is advisable to strain the finished primer solutions through a sieve to completely eliminate the presence of lumps.
You will learn more about how to make a primer with your own hands in the following video.
How to prepare walls for primer application?
Walls should be carefully prepared before treating with a primer. So, no old finish should remain on the surfaces - it is better to remove wallpaper, paint and plaster. You should carefully inspect the walls for protruding nails or screws, remove baseboards, etc. If necessary, you can plaster or putty the surfaces. In this case, individual areas subject to additional treatment should first be treated with a primer composition, and only then applied to all other surfaces. In some cases, it is necessary to prime not once, but twice, but it is necessary to allow time for the first layer to dry. You can begin the final stage of finishing - painting or wallpapering - after the last primer layer has completely dried.
If the technology is followed, a home-made primer will turn out no worse than its factory counterpart. However, it will allow you to save money, make the wall surface ready for final finishing and achieve a very high-quality result.
How to prepare soil with agroperlite and vermiculite
Perlite is a rock of volcanic origin in the form of small white granules. Vermiculite is a mineral made from mica, a gray friable powder. Due to the similarity of properties, it is necessary to use either one or another useful substance to prepare seedling soil. When preparing home base soil to improve it, you can add one of the named minerals up to 20-25% of its volume.
Both of these mineral soil additives make the soil looser and more permeable. They can even be added to a ready-made purchased soil mixture, because they will give it the very important property of remaining evenly moist for a long time.
Perlite and vermiculite are designed to make the soil for seedlings looser and more breathable. It is useful to add them even to store-bought soil. This will give it additional positive properties, for example, the ability to remain evenly moist for a long time, which will allow you to water less often and will become an obstacle to the plant disease “black leg”.
100 grams of perlite can absorb up to 400 milliliters of water, and vermiculite - up to 500 milliliters of water. After water is absorbed, the process of slowly returning moisture containing fertilizers to the soil occurs. This will allow the seedlings to go without watering for 5-7 days - if necessary, you can leave for such a period.
In addition, both minerals included in the seedling soil, having the property of smoothing out temperature fluctuations, can help the development of seedlings even with the contrast of cold air from the window and hot air from the heating system. At the same time, even warmth is maintained at night. Seedlings of eggplants, tomatoes, peppers, cucumbers and large-seeded flowers grow well with the addition of these minerals.
How can I replace store-bought analogues?
You can not only apply the primer to the wall yourself, but also create it. Usually the composition of mixtures from different manufacturers is similar. On the building materials market you can purchase the components mentioned on the factory product label. From these ingredients you can easily create a product that will not be inferior in quality and characteristics to store-bought counterparts.
Why create a primer with your own hands if there is a huge assortment of them in stores? Firstly, this will save money. You won't have to overpay for packaging and branding. Instead of a store-bought primer, you will get a homemade one, which is no worse. And, secondly, someone will find this idea tempting - making a building mixture with their own hands.
The components for preparing the composition can be purchased on the construction market. The product is made in a matter of minutes, after which it is immediately ready for application.
The only important condition is to check the correct proportions during the manufacturing process
Recipes of different types and compositions
When preparing your own primer, it is important to maintain the correct proportions, as well as take into account the main purpose and type of surface. A special solution is made for wooden surfaces; mixtures for concrete or drywall are not suitable for them.
According to their intended purpose, primers are distinguished with the following properties:
- for deep penetration;
- strengthening;
- with an increased level of adhesion.
To make a primer you will need the following tools:
- enamel container;
- shoulder blade;
- mixer with whisk.
The simplest recipe for a primer solution includes the following ingredients: PVA construction adhesive and water.
Making a primer consists of the following steps:
- It is necessary to pour liquid PVA glue into the prepared container and add water in a ratio of 1: 2.
- Mix the materials thoroughly using a spatula or mixer until the mixture is homogeneous. A watery film should not be allowed to form on the surface.
This recipe is best suited for treating non-residential premises (basements, storage rooms), because it provides excellent moisture resistance, but does not guarantee long-term external beauty.
If you dilute cement or chalk in a simple glue-based composition, you can get a primer with deep penetration. The sequence of actions is almost identical, but now the ratio of glue and water is 1: 8. You need to add a small amount of cement (or chalk) to the mixed materials and also mix thoroughly until smooth.
The strengthening primer solution also consists of glue (you can take carpenter's glue), but now 65% laundry soap and copper sulfate are added to it. The proportions of glue, copper sulfate and laundry soap are 5: 1: 2.
Making a strengthening primer consists of the following steps:
- It is necessary to grind the laundry soap (you can use a regular grater).
- Pour water into an enamel container and boil it.
- Then soap is added to the water, and the mixture must be boiled until smooth, stirring occasionally with a wooden spatula.
- Copper sulfate and glue are added. Continue cooking over low heat for about 30 minutes, stirring with a spatula, making sure no lumps form.
After 30 minutes, you can remove the solution from the heat, and after it has cooled, you need to strain it. After this work, you can begin to use the finished primer.
If the lumps are not removed, you can use a construction mixer.
Additional Information:
It should be noted that copper sulfate is sold in gardening stores. During cooking, only enamel utensils are used, which will not be used in the future for cooking. Other species may react when cooked.
Modern production technologies can provide a fairly diverse range of floor primers of varying quality, at an affordable price and for any purpose. But, in certain situations, you can save a lot of money and prepare not the worst composition with your own hands.
As noted above, the primer increases the service life of the wall covering, improving the quality of adhesion of the material to the wall surface. The primer is a liquid mixture that is applied to the walls in an even layer and, as it dries, creates a dense film on which plaster, paint, wallpaper, etc. fit well. If plaster is falling off your walls, and the walls themselves are loose and dilapidated, plaster will help further strengthen them.
The priming stage is the most important process of repair and finishing work. Prepare a deep penetration primer yourself? Before wallpapering or applying paint, any surface requires priming to ensure the best adhesion and adhesion of the finishing material to the walls.
In addition, it prevents the development of mold and pathogens, reduces the consumption of glue or paint and does not interfere with the formation of an optimal microclimate in the room. But you don’t have to spend money on expensive primers. You can make the primer yourself, saving significantly on the purchase of repair materials.
- Fill a container with plain water. Boil it.
- You can grate the soap or simply grind it in another way.
- Combine soap and water. Cook over low heat until a homogeneous mass is formed. To speed up the process, stir with a wooden spatula.
- Add vitriol and glue to the solution.
- Cook over low heat for 30 minutes. To prevent lumps from appearing, stir occasionally.
- After the indicated time has passed, set aside and let cool for a few minutes.
- Strain using a sieve. You can use gauze or a bandage folded in several layers.
- Once the solution has cooled, it can be used to cover the walls.
Such protection cannot be considered strong enough, but it is much better than not using a primer at all. A significant disadvantage of such compositions is that they are not able to penetrate deep into the surface and strengthen the structure of the wall. In addition, the solution prepared by yourself does not have antibacterial properties.
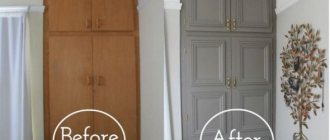
The desire to make repairs yourself often appears suddenly. Sometimes it is so great that a novice builder is not afraid of either lack of experience or dirt. How to update an old refrigerator with your own hands before and after photos?
If you take on repairs with your own hands, then you need to value your work and do everything thoroughly. This article will tell you how to make a primer with your own hands.
Priming is a mandatory step in preparing the surface for any finishing. This layer is not visible outwardly, but its role is difficult to overestimate. The primer promotes high-quality adhesion of materials of different densities and properties, serves as an obstacle to moisture, prevents the appearance of fungus and mold, and can even slightly strengthen dilapidated walls. Manufacturers offer many types of mixtures. They differ in scope and main components.
But you can make a primer yourself, because it contains accessible substances.
First of all, reviews of such mixtures note: the composition, which was properly prepared, has the same properties as store-bought products. Fans of homemade soil solutions are attracted by the low cost of their compositions, as well as the simplicity of the process itself. As many builders note, a homemade primer saves a considerable amount of money if a large-scale renovation of the premises is planned.
How to choose material for processing
There are many primer mixtures available, among them it is easy to choose the one you need, taking into account the surface that will be treated. Main types of primer:
- Acrylic primer - can be used anywhere except metal surfaces. It is most popular among builders.
- Alkyd is good for untreated wood; it will smooth out all the unevenness.
- Shellac - used for processing knotty boards.
- Polystyrene - although it fits well on wood and plaster, it contains substances harmful to breathing. You cannot prime walls in residential areas with it.
- Glypthal, perchlorovinyl and some other primers are suitable for metals.
- If there is a possibility of mold or mildew developing, it is better to use mixtures with an antibacterial component.
Priming walls depending on the surface
Concrete walls
For concrete bases, deep penetration acrylic primer is used. This composition allows you to increase adhesion and also eliminate minor surface roughness (scratches, chips).
Brick structures
Before priming a brick wall, you need to pay attention to the condition of the surface. If there is damage and the mortar spills out in the joints, then it is necessary to use water-dispersed soil, which will strengthen the plane of the wall and give it adhesive properties. You can also use mineral compounds based on cement, gypsum or lime for strengthening.
You can also use mineral compounds based on cement, gypsum or lime for strengthening.
Walls made of facing bricks require treatment with water-repellent agents, which will prevent the appearance of efflorescence (white deposits) on the masonry.
Plasterboard partitions
Plasterboard walls must be primed with acrylic or water-dispersed deep penetration compounds. Universal primers are also used.
Drywall is primed both before puttying and before painting.
Plaster on the walls
Plastered surfaces, depending on the finishing coating, are primed with acrylic, water-dispersed or mineral compounds. The soil must be deeply penetrating and have antiseptic and adhesive properties.
Priming wallsSource roomester.ru
Tips for preparing primer
The use of certain substances can significantly improve the properties of home-prepared wall primers. For example, you can add crushed chalk or a small amount of resin to the building mixture. The composition obtained as a result of such manipulations is ideal for treating walls if they are covered with wallpaper.
A distinctive feature of PVA adhesive-based mixtures is that it is not absorbed into the base and does not make it possible to get rid of microcracks. Preparing a primer for walls at home is best done in a warm room, with the balcony and windows closed.
When mixing, it is necessary to simultaneously work with a stick or a special spatula so that the glue mixture can be completely dissolved in the liquid.