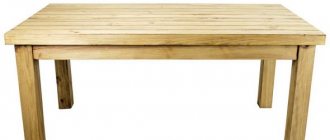
A table in the classical sense is a rectangular piece of wood that stands on four legs. To prevent the table from swaying and to be stable, you need to attach the legs correctly. It is also necessary to take into account the material from which it is made and the location of the piece of furniture. The tabletop, no matter what it is made of, is subject to deformation under the influence of humidity and temperature changes, which is why the choice of fixation method is so important. There are several ways to attach legs to a tabletop.
Fixation with surface plates
The plates are fastened with self-tapping screws on four sides of the tabletop. The bolt is screwed into the legs with the head facing inward. The legs are then screwed into the attached plates. One of the suitable plates is the platform for attaching the tlb60 leg. As a rule, they are made of chrome. They are reliable and easy to find in furniture supply stores.
Fixing with T-nuts
This form of fastening is suitable for countertops that in the future will be covered with other types of wood or upholstered with material. In addition to the nuts themselves, it is necessary to purchase bolts with eyes and eyes. Four holes should be drilled into the tabletop at equal distances through the base. Then the T-nut is driven in with a hammer so that it is completely in the array. Screw bolts with lugs and eyes into the legs. For greater convenience, you can use pliers. All that remains is to connect all the elements of the table.
Screw mounting
If the table does not come with a side drawer, this method may not be suitable, or you should purchase this element separately. Fastening the drawer will provide additional stability and reliability to the table. The drawer is a fastening strip along the entire perimeter of the table, to which the legs are screwed. A special expansion in the form of a cone in the drawer helps ensure slight mobility of the screw with some deformation of the tabletop (this is typical due to changes in temperature and humidity).
How to install table legs correctly?
For attaching legs
(more precisely, their cast holders), on the underside of the tabletop we apply pencil markings in the form of two perpendicular lines at the place where each holder is attached.
As a general rule, a good option is to install the legs
about 100mm from the edge of the tabletop (see photo).
Interesting materials:
How to get from Moscow to Lipetsk? How to get to Khimki by metro? How to get to Mytishchi by metro? How to get to Zelenograd from Moscow? How to prove the fact of a family relationship? How to prove your relationship with your great-aunt? How to prove the relationship between an aunt and nephew? How to prove the degree of relationship with your grandmother? How long does whipped cream last? How long do dental implants last?
What types of furniture supports (legs) are there?
In general, furniture supports are designed to perform a protective and aesthetic function.
Table legs perform a protective and aesthetic function.
Nevertheless, despite all the variety of designs, there are three main types of legs:
- Solid. The most common classic version. It can be made of wood, plastic or metal.
- Sliding. A more technologically advanced solution that allows adjustment in height or, less commonly, width.
- Decorative. A variety of materials can be used, since its function is rather decorative.
The table can also be installed on one leg.
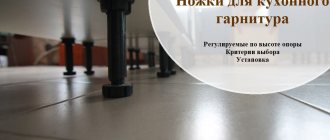
Adjustable and non-adjustable legs for kitchen units: rules for selection and installation
It would seem that insignificant details often determine whether the furniture will be comfortable and durable or not. Choosing and installing the right legs for a kitchen unit is not as easy as it seems at first glance. Delving deeper into this question, it turns out that they are very different from each other: high and low, adjustable and not, plastic and metal... So which are better, and are they needed at all?
Installation of tabletops using figure-eight holders
Steel figure-eight fasteners are another popular hardware option used to secure countertops. The bracket is installed in a small recess drilled with a Forstner drill or a square recess selected with a chisel so that it is flush with the upper edge of the drawer. The holder is fixed with two screws: one to the body, the second to the back side of the tabletop as shown in the photo. As the board swells or contracts, the bracket rotates slightly, preventing the wood cap from bending. The recommended distance between fasteners is 15-20 cm.
Figure-eight holders come in two types: with washers of the same and different sizes. In the latter case, a washer with a large diameter is attached to the drawer. When deciding to attach the tabletop to a kitchen or room set in this way, you need to make sure in advance that the thickness of the drawer matches the diameter of the washer.
Mounting on wooden clamps
Using homemade wooden clamps is a simple and reliable way to attach a tabletop to a tabletop without purchasing hardware. Clamps work on the same principle as metal Z-clamps. They are easy to make in series from scraps that can be found in every workshop. Of course, this takes time, but often not much more than it takes to go to the store for accessories.
When making wood clamps, be sure to maintain the correct grain orientation as shown in the diagram to give the bracket proper strength.
Manufacturing process: step-by-step instructions
Drawing of a wooden table with four legs
First, you must make a drawing. Decide which legs you will attach - purchased ones or make them yourself. The form can be any.
Curly balusters or legs for a homemade table
If the tabletop is 0.8 m wide, then the legs should be 1.2 m long. To ensure the tabletop is smooth, sand it with a sander. There should be no gaps between the joints. To prevent the tabletop from deforming due to high humidity, the boards must be laid with a counter texture.
Tabletop boards at least 30cm thick
At the ends of the boards to be joined, you need to drill holes 8 cm deep, keeping the gap between them at 10-15 cm. We go through the prepared areas with sandpaper and lubricate the edges, dowels and holes with glue. We insert the dowels into the holes, thus connecting the tabletop. Remove excess glue.
Option for attaching legs to a wooden table
Using glue and screws, we connect the transverse and longitudinal boards to the legs. On top of the latter we make two recesses to attach the tabletop. We wait twelve hours and install it. We cover the structure with varnish, stain or paint.
Table with fixed top, frame and legs
Important! When using stain, consider the following: choose the thinner wisely, the surface before coating must be carefully sanded, the main thing is to properly adjust the gun (the shape of the torch should be oval, and the layer you apply should cover the existing one by half).
Cover with varnish or wax to protect the top layer
Having familiarized yourself with the options for attaching legs to the tabletop, it will not be difficult for you to make a table with your own hands, thereby updating the interior with such an original thing.
Fastening the tabletop with screws
This is a simple and time-tested option for attaching the table top to the table frames without the use of additional fittings. The special conical extension selected in the frame ensures slight mobility of the screw when changing the size of the tabletop. The cover itself is securely attached to the body.
Having made the basic markings, an end hole is drilled in the drawer. After this, using a wide semicircular chisel, select a pocket for hidden installation of a screw.
Using a narrow chisel, make an angular expansion on the upper edge of the drawer. The extension of this groove is always done across the grain of the tabletop, since wood expands and contracts in this direction.
Materials used
Depending on the type of support, as well as design features, fastening for table legs may require:
- For plates: mounting pad, bolts, screws.
- For Z and 8-shaped holders: the holders themselves, screws, self-tapping screws.
- For wooden clamps: screws and, in fact, clamps.
- When mounting with T-nuts: eye bolts, nuts.
- For permanent installation: side drawers, screws.
Depending on the type of legs, different materials will be required.
Video: Solid wood table top. My mounting option
There was a table with an excellent top. However, during operation, the scabbard mount (it was plastic) cracked and had to be removed. How to attach the legs to the tabletop so that they last long enough?
It depends on what kind of “legs” (they are also furniture supports), as well as what material the tabletop is made of and, most importantly, how thick it is.
Here is an example of a fastening option: metal supports (legs) are attached with self-tapping screws to the table top.
The self-tapping screw is shorter than the thickness of the material from which the tabletop is made.
How to screw it to furniture?
Various manufacturers literally compete in a variety of shapes and designs. But when choosing a non-standard solution, you should remember that the method of fastening will depend on the shape of the legs. Conventionally, all installation options can be divided into three types:
Most ready-made sets that only require self-assembly (from Ikea, etc.) have counters - small diameter holes in the places where the legs are supposed to be installed.
Screw-in legs are installed directly into the countersinks. Other models of supports are fixed so that this hole coincides with the center of the leg.
If the furniture was made to order, and there are no mounting holes for supports in the bottom cover, then you need to choose at what distance to attach the legs of the kitchen set based on three simple rules:
Next, on the bottom cover, markings are made for the legs in the form of crosses (the intersection of the lines should coincide with the center of the support). If there will be a lot of supports, it makes sense to make a template through which it will be convenient to put marks and make holes. In this case, you need to ensure that all supporting elements are at the same distance from the edge.
If the legs are fixed using self-tapping screws, then the length of the fastener should be 3 mm shorter than the thickness of the bottom cover. So, in order to properly screw the legs to a base 18 mm thick, you need 15 mm self-tapping screws.
Source
Advantages and disadvantages
There are no advantages without disadvantages, but kitchen legs have many more advantages than disadvantages.
The positive points include:
There are significantly fewer negative aspects. The main disadvantages can be considered:
Most manufacturers of high-quality furniture make it with legs. Only budget models of headsets of not very high quality are produced on a non-removable base (a box made of MDF or chipboard). Such a support swells very quickly from moisture and loses its appearance. Even the silicone base covers (covers) that are sold to protect the box do not help.
Required Tools
The above methods require the use of your own tool. However, it makes sense to keep a complete set of everything you need on hand:
- Screwdriver, set of screwdrivers.
- Chisel: thin, wide flat, and also narrow semicircular.
- Drill with a set of drill bits for wood.
- Hammer, pliers.
- Hacksaw.
It is better to have all the necessary tools at your fingertips.
