It’s easy to make original souvenirs, decorative items, toys and crafts using old newspapers or other printed materials as raw materials. It’s easy to master this unique technology, but you’ll have to spend some time making the rod itself.
Both the appearance of the products and the technology for their creation are very similar to weaving from ordinary wicker or straw.
A little history of needlework
Weaving from paper strands has existed in Asian countries for a long time.
Mizuhiki - the art of weaving knots from thin paper ropes is popular in the Land of the Rising Sun.
Chiseung is a Korean technique that uses handmade paper from the inner layer of mulberry bark and dyed with natural dyes.
These are expensive materials from which Asians make entire works of art “for centuries.”
You can also make original little things from old newspapers that will look fresh and elegant:
- containers for bulk products in the kitchen;
- braids for bottles;
- baskets;
- trays;
- decorative plates;
- furniture for dolls and pets.
A great way to express yourself. At the same time, it allows you to get rid of the accumulated waste paper that occupies cabinets and mezzanines.
How to make a pen
The easiest way to make a handle for a basket:
- You will need 4 long flexible ropes. For elasticity, it is worth spraying them with a spray bottle.
- Use clothespins to mark the places on the basket where the handle will be attached.
- Pass the tubes through the rows already made so that they are of equal length.
- Having obtained two rows of four strands, you should cross the parts. As a result, an even braid-curl should form.
- Make spirals until you get a handle of the desired length.
- Thread the braid through the braided model.
The process of making straws
For those who are taking up this handicraft for the first time, you can start with leaflets or office paper in A-4 format. Sitting in front of the TV watching your favorite series, you will be able to wind several hundred tubes in an evening.
To make it convenient to work with the material later, remember these simple rules:
- The thickness of the vine depends on the base on which it is wound. The thicker it is, the thicker the stick and the easier it is to flatten.
- The correct vine is narrower on one side than on the other. The next extension tube will be inserted into the wider hole.
Twisting the tubes
Let's look at weaving from newspaper tubes step by step.
- Cut equal pieces of newsprint (8 cm wide).
- We wind the leaves onto a knitting needle, pressing them tightly to the table.
- Carefully glue the remaining edge of the sheet.
- We take out the knitting needle and twist the next sheet.
Building up
To connect, you need to drop a drop into the wide hole of one vine and, using gentle screwing movements, push the other tube inside.
Coloring
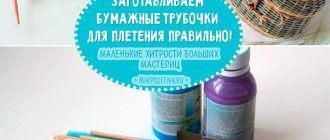
If you paint the blanks before weaving, they will look better in the product.
Painting materials
- Stain (can be water-based or alcohol-based). The color range is varied: maple, walnut, plum, oak and others. Alcohol is several times cheaper, but has a toxic odor. It is better to work with it outdoors.
- The stain needs to be painted several times. You can put several tubes into the neck of the bottle at once.
- Acrylic paints will give the product not only color, but also a glossy shine. They will paint over newspaper letters well.
- A cocktail of construction colors.
The mixture is prepared as follows:
Mix 0.5 liters of water with 2 tablespoons of construction color and 1 tablespoon of acrylic varnish. This solution is suitable for white paper tubes. After this method of painting, they will remain elastic, but durable and in bright colors.
The final coating of the finished product is done as follows:
- Carefully spread PVA glue on all sides several times. In this case, you can adjust the shape.
- If you are painting the finished product, apply a white base. Then paint it in the desired shade.
- Coat the top with acrylic or furniture varnish in several layers.
Tools.
To conveniently twist the tubes, you will need knitting needles or wooden skewers of various diameters.
You will probably have to use both thinner and thicker tubes for crafts. The thinner the tube, the denser it is. But thicker tubes are easy to flatten.
Naturally, when working with paper you need scissors. And for painting - brushes.
Stock up on clothespins to secure finished products.
Making a braid for a bottle
To make the bottle look much more beautiful, you need to pay special attention to its additional decoration.
Necessary materials
To work you will need:
- pre-painted newspaper tubes about 150 pieces;
- cardboard;
- PVA glue;
- scissors;
- pencil.
Progress
- We cut out 2 identical round blanks from cardboard with a diameter similar to the bottom of the bottle. At a distance of 2 cm we apply divisions, marking the places where the tubes are attached.
- We glue the tubes to one blank according to the markings and glue a second cardboard circle on top to hide the places where the tubes are glued.
- We lift all the tubes - the racks up.
- We take 2 vines and connect them. We bend it in half and place it behind one of the posts. We put another long tube behind the adjacent counter.
- We will weave the second and subsequent rows using the rope technique.
Features of paper curling
Only at first glance, “twisting” is performed quickly and easily. Practice shows that you can master the technique taking into account several features.
- We cut strips of the same size from the press spreads in an approximate ratio of 1X3. To increase productivity, fold the paper into a stack and use a utility knife;
- hold the tool at an angle of 45° and tightly wind the tapes onto it. If you wind the paper at an angle of 30°, you will get a thick stick (it will be useful for “knitting needles”). And at 90° the stick will turn out to be very thin (it is used for edging);
- We fix the tail-kerchief with glue, and then remove the workpiece.
During the twisting process, they are spliced together by inserting the thin end coated with glue from one tube into the wide hollow hole of the other.
For panels, decorative rugs and frames, flat blanks are required.
Place the finished “twigs” on a flat, hard surface and roll them with a rolling pin. Look at the master class in the photo.
Weaving patterns from newspaper tubes
There are several weaving options. Each master must find one that he will use in the future.
“Rope” is the simplest and most durable weaving pattern
Between the two posts, two vines are laid crosswise in such a way that one lies in front of the work, and the other behind it.
When we circle around the posts, the vine that was in front ends up in the back, and vice versa.
To make this pattern look good, you need to take an odd number of posts.
Next, we insert the bottle as a base and weave it to the desired height.
To complete the work, we secure the working tubes, hiding them in the nearest weave. This can be done with a knitting needle.
To do this, retreat 4 rows, insert a knitting needle that will come out next to the working tube. We bend the vine and place it on a knitting needle. Carefully pull it out where the knitting needle was inserted.
We cut the tube as close as possible to the place of weaving.
Do the same with the second working tube.
For beginners, weaving from newspaper tubes is the best finishing option.
Openwork weaving from newspaper tubes in patterns
How it's done
Straight openwork is a method where stripes remain without weaving. You can weave another design into them.
- First we weave the walls to the required distance and secure them with wire.
- We retreat to the width of the gap and make several rows using the “rope” method.
- We continue to weave with the previous pattern.
Linen openwork is the second method, which is very popular.
- We make the working tubes flat using a roller, rolling pin or iron.
- Using flat strips, we intertwine the racks one after another in a horizontal direction.
- Between the horizontal rows you need to leave a distance equal to the width of the space between the posts.
Preparing paper strips
Before you start rolling, you need to prepare the paper strips so that the final result is long and neat.
To do this you need to do the following:
- Place a sheet of newspaper in front of you. Fold the paper in half vertically.
- Cut the newspaper along the fold using a knife.
- Fold 1/2 of the paper in half vertically, cutting it along the fold.
Blanks that were twisted from strips with a clean newspaper edge will turn out without letters and light-colored. The rest will contain a drawing or typographic font.
In order for the wicker product to be of medium size, it is necessary to take a knitting needle with a thickness of no more than 1 mm, while the width of the strip should be within 10 cm. If the paper density is low, the workpiece for twisting should be wide.
It is undesirable to twist elongated pieces to a full turn of the paper, because the product will not be even. In this case, difficulties may arise with extending the tube, which will negatively affect the appearance of the wicker product.
Beginning craftsmen are not recommended to use long tubes longer than 40 cm; for them, weaving blanks 30 cm long is suitable. Thanks to this, you will not have to build up the product, and the appearance will not deteriorate.
To weave newspaper tubes, it is recommended to cut the sheet along the fibers. When cutting the first strips, initially everything goes correctly in one direction, but in the other direction the process becomes more difficult and the cut comes out crooked.
This is due to the direction of the cellulose fibers in the paper sheet. Therefore, it is recommended to establish their placement before slicing.
Determining the direction of cellulose fibers in a paper sheet
This can be done in 2 ways:
- First option. The sheet should be torn horizontally and vertically. If the tear occurs along the grain, it will be straight and even, and the edges will not be too shaggy. If the tear occurs across the grain, it will be uneven.
- Second option. You should fold the paper sheet in 2 directions perpendicularly, ironing the resulting folds. The bend that follows the fibers will be even and smooth. If it runs across the grain, it will be broken and rough.
conclusions
Making products from newspaper strips, which you don’t have to go to the forest to harvest, is not a complicated, exciting, low-cost process.
Having mastered basic techniques, any beginning craftswoman will make beautiful crafts, souvenirs, and decorative utensils for the kitchen in just a few evenings.
By cutting out beautiful pictures from glossy magazines and decorating them with a simple frame made of newspaper tubes, you can get a magnificent panel or tray. This hobby can become a hobby for the whole family. Together things move faster.
Openwork weaving and the use of unusual materials
Craftsmen involved in weaving have existed at all times, making useful household utensils and beautiful accessories for home decoration.
Newspapers and catalogues, magazines and even ordinary office paper are suitable for weaving and creating unusual products with original, simple or intricate designs.
Newspaper material is easy to process and you don’t have to make Herculean efforts for the creative process. This provides opportunities to involve children in the process, which guarantees the improvement of their practical skills and abilities, expansion of abilities and creative potential.
Photos of wicker products made from newspaper tubes
Chess pattern
To obtain a different pattern, you need to use two pairs of tubes at once.
- The first pair is attached to a vertical stand, weaving is done through each stand with both tubes.
- Having gone in a row, the second pair of tubes is attached offset to one rack. Weaving is done the same way.
The result will be an original chess pattern, suitable for weaving a variety of quite durable products. Patterns are easy to combine when weaving one product in various combinations. For variety, you can use tubes of different colors when weaving.
