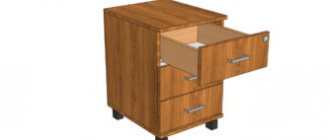
Drawers are an integral part of the kitchen interior. Moreover, these days such drawers are beginning to be actively built into other furniture that has nothing to do with storing kitchen utensils - chests of drawers and wardrobes increasingly require the presence of one or another retractable system.
Drawers not only save space, but also constructively organize the space from the inside, allowing you to quickly access the things you need. We'll talk about what types of drawer systems exist and how to make a drawer with your own hands below.
How to make a drawer with your own hands
Advantages of drawers
Despite the fact that the advantages of drawers are obvious to most owners, let us briefly dwell on the main ones:
- Thanks to the drawers, access to necessary household items is greatly simplified. The opening overview allows you to immediately cover all the items in the drawer, without forcing you to go deeper into the closet or table;
- convenient design eliminates the need to interrupt all other objects cluttering the foreground in order to get to the thing you are looking for;
- You can appreciate the practicality of drawers in the kitchen, because you no longer have to clink pans and dishes, increasing the risk of them falling out. With a drawer, everything you need is at hand here and now.
Drawers allow you to arrange items in different ways
Metal mesh baskets for wardrobes
Durable metal rods and reliable fastening, equipped with high-quality telescopic guides allow you to store quite heavy things in mesh baskets of this type. In addition, there are many more design and content options available.
Classic metal baskets are also built according to the principle of a box - into a “base” of a certain size. By base we mean a certain width and depth of the niche for installation. But, since manufacturers produce similar content for sliding wardrobes in series, you can choose additional pull-out storage systems for the baskets in the form of trouser racks, shoe shelves, drawers for storing various accessories, and rods of a similar design.
No less conveniently, you can store shoes on special pull-out shelves.
The role of a tie maker can easily be played by a pull-out shelf with compartments. Convenient for storing belts.
Use drawers and baskets for your wardrobe - this will help you store things more neatly, conveniently and organized.
Disadvantages of drawers
The disadvantages listed below will relate not so much to the weaknesses of the structure itself, but to the features of its manufacture, which are important to consider before starting work. These features include the following:
- price. It is logical to assume that drawers, due to additional parts, are on average more expensive than drawers for traditional cabinets that do not involve complicated mechanisms. When creating retractable cabinets, it is very important to acquire high-quality fittings, which are not cheap, but provide the drawer with a long life and correct operation;
The quality of the fittings largely determines the quality of the future drawer - reducing the area of the box. Before you start making a drawer, it is important to be aware of what material you will use. When referring to chipboard, it is important to consider that its thickness will affect the available space, reducing it slightly compared to the expected figures;
- time costs. Drawers require more time to manufacture, especially if you are encountering them for the first time. Even professionals need to spend a lot of effort to create a high-quality structure that can last as long as possible. Assembling a drawer requires a lot of effort and time, but the result is worth it
Types of retractable systems
You don’t have to worry about getting confused in retractable systems, since there are only two main types of them, an understanding of which will allow you to more or less correctly navigate how such drawers function:
- ball system;
- roller system.
These systems differ from each other in the way they move profiled metal guides, and these guides can be moved either by balls or by rollers.
Roller system
It is quite difficult to calculate the cost of a roller system in advance, since it is based, in turn, on the type of extension. There are two main methods of extension:
- complete;
- incomplete.
The dimensions of the roller guides depend on the specific drawer and are calculated according to a certain scheme.
Depending on the choice of one of the types of extension, the price may increase or decrease several times, which is important to consider when planning your budget.
The main disadvantage of the roller system is the characteristic sounds that accompany the movement of the box. Some people quickly get used to them, while others experience discomfort, so this drawback of this system is largely individual. In some cases, retractable systems are equipped with rubber-coated rollers, which significantly reduces noise.
Roller guides are considered to be the noisiest
Assembling a drawer on roller guides
When assembling the drawer, you will need one set of slides, consisting of four pieces. In this case, two elements are attached to the box, and two more to the sides. The general procedure that can be followed when making a drawer is given below.
Step 1. Using self-tapping screws, secure the guides according to the marks (the roller should be at the bottom). The guide should extend approximately 2 millimeters from the front edge. Attach the second guide in the same way. Make sure that the screws do not protrude too much.
Roller guides
Securing the guides
Step 2. Attach the drawer front to the sides using an eccentric tie. This screed includes a twister, which can have a different appearance depending on the manufacturer. Screw the twisters into a small blind hole, 5 millimeters in diameter, to the stop where the thread ends.
Screwing in the twister
Step 3. Insert dowels into the larger holes (about 7 millimeters in diameter). In order to strengthen the structure, you can also add PVA glue.
The dowels are located next to the twisters
Step 4. Insert the eccentric with the arrow on the inlet hole at the end.
There is a special single hole for eccentrics.
Step 5: Install and tighten the sidewall clockwise. Do the same with the second side panel.
Tightening the sidewall
Step 6. Secure the rear side panel with Euroscrews.
Euroscrews are designed specifically for the rear side
Step 7. Insert the fiberboard into the facade pass and align it.
It is important to level the fiberboard to avoid further deformation.
Step 8. Screw the guide, resting it on the part. Please note that it is not advisable to screw screws on the side.
Fixing the roller guide
Step 9. Using self-tapping screws, screw on the handles.
Handles are selected according to the master's taste
Step 10. When inserting the drawer, place the drawer roller behind the side roller and lift it slightly, then carefully roll it inside.
After you finish making the box, check the smoothness of its movement
Assembly Recommendations
There are a few basic drawer assembly tips that will help you coordinate your work:
- If you want to make a box from chipboard or MDF, it is recommended to order these materials from special furniture or construction stores. In most of these places, there is a service for sawing the parts you have chosen and then covering the cut areas with film or veneer, which will make your further work much easier; It is much more convenient to assemble a box, the components of which were purchased at a furniture store.
- Most experts advise completely abandoning the mortise bottom made of fiberboard. There are two good reasons for refusal: firstly, such a bottom will be very difficult to work with, and secondly, this material is quite fragile and may not cope with its tasks. It is advisable to select materials whose thickness is practically the same as other elements of the box;
- After attaching the guides, re-check that they are all at approximately the same level and moving at the same speed. In this case, all guides must be located strictly proportional to the bottom of the box, without exceeding the dimensions of the side parts.
If the roller guides are not installed level, the drawer may not function correctly.
Ball (telescopic) system
Ball or telescopic systems are considered a more practical option due to their noiselessness. Other advantages of this type of extension over a roller system include:
- convenience of design. Almost all roller systems include full drawer extensions, making it even easier to access and organize your essentials;
- strength. Drawers on a ball retractable system can withstand heavy loads - certain models can hold a load weighing sixty kilograms. No other roller system can produce similar results;
Ball guides are popular due to their durability - price. On average, ball systems cost a couple of times less than roller systems (of course, this ratio depends on the initial cost and the quality of the chosen fittings, materials, and so on);
- versatility. When working with ball systems, you are not limited in any way when choosing a mounting method - on the plane, on the sides, above or below in relation to the retractable structure.
Telescopic guides consist of two pairs of parts:
- one pair is designed for mounting directly on the box;
- the second pair is designed for installation in the cabinet body itself.
Installation of ball guides
In this regard, this system is truly universal, and is actively used for most pieces of furniture that involve drawers:
- chests of drawers;
- kitchen sections;
- wardrobes.
Of course, fittings for telescopic boxes are not cheap, but this is exactly the case when the price justifies the quality. By purchasing high-quality parts for the telescopic system, you can be sure that the boxes created with their help will serve you for many years.
Ball runners are widely used for various dressers and cabinets
Among the main advantages of the telescopic system are:
- ease of use. Since telescopic guides do not require the presence of right or left elements, even an inexperienced master can handle them easily;
- Ease of use. All telescopic systems are designed to fully extend the drawer, and at the same time, no matter how far you extend this drawer, it will not fall out due to the thoughtfulness of the guides.
Calculate the dimensions of the box
In order to subsequently install fittings on the box, it is important to correctly calculate its detailing, namely:
- length: dimensions of ball system fittings for retractable structures from two hundred and fifty to eight hundred millimeters in increments of fifty millimeters: 250 – 300 – 350 – 400 and so on up to 600;
- width: if we rely on the technological dimensions of furniture design, the width of the box should have a gap of thirteen millimeters on each side (in this case, the box is considered without a facade). These gaps are ideal for the thickness of the ball fittings;
- height: height is a relatively free value, which is calculated based on the preferences of the master himself. As a rule, the height varies from eighty to two hundred and fifty millimeters.
Installation diagram of ball guides
It is also important to take into account the depth of the drawer, which is calculated quite easily and is determined by the length of the guide itself.
Important! In order for the drawer to function properly in the future, you should always remember to leave a gap of ten millimeters in length between the back of the cabinet/section/chest of drawers and the back of the drawer.
Installation of telescopic guides
Despite the fact that this is precisely the point that causes difficulties for most beginners, its problematic nature is exaggerated. By following a few simple tips, you can easily correctly identify the points intended for fastening and place the fittings in them. An approximate list of actions when installing a drawer is as follows:
- Before you begin active operations, disassemble the telescopes into two parts. To do this, find their special black antennae, pinch and pull. The two resulting elements should be in two different places - one on the side of the drawer, the second on the inner side of the cabinet;
Telescopes should be disassembled into two parts before use.
Disassembled telescope - the guide intended for the side of the drawer must be screwed horizontally and strictly in the center. It is important to ensure that this part is parallel to the top and bottom lines of the side, otherwise the box will not be able to move; Side guide
- Mark the same horizontal line for the inside wall of the cabinet. Since the cabinets differ in their dimensions, it is impossible to indicate exact universal measurements in the instructions. When creating a drawer, you will in any case have to be guided by a drawing of your own closet or chest of drawers. An example of such a drawing can be seen below. Based on the drawing, mark 417 millimeters from the floor on the sidewall and secure the part; This drawing will allow you to determine the mounting locations for the guides
- Screw the two halves of the telescopes to the box and to the cabinet wall, then carefully place the box into the slot. If it does not fit, or if it fits in with great effort, you should study the drawings more carefully and look for possible ones in the measurements.
Cabinet sides with fixed guides
Assembled drawer
By the way! There are two more types of boxes, called “advanced” - metaboxes and tandemboxes. What is their novelty and what are their differences from each other can be read below.
Metaboxes and tandemboxes differences
Video - Installation of ball guides
Convenient furniture accessories
With the variety of additional accessories for assembling furniture, the question of how to assemble a kitchen cabinet with your own hands ceases to be difficult and intimidating. When assembling furniture for yourself, you can use special closers - they will make the process of closing furniture doors smooth and silent.
Lift systems are convenient in horizontal hanging cabinets. In ready-made kitchens, all these “bells and whistles” are not very cheap. When making furniture yourself, they even use simple materials - it is possible to make the kitchen very functional and comfortable.
Note!
- A simple and beautiful DIY bathroom shelf made of MDF, glass, plasterboard: straight and corner options. Photo instructions, tips, video master class
How to make a computer desk with your own hands from wood or chipboard. Photo/video master class + description of models
- Do-it-yourself folding table: description of types, calculations and selection of tools and materials. Video master class for beginners
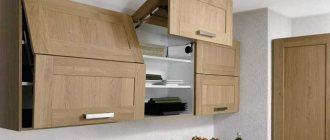
On wall cabinets it is convenient to place hanging accessories - shelves-holders for glasses, lids, sets for spices.
DIY drawer
The assembly of the box is largely determined by the individuality of the craftsman who chooses certain tools. That is why all existing instructions will differ from each other in one way or another. Some craftsmen use templates, some do not, some craftsmen work only with clamps, and some consider them a waste of time.
In this regard, the sooner you develop your own manufacturing style, the better it will affect your work.
Available materials
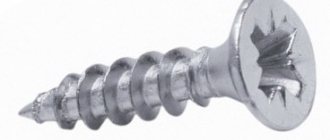
To install the drawer you will need the following tools:
- laminated chipboard (chipboard);
- drill and screwdriver (you can choose one);
- hexagon;
- drill;
- self-tapping screw;
- guides;
- awl;
- measuring square;
- ruler;
- pencil.
Step-by-step instruction
Step 1. The first and one of the most important stages in making a box is the correct marking. In order for the parts to connect, the conformation must be located in two places - below and above.
There should be two holes for future screws, as well as markings. The holes should be equidistant from the edges of the sidewall
Step 2: Take a 50mm template and make a mark on the top and bottom of the board. It is not recommended to measure less than 50 millimeters, since the fittings can split the chipboard.
When creating a box, you can work without a template, but it greatly simplifies the work
Step 3. Measure half the thickness of the material from which you are assembling the box. For such purposes, it is also convenient to use a template. Repeat this procedure for the top and bottom marks.
The template performs several useful functions at once when making a box
Step 4. To prevent the drill from going away during work, tap a hole at the intersection of the two marks using a screwdriver or any other sharp object.
The hole will be needed for further drilling with a drill.
Step 5. Align the parts of the future box using a template.
Before using the drill, make sure the sides of the box are not warped.
Step 6. Take the drill and press its tip into the indentations already made to fix the tool. While drilling, try to hold the drill straight so that the hole left by it will help the guides fit correctly.
You need to drill the hole gradually so that it comes out neat.
Step 7. Insert the screwdriver into the conformat bit, then insert the conformat itself and position it in place of the hole, smoothly placing it into the recess. If you find that the box has become skewed while placing the conformat, press it out using a hand hexagon and straighten the sides, then clamp it back. To avoid inconvenience, you can use corner clamps, which will immediately give the box the correct angle of inclination.
Insert conformat into the hole made
Step 8. Turn the box over and do the same procedure with the second hole.
Repeat with the second mark
Step 9. Once all other sides of the box have been drilled using the same method, check the diagonals to make sure they match each other.
The side panels folded together should be perpendicular to each other.
Step 10. Screw the bottom to the box, first leveling it. You can use an MDF board (six) as the bottom. If desired, the plate can be coated with enamel.
Fiberboard is often used as a bottom for drawers
Video - How to assemble a drawer
We nail the fiberboard bottom
From the bottom of the resulting box we nail a structural part made of fiberboard, having previously aligned the quadrangle along two diagonals
It is very important that the diagonal sizes are equal! Otherwise, you will have problems using the furniture box; it will constantly jam when moving, and will not fit completely
We nail the fiberboard bottom
How to choose a drawer for the kitchen
Choosing a drawer for the kitchen is one of the most important stages of planning a given room, since kitchen utensils are usually the heaviest and require exceptionally high-quality designs. There are several types of boxes of different shapes depending on their purpose and the items that are intended for such boxes, be it:
- cutlery;
- dishes;
- spices;
- conservation;
- bread;
- utensils for cutting food and so on.
Drawers for the kitchen are selected individually, based on the size of the room and the customer’s goals.
When choosing drawers for the kitchen, it is advisable to choose full-drawer options, because only they allow you to immediately have everything at hand. Otherwise, there are several criteria that you should definitely keep in mind before purchasing a drawer:
- room layout. Before purchasing drawers or making them yourself, it is important to decide on the total number of cabinets and their location. Avoid building drawers at ninety degrees in kitchen corners. For such places it is more convenient to use ordinary shelves that save space;
Drawers can have very different areas and volumes - degree of workload. Consider the types of items you intend to store in a particular drawer. Despite the fact that some retractable cabinets are very durable, it is not recommended to load them with kitchen utensils to a critical level - you risk sooner or later damaging the mechanisms and rendering the drawer unusable;
- quality of guides. We have already talked about how to choose suitable guides. It is advisable to give preference to those parts that are made of the most durable and thick metal, which is the key to the durability of the structure. If you have the opportunity to check the guides in practice, observe whether they make unnecessary sounds, whether they are distorted horizontally or vertically, etc.;
The quality of the guides is responsible for the strength of the entire retractable system - box materials. In most hardware stores you will come across boxes made of chipboard or MDF, and occasionally - made of natural wood. Of course, natural wood is the highest quality material, but due to its high cost, not all buyers can afford it. However, if you have wooden boards at home, you can use them as a basis and make your own box. Otherwise, the boxes purchased should not have chips, small cracks or signs of swelling.
Assembly order
As a rule, ready-made parts are used for self-assembly of furniture. They can be ordered in the desired size in stores. This is where an accurate drawing is simply necessary! It is necessary to think over and provide for methods of fastening parts, places for wires and sockets.
The instructions on how to make a cabinet with your own hands are almost the same as the instructions on how to assemble factory furniture yourself. Assembly begins with the box. When connecting parts using a screwdriver, it is important to prevent through drilling - you must work carefully and slowly.
Next, the back wall is attached to the finished box - it seems to fix and strengthen the structure. At each stage of furniture assembly, it is necessary to check the symmetry of the arrangement of parts and the perpendicularity of the corners. The top wall is then installed in the wall cabinet.
Note!
DIY stool: master class on how to make it from wood. Instructions for preparation, assembly and beating (video + photo)- Do-it-yourself bench made from logs, pallets, beams or logs: photo master class on how to create. Video advice from the best masters
- How to make a backlit mirror with your own hands: necessary materials, tools. Tips for choosing lamps and LED strips